The Cozy Magic of Homemade Garlic Butter Dinner Rolls
Hey there, my fellow food lovers! Emily from Tasty Chow here. Is there anything in this world that smells more like pure, unadulterated happiness than bread baking in the oven? I’m talking about that warm, yeasty, buttery aroma that wafts through the entire house, pulling everyone into the kitchen like a magnet. It’s the smell of anticipation, of comfort, of a meal made with love.
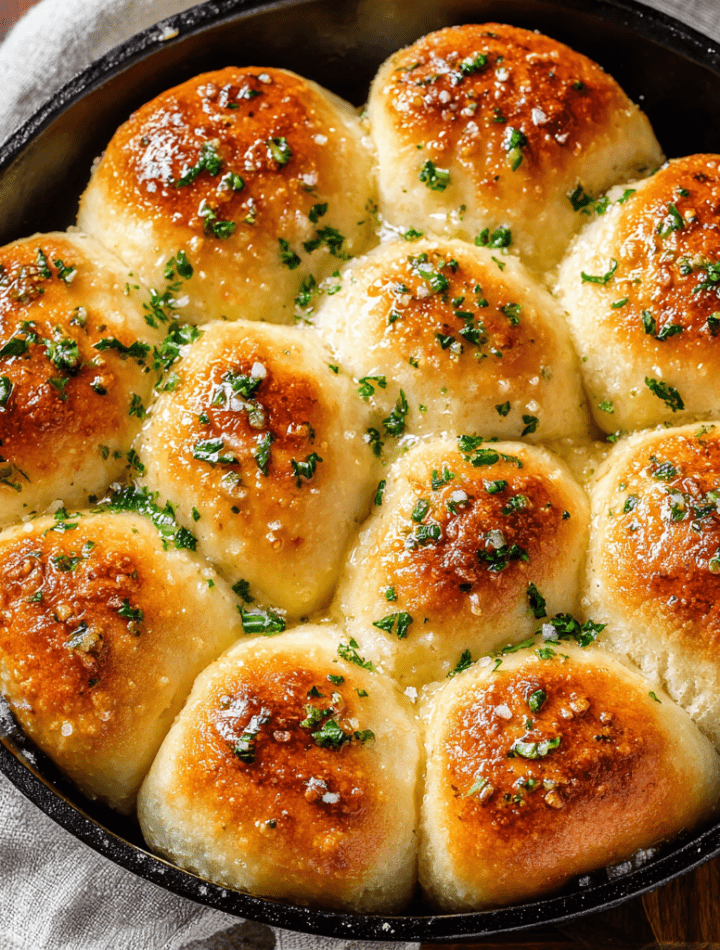
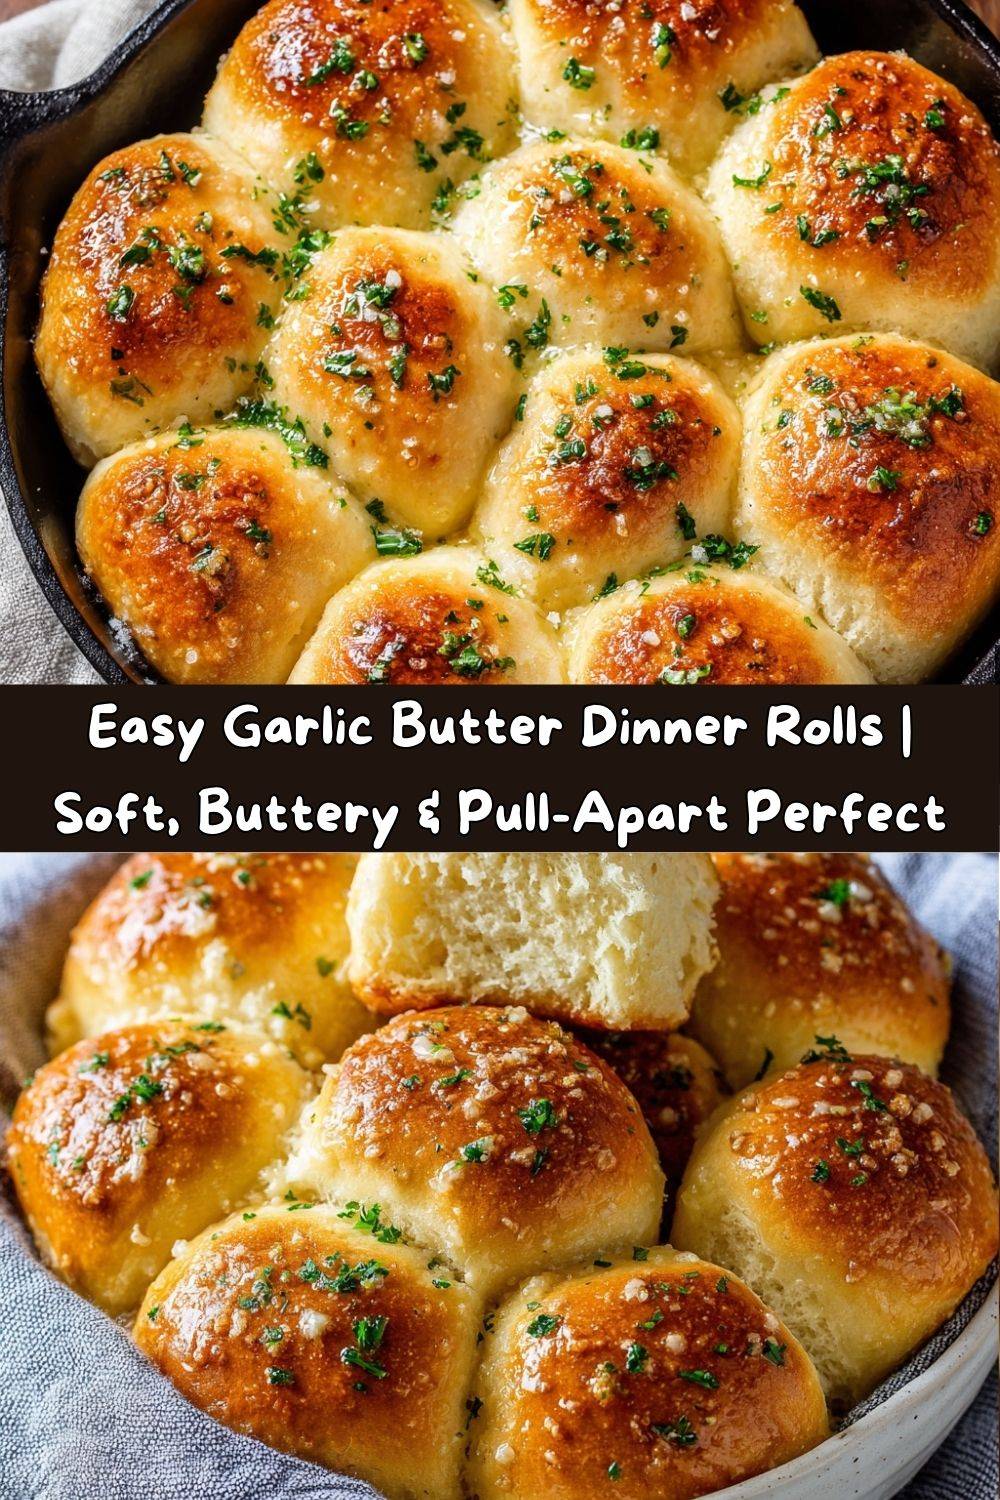
Today, we’re not just making any bread. We’re creating the ultimate sidekick to any meal: Easy Garlic Butter Dinner Rolls. These aren’t your average, forgettable rolls. These are soft, pillowy clouds of joy, baked until golden brown and then slathered in a sinful garlic butter topping while they’re still piping hot. They’re the kind of pull-apart perfection that turns a simple Tuesday night dinner into a celebration and makes your holiday table absolutely legendary.
I know the idea of homemade yeast bread can feel a little intimidating. But trust me, your friendly neighborhood apron-wearer—this recipe is designed for success. We’re using simple ingredients, and I’ll walk you through every single step with all my favorite chef hacks. No fancy skills required, just a willingness to get your hands a little doughy and your kitchen smelling incredible. So, tie on your favorite messy apron, and let’s bake up some magic together!
Grandma’s Kitchen and the Lesson of the Wooden Spoon
This recipe always takes me right back to my grandma’s kitchen. It was a place of wonder, with a well-worn wooden table and a countertop perpetually dusted with flour. Sunday dinners were a sacred event, and no meal was complete without a basket of her famous dinner rolls. I remember standing on a little stool next to her, watching her strong hands knead the dough with a rhythm that seemed as natural as breathing.
One Sunday, she let me try. I was so eager I dumped what felt like a whole bag of flour into the sticky mess, creating a pasty, unworkable lump. I was devastated, sure I’d ruined everything. But Grandma just laughed her warm, rumbling laugh. “Oh, honey,” she said, “baking bread teaches you patience. You can’t rush it. You just have to feel it.” She showed me how to add just a sprinkle of water and a little more kneading to bring it back to life. That was my first real kitchen lesson: cooking isn’t about perfection; it’s about feeling, learning, and sharing. These garlic butter rolls are my homage to her—a simple, forgiving, and utterly delicious recipe that’s all about sharing the love.
Gathering Your Ingredients for Pull-Apart Perfection
Here’s everything you’ll need to make about 12-15 show-stopping rolls. Remember, baking is a science, but it’s also about flexibility! I’ve included my favorite insights and swaps for each ingredient.
- 3 cups all-purpose flour: The trusty workhorse of the baking world! It gives our rolls that perfect, tender structure. For a slightly chewier roll, you can swap one cup for bread flour.
- 2¼ tsp active dry yeast (1 packet): Our little miracle worker! This is what makes the dough rise and become airy. Make sure your yeast isn’t expired for the best results.
- 2 tbsp sugar: This isn’t just for sweetness; it’s the favorite food for the yeast, helping it activate and get foamy. You can use honey or maple syrup here for a different flavor note.
- 1 tsp salt: Crucial for balancing the flavors and strengthening the gluten in the dough. Never add salt directly on top of the yeast, as it can kill it!
- ¾ cup warm milk (110°F/43°C): Warm milk makes the dough extra soft and rich. Whole milk is my go-to for maximum tenderness, but 2% works great too. Chef’s Tip: If you don’t have a thermometer, the milk should feel warm to the touch, not hot—like a pleasant bath temperature.
- ¼ cup warm water: This helps achieve the perfect dough hydration. Same rules apply: warm, not hot!
- ¼ cup unsalted butter, melted (for the dough): Butter equals flavor and tenderness. Using unsalted lets you control the salt level. If you only have salted, just reduce the added salt in the dough by a quarter teaspoon.
- 1 egg: This acts as a binder, adding richness, color, and helping to create a beautifully tender crumb.
For That Irresistible Garlic Butter Topping:
- ¼ cup butter, melted: The glorious, glistening finish.
- 2–3 garlic cloves, minced: Fresh is absolutely best here for that punchy, aromatic flavor. In a pinch, ¾ tsp of garlic powder works.
- 1 tbsp fresh parsley, chopped: Adds a pop of color and a fresh, herbal note that cuts through the richness. Dried parsley works (use 1 tsp), but it won’t be quite the same.
- Pinch of salt: To tie all the topping flavors together.
Let’s Get Baking: Your Step-by-Step Guide to Golden Rolls
Follow these steps, and you’ll have a bowl of beautiful dough in no time. Let’s do this!
- Activate Your Yeast: In a large bowl, gently whisk together the warm milk, warm water, and sugar. Sprinkle the yeast over the top and give it one quick stir. Now, walk away! Let it sit for 5-10 minutes until it becomes foamy and looks like a little yeasty cappuccino. This is your sign that the yeast is alive and happy. If it doesn’t foam, your yeast might be old or your liquid was too hot/cold. Start over!
- Mix the Dough: To the foamy yeast mixture, add the melted (and slightly cooled) butter, the egg, and the salt. Give it a good whisk until it’s combined. Now, start adding the flour, one cup at a time, stirring with a wooden spoon or a dough whisk. After about 2.5 cups, the dough will start to pull away from the sides of the bowl and become shaggy.
- Knead Until Smooth: Lightly flour your clean countertop and turn the dough out onto it. Sprinkle on the remaining ½ cup of flour (you may not need it all!) and start kneading. Push the dough away from you with the heel of your hand, fold it over, give it a quarter turn, and repeat. Do this for 8-10 minutes. You’ll know it’s ready when the dough is smooth, slightly elastic, and springs back slowly when you poke it. Chef’s Hack: Set a timer! It’s longer than you think, but this kneading builds the gluten for those soft, pillowy layers.
- The First Rise: Place your beautiful smooth dough ball into a lightly greased bowl (I just use the same mixing bowl, wiped clean and greased). Turn the dough over once to grease the top. Cover the bowl with a clean kitchen towel or plastic wrap and place it in a warm, draft-free spot. Let it rise for about 1 hour, or until doubled in size. My favorite warm spot? On top of the oven while it’s preheating for something else.
- Shape the Rolls: Punch the dough down right in the center to release all the air—this is the fun part! Turn it out onto a lightly floured surface and divide it into 12-15 equal pieces. I like to use a kitchen scale for perfect rolls, but eyeballing works just fine. Roll each piece into a smooth ball by tucking the edges under and pinching them at the bottom. Place them seam-side down into a greased 9×13 inch baking dish or round cake pan, arranging them so they’re just touching.
- The Second Rise: Cover the pan with that same kitchen towel and let the shaped rolls rise again for 30-40 minutes. They should look puffy and have snuggled up against each other.
- Bake to Golden Glory: While the rolls rise, preheat your oven to 375°F (190°C). Once puffy, bake them for 15-18 minutes, or until the tops are a beautiful golden brown and they sound hollow if you tap on one.
- The Grand Finale: Garlic Butter Bath! While the rolls bake, mix your topping: melt the butter and stir in the minced garlic, parsley, and a pinch of salt. As soon as the rolls come out of the oven, immediately brush this garlic butter goodness all over the tops. You’ll hear that glorious sizzle as it soaks into every nook and cranny. Let them cool in the pan for just 5 minutes before devouring.
How to Serve These Buttery Beauties
Honestly, these rolls are so good they barely need any accompaniment—they’ll likely be eaten straight from the pan! But here’s how to make them the star of the show:
The Basket: Pile them high in a rustic bread basket lined with a checkered napkin for that ultimate homemade feel. Place a small dish of softened butter flecked with sea salt and extra chopped parsley right next to it.
The Meal: These rolls are the undisputed MVP alongside a big bowl of cozy soup (try my hearty potato leek!), a holiday roast, a fresh garden salad, or a big plate of spaghetti. They’re perfect for sopping up every last bit of sauce or gravy.
The Upgrade: Turn them into the most incredible mini sandwiches! Slice them in half and fill with leftover holiday turkey and cranberry sauce, or some pulled pork for a next-level slider.
Get Creative: Fun Flavor Twists!
Once you’ve mastered the classic, the world is your buttery oyster! Here are a few of my favorite ways to mix it up:
- Everything Bagel Rolls: Before the second rise, brush the tops of the shaped rolls with a little egg wash (1 egg + 1 tbsp water) and sprinkle generously with everything bagel seasoning. Bake as directed.
- Cheesy Pull-Aparts: Add ½ cup of shredded sharp cheddar cheese or parmesan to the dough during the mixing stage. For extra cheesy goodness, sprinkle another ¼ cup on top before baking.
- Herb Garden Rolls: Add 2 tablespoons of finely chopped fresh herbs (like rosemary, thyme, and chives) directly into the dough. It’s like a little garden party in every bite!
- Whole Wheat Version: Substitute half of the all-purpose flour with whole wheat flour for a nuttier, heartier roll. You may need to add a tablespoon or two more liquid, as whole wheat flour absorbs more.
- Honey Butter Sweet Rolls: For a sweeter version, skip the garlic and parsley. Instead, brush the warm rolls with a mixture of melted butter, honey, and a pinch of cinnamon. Divine for breakfast!
Chef Emily’s Notes from a Flour-Dusted Kitchen
This recipe has been my go-to for years, and it’s evolved with me. I once tried to rush the second rise during a hectic holiday dinner, and the rolls turned out dense and sad. It was a powerful reminder of my grandma’s lesson: bread has its own timeline. Respect the rise!
I also highly recommend doubling the garlic butter topping. I’m only half-joking. There is no such thing as too much. The recipe above is the polite amount, but my heart says to double the garlic and butter for maximum flavor impact. Live a little!
Finally, don’t be afraid of the dough. Get your hands in there and feel it change from sticky to smooth. That connection is the real magic of baking. It’s my favorite kind of kitchen therapy.
Your Questions, Answered!
Q: Can I make these rolls ahead of time?
A: Absolutely! You have two great options: 1) Refrigerate after shaping: After you shape the rolls into the pan, cover them tightly with plastic wrap and refrigerate for up to 24 hours. When you’re ready, let them sit on the counter for about an hour to finish rising, then bake. 2) Freeze the baked rolls: Bake and cool them completely, then freeze in a zip-top bag. Reheat in a 350°F oven for 10 minutes until warm.
Q: My dough didn’t rise. What went wrong?
A: The most common culprits are old/expired yeast or liquid that was too hot (which killed the yeast) or too cold (which put it to sleep). Always check the expiration date on your yeast and use a thermometer if you’re unsure about the liquid temperature. Also, ensure your rising spot is warm and draft-free!
Q: Why are my rolls dense and not fluffy?
A: This usually happens if the rising time was cut short, or if you used too much flour. When measuring flour, fluff it up in the bag first, then spoon it into your measuring cup and level it off. Don’t scoop directly with the cup, as it packs the flour down and leads to over-measuring.
Q: Can I use a stand mixer?
A: Yes! This is a great stand mixer recipe. Use the dough hook attachment. Mix the wet ingredients on low, then add the flour gradually until a dough forms. Let the mixer knead the dough on medium speed for 5-7 minutes until smooth.
Easy Garlic Butter Dinner Rolls
- Total Time: ~2 hrs
- Yield: 12 - 15 rolls 1x
Description
Soft, buttery, and brushed with garlicky goodness—these rolls are the MVP of any dinner spread. No fancy ingredients, no fuss—just warm, pillowy bites that melt in your mouth. Serve them fresh from the oven, and watch them vanish in minutes!
Ingredients
3 cups all-purpose flour
2¼ tsp active dry yeast (1 packet)
2 tbsp sugar
1 tsp salt
¾ cup warm milk (110°F/43°C)
¼ cup warm water
¼ cup unsalted butter, melted (for dough)
1 egg
Garlic Butter Topping:
¼ cup butter, melted
2–3 garlic cloves, minced
1 tbsp fresh parsley, chopped ✨
Pinch of salt
Instructions
Activate Yeast: In a bowl, mix warm water, milk, sugar, and yeast. Let sit 5–10 mins until foamy.
Mix Dough: Add melted butter, egg, salt, and flour. Mix until dough forms. Knead for 8–10 mins until smooth.
First Rise: Place dough in a greased bowl, cover, and let rise for 1 hour or until doubled.
Shape Rolls: Punch down dough and divide into 12–15 balls. Arrange in a greased baking dish.
Second Rise: Cover and let rise another 30–40 mins.
Bake: Preheat oven to 375°F (190°C). Bake rolls for 15–18 mins or until golden.
Brush with Garlic Butter: Mix garlic, melted butter, and parsley. Brush rolls right out of the oven.
- Prep Time: 20 minutes
- Chill Time: 1.5 hours
- Cook Time: 15–18 min
Nutrition
- Calories: 160 / Roll
- Sugar: 2g / Roll
- Sodium: 180mg / Roll
- Fat: 6g / Roll
- Saturated Fat: 3.5g / Roll
- Carbohydrates: 22g / Roll
- Protein: 4g / Roll
- Cholesterol: 25mg / Roll
Nutritional Information (Because We Care!)
Okay, let’s be real—these are a treat, and they’re worth every single buttery calorie! But here’s a general breakdown per roll (assuming the recipe makes 14 rolls). Remember, this is an estimate and can vary based on specific ingredients used.
Calories: ~160 kcal
Carbohydrates: 22g
Protein: 4g
Fat: 6g
Saturated Fat: 3.5g
Cholesterol: 25mg
Sodium: 180mg
Fiber: 1g
Sugar: 2g
These rolls provide a source of energy from carbohydrates and a small amount of protein. To balance your meal, enjoy them alongside lean proteins and plenty of vegetables!
Final Thoughts from My Kitchen to Yours
There you have it, friends! My ultimate recipe for Easy Garlic Butter Dinner Rolls. This isn’t just about following steps; it’s about creating a moment. It’s about the pride of pulling a pan of gorgeous, golden, homemade rolls from your own oven and seeing the smiles on your family’s faces.
I hope this recipe becomes a staple in your home, just like it is in mine. I hope it gives you the confidence to play with yeast and discover the pure joy of baking from scratch. Most of all, I hope it brings you as much warmth and happiness as it brings me.
If you make them (and I really hope you do!), please tag me on social @TastyChow so I can see your beautiful creations! Now, go preheat that oven and get ready for your kitchen to smell like a five-star bakery. Happy baking!
With love and a full bread basket,
Emily