Ham & Cheese Puff Pastry Christmas Trees: Your New Holiday MVP!
Hey there, my festive friend! Can you smell it? That magical blend of buttery pastry, savory ham, and melty cheese wafting from the oven, mingling with the scent of pine and possibility. If there’s one thing I believe in more than a well-seasoned cast-iron skillet, it’s that holiday magic is best served warm, flaky, and straight from a baking sheet. And that’s exactly what these Ham & Cheese Puff Pastry Christmas Trees are all about!
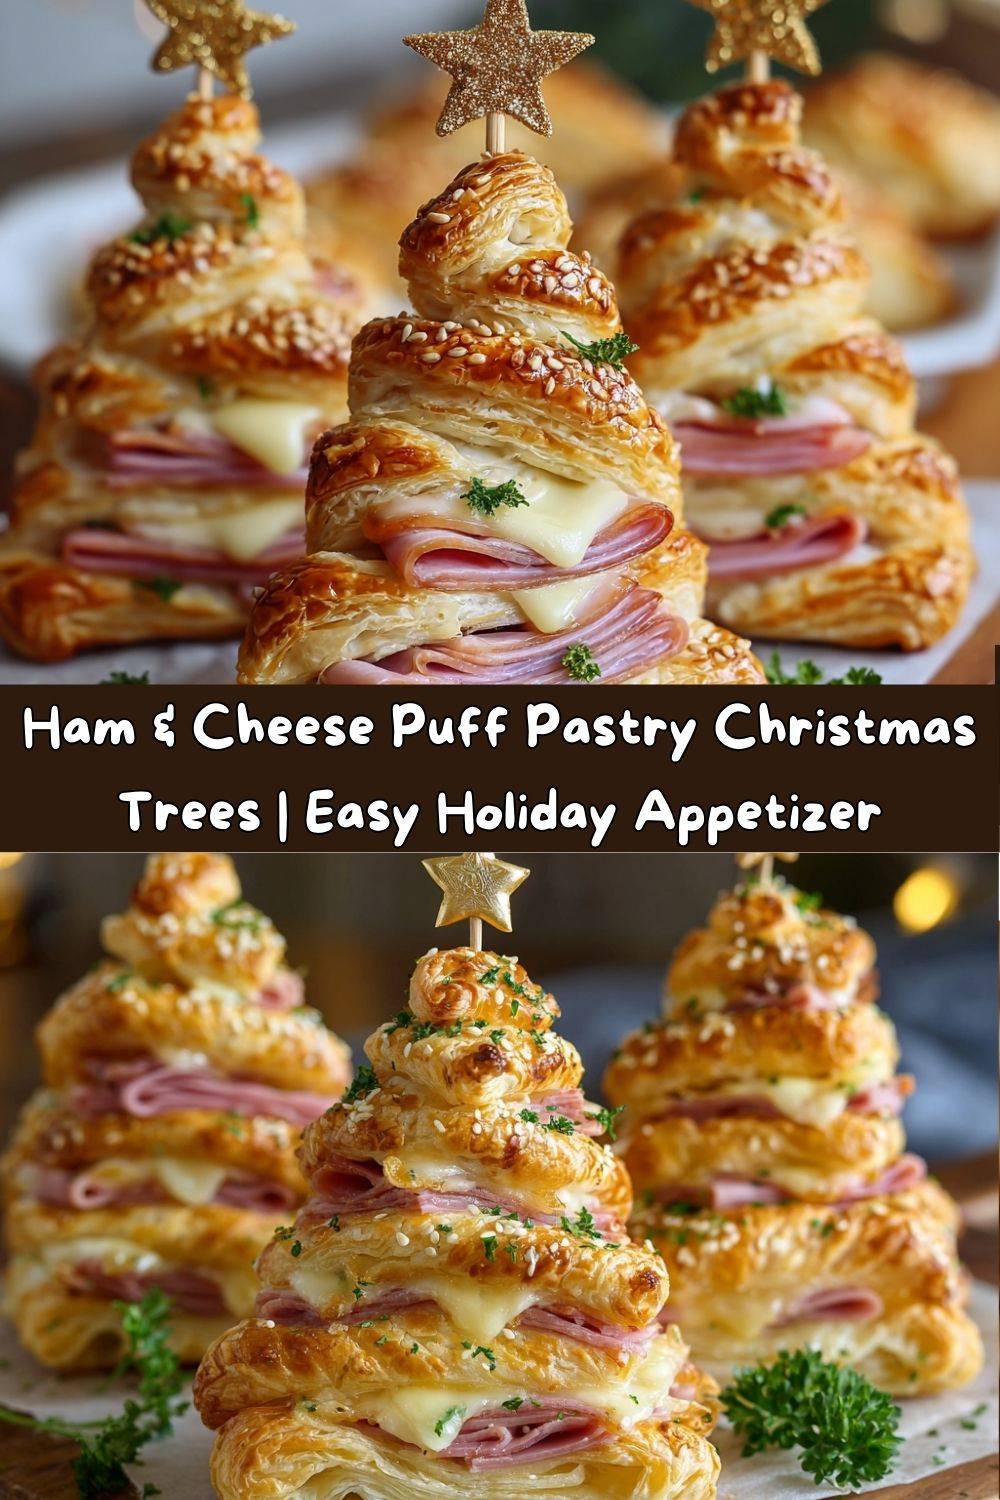
Picture this: you’re at a holiday party. There’s a platter of these adorable, golden-brown pastry trees. Someone picks one up, their eyes light up at the whimsical shape, they take a bite, and—BAM!—flaky layers give way to a warm, cheesy, savory center. They instantly become the talk of the gathering. The best part? You made them, and they were shockingly easy. No one needs to know your secret! These trees are the ultimate crowd-pleaser, perfect for Christmas morning brunch, a festive appetizer spread, or even a fun, cozy night in with a holiday movie. They look like you fussed for hours, but we know the truth: the magic is in the simplicity. So, tie on your favorite festive apron (the one with the gingerbread men, obviously), and let’s make some delicious, edible holiday cheer together!
A Tree Grows in My Kitchen: The Story Behind the Bite
This recipe always takes me right back to my first Christmas in my own little apartment. The budget was… let’s call it ‘cozy’. I wanted to host my friends for a proper holiday soirée, but a full gourmet spread was out of the question. I had a packet of puff pastry in the freezer, some leftover ham from a dinner, and a block of cheese that was begging to be used. I started playing around, stacking and rolling, and had a sudden flash of inspiration: what if I made them look like Christmas trees?
My first attempt was… abstract. Let’s just say it looked more like a pastry cactus than an evergreen. But I tweaked the folding technique, and on the second try, they came out of the oven puffed, golden, and undeniably tree-like. I arranged them on my one nice platter, and when my friends arrived, their faces lit up. They weren’t just eating an appetizer; they were eating a moment. That’s the power of playful, heartfelt food. It’s not about perfection; it’s about the joy you bake into it. These little trees became an instant tradition, a reminder that the most memorable dishes are often born from a bit of creativity and a whole lot of love.
Gathering Your Forest: What You’ll Need
Here’s your shopping list for this festive forest! The beauty of this recipe is its flexibility, so don’t be afraid to swap things based on what’s in your fridge.
- 2 sheets puff pastry (thawed): This is our MVP! Look for it in the freezer aisle. The key is to let it thaw slowly in the fridge overnight, or on the counter for about 40 minutes. It should be pliable but still cold. If it gets too warm and sticky, it’s harder to work with. Pro Chef Tip: I always keep a box in the freezer for last-minute pastry emergencies!
- 12 slices of deli ham (thinly sliced): I love a good black forest ham for its flavor, but honey ham or even prosciutto would be fantastic. If your slices are large, you can fold them to fit the pastry. This is a great way to use up leftover holiday ham—just slice it very thinly!
- 12 slices of cheese: This is where you can get creative! I’ve used everything.
- Cheddar: For a classic, sharp flavor.
- Gouda: Especially smoked gouda—hello, depth!
- Swiss: The nuttiness pairs perfectly with ham.
- Mozzarella: For that epic, stretchy cheese pull.
Just make sure it’s a good melting cheese. Pre-sliced works, but sometimes block cheese sliced thinly melts even better.
- 24 wooden skewers: These are the trunks of our trees! If you don’t have them, you can use sturdy toothpicks, but skewers give you more stability for the folding process.
- Optional Garlic Butter Glaze: Trust me, don’t skip this. It adds so much flavor and helps the pastry achieve that gorgeous golden color.
- 4 tbsp melted butter: The rich base of our glaze.
- 2 tsp minced garlic: Fresh is best for a punchy flavor, but the jarred stuff works in a pinch!
- 2 tbsp chopped fresh parsley: Adds a fresh, herby note and a pop of green. Dried parsley can work, but use about 2 teaspoons.
- Sprinkle of sesame or poppy seeds: This is our optional “holiday glitter.” It adds a lovely little crunch and makes them look professionally finished.
Let’s Build Some Trees! Your Step-by-Step Guide
Okay, team, let’s get our hands floury! Follow these steps, and you’ll have a forest of deliciousness in no time. Read through all the steps once before you start—it’s my number one chef hack for a smooth cooking experience.
- Preheat and Prep: Preheat your oven to 375°F (190°C). This is crucial for getting that instant puff! Line a baking sheet with parchment paper. Not only does this prevent sticking, but it makes cleanup an absolute dream. No one wants to scrub a baking sheet on Christmas, am I right?
- Assemble the Layers: On a lightly floured surface, gently unfold your first thawed puff pastry sheet. If it has cracks, just press them together with your fingers—it’s very forgiving. Now, let’s layer! Arrange your cheese slices in a single layer, covering most of the pastry. Follow this with a layer of ham. The order here is key: cheese on the bottom helps it melt directly into the pastry, creating an incredible base for the ham. Place the second sheet of puff pastry directly on top and gently press down over the entire surface. This helps “glue” the layers together so they don’t shift when we cut them.
- The Big Cut: Using a sharp knife or a pizza cutter (my personal favorite for clean lines), carefully slice the layered pastry into 1-inch wide strips. You should get about 12 strips from a standard sheet. You’ll see all those beautiful layers waiting to get puffy!
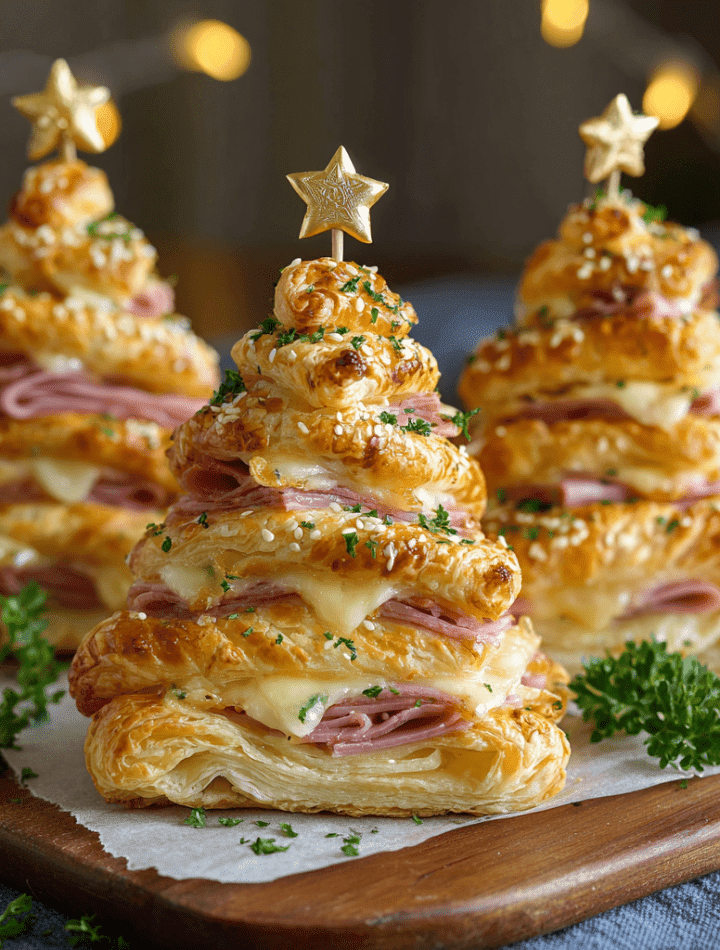
- The Fold: Here’s the fun, slightly meditative part! Take one strip and a wooden skewer. Starting at one end, begin folding the strip back and forth onto itself along the skewer, creating a zig-zag pattern that resembles a Christmas tree. Alternate the folds left and right, pressing lightly as you go. Leave a little space at the bottom for the “trunk.” It might feel awkward on the first one, but you’ll get the hang of it by the second! Place your finished tree on the prepared baking sheet. Repeat with the remaining strips.
- The Glaze: In a small bowl, mix together the melted butter, minced garlic, and chopped parsley. Using a pastry brush, generously brush this garlic butter goodness over each tree. Get into all the nooks and crannies! This is where the flavor magic happens. Now, if you’re using them, sprinkle on those sesame or poppy seeds for that extra festive touch.
- Bake to Golden Perfection: Slide your baking sheet into the preheated oven and bake for 20-25 minutes. You’re looking for a deep, golden brown color and a magnificently puffed texture. Your kitchen will smell absolutely incredible. Try to resist opening the oven door too early, as this can let out the heat and affect the puff.
- The Grand Finale: Once they’re beautifully golden, remove them from the oven. Let them cool on the baking sheet for just 5 minutes. This allows the cheese to set slightly so it doesn’t all ooze out when you pick them up. They are best served warm, when the cheese is at its peak melty-ness!
How to Serve Your Edible Evergreens
Presentation is part of the fun! You’ve created these adorable edible ornaments, so let’s show them off.
Arrange your warm pastry trees on a large wooden board or a festive platter. I like to create a little “winter scene” by scattering some fresh rosemary sprigs around them—they look like little pine trees and smell amazing! For a dip, I highly recommend a simple side of marinara sauce for dipping (like a cheesy breadstick), a creamy honey mustard, or even a garlic aioli. It adds a cool, creamy element that contrasts wonderfully with the warm, flaky pastry.
These are the ultimate finger food for a holiday party. Stack them high and watch them disappear! They’re also fantastic for Christmas morning brunch alongside a frittata and a mimosa bar. For a cozy night in, serve them with a big bowl of tomato soup for the ultimate comforting, festive meal.
Branching Out: Delicious Recipe Variations
Once you master the basic tree, the forest is yours to explore! Here are a few of my favorite twists to keep things exciting.
- The Sweet & Savory Star: Before adding the cheese, spread a very thin layer of fig jam, apricot preserves, or even a grainy honey mustard over the bottom pastry sheet. The sweet and tangy flavor with the salty ham and cheese is a total game-changer.
- The Vegetarian Wonderland: Skip the ham! Instead, use a layer of sautéed spinach (squeezed very dry), artichoke hearts, and sun-dried tomatoes. A spread of basil pesto under the cheese would also be incredible.
- The Breakfast Tree: Swap the ham for cooked breakfast sausage or crispy bacon. You could even add a very light sprinkle of scrambled egg, but be careful not to overfill, or it might get soggy.
- The “Everything” Tree: Channel your inner bagel lover! Use everything bagel seasoning in your butter glaze and fill with cream cheese and smoked salmon (after baking, for the salmon) for an ultra-luxe version.
- The Starry Night Topper: For a gorgeous finish, use a small star-shaped cookie cutter to cut out pieces of extra cheese. Place one on top of each tree before baking. As it melts, it creates a perfect cheesy star tree topper!
Chef Emily’s Kitchen Notes
This recipe has evolved so much since that first “cactus” batch! I’ve learned that keeping your pastry cold is the number one secret to maximum puff. If the butter in the pastry melts before it hits the oven, you won’t get those glorious, separate layers. If your kitchen is warm, pop the assembled-but-uncut layered pastry into the fridge for 10 minutes before you slice it into strips.
Another funny lesson: the first time I made these for my family, my nephew, who was about four at the time, refused to eat them because he didn’t want to “hurt the trees.” We had to convince him they were magic trees that wanted to be eaten! Now, it’s his job to add the cheese stars. The recipe is forgiving, so make it your own and have fun with it. That’s what cooking is all about!
FAQs & Troubleshooting: Your Questions, Answered!
Q: Can I make these ahead of time?
A: Absolutely! You can assemble the trees up to the point of baking, place them on the baking sheet, cover tightly with plastic wrap, and refrigerate for up to 24 hours. When you’re ready, just brush with the glaze and bake. You might need to add 1-2 extra minutes to the baking time since they’ll be going in cold.
Q: My pastry didn’t puff much. What happened?
A: The most common culprit is the pastry getting too warm before baking. Always work with cold, not room-temperature, pastry. Also, make sure your oven is fully preheated. An oven thermometer is a cheap and invaluable tool to ensure your oven is at the right temp!
Q: Can I use phyllo dough instead?
A: I wouldn’t recommend it for this specific recipe. Phyllo dough is much more delicate and doesn’t have the same layering of butter that creates the thick, sturdy puff you need for folding. Puff pastry is the way to go!
Q: The cheese is leaking out everywhere. How do I prevent that?
A> A little leakage is normal and delicious! But to minimize it, avoid overfilling right to the very edges of the pastry. Leave a tiny border. Also, using cheese that isn’t overly greasy when it melts (like a firmer cheddar or gouda versus a super-oily mozzarella) can help.
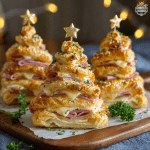
HAM & CHEESE PUFF PASTRY CHRISTMAS TREES
- Total Time: 40 minutes
- Yield: 24 trees 1x
Description
Flaky, golden puff pastry layered with melty cheese and savory ham, twisted into the cutest holiday trees. These are the ultimate finger food for parties, brunches, or cozy nights in. Bonus: they look fancy, but come together fast!
Ingredients
2 sheets puff pastry (thawed)
12 slices of deli ham (thinly sliced)
12 slices of cheese (cheddar, gouda, Swiss, or mozzarella work well)
24 wooden skewers
Optional Garlic Butter Glaze:
4 tbsp melted butter
2 tsp minced garlic
2 tbsp chopped fresh parsley
Sprinkle of sesame or poppy seeds (optional holiday flair)
Holiday Twists:
Add a thin layer of honey mustard or fig jam under the cheese for a sweet-savory combo
Use star-shaped cheese cutouts on top for a decorative “tree topper”
Swap ham for turkey or spinach-artichoke spread for a vegetarian version
Instructions
Preheat oven to 375°F (190°C). Line a baking sheet with parchment paper.
Assemble the layers: Lay out one puff pastry sheet. Top with cheese slices, then ham slices. Add the second sheet of pastry on top and press down lightly.
Cut strips: Slice into 1-inch wide strips. Fold each strip back and forth onto a skewer to resemble a tree shape.
Brush with glaze: Mix melted butter, garlic, and parsley. Brush over the trees.
Bake for 20–25 minutes or until puffed and golden.
Cool slightly & serve: Best warm, but still tasty at room temp.
- Prep Time: 15 minutes
- Cook Time: 25 minutes
Nutrition
- Calories: 160 / Tree
- Fat: 11g / Tree
- Carbohydrates: 10g / Tree
- Protein: 6g / Tree
Nutritional Information (Per Tree)
Okay, let’s talk facts! Remember, this is an indulgent holiday treat, and that’s perfectly okay. Balance is key! Here’s a rough estimate based on the core ingredients. Values will change with substitutions.
- Calories: ~160
- Protein: 6g
- Fat: 11g
- Carbohydrates: 10g
Prep Time: 15 minutes
Cook Time: 25 minutes
Total Time: 40 minutes
Cost: ~$10–12 (for 24 trees) – Much cheaper and more impressive than store-bought appetizers!
Final Thoughts: Share the Delicious Joy!
And there you have it! Your guide to creating the most delightful, show-stopping, and secretly easy holiday appetizer. These Ham & Cheese Puff Pastry Christmas Trees are more than just food; they’re a conversation starter, a memory maker, and a guaranteed way to spread some delicious joy this season.
I hope you have as much fun making them as I do. Remember, it doesn’t have to be perfect. A lopsided tree is just as delicious as a symmetrical one! If you make them (and I really hope you do), please share your creations with me. Tag me @TastyChow on social media so I can see your beautiful edible forests. Nothing makes me happier than seeing you in the kitchen, creating your own stories.
From my kitchen to yours, have a warm, flaky, and very merry holiday season! Now go forth and bake.
With love and butter,
Emily
