Sweet, Salty & Seriously Addictive: The Ultimate Chocolate Covered Pretzels
Hey there, my fellow food lover! Have you ever found yourself in that beautiful, impossible-to-resist space between a salty craving and a sweet tooth? You know the one. You’re scrolling through your pantry, and the pretzels are calling your name, but so is that bar of chocolate hiding in the cupboard. Well, my friend, I’m here to tell you that you don’t have to choose. In fact, the universe (and your taste buds) are begging you to combine them.
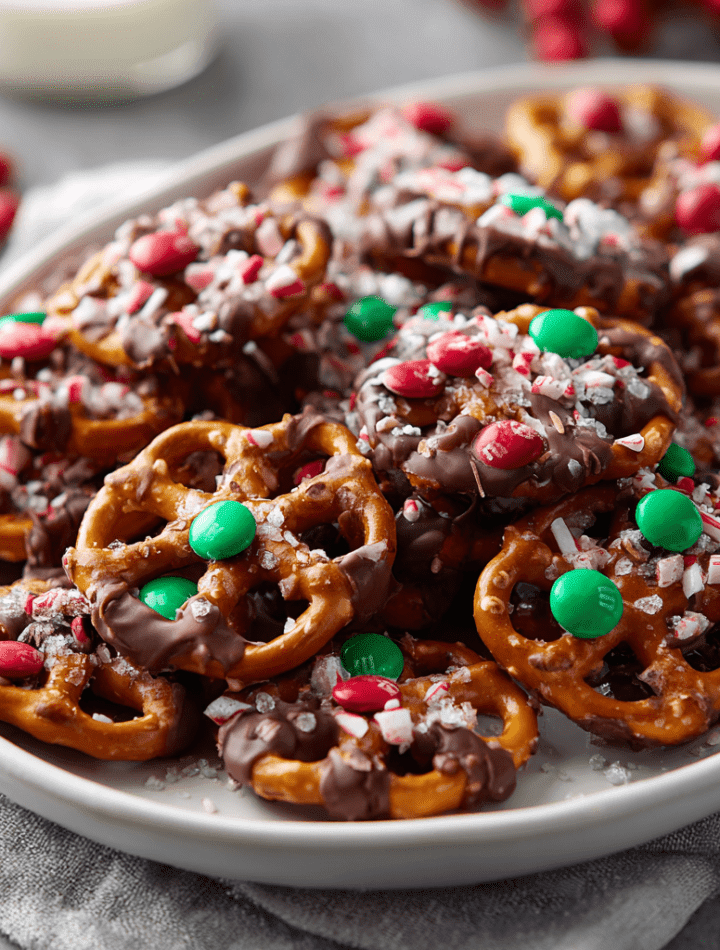
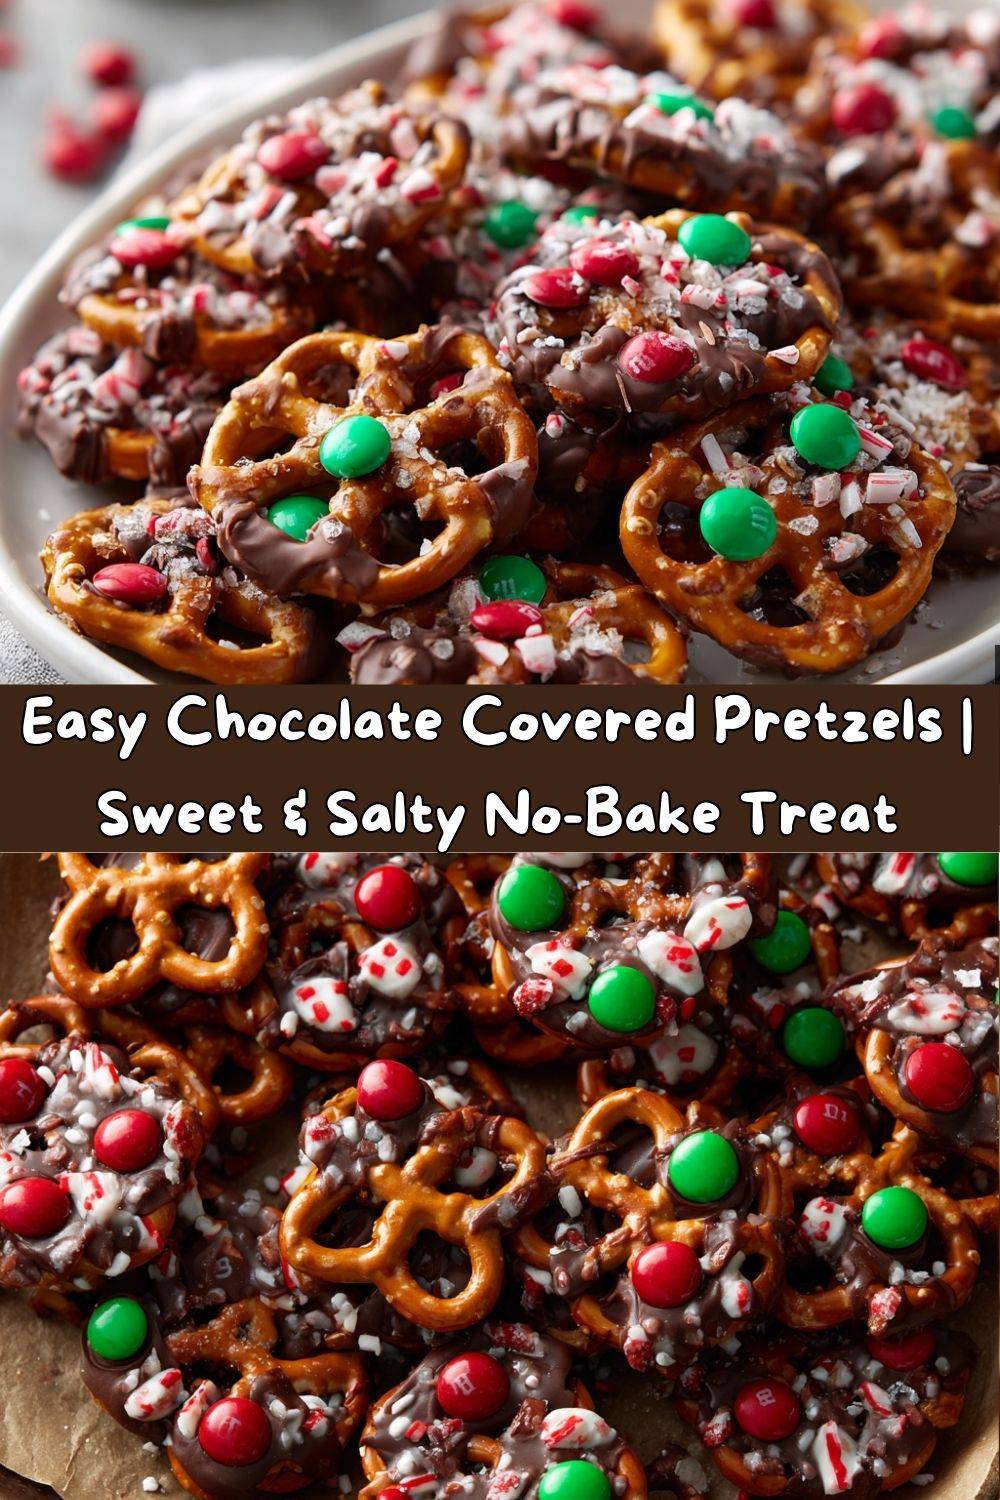
Today, we’re making the ultimate no-bake, crowd-pleasing, smile-inducing treat: Chocolate Covered Pretzels. This is the kind of kitchen magic that feels like a party. It’s fast, it’s fun, and it’s virtually impossible to mess up. Whether you’re prepping for a holiday bash, whipping up a last-minute edible gift that looks like you spent hours, or just need a cozy afternoon project with the kids (or, let’s be real, by yourself with a good podcast), this recipe is your new best friend.
We’re talking crispy, salty pretzels dipped in luxuriously rich, melted chocolate and then decked out with all the sprinkles, crushed candy, and drizzles your heart desires. The contrast of the crunchy salt with the smooth, sweet chocolate is a flavor experience that never, ever gets old. So, grab your favorite apron—the one that’s probably already dusted with flour and a little bit of last night’s dinner—and let’s get our hands a little chocolatey. I promise, it’s worth it.
The Day My Grandma’s Pretzels Saved Christmas
This recipe always takes me right back to my grandma’s kitchen, specifically to one hilariously chaotic Christmas Eve. I was about ten years old, and I had been put in charge of setting out the cookies for Santa. Well, in a tragic turn of events involving an overexcited Labrador named Buster and a poorly placed plate, our beautifully decorated sugar cookies ended up on the floor.
I was devastated. But my grandma, never one to fluster, just winked at me. She pulled out a bag of pretzels, a block of chocolate she’d been saving for fudge, and a container of red and green sprinkles. “Santa,” she declared, “is a salty-and-sweet kind of guy. He’ll love these even more.”
We spent the next hour dipping and sprinkling and laughing, our fingers covered in chocolate. The next morning, the plate was empty, and Santa had left a note thanking us for the “best snack ever.” It was a powerful lesson for little me: the best recipes aren’t about perfection. They’re about the joy you make along the way. To this day, the sight of a chocolate-dipped pretzel feels like a warm hug and a reminder that sometimes the happiest kitchen moments come from happy little accidents.
Gathering Your Sweet & Salty Toolkit
One of the best things about this recipe is its simplicity. You only need a few key players to create something truly magical. Here’s what you’ll need to make about 40 delicious pretzel bites:
- 40 mini pretzels or 20 pretzel rods: The star of the show! I love mini twists or rods for easy dipping. The classic salty snap is non-negotiable. Chef’s Insight: If you’re using rods, go for the thicker ones—they’re sturdier and less likely to break during their chocolate bath.
- 12 oz semi-sweet or milk chocolate chips: This is your rich, decadent base. I’m a semi-sweet girl myself—I love the deeper chocolate flavor that balances the salt. Substitution Tip: Feel free to use dark chocolate for a more intense, less sweet treat, or milk chocolate for a classic, kid-friendly favorite. You can use high-quality chocolate bars chopped up, but chips have stabilizers that make them melt a bit easier for beginners.
- 12 oz white chocolate chips or candy melts: Hello, beautiful contrast! White chocolate is perfect for drizzling and for creating that gorgeous marbled look. Chef’s Insight: Candy melts (also called melting wafers) are fantastic because they set up with a super smooth, snappy finish and come in a rainbow of colors. They’re my secret weapon for holiday-themed treats!
- Toppings Galore! This is where your personality shines. Think:
- Holiday sprinkles: Jimmies, nonpareils, sugar shapes—anything goes!
- Crushed candy canes: A must for peppermint crunch. Pro tip: crush them in a zip-top bag with a rolling pin.
- Flaky sea salt: A light sprinkle enhances every single flavor. Trust me on this.
- Chopped nuts: Pecans, almonds, or peanuts add a wonderful texture.
- Shredded coconut: Toasted or not, it’s a tropical delight.
Let’s Make Some Magic: Step-by-Step Dipping
Okay, team! Let’s do this. Clear a little space on your counter, and let’s transform these simple ingredients into edible works of art.
- Prep Your Station: Line a large baking sheet with parchment paper or a silicone baking mat. This is your pretzels’ landing pad and will prevent any sticky situations. Do this first! There’s nothing worse than melting chocolate with nowhere to put your dipped goodies. Chef’s Hack: If your kitchen is particularly warm, you can even pop this baking sheet into the fridge for 10 minutes before you start. A cold surface helps the chocolate set faster.
- Melt the Chocolate: This is the most crucial step for a smooth, professional look. Place each type of chocolate in its own separate microwave-safe bowl. Heat one bowl at a time in the microwave on 50% power in 20-second intervals. After each interval, stop and stir vigorously. I repeat: STIR! This redistributes the heat and prevents the chocolate from scorching. Keep going until the chocolate is just smooth and liquid. Chef’s Warning: Do not overheat! White chocolate and chips are especially sneaky—they can hold their shape even when melted, so stirring is key. If your chocolate seems thick, you can add a tiny, tiny amount of coconut oil or vegetable shortening (about ½ tsp at a time) to thin it out to a perfect dipping consistency.
- Dip the Pretzels: Now for the fun part! Hold a pretzel by one end and dunk it halfway (or all the way if you’re feeling bold!) into the melted chocolate. Use a fork or a dipping tool to swirl it around and ensure it’s fully coated. Gently lift it out, tap your wrist lightly against the edge of the bowl to shake off any excess chocolate. This is the secret to avoiding a big, messy chocolate puddle underneath your pretzel. Carefully place it on your prepared baking sheet.
- Decorate Immediately: You’ve got a small window of opportunity here! While the chocolate is still wet, shower on your sprinkles, crushed candy, or a pinch of sea salt. If you’re planning a drizzle with the second chocolate, you can wait for the first layer to set a bit before adding it. But for toppings that need to stick, now’s the time!
- Set & Serve: Once your baking sheet is full of gorgeous, decorated pretzels, you have two options. You can let them set at room temperature, which might take 30-45 minutes depending on the humidity. Or, if you’re impatient like me, you can very carefully transfer the entire tray to the refrigerator for 10-15 minutes until the chocolate is completely firm to the touch. The fridge method gives you that satisfying *snap* when you break into one.
How to Serve These Shiny Happy Pretzels
You’ve created a masterpiece, so let’s show it off! Presentation is part of the fun. For a casual family snack, just pile them high on a fun plate or in a big bowl. Watch them disappear!
If you’re giving them as a gift or serving them at a party, a little extra effort goes a long way. For pretzel rods, consider standing them up in a tall jar or mug for a dramatic, edible centerpiece. For the mini pretzels, layer them in a cellophane bag tied with a cute ribbon—it makes the perfect party favor or teacher gift. You can also arrange them in a single layer in a festive tin, separating layers with parchment paper so they don’t stick together.
Pair them with a cup of cold milk for the ultimate nostalgic combo, or alongside a mug of rich hot coffee to balance the sweetness. They also look absolutely stunning on a dessert charcuterie board next to some fresh fruit, cookies, and a variety of cheeses.
Get Creative: 5 Fun Twists to Try
The basic formula is just the beginning. Once you’ve mastered the classic, the flavor world is your oyster! Here are a few of my favorite ways to mix things up:
- Nutty Love: After dipping, roll your chocolate-covered pretzel in finely chopped pistachios, toasted almonds, or crushed peanuts. It adds a fantastic crunch and a sophisticated flavor profile.
- Peppermint Swirl: Add a ¼ teaspoon of peppermint extract (not mint!) to your white or dark chocolate before dipping. Top with crushed candy canes for the ultimate holiday treat.
- Color Splash: Use colored candy melts instead of traditional chocolate. Think pastel blues and pinks for a baby shower, red and green for Christmas, or orange and black for Halloween. The possibilities are endless!
- Drizzle Effect: Once your first layer of chocolate is set, use a fork or a small piping bag to drizzle the contrasting chocolate over the top in zig-zags or stripes. It looks incredibly professional and is so easy to do.
- S’mores Delight: Dip in milk chocolate, then immediately roll in crushed graham cracker crumbs. After they set, give them a little drizzle with melted marshmallow fluff (thinned with a tiny bit of water) for a campfire-inspired treat.
Chef Emily’s Notes & Kitchen Confessions
This recipe has been a staple in my kitchen for years, and it’s evolved from a simple dip-and-eat operation into a full-blown creative outlet. I’ve learned a few things along the way. First, always melt more chocolate than you think you need. It’s far easier to dip when you have a deep pool of chocolate to work with. Second, embrace the mess! There will be sprinkles on the floor and probably chocolate on your elbow. It’s all part of the fun.
One of my favorite kitchen stories involves a double batch of these for a school bake sale. I was using a makeshift double boiler (a bowl over a pot of simmering water) and got a little steam in the chocolate, causing it to “seize” up into a grainy mess. I almost panicked, but then I remembered a chef school trick: whisk in a little warm cream or coconut oil, one tablespoon at a time, until it smooths back out. It worked like a charm! It was a great reminder that even “mistakes” in the kitchen are just opportunities to learn a new hack.
FAQs & Troubleshooting: Your Questions, Answered!
Q: My chocolate got thick and clumpy when I melted it! What happened and can I fix it?
A: Ah, you’ve encountered “seized” chocolate! This usually happens if a tiny drop of water or steam gets into the melting chocolate. Don’t toss it! To fix it, immediately remove it from the heat and whisk in a small amount of neutral oil (like vegetable or coconut oil) or warm heavy cream, one teaspoon at a time, until it becomes smooth again.
Q: Why won’t my sprinkles stick?
A: This almost always means you waited too long to add them! The chocolate sets surprisingly fast. You have to decorate immediately after dipping, while the surface is still wet and shiny. If you’re doing a large batch, only melt a portion of your chocolate at a time so you can work quickly.
Q: Can I use almond bark or vanilla flavored candy coating?
A: Absolutely! Almond bark and candy melts are designed specifically for dipping and coating. They melt beautifully and set up with a very clean, hard finish, making them a fantastic and user-friendly choice.
Q: How do I store these, and how long do they last?
A: Store them in an airtight container at cool room temperature for up to 2 weeks. You can layer them with parchment paper so they don’t stick. Avoid the refrigerator for long-term storage, as condensation can make the pretzels lose their crunch. They can also be frozen for up to 2 months!
Chocolate Covered Pretzels
- Total Time: 30 minutes
- Yield: ~40 mini pretzels
Description
Crispy pretzels dipped in rich chocolate and topped with festive sprinkles or drizzle – this no-bake treat is fast, fun, and impossible to resist. Perfect for holiday parties, edible gifts, or a cozy kitchen project with the kids.
Ingredients
40 mini pretzels or 20 pretzel rods
12 oz semi-sweet or milk chocolate chips
12 oz white chocolate chips or melts
Holiday sprinkles, crushed candy canes, or sea salt for topping
Instructions
Prep your station
Line a baking sheet with parchment paper or a silicone mat.
Melt chocolate
In microwave-safe bowls, melt chocolates separately in 20-second intervals, stirring in between until smooth.
Dip the pretzels
Dip each pretzel halfway into chocolate (or swirl both chocolates for a marbled look). Tap gently to remove excess.
Decorate
While chocolate is still wet, top with sprinkles, candy cane pieces, or sea salt.
Set & serve
Place on the baking sheet and let set at room temperature or chill for 10–15 minutes until firm.
Fun Twists & Tips
Nutty Love: Roll in chopped pistachios, almonds, or peanuts
Peppermint Swirl: Add a dash of peppermint extract to white chocolate
Color Splash: Use red and green candy melts for festive flair
Drizzle Effect: Use a fork to drizzle contrasting chocolate over dipped pretzels
- Prep Time: 15 minutes
- Set Time: 15 minutes
Nutrition
- Calories: 90 / mini pretzel
- Sugar: 6g / mini pretzel
- Fat: 5g / mini pretzel
- Carbohydrates: 10g / mini pretzel
- Protein: 1g / mini pretzel
A Quick Note on Nutrition
While we’re definitely not claiming these are a health food, it’s always good to know what you’re enjoying! The following is a rough estimate per mini pretzel, based on using semi-sweet chocolate and no extra toppings. Remember, values can vary greatly based on your specific ingredients and how heavily you coat them.
Estimated per mini pretzel: ~90 calories | 5g fat | 10g carbohydrates | 1g protein | 6g sugar
These are a treat, through and through. The joy is in savoring them! I always say it’s better to enjoy one or two mindfully than to mindlessly eat a dozen. Savor that perfect sweet-salty-crunchy combination. You made it!
Final Thoughts from My Kitchen to Yours
Well, my friend, there you have it! Everything you need to know to create a batch of ridiculously delicious, totally giftable, and incredibly fun chocolate covered pretzels. This recipe is more than just a list of ingredients; it’s an invitation to play, to create, and to share something made with love.
I hope this brings a little bit of joy and a whole lot of flavor into your kitchen. Remember, cooking isn’t about being perfect. It’s about the laughter, the little messes, and the shared moments around the table. So whether you’re making these for a party, a gift, or just for a quiet Tuesday night treat, I hope you have as much fun making them as I do.
Happy Cooking!
— Emily 🥨✨