Christmas Monster Cookies: The Ultimate Festive Treat!
Hey there, my festive friend! Is there anything that smells more like pure, unadulterated holiday joy than a batch of cookies baking in the oven? That warm, buttery, sugary scent just wraps you up like a cozy blanket, doesn’t it? If you’re anything like me, your Christmas baking list is a mile long, but there’s always room for one more show-stopping recipe. And oh, do I have a show-stopper for you today.
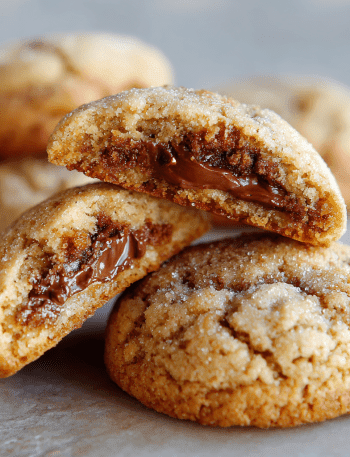
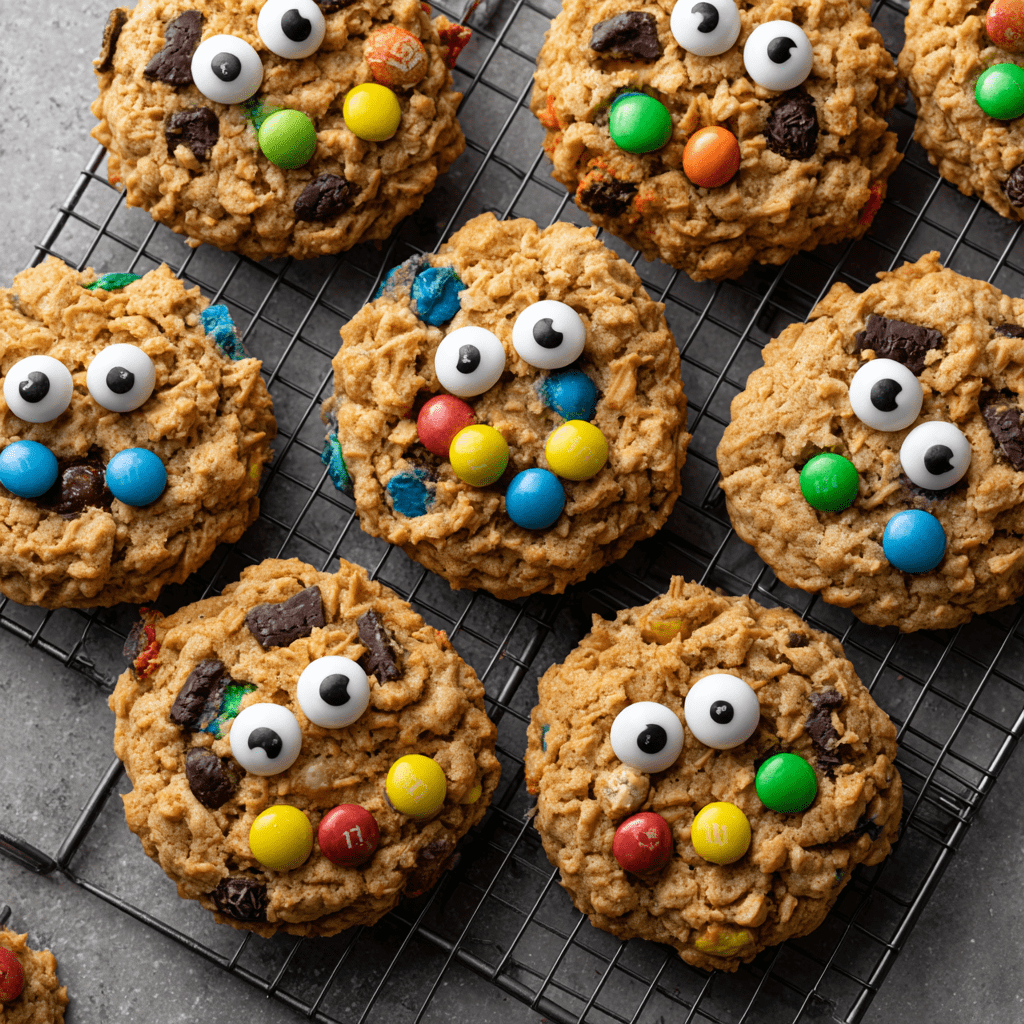
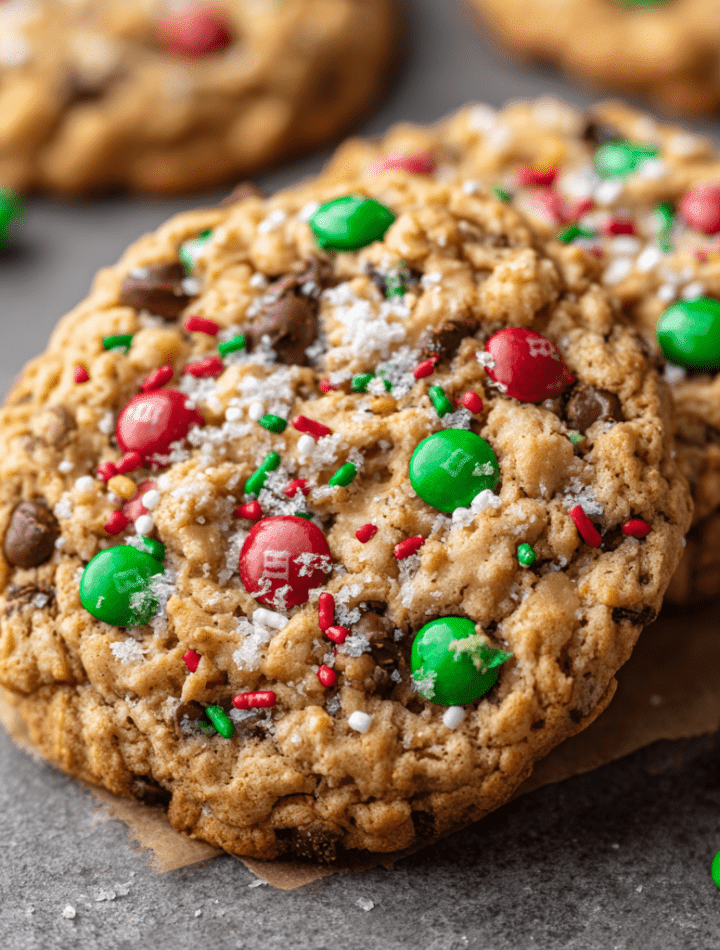
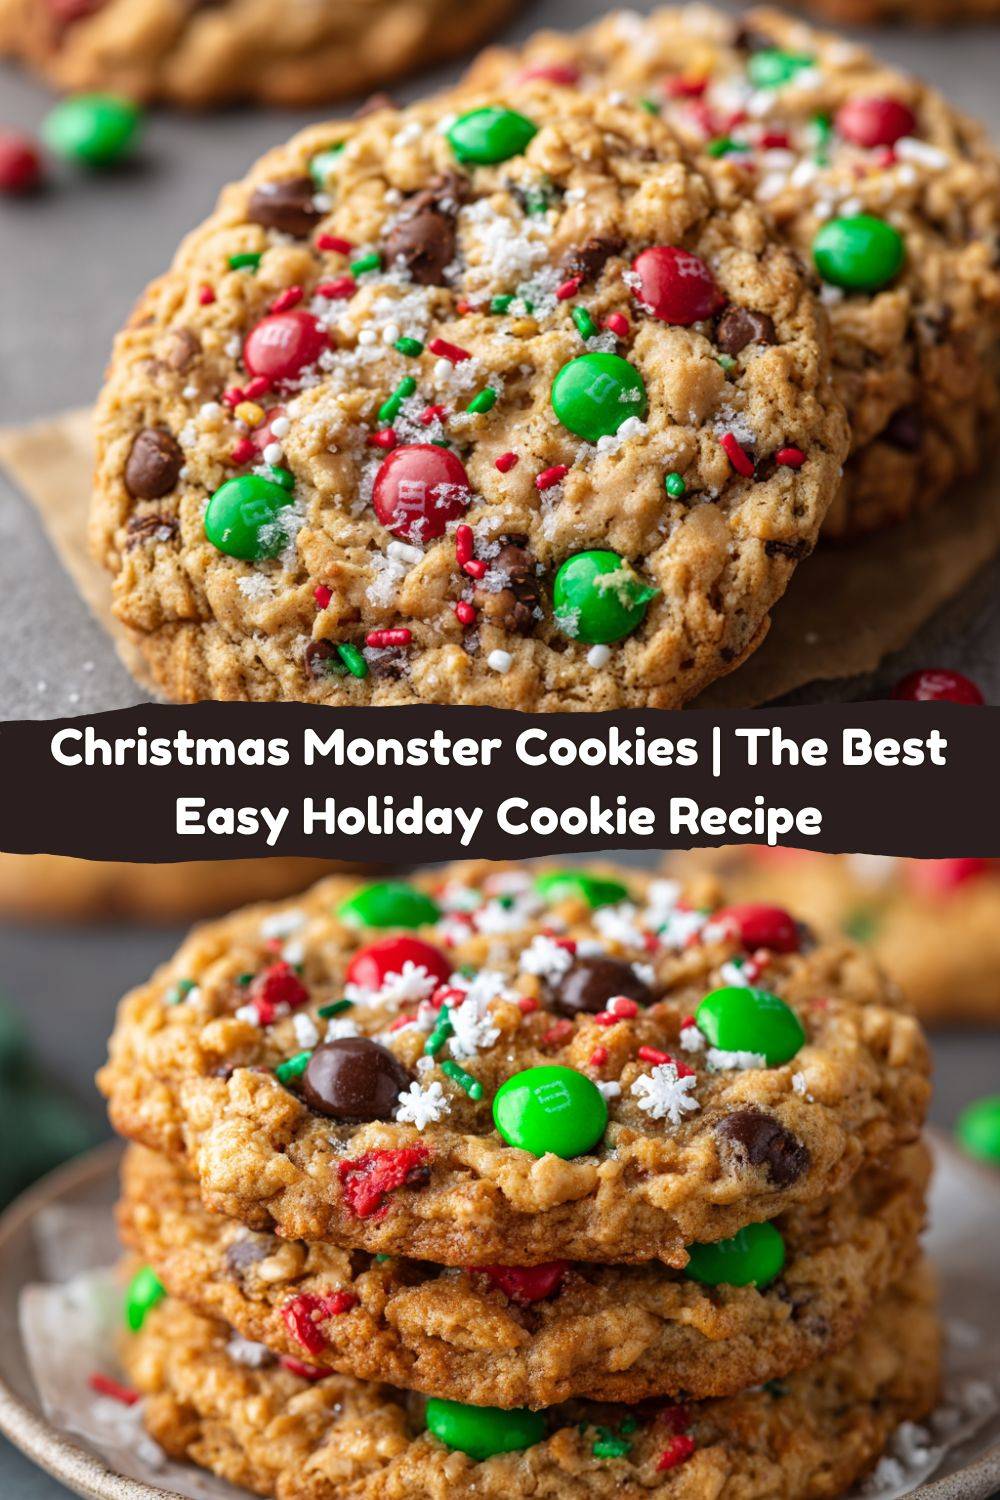
Let’s talk about Christmas Monster Cookies. We’re not making dainty, delicate little snowflakes here. No, no. We’re making BIG, chewy, gloriously loaded cookies that are basically a Christmas party in every single bite. Imagine this: a soft, peanut butter oat base, stuffed to the absolute brim with pools of melted chocolate, festive red and green M&Ms, and a little extra crunch and sparkle from holiday sprinkles. These cookies are the ones everyone remembers. They’re the ones Santa secretly hopes you leave out for him. They’re the perfect centerpiece for your cookie box, a guaranteed hit at any holiday potluck, and the ultimate reward after a long day of wrapping presents.
So, tie on your favorite festive apron (the one with the gingerbread men stains—that’s the lucky one!), and let’s make some magic together. This isn’t just a recipe; it’s a memory in the making. Let’s bake!
The Christmas Cookie That Started It All
I’ll never forget the first time I truly fell in love with a cookie. I was about eight years old, and my Grandma Mae had this magical tin she’d bring out only in December. It wasn’t your typical sugar cookie or gingerbread man inside. Oh no. It was filled with these enormous, lumpy, absolutely beautiful cookies packed with what looked like the entire contents of her baking cupboard. She called them her “Kitchen Sink Specials,” but I knew they were monsters—the best kind.
One particularly frosty afternoon, she let me be her official “M&M Placer.” My small, serious job was to press a few extra colorful candies on top of each dough ball right before they went into the oven. I remember the warmth of her kitchen, the smell of peanut butter and toasting oats, and her telling me, “Emily, the secret isn’t in the recipe. It’s in the love you mix in with the M&Ms.” It was my first real kitchen lesson: food is about joy, sharing, and a little bit of beautiful mess. Every time I bake these Christmas Monster Cookies, I’m right back in that kitchen with her, and I feel that same spark of holiday magic. Now, I get to share that magic with you.
Gathering Your Cookie Crew: The Ingredients
Here’s your shopping list for holiday happiness! The beauty of a monster cookie is its flexibility, so I’ve included my favorite chef-y tips and swaps to make these truly your own.
- 1 cup unsalted butter, softened – This is the foundation of our rich, tender cookie. Chef’s Tip: “Softened” means cool to the touch but leaves a slight indent when you press it. Don’t melt it! If you only have salted butter, just reduce the added salt to ¼ tsp.
- 1 cup brown sugar & ½ cup granulated sugar – The dynamic duo! Brown sugar brings that deep molasses moisture and chew, while white sugar helps them spread and crisp up just a bit on the edges.
- 1 cup creamy peanut butter – The soul of the monster cookie! It adds incredible flavor and a dense, chewy texture. Use a standard commercial brand like Jif or Skippy for the best consistency. Natural, oily peanut butter can make the cookies spread too much.
- 2 large eggs & 1 tsp vanilla extract – Our binding agents and flavor enhancers. Make sure your eggs are at room temperature to blend seamlessly into the dough.
- 1½ cups all-purpose flour, 1 tsp baking soda, ½ tsp salt – The structural team. Whisking these together first ensures our leavening is evenly distributed for the perfect rise.
- 2 cups old-fashioned oats – This is what gives the monster cookie its signature hearty, chewy, wholesome texture. Don’t use quick oats—they absorb moisture differently and can make the cookies dry.
- 1 cup holiday M&Ms (red & green), ¾ cup semi-sweet chocolate chips, ¼ cup holiday sprinkles – The PARTY! This is where the Christmas spirit really shines. Feel free to get creative with the mix-ins—this is your canvas!
Let’s Get Baking: Step-by-Step Instructions
Okay, team! Let’s turn these ingredients into edible holiday treasures. Read through all the steps first, and remember: baking is a science, but it’s also an art. Have fun with it!
- Preheat and Prepare: Fire up that oven to 350°F (175°C). Line your baking sheets with parchment paper. Chef’s Hack: This is non-negotiable for me! It prevents sticking and makes cleanup an absolute dream. No parchment? A silicone baking mat works wonders too.
- Cream the Good Stuff: In a large bowl, beat the softened butter, brown sugar, and granulated sugar together with an electric mixer on medium speed for a good 2-3 minutes. We’re not just mixing; we’re creaming! This incorporates air into the dough, which helps give our cookies a lighter texture. You’ll know it’s ready when the mixture turns noticeably paler and fluffy.
- Add the Wet Team: Beat in the peanut butter until it’s completely smooth and incorporated. Then, add the eggs one at a time, mixing well after each addition. Finally, mix in the vanilla. Scrape down the sides of the bowl with a spatula to make sure everything is homogenous.
- Combine the Dry Team: In a separate, medium-sized bowl, whisk together the flour, baking soda, and salt. This is a crucial step! It ensures the baking soda is evenly distributed so you don’t end up with a bitter bite in one cookie and a flat cookie from another.
- Bring It Together: Gradually add the dry flour mixture to the wet peanut butter mixture, mixing on low speed just until the flour disappears. Chef’s Warning: Do not overmix at this stage! Overworking the flour develops gluten, which can lead to tough cookies.
- The Grand Finale—Mix-ins! Switch to your trusty spatula or wooden spoon. Fold in the old-fashioned oats, followed by the festive M&Ms, chocolate chips, and holiday sprinkles. Mix until everything is evenly distributed. That color! That potential! The dough will be thick and chunky—that’s exactly what we want.
- Scoop and Space: Using a large cookie scoop or a hearty tablespoon, drop mounds of dough (about 2 tablespoons each) onto your prepared baking sheets. Leave at least 2 inches between them. These are MONSTER cookies, and they need room to spread and become their magnificent selves.
- Bake to Perfection: Bake for 10-12 minutes. You’re looking for golden brown edges but soft, slightly underbaked-looking centers. Chef’s Secret: They will continue to cook on the hot baking sheet after you pull them out. This is the key to a super chewy, soft center. If you wait for the centers to look fully done in the oven, they’ll be overbaked and crunchy once cooled.
- The Cool Down: This is the hardest part—patience! Let the cookies cool on the baking sheet for a full 5-10 minutes. This allows them to set up so they don’t fall apart when you move them. Then, transfer them to a wire rack to cool completely… or just grab a glass of milk and enjoy one warm and gooey. I won’t tell!
How to Serve These Holiday Heroes
You’ve created masterpieces—now let’s show them off! Presentation is part of the fun. For a classic Christmas Eve, nothing beats a simple stack of these cookies right next to a glass of cold milk for Santa. The man in red deserves the best, after all!
If you’re serving them at a party, create a Christmas Cookie Charcuterie Board. Pile these monster cookies in the center alongside some fresh berries, clementines, and a few chunks of dark chocolate. It’s a stunning, crowd-pleasing centerpiece.
And for the ultimate cozy night in? Place two slightly warm cookies on a plate with a giant scoop of vanilla bean ice cream sandwiched between them. Yes, you just made a Christmas Monster Cookie Ice Cream Sandwich. You’re welcome. The contrast of the warm cookie and cold ice cream is a little slice of heaven.
Mix It Up! Fun Recipe Variations
The fun doesn’t stop here! This dough is your playground. Here are a few of my favorite ways to switch it up:
- The Nutty Elf: Swap the chocolate chips for white chocolate chips and add ¾ cup of chopped dried cranberries and ½ cup of chopped pecans. It’s a fantastic sweet-and-tart combination.
- Peanut-Free Reindeer: Have an allergy in the crowd? Replace the peanut butter with sunflower seed butter or Wowbutter for a similar texture and flavor profile. Just be sure to use safe mix-ins too!
- Double Chocolate Monster: For the chocoholics, reduce the flour by ¼ cup and add ¼ cup of unsweetened cocoa powder to the dry ingredients. Use holiday M&Ms and dark chocolate chips for an intensely chocolatey experience.
- Salty Sweet Snowman: Finish your baked cookies with a light sprinkle of flaky sea salt right when they come out of the oven. The salt makes all the other flavors pop!
- Gluten-Free Joy: You can easily make these gluten-free! Use a 1:1 gluten-free all-purpose flour blend (I love Bob’s Red Mill) and certified gluten-free oats. The texture is just as wonderful.
Chef Emily’s Notes
This recipe has evolved so much since my Grandma Mae’s days! I’ve tested countless batches to get the ratio of oats to flour just right for that perfect chew. My biggest kitchen fail? The time I accidentally used quick oats and then wondered why my cookies spread into one giant, thin, crispy sheet pan cookie. We had to break it into pieces and call it “Christmas Bark.” It was still delicious, but not the monster we were hoping for! Another pro tip: if you can resist, these cookies taste even better the next day. The flavors have time to meld together, making them even more decadent. But let’s be real… resisting is nearly impossible.
FAQs & Cookie Troubleshooting
Q: My cookies spread too much and got really flat. What happened?
A: This is usually caused by butter that’s too warm. Make sure your butter is softened but not melty. Another culprit could be a warm baking sheet—always allow your baking sheets to cool completely between batches. If all else fails, you can pop the dough in the fridge for 30 minutes before baking to firm it up.
Q: Can I freeze the cookie dough?
A: Absolutely! This is a fantastic time-saver. Scoop the dough into balls, place them on a parchment-lined plate or baking sheet, and flash freeze for 1 hour. Then, toss the frozen dough balls into a zip-top freezer bag. They’ll keep for up to 3 months. When you’re ready to bake, just add 1-2 minutes to the baking time—no need to thaw!
Q: My cookies are too cakey. I want them chewier!
A> A cakey texture often comes from overmixing the dough once the flour is added. Remember to mix on low and only until the flour streaks disappear. Also, be careful not to over-bake. Taking them out when the centers still look soft is key.
Q: Can I use crunchy peanut butter?
A: You sure can! It will add a lovely little extra crunch throughout the cookies. It’s a delicious textural twist.
Nutritional Information (Approximate, Per Cookie)
Let’s be real—these are a treat, and they’re meant to be enjoyed as part of the festive celebration! Here’s a rough breakdown so you can indulge knowingly. Remember, values can vary based on specific brands and exact measurements of your mix-ins.
Calories: 240 | Total Fat: 12g | Saturated Fat: 5g | Cholesterol: 30mg | Sodium: 120mg | Total Carbohydrates: 30g | Dietary Fiber: 2g | Sugars: 18g | Protein: 4g
The oats provide a bit of fiber, and using a quality peanut butter adds some healthy fats and protein. But mostly, these cookies provide joy—and that’s calorie-free!
Final Sweet Thoughts
Well, my fellow foodie, we’ve done it! We’ve created a batch of cookies that are as fun to make as they are to eat. I hope your kitchen is filled with the incredible smell of baking holidays and that these Christmas Monster Cookies become a new tradition in your home, just like they are in mine.
Baking is about so much more than the final product. It’s about the laughter that happens while you’re waiting for the timer to ding, the flour on your nose, and the love you stir into every bowl. So share these cookies generously, save a few for yourself, and have the merriest, tastiest Christmas yet.
Happy Baking!
— Emily