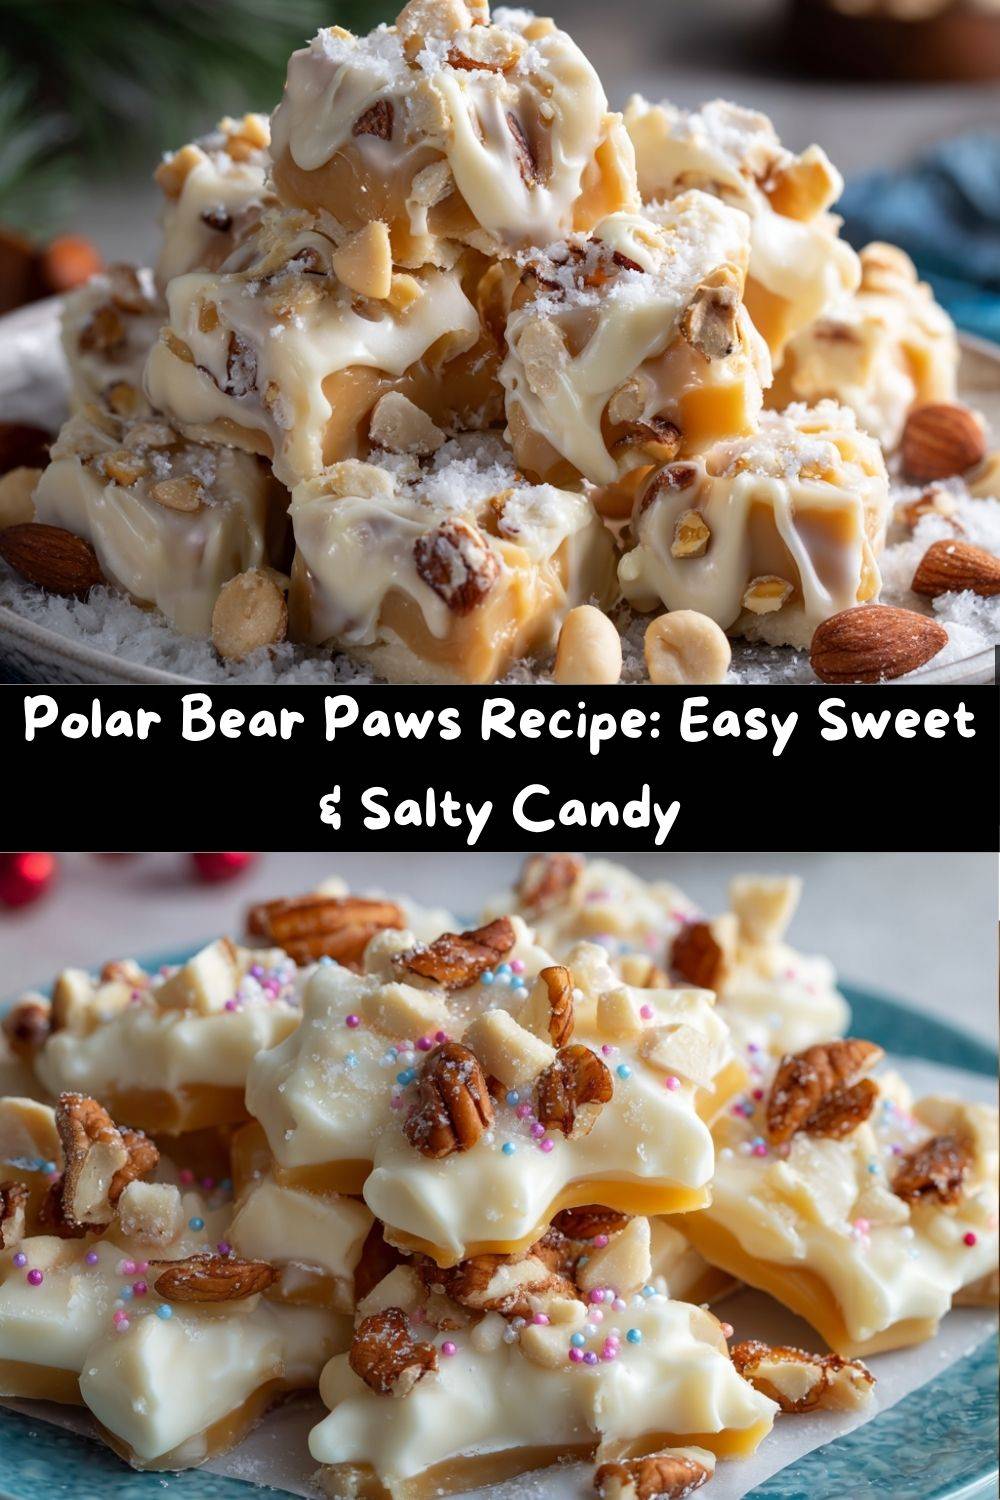
Polar Bear Paws: Your New Favorite Sweet & Salty Obsession
Hey there, my fellow foodie friend! Chef Emily here, coming to you from my happily cluttered kitchen. Is there anything better than that moment when you bite into something so perfectly balanced, so delightfully addictive, that you just have to close your eyes for a second? You know what I’m talking about. That magical dance between sweet and salty that makes your taste buds sing.
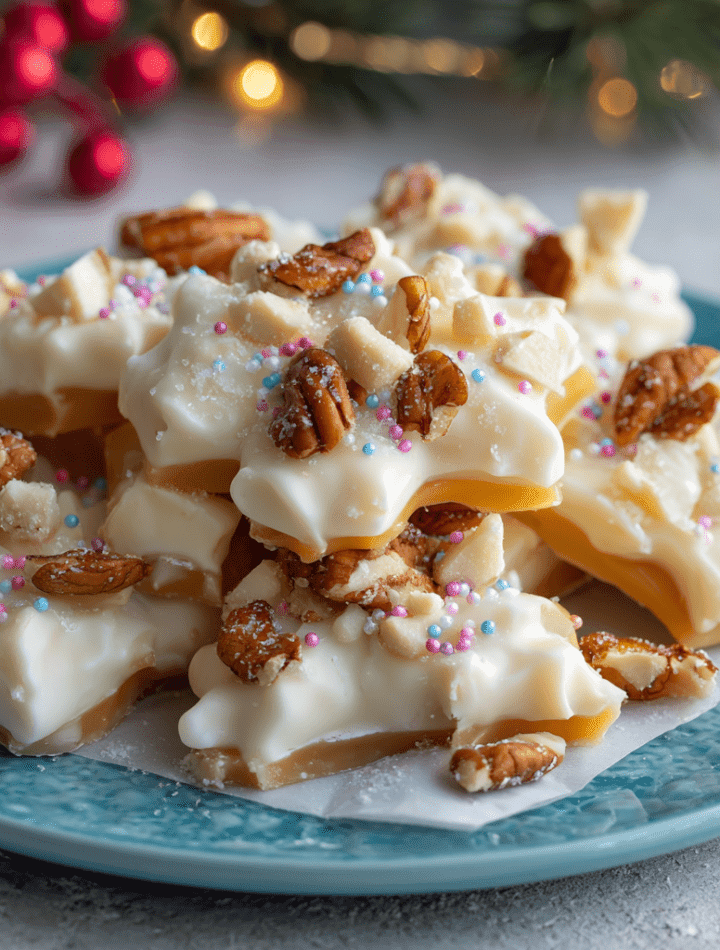
Well, pull up a stool and get ready, because today we’re making my all-time favorite no-bake treat: Polar Bear Paws. Imagine this: a creamy, soft-centered caramel packed with crunchy, salty peanuts, all enveloped in a smooth, rich coat of white chocolate. They’re like little bites of happiness that are surprisingly simple to whip up.
I’ve given this recipe a fun double-batch upgrade with some playful twists because, let’s be real, one batch of these never seems to be enough. They disappear faster than a snowman in July! Whether you’re prepping for a holiday cookie swap, need a standout treat for a party, or just want to satisfy that specific craving for something decadent, these Polar Bear Paws are your answer. So, tie on your favorite apron (the one with the stains that tell a story), and let’s make some magic happen.
A Snowy Day & A Sweet Discovery
This recipe takes me right back to my first winter after culinary school. I was living in a tiny apartment with a kitchen the size of a postage stamp, but I didn’t care. A blizzard had rolled in, blanketing the world in white and trapping me inside with a serious case of baking restlessness. I craved something sweet, but I was out of flour and, tragically, eggs.
Rummaging through my pantry, I found a bag of caramels left over from Halloween, a giant bag of peanuts for snacking, and a lonely bar of white chocolate. A lightbulb went off. I melted, I stirred, I dipped, and I chilled. When I finally tasted one of those lumpy, imperfect little clusters, I did a happy dance right there in my galley kitchen. They were a total happy accident! I immediately boxed some up (once the snowplows came through) and delivered them to my neighbors, who instantly demanded the recipe. That’s when I knew this was a keeper. It’s a reminder that the best creations often come from a little improvisation and a lot of heart.
Gathering Your Ingredients
Here’s everything you’ll need to create these irresistible sweet and salty bites. I’ve included some of my favorite insights and swaps to make these paws truly your own!
- 22 oz caramel squares, unwrapped (two 11 oz bags): This is the chewy, gooey heart of the paw! I highly recommend the classic Kraft caramels for consistent melting. Chef’s Tip: To make unwrapping a breeze, lightly spray your scissors with cooking spray—the wrappers will slide right off!
- 6 tablespoons heavy whipping cream: This is our secret to a luxuriously soft caramel. It prevents the caramel from seizing up and becoming too hard. For a lighter version, you can use half-and-half, but the cream gives the best texture.
- 2 tablespoons unsalted butter: Butter adds a rich, silky flavor and a beautiful sheen to the melted caramel. Using unsalted lets us control the saltiness.
- 2 teaspoons vanilla extract: Don’t skip this! A good quality vanilla adds a warm, complex depth that takes the caramel from great to “oh-my-goodness” amazing.
- 2 cups roasted salted peanuts: The “salty” in our sweet-and-salty equation! The saltiness cuts through the sweetness perfectly. Substitution: Feel free to use dry-roasted peanuts for a stronger roast flavor, or swap in cashews or pecans for a different vibe.
- 2 pounds white chocolate or white almond bark, chopped or in melting wafers: This is our snowy white coating. White almond bark is fantastic for dipping because it sets firmly and is less temperamental than real white chocolate. If you’re a purist, go for a high-quality white chocolate bar. Chef’s Insight: I’m using melting wafers today—they melt like a dream and require no chopping!
Optional Twists for Our Double Batch:
- ½ teaspoon sea salt: A flaky sea salt sprinkled on top at the end elevates these to gourmet status. It’s my #1 recommended add-in!
- 1 cup crushed pretzels or Rice Krispies: For an epic crunch factor! Pretzels add more salt, while Rice Krispies give a light, airy texture.
- Sprinkles, edible glitter, or mini chocolate chips: Let’s get festive! Perfect for holidays or just because a little sparkle makes everything better.
Crafting Your Polar Bear Paws: A Step-by-Step Guide
Okay, team! Let’s get our paws dirty. This process is simple, but a few chef-approved hacks will ensure candy-making success.
Step 1: Prep Your Stage. Line a large baking sheet with parchment paper. Give it a very light spritz with cooking spray. This dynamic duo guarantees your caramel clusters will release easily without sticking. Trust me, this little step saves a lot of frustration later!
Step 2: Melt the Caramel Dream. In a large, microwave-safe bowl, combine the unwrapped caramels, heavy cream, and butter. Now, the key to smooth caramel is patience! Microwave on high for 30 seconds. Take it out, stir. It will look a little messy. Another 30 seconds, stir again. You’ll see it starting to come together. Continue in 30-second bursts until the mixture is completely smooth and silky. This usually takes about 2-3 minutes total. Chef’s Hack: Resist the urge to microwave for a full minute straight—you risk burning the caramel!
Step 3: The Flavor Party. Once your caramel is smooth, stir in the vanilla extract. Ah, smell that? Heavenly. Now, dump in your peanuts and any additional crunchies (pretzels, etc.). Stir until everything is evenly coated in that glorious caramel.
Step 4: Form the Paws. Using two spoons or a small cookie scoop, drop tablespoon-sized mounds of the caramel mixture onto your prepared baking sheet. Don’t worry about making them perfect—their rustic, paw-like shape is part of the charm! Leave a little space between each one.
Step 5: The Big Chill. Pop the entire baking sheet into the refrigerator for at least 30 minutes. This firms up the caramel centers, making them much easier to dip later. This is the perfect time to clean up and get your dipping station ready!
Step 6: Create the Snowy Coating. Place your white chocolate or almond bark wafers in a clean, dry microwave-safe bowl. Melt in 20-second intervals on medium power, stirring thoroughly each time, until completely smooth. Chef’s Pro Tip: The number one rule for melting chocolate is NO WATER. Not even a drop in the bowl or on your spoon, or it will seize up into a grainy mess.
Step 7: The Dip! Remove the firm caramel clusters from the fridge. Using a fork or a dipping tool, dip each cluster into the melted white chocolate, swirling to coat it completely. Gently tap the fork on the edge of the bowl to shake off any excess chocolate. Carefully place it back on the parchment paper.
Step 8: Decorate & Set. Immediately after dipping, while the chocolate is still wet, sprinkle on your sea salt, sprinkles, or other decorations. Once they’re all beautifully coated, return the tray to the fridge for another 30 minutes, or until the chocolate is fully set and firm.
How to Serve Your Masterpiece
Once your Polar Bear Paws are fully set, it’s time for the best part: serving! I love arranging these on a beautiful platter or in a rustic wooden bowl. They stack wonderfully for a impressive display. For a cute gift, layer them in a cellophane bag tied with a festive ribbon, or pack them into a decorative tin. They make fantastic edible gifts for teachers, neighbors, or hostesses.
These treats are rich, so they pair beautifully with a hot cup of black coffee to cut the sweetness or a cold glass of milk for the ultimate nostalgic experience. They’re the star of the show, so they don’t need much else, but they look gorgeous on a dessert table alongside other cookies and treats.
Get Creative! Fun Polar Bear Paw Variations
The basic recipe is a blank canvas for your creativity! Here are a few of my favorite ways to mix things up:
- Trail Mix Paws: Swap out the peanuts for a mix of chopped almonds, dried cranberries, and mini chocolate chips for a fruit-and-nut twist.
- Peppermint Polar Bears: Perfect for the holidays! Add ¼ teaspoon of peppermint extract to the melted caramel and crush up candy canes to sprinkle on top of the white chocolate.
- Dark Chocolate Dip: Not a white chocolate fan? No problem! Use dark or milk chocolate for the coating. It creates a delicious contrast with the sweet caramel.
- Turtle Paws: Embrace the classic turtle candy flavor by using pecans instead of peanuts and dipping in milk chocolate. You can even drizzle a little extra chocolate over the top.
- Gluten-Free Friendly: This recipe is naturally gluten-free if you use certified GF pretzels or skip them altogether. Always check your caramel labels to be sure.
Chef Emily’s Notes from the Kitchen
Over the years, this recipe has seen many iterations. I once, in a pre-coffee haze, accidentally used potato chips instead of pretzels. Surprisingly, it was a delicious mistake! The ultra-salty, thin crunch was fantastic. It just goes to show that some of the best kitchen discoveries are happy accidents.
I’ve also learned that the size of the “paw” is crucial. I used to make them too big, and they were a handful to eat. Keeping them to a tablespoon-sized mound is the perfect sweet-bite ratio. This recipe has become a staple in my house, especially during the holiday season. My friends and family now expect a tin of these every year—it’s just not Christmas without them!
FAQs & Troubleshooting
Q: My caramel seized up and became thick and grainy. What happened?
A: This usually means it was overheated. Caramel is sensitive! Always use the 30-second interval method and stir well each time. If it seizes, you can try adding another tablespoon of warm cream and stirring vigorously to bring it back.
Q: Can I make these ahead of time?
A: Absolutely! These are a great make-ahead treat. Store them in an airtight container in the refrigerator for up to two weeks. You can also freeze them for up to 3 months. Just separate layers with parchment paper so they don’t stick together.
Q: My white chocolate is thick and clumpy. How can I fix it?
A: This is called seizing, often caused by steam or a drop of water. If it’s just a little thick, you can stir in a teaspoon of coconut oil or vegetable shortening to thin it out. If it’s fully seized, it’s best to start over with a new bowl and completely dry utensils.
Q: Can I use homemade caramel instead?
A> You sure can! If you’re a caramel-making rockstar, use about 2 cups of a soft, scoopable homemade caramel sauce. Gently warm it and mix in the other ingredients. This is a fantastic way to elevate the recipe!
Nutritional Information (Approximate)
Let’s be real, we’re not eating candy for its health benefits, but it’s always good to be informed! This information is per piece (assuming the batch makes 40 candies).
Calories: 150 | Fat: 8g | Carbohydrates: 18g | Sugar: 16g | Protein: 2g
Remember, these are estimates and can vary based on the specific brands of ingredients you use and the size of your clusters. The main sources of sugar are the caramels and white chocolate. For a slightly lighter version, you could use a low-fat cream alternative and look for sugar-free caramel options, though the texture may change slightly. Enjoy these as a delightful treat in moderation!
Final Sweet Thoughts
And there you have it! Your very own batch of homemade Polar Bear Paws. I hope you have as much fun making these as I do. There’s something so satisfying about creating a candy treat from scratch that looks and tastes like it came from a fancy confectionery.
I’d love to see your creations! Tag me on social @TastyChow with #PolarBearPaws so I can see your beautiful (and delicious) work. Did you try a fun variation? I want to hear all about it!
Now, go on, enjoy one (or three). You’ve earned it. Until next time, happy cooking!
— Emily