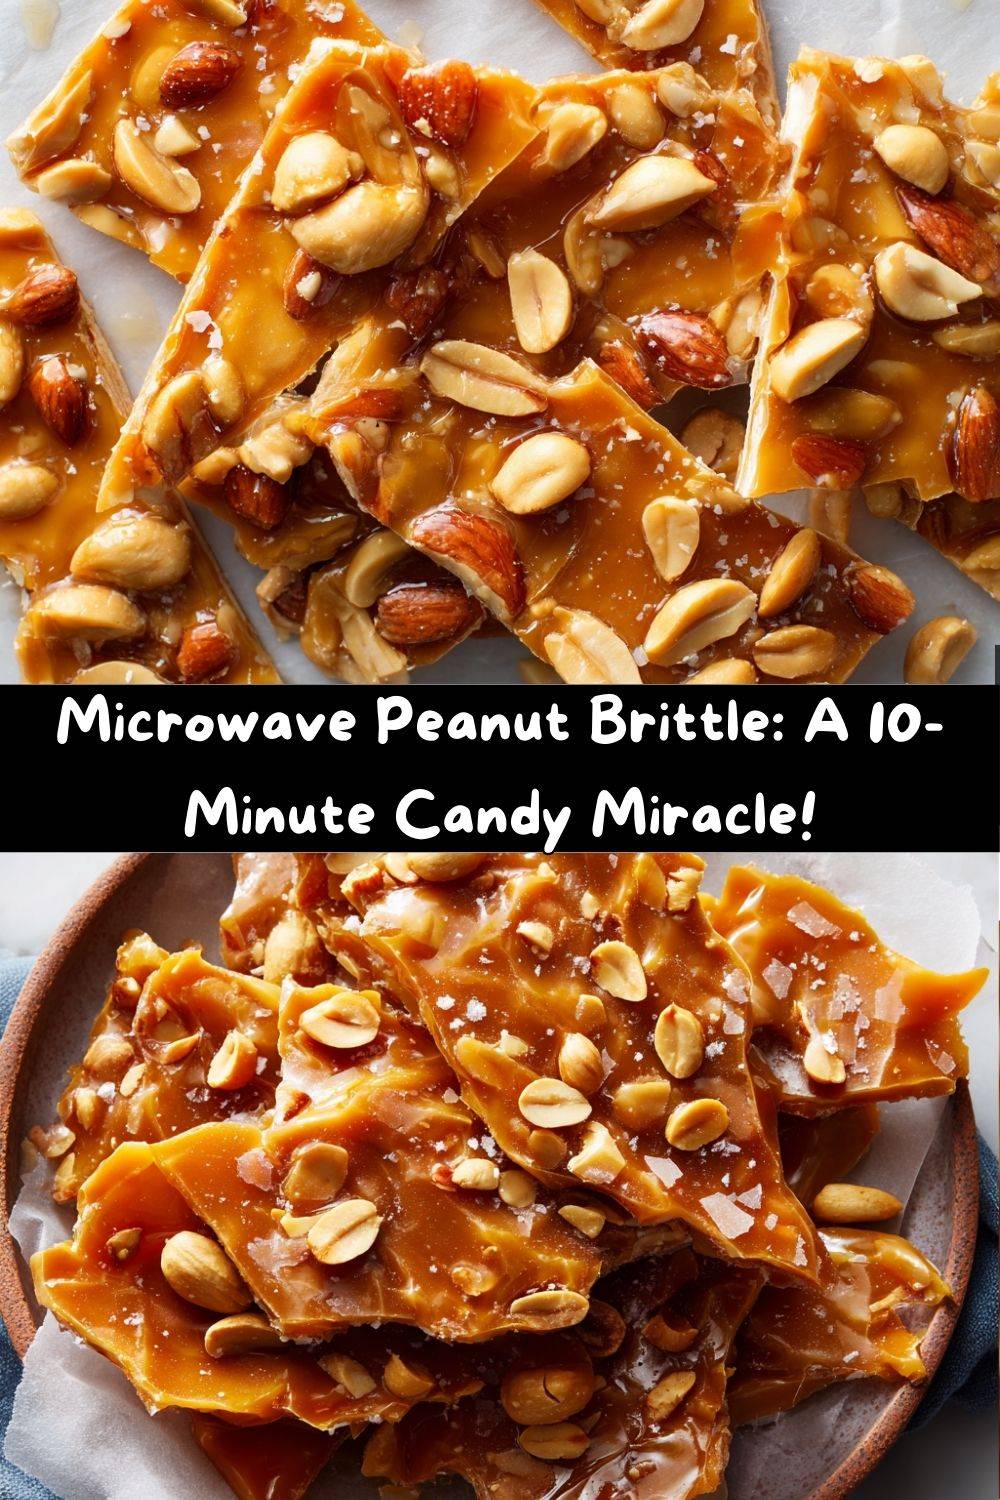
Forget the Fuss: Your New Favorite Microwave Peanut Brittle is Here!
Hey there, friend! Let’s be real for a second. The holiday season, as magical as it is, can be a whirlwind of to-do lists, gift wrapping, and trying to be in twelve places at once. And right in the middle of all that chaos, there’s this little voice that whispers, “You should make homemade candy.” Traditionally, that voice would be met with a sigh. Because homemade candy usually means wrestling with a finicky candy thermometer, watching a pot of molten sugar like a hawk, and praying to the kitchen gods that you hit the hard-crack stage without burning the whole batch. Sounds stressful, right?
Well, I’m here to tell you that voice can now be answered with a resounding, joyful, “YES, I CAN!” This Microwave Peanut Brittle is nothing short of a kitchen miracle. It’s the ultimate holiday hack that delivers all the satisfying, glass-like crunch and deep, caramelized flavor of old-fashioned brittle, but in a fraction of the time and with a fraction of the stress. In less than 10 minutes of active cooking time, you can have a tray of candy-shop-worthy brittle cooling on your counter. It’s the perfect project for a busy weeknight, a last-minute gift, or when that sweet-and-salty craving hits hard. So, tie on your favorite apron (the one that might already have a little flour on it, because that’s how we roll), and let’s make something dangerously addictive together.
A Spoonful of Sugar (and a Whole Lot of Love)
This recipe takes me right back to my Grandma Shirley’s kitchen. Every December, her small, warm kitchen would transform into a candy factory. The air would be thick with the smell of chocolate fudge and peppermint, but the star of the show was always her peanut brittle. She had this giant, well-loved copper pot, and the process felt like a sacred, day-long ritual. I’d sit on a stool, mesmerized, watching her stir the bubbling syrup with a wooden spoon that was almost as big as I was. She’d let me test the brittle by dropping a tiny bit into a glass of cold water, and my job was to declare if it was ready. It felt like magic.
When I first started developing recipes for Tasty Chow, I wanted to capture that exact magic—the crisp snap, the buttery, nutty flavor—but I knew that for most of us, Grandma’s all-day method isn’t realistic. After a lot of experimenting (and a few batches that shall remain classified information!), I cracked the code. This microwave version is my love letter to Grandma Shirley’s tradition. It’s simplified for our modern lives but still packed with all the heart and flavor of that memory. It proves that you don’t need a fancy setup to create something truly special; you just need a good recipe and a willingness to get a little sticky.
Gather Your Lineup: Simple Ingredients, Big Flavor
One of the best things about this recipe is its beautiful simplicity. You probably have most of these ingredients in your pantry right now! Here’s what you’ll need and a little chef’s insight on each one.
- 1 cup granulated sugar: This is the foundation of our brittle, providing the structure and that classic glass-like crunch. It caramelizes with the corn syrup to create that deep, golden color and rich flavor.
- ½ cup light corn syrup: Don’t let the rumors scare you! Corn syrup is the secret hero here. It prevents the sugar from crystallizing, ensuring our brittle is crackly and clear, instead of grainy and cloudy. It’s non-negotiable for the perfect texture.
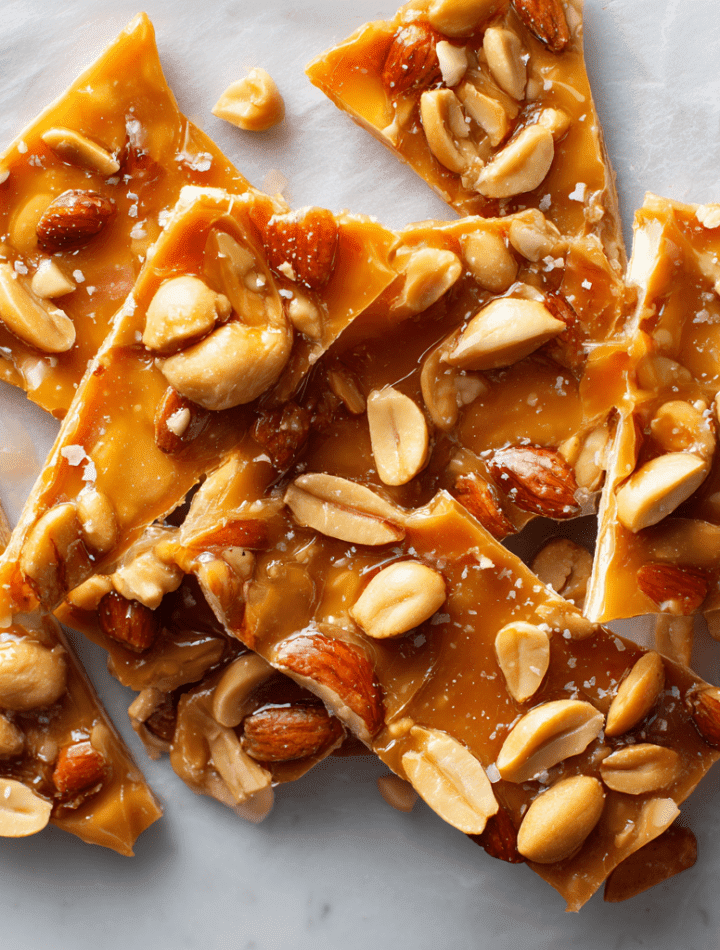
- 1 cup roasted, salted peanuts: I’m a firm believer that the salty contrast is what makes brittle so addictive. Using salted peanuts is my pro-tip. If you only have unsalted, just add an extra pinch (about ¼ tsp) of salt to the mixture. You can also use other nuts—see the variations below!
- 1 tablespoon unsalted butter: This adds a rich, buttery flavor and helps create a more tender crunch. Using unsalted butter lets us control the salt level perfectly.
- 1 teaspoon vanilla extract: A splash of vanilla adds a wonderful warmth and depth that makes the brittle taste more complex. For a fun twist, you could use almond extract instead!
- 1 teaspoon baking soda: This is the magic ingredient! When you stir it in, it creates a chemical reaction that causes the candy to foam up. This incorporates tiny air bubbles, making the brittle porous, light, and delightfully easy to bite into instead of a tooth-shattering rock.
Let’s Get Cooking: Your Foolproof, Step-by-Step Guide
Ready? This is where the fun begins. I’ll walk you through every step. Remember, we’re working with hot sugar, so safety first! Have all your ingredients measured and ready to go (this is called mise en place – fancy chef talk for “everything in its place”) before you even turn on the microwave.
Step 1: Prep Your Station. First things first, grab a rimmed baking sheet (a standard half-sheet pan is perfect) and either grease it lightly with butter or line it with a sheet of parchment paper. Do this NOW. Once the sugar is cooked, you’ll have to work quickly, and you don’t want to be searching for a pan. Place it near your microwave.
Step 2: The First Cook. In a large, microwave-safe glass bowl (I’m talking big—at least 2 quarts. The mixture will bubble up a lot later!), combine the granulated sugar and light corn syrup. Give it a quick stir until it looks like wet sand. Now, microwave this on high for 4 minutes. Your microwave power may vary, but this is a great starting point.
Step 3: Add the Nutty Crew. Carefully remove the bowl from the microwave—IT WILL BE EXTREMELY HOT! I always use oven mitts for this part. The mixture will be clear and bubbling. Quickly stir in the 1 cup of roasted salted peanuts until they’re fully coated. Pop the bowl back into the microwave and cook for another 3 to 4 minutes. You’re looking for a light, golden-amber color. If it’s still pale at 3 minutes, give it the extra minute.
Step 4: Butter and Vanilla Bliss. Again, carefully remove the hot bowl. Immediately add the tablespoon of butter and the teaspoon of vanilla extract. Stir vigorously. The butter will melt in and the vanilla might sizzle a bit—that’s okay! It’s just saying hello. Once everything is combined, microwave for one final minute.
Step 5: The Big Foam (Baking Soda Time!). This is the most exciting part! Take the bowl out one last time. The mixture will be a beautiful, deep golden brown. Now, quickly sprinkle the teaspoon of baking soda over the top and stir it in with gusto. Watch in amazement as it instantly puffs up and turns into a foamy, cloud-like mixture. This means you’ve done it perfectly!
Step 6: Spread it Out. Working quickly but carefully, immediately pour the hot candy onto your prepared baking sheet. Use a heat-resistant spatula or the back of a spoon to spread it out as thinly as you can. Don’t worry if it’s not perfect—rustic is charming! Let it sit, undisturbed, for at least 30 minutes to cool completely and harden.
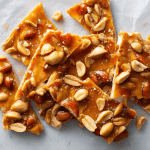
Step 7: The Best Part—Breaking It! Once the brittle is completely cool and hard, it’s time for the fun part. Use your hands to break it into rustic, irregular pieces. You can also place it in a zip-top bag and gently tap it with a rolling pin for more uniform pieces. Store it in an airtight container at room temperature.
How to Serve Your Sweet Masterpiece
Okay, you’ve made this gorgeous brittle. Now what? The possibilities are endless!
The Simple Route: Pile the pieces high in a beautiful bowl or a rustic wooden tray. It’s a stunning addition to any holiday dessert table or a wonderful treat to leave out for guests. It’s perfect for gifting, too! Package it in cellophane bags tied with a ribbon for a homemade touch that says, “I made this just for you.”
The Chef’s Upgrade: Take your dessert game to the next level. Crumble a piece of this brittle over a scoop of rich vanilla ice cream or a decadent chocolate mousse. The contrast of cold, creamy ice cream and the sharp, crunchy brittle is a textural dream come true. You can also use smaller pieces as a garnish for cupcakes or even a slice of cheesecake.
Get Creative: 5 Fun Flavor Twists
Once you’ve mastered the classic, why not play with your food? Here are a few of my favorite ways to mix it up.
- The Spicy Kick: Add ½ teaspoon of cayenne pepper along with the baking soda. The slow-building heat paired with the sweet and salty flavors is incredibly sophisticated and addictive.
- Festive Spice: Stir in 1 teaspoon of pumpkin pie spice or just cinnamon with the peanuts for a warm, cozy flavor that screams “holidays.”
- Nutty Mix-Up: Swap the peanuts for an equal amount of your favorite nuts. Almonds, pecans, or cashews are all fantastic. A mix of everything is my personal favorite!
- Sea Salt Finish: Right after you spread the hot brittle on the pan, sprinkle the top with a little flaky sea salt (like Maldon). This amplifies the salty-sweet contrast beautifully.
- Chocolate Drizzle: After the brittle is broken, melt some dark or semi-sweet chocolate and drizzle it over the pieces. Let it set before serving. Because everything is better with chocolate.
Microwave Peanut Brittle – Quick, Crisp, and Candy-Shop Worthy
- Total Time: 45 minutes
- Yield: 40 Pieces 1x
Description
Forget the candy thermometer—this microwave peanut brittle is your new go-to holiday hack. It delivers all the crackle and caramelized crunch of traditional brittle in a fraction of the time. Sweet, salty, and dangerously addictive, it’s a classic reimagined for speed and simplicity.
Ingredients
1 cup granulated sugar
½ cup light corn syrup
1 cup roasted salted peanuts
1 tablespoon unsalted butter
1 teaspoon vanilla extract
1 teaspoon baking soda
Optional twists:
Add a pinch of cayenne or cinnamon for a spicy kick
Use mixed nuts instead of peanuts
Finish with a light sprinkle of flaky sea salt for balance
Instructions
Grease a baking sheet or line with parchment paper.
In a large microwave-safe glass bowl, combine sugar and corn syrup. Microwave on high for 4 minutes.
Carefully stir in peanuts and microwave for 3–4 more minutes, until light golden brown.
Add butter and vanilla; stir to combine. Microwave for 1 more minute.
Quickly stir in baking soda (mixture will foam). Immediately pour onto prepared sheet and spread quickly.
Let cool completely (about 30 minutes), then break into pieces.
- Prep Time: 5 minutes
- Cool Time: 30 minutes
- Cook Time: 10 minutes
Nutrition
- Calories: 90 / Piece
- Sugar: 10g / Piece
- Fat: 4g / Piece
- Carbohydrates: 12g / Piece
- Protein: 2g / Piece
Chef Emily’s Kitchen Notes
This recipe has become a staple in my house, especially during the hectic holiday season. I’ve lost count of how many batches I’ve made! One of my favorite kitchen memories involves my nephew, who was “helping” me make a batch. When I added the baking soda and it foamed up, his eyes got as wide as saucers and he yelled, “IT’S ALIVE!” That’s the kind of fun, low-stress baking I love. Over time, I’ve learned that the key is confidence. Don’t be scared of the hot sugar—just be prepared and respectful of it. Have everything ready, and you’ll be a brittle-making pro in no time. This recipe is forgiving and wants to work for you!
Your Questions, Answered!
Q: My brittle turned out sticky and chewy. What happened?
A: This usually means the sugar didn’t get hot enough to reach the hard-crack stage. Microwave wattages can vary. If your brittle is sticky, try increasing the cooking time in 30-second increments during the second stage (after adding the nuts) until the syrup is a definite light amber color.
Q: Why did my brittle not puff up when I added the baking soda?
A: Your baking soda might be old! Baking soda loses its potency over time. To test it, add a small pinch to a bit of vinegar. If it doesn’t bubble vigorously, it’s time for a new box.
Q: Can I double this recipe?
A: I don’t recommend it for the microwave method. The volume is too large to cook evenly, and it could bubble over and make a huge mess. If you need more, make two separate batches—it’s so quick anyway!
Q: How long does this brittle last, and how should I store it?
A: Stored in an airtight container at room temperature, it will stay perfectly crisp and delicious for up to 3 weeks… if it lasts that long!
A Quick Note on Nutrition
Let’s keep it real, friends—this is a candy treat! It’s meant to be enjoyed in moderation as part of a balanced diet. The approximate nutritional info per piece (based on 40 pieces) is about 90 calories, 4g fat, 12g carbs, and 2g protein. The peanuts do add a bit of healthy fat and protein, which is a nice bonus. The main thing to be mindful of is the sugar content. So savor a piece or two with your afternoon coffee, share it with friends, and enjoy every last crunchy, salty-sweet bite without any guilt. Life’s too short not to enjoy homemade candy!
You Did It! Now, Go Enjoy the Crunch.
See? I told you it was easy. You just made legitimately impressive, homemade candy in your microwave. I am so proud of you! This recipe is all about taking the intimidation out of cooking and replacing it with joy and a sense of accomplishment. It’s a reminder that the best recipes aren’t always the most complicated ones; they’re the ones that bring people together and put a smile on their faces.
I hope this microwave peanut brittle becomes a new tradition in your home, just like my Grandma Shirley’s was in mine. It’s proof that you can create something wonderful, even on the busiest of days. Now, go on and break off a piece. Listen to that satisfying snap. That’s the sound of success, my friend. Happy cooking!
— Emily