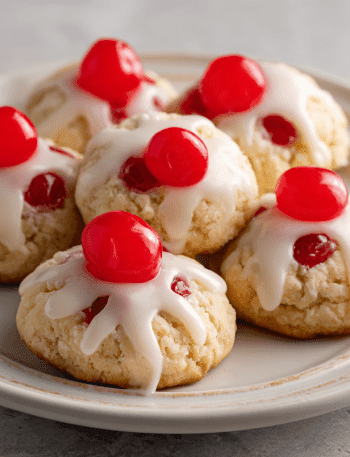
Candy Cane Kiss Cookies: Your New Holiday Baking Obsession
Hey there, my festive friend! Can you smell it? That crisp, chilly air is starting to carry the scent of pine trees, spiced cider, and… is that peppermint? Oh, you bet it is. The holiday season is officially here, and my kitchen is buzzing with the kind of excitement that only comes from pulling out the red and green sprinkles and dreaming up delicious ways to celebrate.
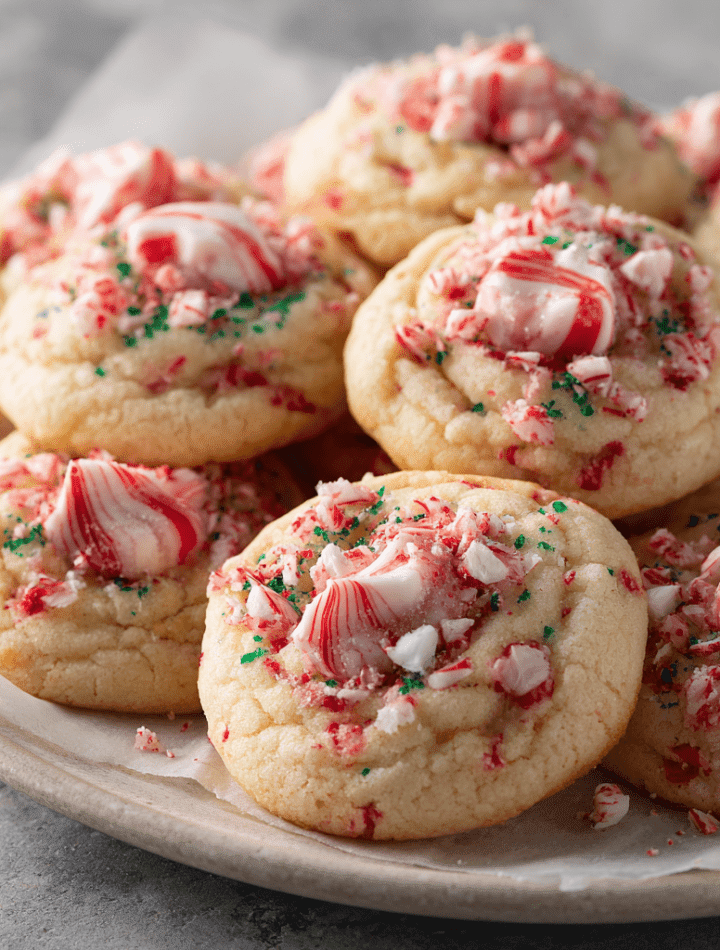
If you’ve been around Tasty Chow for a while, you know I live for recipes that are equal parts show-stopping and soul-warming. And these Candy Cane Kiss Cookies? They are the absolute stars of my holiday cookie tray. Imagine this: a wonderfully soft and buttery cookie that bakes up with just the right amount of crispness, thanks to a festive roll in crushed candy canes. Then, while they’re still warm and oh-so-inviting, we crown each one with a creamy, swirly Hershey’s Candy Cane Kiss. The result is a cookie that’s a pure joy to make and an even bigger joy to eat.
The cool peppermint flavor is like a little holiday carol for your taste buds—not too overpowering, but perfectly present. The buttery cookie base is the cozy sweater your peppermint dreams of wearing, and that sweet candy cane crunch? That’s the jingle bell that makes every bite sing. They’re crisp on the outside, soft and tender on the inside, and packed with so much holiday cheer, you might just find yourself doing a little happy dance right there by the oven.
So, tie on your favorite apron (the one with the gingerbread man stain, we’ve all got one!), and let’s make some magic happen. This is more than a recipe; it’s a memory in the making. Let’s get baking!

The Sweet Sound of Smashing Candy Canes
You know, every time I make these cookies, the sound of crushing candy canes takes me right back to my grandma’s kitchen. It wasn’t a fancy kitchen by any means—linoleum floors, chipped countertops, and a oven that always ran about 25 degrees hot. But during the holidays, it was the heart of our entire world.
One of my favorite jobs as a kid was the very important task of “preparing the candy cane crunch.” Grandma would hand me a hefty zip-top bag and a whole box of candy canes, and then she’d give me her trusty wooden rolling pin. “Now, Em,” she’d say with a wink, “make some noise!” I’d whack and roll that bag with all the glee a seven-year-old could muster, turning those beautiful striped canes into a pile of sparkling pink and red dust. The sound was a chaotic, joyful symphony of cracking sugar, and I felt like the most powerful little chef in the world.
We didn’t use Kisses back then; Grandma’s version was a simple thumbprint cookie. But the spirit was the same: taking simple, joyful ingredients and turning them into something magical. That memory is baked right into every batch I make today. It reminds me that holiday baking isn’t about perfection; it’s about the fun, the mess, and the love you pour into it. So, when you grab that bag to crush your candy canes, I hope you channel a little bit of that childlike joy. Go on, make some noise!
Gathering Your Cookie Crew: The Ingredients
Alright, let’s gather our squad! One of the things I love most about this recipe is how approachable the ingredient list is. You probably have most of this in your pantry right now. Here’s what you’ll need, plus a few of my chef-y insights to help you nail it.
- ½ cup unsalted butter, softened: This is the foundation of our cookie’s rich, tender texture. Using unsalted butter lets us control the salt level. Chef’s Tip: “Softened” means your butter should give slightly when you press it, but your finger shouldn’t sink right through. Leave it on the counter for about 30-60 minutes before you start. In a pinch? You can gently soften it in the microwave for 5-10 second bursts, but be careful not to melt it!
- 1 cup granulated sugar: This sweetens the deal and, when creamed with the butter, creates tiny air pockets that help the cookies rise and become light.
- 1 large egg: Our binding agent! It brings the dough together and adds structure. Make sure it’s at room temperature to help it incorporate smoothly with the butter and sugar.
- 1 tsp vanilla extract + ½ tsp peppermint extract: The dynamic flavor duo! The vanilla provides a warm, classic base note, while the peppermint brings that cool, festive kick. Substitution Tip: If you’re not a huge peppermint fan, you can reduce the peppermint extract to ¼ tsp for a milder flavor.
- 2 cups all-purpose flour: The backbone of our cookie. I always recommend fluffing your flour with a spoon before scooping it into your measuring cup and leveling it off. This prevents accidentally using too much flour, which can make cookies dry.
- ¼ tsp salt: Don’t skip this! Salt is a flavor enhancer that makes the sweet and buttery notes pop.
- ½ tsp baking soda: Our leavening agent. It helps the cookies spread just a bit and gives them a lovely soft texture.
- 2 tsp milk: A little splash of milk brings the dough together to the perfect consistency and adds a touch of tenderness.
- ½ cup crushed candy canes (for rolling): This is where the festive crunch comes in! You’ll need about 8-10 standard-sized candy canes to get a half-cup of crumbs. See my grandma’s method above!
- 28 Hershey’s Candy Cane Kisses, unwrapped: The glorious finishing touch! Unwrap these beauties while the cookies are baking so you’re ready to go the second they’re out of the oven.
Let’s Bake! Your Step-by-Step Guide to Cookie Perfection
Ready to create some holiday magic? Follow these steps, and you’ll have a kitchen that smells like a North Pole bakery in no time. I’ve sprinkled in all my best tips to ensure your cookies turn out perfect.
- Preheat and Prep: First things first, preheat your oven to 350°F (175°C). This is non-negotiable for even baking! While it’s heating, line your baking sheets with parchment paper. Chef’s Hack: Parchment paper is a lifesaver. It prevents sticking and makes cleanup an absolute dream. No parchment? A silicone baking mat works wonderfully too.
- Cream the Butter and Sugar: In a large mixing bowl, beat the softened butter and granulated sugar together on medium-high speed. We’re not just mixing them; we’re “creaming” them. This means beating until the mixture becomes pale, light, and fluffy. This should take about 2-3 minutes. This step is crucial for that perfect cookie texture!
- Add the Wet Ingredients: Beat in the egg, followed by the vanilla and peppermint extracts. Scrape down the sides of the bowl with a spatula to make sure everything is beautifully combined.
- Whisk the Dry Ingredients: In a separate, medium-sized bowl, whisk together the flour, salt, and baking soda. Whisking them first ensures the leavening agent and salt are evenly distributed throughout the flour, so every cookie bakes uniformly.
- Combine Wet and Dry: Gradually add the dry ingredient mixture to the wet ingredients, mixing on low speed just until the flour disappears. Pro Tip: Don’t overmix! Overworking the dough once the flour is added can lead to tough cookies. A few streaks of flour are okay; we’ll finish mixing it in the next step.
- Bring it Together with Milk: Add the 2 teaspoons of milk and mix until a soft, cohesive dough forms. It should be smooth and slightly soft, but not sticky.
- Crush and Roll: Place your crushed candy canes in a small bowl. Take about a tablespoon of dough and roll it between your palms to form a smooth 1-inch ball. Roll each ball generously in the crushed candy canes, pressing gently to help the pieces adhere. Place the balls about 2 inches apart on your prepared baking sheets.
- Bake to Perfection: Bake for 8-10 minutes. The cookies are done when the edges are just barely starting to turn a light golden brown and the centers look “set.” They might still look a tiny bit soft in the middle—that’s perfect! They will continue to cook on the hot baking sheet as they cool. Watch closely: Ovens vary, so your first batch is your test batch!
- The Kiss is Key: As soon as you pull the baking sheet from the oven, work quickly but carefully. Gently press a Candy Cane Kiss into the center of each warm cookie. The warmth of the cookie will slightly melt the base of the Kiss, creating a perfect, delicious seal.
- Cool Completely: This is the hardest part—waiting! Let the cookies cool on the baking sheet for about 5 minutes before transferring them to a wire rack to cool completely. This allows the chocolate Kiss to firm back up beautifully.
How to Serve These Festive Delights
Presentation is part of the fun! These cookies are so pretty all on their own, but here’s how I love to show them off:
For a classic holiday cookie tray, arrange them in a single layer on a beautiful platter. I like to add some fresh rosemary sprigs or whole candy canes around the edge for a pop of green and red. They look absolutely stunning next to classic chocolate chip cookies and snowball cookies.
Thinking of the perfect foodie gift? Package them up! Place a few cookies in a cellophane bag tied with a festive ribbon, or stack them carefully in a holiday tin lined with wax paper. They make the most thoughtful, homemade gift for neighbors, teachers, or your mail carrier.
And for the ultimate cozy moment? Serve them slightly warm with a tall glass of cold milk or a mug of rich hot chocolate. The combination of cool peppermint and warm chocolate is pure bliss on a cold winter’s night.
Get Creative! Fun Recipe Variations
Love the base recipe but want to mix it up? Here are a few of my favorite twists:
- Chocolate Peppermint Twist: Replace ¼ cup of the all-purpose flour with ¼ cup of unsweetened cocoa powder for a chocolate-peppermint cookie base. It’s like a peppermint patty in cookie form!
- White Chocolate Dream: Swap the Candy Cane Kisses for White Chocolate Kisses. The creamy, sweet white chocolate pairs beautifully with the sharp peppermint crunch.
- Gluten-Free Goodness: You can easily make these gluten-free! Use a 1:1 gluten-free all-purpose flour blend (I love the ones by Bob’s Red Mill or King Arthur). The texture is virtually identical.
- “Filled” Surprise: For a fun surprise, take a small piece of a Hershey’s Candy Cane Kiss and press it into the center of the dough ball before rolling it in the candy canes. You’ll get a gooey, melted center when you bite in!
- Dipped & Drizzled: After the cookies are completely cool, melt some dark or white chocolate and drizzle it over the top for an extra-decadent finish.
Chef Emily’s Kitchen Notes
This recipe has been a part of my holiday rotation for years, and it’s evolved in little ways. I used to chill the dough, thinking it would help the cookies hold their shape, but I found it made the candy cane coating weep and get sticky. Skipping the chill gives us that perfect crisp exterior. Kitchen lessons, right?
One of my favorite kitchen fails was the year I tried to “save time” by crushing the candy canes in my food processor. Let’s just say I ended up with more pink dust on my ceiling than in the bowl. The good old zip-top bag and rolling pin method is truly the best—and the most fun!
Most of all, remember that these cookies are about joy. If a few break, or if your Kisses get a little melty, it’s okay! They will still taste incredible. The real magic is in the making and the sharing.
FAQs & Troubleshooting: Your Questions, Answered!
Q: My candy cane coating melted into the cookie! What happened?
A: This usually happens if the candy canes are crushed too finely (turning into powder) or if the oven temperature is too low. Make sure your candy canes have some small, crunchy pieces, and use an oven thermometer to ensure your oven is at the correct 350°F temperature.
Q: Can I make the dough ahead of time?
A: You can! Prepare the dough, roll it into balls (but don’t roll in candy canes yet), and place them on a baking sheet. Freeze until solid, then transfer to a zip-top bag. When ready to bake, let the balls thaw just enough to be slightly sticky, roll them in the crushed candy canes, and bake as directed. You may need to add a minute or two to the baking time.
Q: My Kisses are completely melting and losing their shape. Help!
A> This means the cookies are too hot when you’re adding the Kisses. The residual heat from the cookie should just soften the base. Try letting the cookies cool on the baking sheet for 1-2 minutes before adding the Kiss. Also, make sure your Kisses are at room temperature, not warm.
Q: Can I use something other than Candy Cane Kisses?
A> Absolutely! While the Candy Cane Kisses are classic, you can use a regular Hershey’s Kiss for a chocolate-peppermint combo, a Rolo for a caramel twist, or even a unwrapped Hershey’s Hug for a swirled effect. Get creative!
A Quick Note on Nutrition
I believe all foods can have a place in a happy, balanced life, especially during the holidays! While these are definitely a treat, here’s a general nutritional breakdown per cookie (assuming a yield of 28 cookies). Please note, this is an estimate and can vary based on specific ingredients used.
Per Cookie: Calories: ~130 | Fat: 6g | Saturated Fat: 3.5g | Carbohydrates: 18g | Sugars: 12g | Protein: 1g | Sodium: 60mg
Remember, baking is about more than just numbers. It’s about the joy of creating something with your own hands and sharing it with people you love. So enjoy every delicious, festive bite!
Final Thoughts from My Kitchen to Yours
Well, my friend, there you have it—my all-time favorite holiday cookie recipe, straight from my heart (and my messy kitchen) to yours. I hope these Candy Cane Kiss Cookies bring as much light, laughter, and deliciousness to your home as they have to mine over the years.