Whipped Delight: The Only Vanilla Pudding Frosting You’ll Ever Need
Hey there, friend! Chef Emily here, waving at you from my flour-dusted kitchen. Is there anything more universally joyful than a perfectly frosted cake? That moment you spread on that final, swooping layer of creamy goodness just feels like a victory dance for your taste buds. But let’s be real for a second. We’ve all been there: standing over a bowl of buttercream that’s somehow both too sweet and too heavy, or a Swiss meringue that decided it just didn’t want to hold its peaks today. It’s enough to make you want to just eat the cake layers with a fork and call it a day.
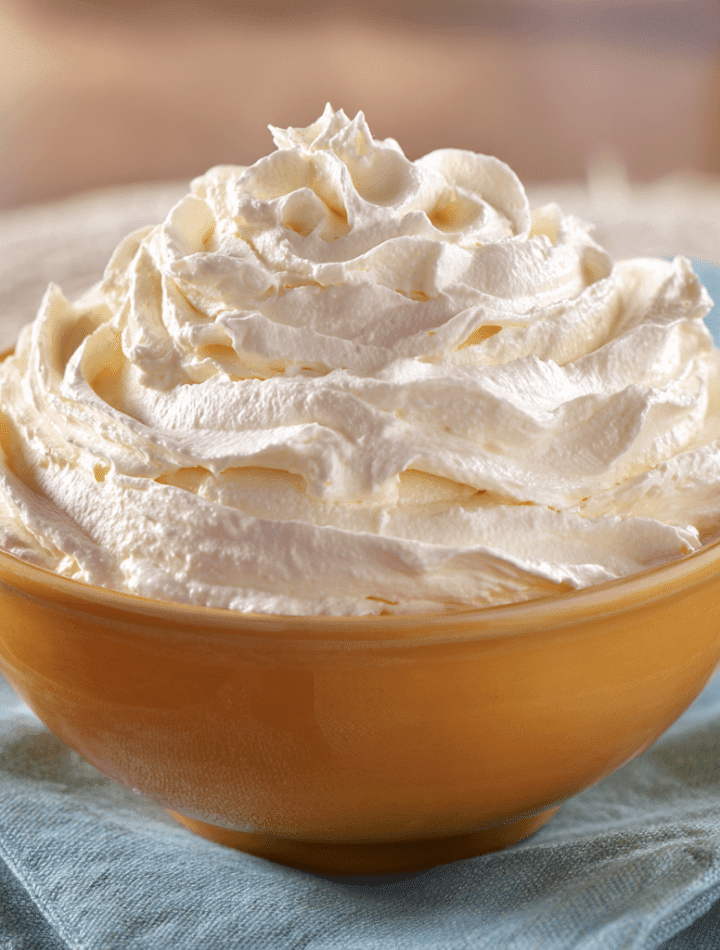
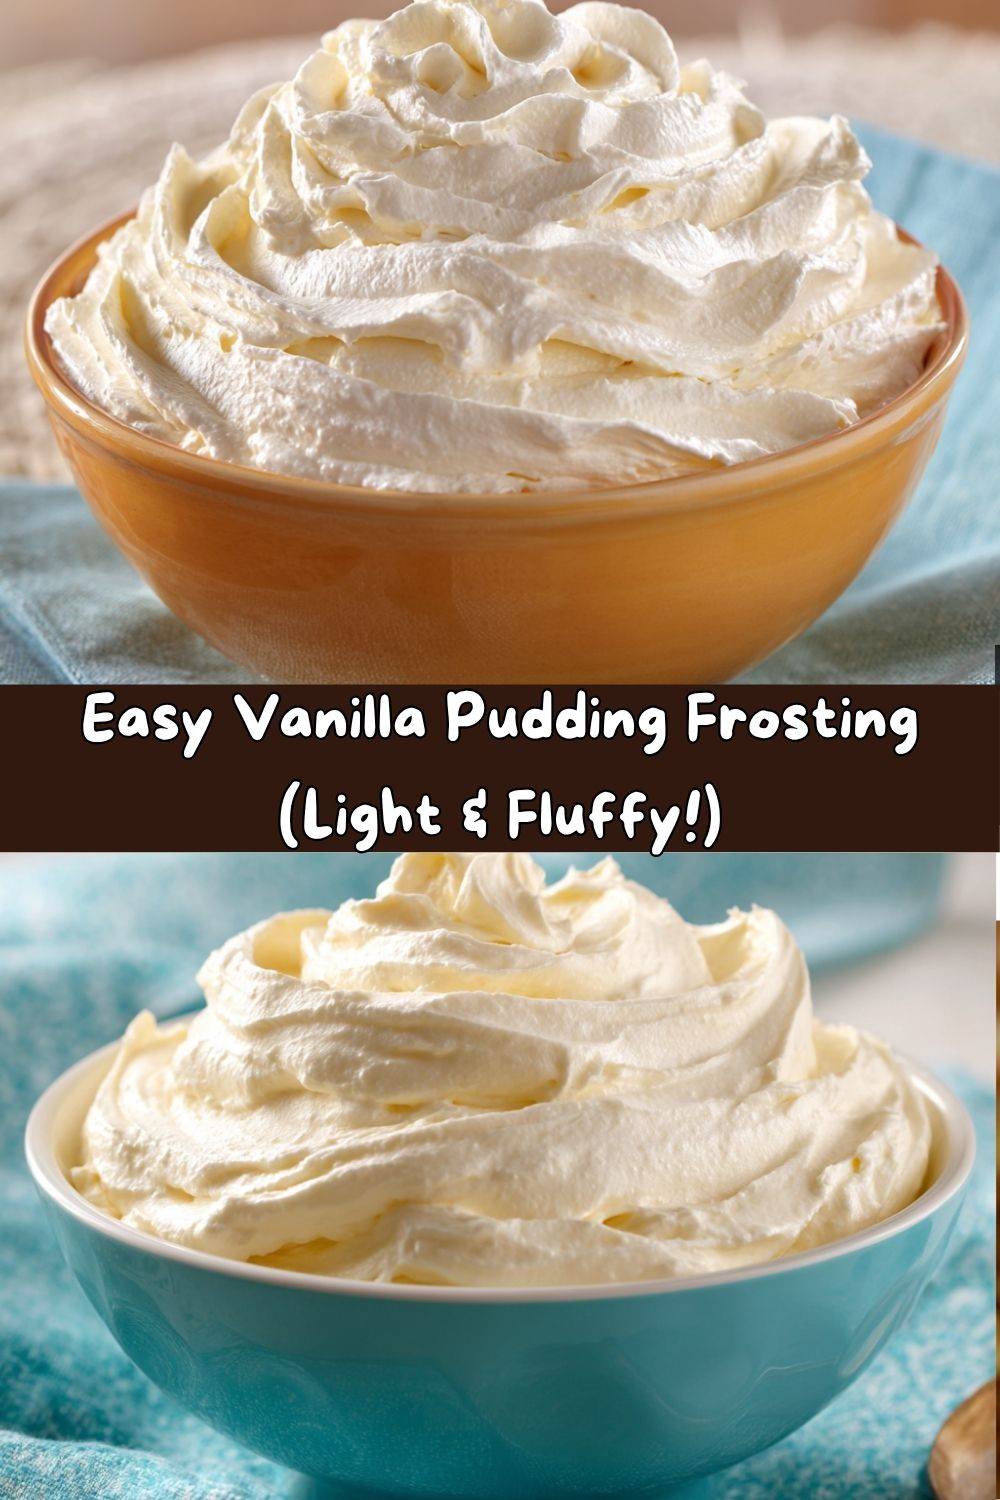
Well, I’m about to let you in on a little secret that’s been a game-changer in my kitchen and for the entire Tasty Chow community. This isn’t just any frosting. This is a cloud-like, dreamy, impossibly light Vanilla Pudding Cool Whip Frosting. It’s the kind of frosting that makes people’s eyes light up and ask, “What is this? It’s amazing!” It’s silky smooth, with a gentle sweetness that doesn’t overwhelm, and a flavor that whispers “homemade” in the best way possible. Whether you’re topping a classic birthday cake, a batch of weekend cupcakes, or just dipping strawberries straight into the bowl, this frosting is about to become your new go-to. So, tie on your favorite apron (the messy one is always the best), and let’s make something deliciously simple together.
The Frosting That Saved My Sanity (And a Birthday Cake)
I’ll never forget the first time this frosting became my kitchen hero. It was my niece’s 7th birthday, and I, in my infinite “professional chef” wisdom, decided to make an elaborate four-layer cake with a fancy Italian meringue buttercream. Long story short, the kitchen was a disaster zone, the buttercream was a soupy, greasy mess, and I was about 30 minutes away from a full-blown panic. Time was ticking, and I had a very excited soon-to-be seven-year-old counting on a cake.
In a moment of sheer desperation, I remembered my grandma. She never had time for finicky frostings. She’d whip up something magical with a box of pudding and some Cool Whip for us to slather on her famous angel food cake. I scrambled through my pantry, my heart pounding. With nothing left to lose, I threw the ingredients together. In five minutes flat, I had a bowl full of the fluffiest, most beautiful frosting I’d ever seen. It spread like a dream, held its shape perfectly, and that cake? It was the hit of the party. My niece declared it the “best frosting ever,” and a star was born. It was a powerful reminder that the best recipes aren’t always the most complicated—they’re the ones that bring joy without the stress.
Gather Your Ingredients: The Dream Team
Here’s the beautiful part: you only need five simple ingredients to create this fluffy miracle. Let’s break them down, because knowing your ingredients is the first step to kitchen confidence!
- 1 package (3.4 oz) Instant Vanilla Pudding Mix: This is the flavor powerhouse and the secret to our frosting’s stability. It’s not just for pudding cups! The mix helps thicken and set the frosting without making it heavy. Chef’s Insight: Make sure you grab “instant” pudding, not “cook-and-serve.” They behave very differently!
- 2 tablespoons Powdered Sugar: A little bit goes a long way! This adds a touch of extra sweetness and helps create a smooth, silky texture. Substitution Tip: If you’re out, you can technically skip it, but your frosting will be a tad less sweet and slightly less stable.
- 1/2 cup Milk: Whole milk will give you the richest, creamiest result, but 2% or even your favorite unsweetened almond milk will work just fine. This is the liquid that activates our pudding mix.
- 1 teaspoon Vanilla Extract: Don’t be shy with the vanilla! It amplifies that warm, cozy flavor. For a real treat, try using vanilla bean paste—you’ll see those beautiful little specks throughout your frosting.
- 1 tub (8 oz) Cool Whip, Thawed: Our fluffy foundation! This is what gives the frosting its incredible, cloud-like texture. Chef’s Hack: This is crucial—make sure your Cool Whip is fully thawed in the fridge. If it’s still frozen, you’ll end up with lumpy frosting. Patience is key!
Let’s Make Some Magic: Step-by-Step Instructions
Ready? This is where the fun begins. I’ll walk you through every single step, with all my favorite tips and tricks to ensure your frosting is absolutely perfect.
Step 1: The Pudding Base
Grab a medium-sized mixing bowl. Pour in your instant vanilla pudding mix and powdered sugar. Now, add the milk and that glorious teaspoon of vanilla extract. Using a hand mixer (or a sturdy whisk and some elbow grease!), beat these ingredients together on medium speed for about 1-2 minutes. Watch closely here! You’re not making pudding; you’re just combining everything until it’s smooth, thick, and free of lumps. It will have a consistency similar to a thick paste. This is exactly what you want!
Step 2: The Gentle Fold
Now, take your beautifully thawed Cool Whip and plop it right on top of your pudding mixture. Here’s the most important technique of the whole recipe: folding. Scrape down the sides of the bowl with a spatula, then, using a gentle, sweeping motion, cut through the center of the mixture, scoop underneath, and fold it over on top. Rotate the bowl a quarter turn and repeat. Chef’s Secret: We fold to keep all the lovely air bubbles in the Cool Whip. If you stir or beat it aggressively, you’ll deflate the frosting and it will lose its volume. Be patient and gentle—imagine you’re tucking a cloud into bed!
Step 3: Chill Out
Once the Cool Whip is fully incorporated and your frosting is one uniform, fluffy dream, cover the bowl with plastic wrap and pop it into the refrigerator. Let it chill for at least 30 minutes. Why this matters: This chilling time allows the pudding mix to fully hydrate and set up, which makes the frosting more stable for spreading and piping. It becomes firmer and holds its shape beautifully. I promise, it’s worth the wait!
Step 4: Frost & Feast!
After its beauty rest, your frosting is ready to transform any dessert! Use it to frost a two-layer cake, pipe it onto two dozen cupcakes, or use it as a delicious dip for fruit and cookies.
Serving It Up with Style
This frosting is the ultimate team player, but how you serve it can make all the difference! Here are a few of my favorite ways to let this whipped delight shine:
The Classic Cake: Slather a generous layer between two moist yellow or chocolate cake layers and all over the outside. For a gorgeous “naked cake” look, use an offset spatula to create swoops and swirls, letting the cake peek through.
Picture-Perfect Cupcakes: Fit a piping bag with a large star tip (I’m a Wilton 1M girl for life!) and pipe tall, beautiful swirls onto your cooled cupcakes. Top with a fresh strawberry, a sprinkle of rainbow jimmies, or a drizzle of chocolate sauce.
The Ultimate Dip: Pour the frosting into a pretty bowl and surround it with a platter of dippable delights! Think: strawberry halves, pineapple chunks, graham crackers, vanilla wafers, and pretzel rods for that sweet-and-salty kick.
Get Creative! Flavor Twists & Swaps
Once you’ve mastered the classic vanilla, the flavor world is your oyster! This recipe is a fantastic blank canvas. Here are a few of my favorite ways to mix it up:
- Chocolate Lover’s Dream: Swap the vanilla instant pudding for chocolate fudge or devil’s food flavor. Fold in a half cup of mini chocolate chips at the end for extra texture.
- Lemon Berry Bliss: Use a box of instant lemon pudding mix. After folding, gently swirl in a quarter cup of seedless raspberry or strawberry jam for a beautiful marbled effect.
- Cookies & Cream: Keep the vanilla pudding base, but fold in one cup of finely crushed Oreo cookies. This is phenomenal on a chocolate cake.
- Peanut Butter Cup: Add a third of a cup of creamy peanut butter to the initial pudding and milk mixture before you beat it. This creates a rich, nutty frosting that’s out of this world.
- Dairy-Free Delight: So easy! Use your favorite unsweetened non-dairy milk (almond, oat, or soy work great) and a dairy-free whipped topping. Just as delicious!
Chef Emily’s Kitchen Notes
This recipe has evolved so much since that frantic birthday years ago! I’ve learned that a dash of almond extract (about 1/4 teaspoon) along with the vanilla gives it a magical, bakery-style flavor. I’ve also found that if I’m planning to pipe very detailed designs, I’ll often let it chill for a full hour to get it extra firm. And a little confession? I almost always make a double batch. One for the cake, and one for the bowl that my husband and I “quality test” with a sleeve of graham crackers. Some kitchen secrets are just too good not to share!
Frosting FAQs: Your Questions, Answered!
Q: Can I make this frosting ahead of time?
A: Absolutely! This frosting is a fantastic make-ahead option. You can prepare it, cover it tightly, and store it in the refrigerator for up to 3 days. Give it a quick stir or a gentle fold before using to bring back its fluffiness.
Q: My frosting is too runny! What did I do wrong?
A: The most common culprit is not chilling it long enough. The pudding needs time to set. Pop it back in the fridge for another 30-60 minutes. Also, double-check that you used instant pudding mix and that your Cool Whip was fully thawed, not melted.
Q: Can I use homemade whipped cream instead of Cool Whip?
A: You can, but the result will be different. Cool Whip is stabilized, so it holds up better over time. Homemade whipped cream is more delicate and may cause the frosting to weep or deflate faster. If you try it, I recommend serving the dessert immediately.
Q: Is this frosting stable at room temperature?
A: Because it contains dairy, I recommend keeping any frosted desserts refrigerated. You can take them out about 30-60 minutes before serving to take the chill off, but for food safety and best texture, the fridge is its happy place.
A Quick Note on Nutrition
Hey, we’re all about balance here at Tasty Chow! While this is a treat, it’s actually lighter than most traditional buttercreams. A 2-tablespoon serving comes in at around 70 calories, with 7g of sugar and 3.5g of fat. Compared to American buttercream which can be double the calories and sugar per serving, this is a fantastic option when you want something indulgent-tasting but a little less heavy. Remember, it’s all about enjoying the foods you love mindfully!
Your New Go-To Frosting Awaits
And there you have it! My not-so-secret, absolutely-foolproof, always-impressive Vanilla Pudding Cool Whip Frosting. This recipe is a testament to my core belief: that incredible food doesn’t have to be complicated. It’s about creating moments of joy, sharing something made with love, and maybe getting a little bit of whipped cream on your nose in the process.
I truly hope this recipe finds a happy home in your kitchen, becoming the star of your birthday parties, potlucks, and quiet Tuesday night treats. If you make it, I’d be absolutely thrilled if you tagged me @TastyChowEmily on social media so I can see your beautiful creations! Now, go forth and frost something fabulous. Your dessert—and your taste buds—will thank you.
With love and a full bowl of frosting,
Emily 🥄