Your 5-Minute Ticket to Chocolate Heaven Is Here!
Hey there, friend! Let’s get real for a second. Have you ever been hit with that sudden, undeniable, gotta-have-it-NOW craving for something warm, chocolatey, and downright comforting? You know the one. It strikes at 9 PM on a Tuesday, when the idea of preheating the oven, hauling out the mixer, and committing to a whole batch of cookies feels like running a culinary marathon. You peer into the fridge, then the pantry, hoping for a miracle.
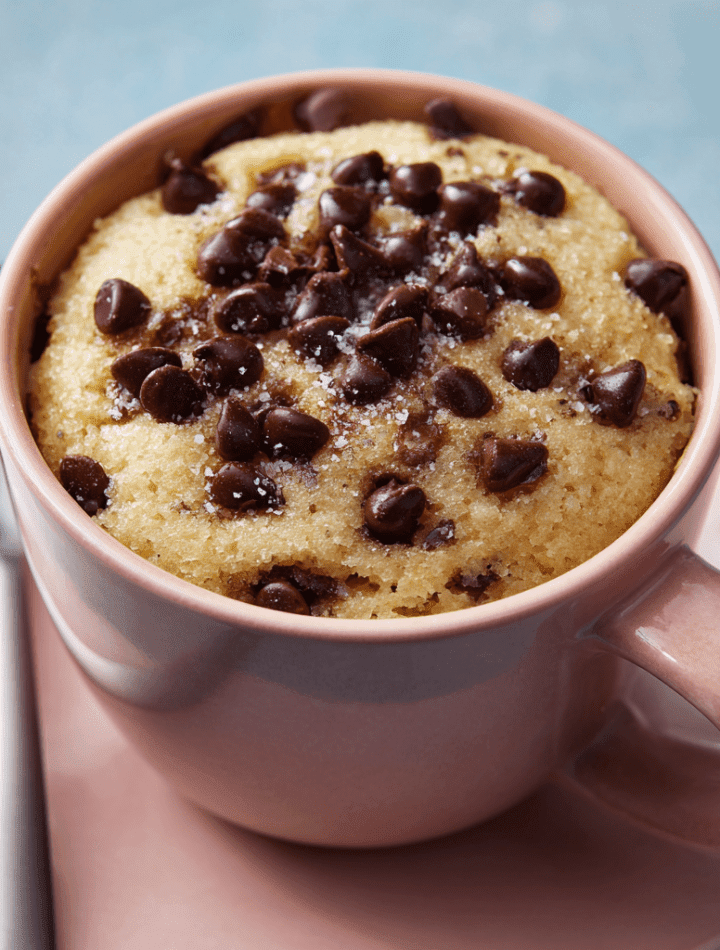
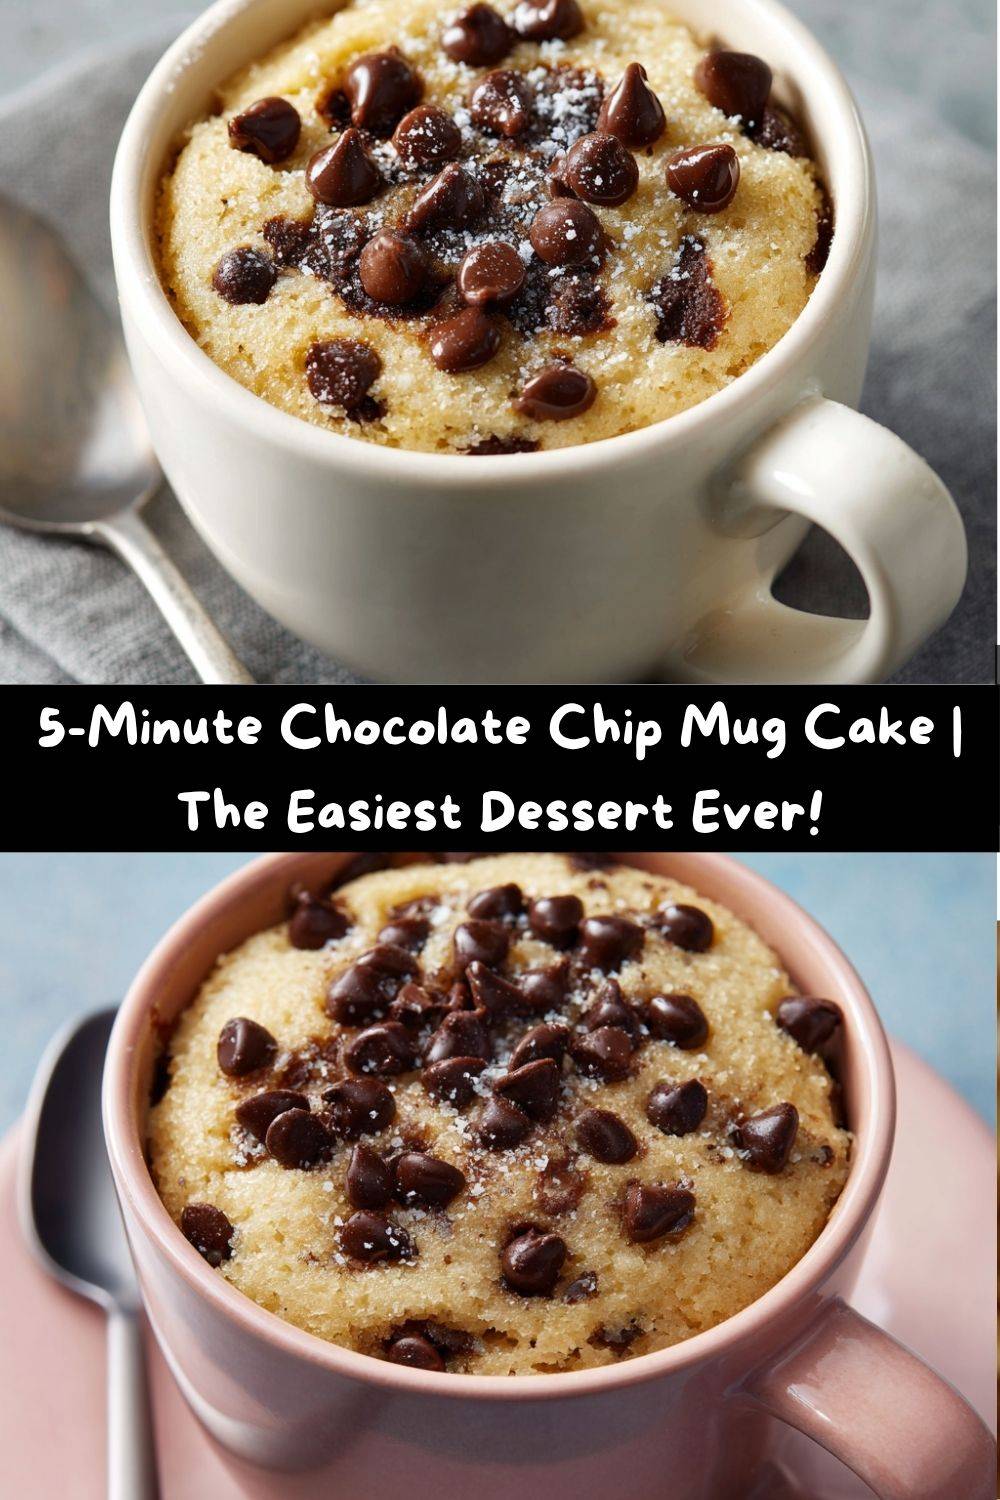
Well, consider that miracle found. I’m talking about a warm, fluffy, individually-portioned cake, studded with pockets of melty chocolate, that you can make in a single mug. In under five minutes. From ingredients you almost certainly have in your kitchen right now. Sounds like a dream, right? This, my dear foodie, is the magic of the Chocolate Chip Mug Cake.
This isn’t just a recipe; it’s your secret weapon against dessert FOMO. It’s the answer to “I deserve a treat,” the solution to “but I only want one serving,” and the hero of “I have zero energy but all the desire for something delicious.” As a self-proclaimed flavor-chaser and busy human, I’ve perfected this little cup of joy to be your go-to. So, grab your favorite mug—the one that makes you smile—and let’s make a mess and a memory. Your cozy, chocolate-filled moment is waiting.
The Midnight Mug That Started It All
This recipe takes me right back to my tiny apartment during culinary school. My kitchen was the size of a postage stamp, and after long nights of studying mother sauces and perfecting knife cuts, my brain was fried. But my sweet tooth? It was wide awake and demanding attention.
One particularly grueling night, I was dreaming of my grandma’s famous chocolate chip cookies, but I had neither the time nor the counter space. In a moment of sheer, sleep-deprived genius (or desperation!), I started throwing things into my trusty, chipped “World’s Best Grandma” mug—a gift from, you guessed it, my grandma. A little flour, a pat of butter, a handful of chocolate chips… I crossed my fingers and hit “start” on the microwave.
A minute later, I was staring at a puffy, steaming, miniature cake. It was a little lopsided, but when I dipped a spoon in and hit a river of melted chocolate, I knew I had stumbled onto something special. It was my first solo kitchen victory that felt entirely, uniquely mine. That messy, imperfect mug cake tasted like pure comfort and independence. It’s that same spirit of easy, joyful cooking that I’ve baked into this very recipe for you.
Gather Your Mug Cake Squad!
Here’s the dream team of ingredients that’s about to make your dessert dreams come true. The beauty is in its simplicity!
- ¼ cup All-Purpose Flour: This is the foundation of our little cake, giving it that classic, tender crumb. No fancy flour needed! Chef’s Insight: For a slightly denser, fudgier texture, you can swap this out for a gluten-free 1:1 baking blend. It works like a charm!
- 2 tablespoons Brown Sugar: I love brown sugar here because it brings a subtle molasses warmth and extra moisture, making the cake extra soft. Substitution Tip: No brown sugar? White granulated sugar works perfectly fine, but you’ll miss a tiny bit of that deep, caramel-y flavor.
- ¼ teaspoon Baking Powder: This is our leavening agent—our little cake’s personal hot air balloon! It’s what gives the mug cake its lift and fluffy texture. Make sure yours is fresh for the best rise.
- A Generous Pinch of Salt: Don’t you dare skip this! Salt is the flavor superhero that makes the chocolate taste richer and the sweet notes pop. It balances everything out beautifully.
- 3 tablespoons Milk: This adds the moisture we need to bring the batter together. Substitution Tip: Any milk you have works! Dairy-free? Almond, oat, or soy milk are fantastic alternatives. I’ve even used a splash of cold coffee for a mocha twist!
- 2 tablespoons Melted Butter: Butter equals flavor and richness. It gives our mug cake that decadent, bakery-style taste. Substitution Tip: For a dairy-free version, melted coconut oil or a neutral vegetable oil will do the trick.
- ¼ teaspoon Vanilla Extract: The quintessential baking flavor that makes everything taste like home. It’s the cozy blanket wrapping all the other flavors together.
- 2 tablespoons Chocolate Chips: The star of the show! These little morsels melt into gooey pockets of joy. Chef’s Insight: I like using a mix of semi-sweet and milk chocolate chips for a more complex flavor. Feel free to use chunks from a chocolate bar for a truly epic melt-factor.
Let’s Build Your Mini Masterpiece!
Ready for the easiest baking session of your life? Follow these steps, and you’ll be spoon-deep in chocolatey goodness before you can say “Is it ready yet?”
- Choose Your Champion Mug. Start by grabbing a microwave-safe mug that holds at least 10-12 ounces. Trust me on this—you need the headspace for the cake to rise without bubbling over. This is a non-negotiable for a clean microwave! Chef’s Hack: Give the inside of your mug a very light coating of butter or non-stick spray. It’s not strictly necessary, but it makes cleanup a dream.
- Mix the Dry Crew. Add your flour, brown sugar, baking powder, and that all-important pinch of salt directly into the mug. Grab a small whisk or a fork and give these a good mix. Why? We want to evenly distribute the baking powder so every bite is perfectly fluffy, not just one pocket of air. Chef’s Commentary: No need to dirty another bowl! The mug is our mixing bowl, baking dish, and serving vessel all in one. I call that a win for dish-duty avoidance.
- Bring in the Wet Team. Pour in the milk, melted butter, and vanilla extract right on top of your dry ingredients. Now, stir, stir, stir! Mix until you have a smooth, cohesive batter. Make sure you scrape the bottom and sides of the mug to incorporate any hidden pockets of flour. A few tiny lumps are okay, but we’re aiming for mostly smooth.
- The Grand Finale: Chocolate! Now for the best part. Sprinkle your chocolate chips over the batter and gently fold them in. Chef’s Pro-Tip: Reserve a few chips to press into the top of the batter right before microwaving. This gives you a beautiful, bakery-style finish with visible chocolate on top.
- Microwave Magic. Place your mug in the center of the microwave and cook on high for 60-75 seconds. Start with 60 seconds! All microwaves have different power levels. You’re looking for a cake that’s puffed up and looks set on top, but might still look a tiny bit moist. Chef’s Hack: The “tap and peek” method is your friend. If the top looks wet, give it another 10-15 seconds. Remember, it continues to cook for a minute after it comes out, so slightly underdone is better than a dry, overcooked hockey puck.
- The Hardest Part: Wait (Just a Bit!). I know, I know. The aroma is intoxicating. But for the love of not burning your tongue, let the mug cake sit for a minute or two before diving in. This allows the structure to set and those molten chocolate chips to cool from “lava” to “blissfully gooey.”
How to Serve Your Instant Dessert Win
You’ve done it! You’ve created a personal dessert masterpiece. Now, let’s talk about how to make this moment even more special. Presentation is everything, even when it’s just for you!
The simplest way is to grab a long spoon, curl up on the couch, and dig right into the mug. It’s humble, it’s honest, and it’s deeply satisfying. But if you’re feeling a little extra (and you should!), here are my favorite ways to level it up:
- À La Mode is Always a Good Idea: Plop a scoop of vanilla ice cream right on top of the warm cake. The contrast of hot and cold, cake and cream, is a classic for a reason—it’s pure perfection.
- Get Drizzly: Have some hot fudge, caramel sauce, or even a simple drizzle of peanut butter in the pantry? Now’s the time to use it! Artfully swirl it over the top for a coffee-shop-worthy treat.
- A Touch of Texture: Sprinkle a few flakes of sea salt, a handful of chopped nuts (toasted pecans, anyone?), or even a few extra chocolate chips on top for a bit of crunch and visual appeal.
However you choose to serve it, do it with a smile. You just made a cake in five minutes! You’re a kitchen rockstar.
Make It Your Own: Fun Flavor Twists!
The basic mug cake is a flawless canvas for your culinary creativity. Once you’ve mastered the original, try one of these delicious variations. It’s like having a whole dessert menu in your back pocket!
- Cookies & Cream Dream: Replace the chocolate chips with 2 tablespoons of crushed Oreo cookies. Swirl a tablespoon of the crumbs into the batter and sprinkle the rest on top before microwaving.
- Peanut Butter Cup Lover’s: Add a tablespoon of peanut butter to the wet ingredients. Fold in chopped peanut butter cups instead of chocolate chips. You’re welcome.
- Salted Caramel Swirl: After pouring the batter into the mug, drop a teaspoon of thick caramel sauce in the center and use a toothpick to swirl it gently. Finish with a flaky sea salt sprinkle.
- Double Chocolate Monster: Replace 1 tablespoon of the flour with 1 tablespoon of unsweetened cocoa powder for an intense chocolate base. You can never have too much chocolate.
- Birthday Cake Funfetti: Use white granulated sugar instead of brown and fold in a tablespoon of rainbow sprinkles! A drizzle of simple glaze (powdered sugar + milk) on top makes it a party.
Chef Emily’s Kitchen Notes & Confessions
This recipe has been my trusty sidekick for years, and it’s evolved with me. I’ve learned a few things along the way. First, I cannot be trusted with a jar of Nutella near this recipe. One time, I added a huge dollop to the center of the batter before microwaving, and it created a molten lava core so divine I almost cried. It’s now a regular, highly recommended “cheat.”
I’ve also found that this recipe is incredibly forgiving. Too much milk? It’ll be a tad denser. A little extra butter? It’ll be richer. Don’t stress about being 100% precise. Cooking, especially something as fun as a mug cake, is about joy, not perfection. The best part is that even the “failures” are usually still pretty darn tasty. So play, experiment, and make it yours!
Your Mug Cake Questions, Answered!
Over the years, I’ve gotten a lot of questions about mug cakes. Here are the answers to the most common head-scratchers to ensure your success every single time.
- Why did my cake turn out rubbery? Ah, the classic rubber cake! This almost always means it was overcooked. Microwaves vary wildly in power. Next time, start with 50 seconds and work your way up in 10-second increments. A slightly undercooked, fudgy center is the goal!
- Can I bake this in the oven instead? You can! While it defeats the “instant” purpose, it works well. Pour the batter into a small, greased ramekin and bake in a 350°F (175°C) oven for about 12-15 minutes, or until a toothpick comes out clean.
- My cake didn’t rise. What happened? The usual suspect here is old baking powder. If your baking powder has been sitting in the cupboard for over six months, it may have lost its lifting power. Time for a fresh canister!
- Can I double the recipe? I don’t recommend doubling it in one mug, as it will likely overflow and make a mess. If you want to make two, simply mix two separate batches in two separate mugs. It takes an extra minute but guarantees perfect results.
A Little Note on Nutrition
Let’s be real: a chocolate chip mug cake is a treat, and we should celebrate it as such! It’s a dessert designed for joy and instant gratification. The nutritional info for the base recipe (without any ice cream or extra toppings) comes in at approximately:
- Calories: 320
- Fat: 18g
- Carbohydrates: 38g
- Sugar: 20g
- Protein: 3g
If you’re looking for ways to lighten it up a touch, you can use a lower-fat milk, swap the butter for unsweetened applesauce, or use a sugar alternative. But my personal philosophy? Life is about balance. Enjoy this decadent little cake mindfully, savor every single bite, and then get back to your veggies at the next meal. No guilt, just goodness.
Go Forth and Conquer Your Cravings!
And there you have it! Your complete guide to conquering any and all spontaneous dessert cravings with grace, speed, and a whole lot of chocolate. This mug cake is more than just a recipe; it’s a reminder that delicious things don’t have to be complicated. It’s a hug in a mug, a five-minute project that always ends with a smile.
I hope this becomes your new favorite kitchen hack. I hope you make it after a long day, share the “recipe” with your best friend, and maybe even get your kids involved in making their own. That’s what Tasty Chow is all about—sharing the love, one messy, delicious bite at a time.
So, from my cozy kitchen corner to yours, happy baking! Or should I say, happy microwaving? Now, go make something delicious.
With love and a chocolate-stained apron,
Emily