Your 4-Minute Ticket to Red Velvet Heaven
Hey there, my fellow flavor-chaser! Let’s get real for a second. We’ve all been there. It’s 9 PM. The kids are finally asleep (or you’ve finally closed your laptop for the day). You’re cozy on the couch, maybe halfway through your favorite show, and then it hits you. That craving. Not just any craving, but a specific, undeniable, gotta-have-it-NOW craving for a slice of rich, velvety, tangy red velvet cake.
But who has the time or energy to preheat the oven, pull out the mixer, and commit to a whole cake? A cake that, let’s be honest, you’d probably end up eating half of yourself over the next 48 hours? (No judgment here, I’ve been there, crumbs on my shirt and all!).
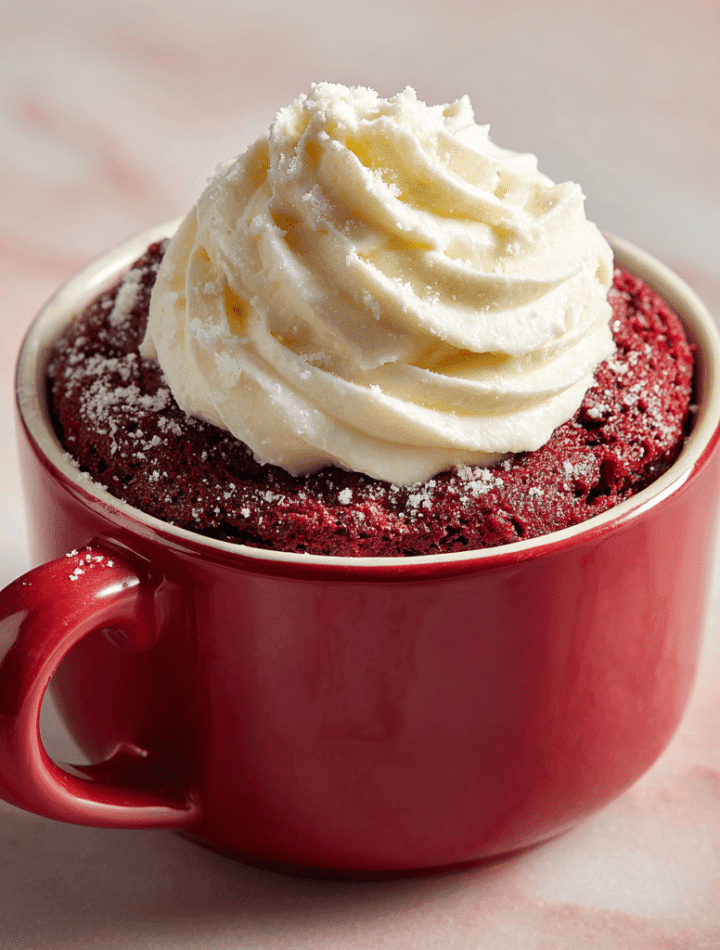
Well, my friend, consider this your kitchen fairy godmother moment. I’m about to share one of my all-time favorite “emergency dessert” recipes: my legendary Red Velvet Mug Cake. We’re talking all the classic, beloved flavor of a from-scratch red velvet layer cake, but it’s single-serving, magically fluffy, and ready in about the time it takes to find a spoon. It’s warm, comforting, and topped with a dreamy swirl of cream cheese frosting that melts into every nook and cranny. This isn’t just a recipe; it’s your secret weapon for instant dessert satisfaction. So, grab your favorite mug—the big, cozy one—and let’s make some magic.
A Little Spark of Red Velvet Magic
This recipe always takes me back to my grandma’s kitchen. She was the queen of “a little something sweet” after dinner. She didn’t always have a full cake on hand, but she had a magical ability to whip up joy with whatever was in her pantry. One rainy evening, I was feeling a little down, and she decided we were going to invent a “cupcake” you could make in a coffee mug. It was a mess of flour, a dash of this, a splash of that, and a whole lot of laughter. It wasn’t perfect, but it was ours.
Years later, in culinary school, I refined that messy, beautiful memory into this perfect little recipe. I figured out the exact science to get that signature red velvet crumb in a microwave. Every time I whisk together the cocoa and that vibrant red food coloring, I’m right back at her formica countertop, covered in flour and feeling utterly loved. That’s the spirit I want to bring to your kitchen with this mug cake—a little bit of science, a whole lot of love, and a guaranteed happy ending.
Gathering Your Mug Cake Squad
Here’s the dream team of ingredients that’s going to come together in a flash. The best part? You probably have most of this in your kitchen right now!
For the Cake:
- ¼ cup all-purpose flour: The backbone of our cake! It gives us that perfect, tender structure. For a gluten-free swap, a 1:1 gluten-free flour blend works like a charm.
- 1 tablespoon cocoa powder: This is the secret to that distinct red velvet flavor. It’s not a chocolate cake, remember? We use just enough for a hint of depth and that beautiful reddish-brown base. Use natural, unsweetened cocoa for the best result.
- 2 tablespoons sugar: Just the right amount of sweetness to balance the tang. I use regular granulated sugar, but you can sub in coconut sugar if you prefer.
- ¼ teaspoon baking powder: Our little leavening agent hero! This is what gives the cake its lift and makes it wonderfully fluffy instead of a dense hockey puck.
- Pinch of salt: Don’t you dare skip this! Salt is a flavor enhancer; it makes the chocolate taste richer and the sweetness pop. It’s a tiny step with a huge impact.
- 3 tablespoons milk: This adds moisture and richness. Any kind works—dairy, almond, oat, you name it.
- 1 tablespoon oil (vegetable or canola): Oil keeps the crumb of this little cake incredibly moist. Butter can sometimes make it a bit heavier in a microwave recipe, so trust me on the oil!
- ¼ teaspoon vanilla extract: The warm, aromatic flavor that makes any dessert feel like home.
- ¼ teaspoon apple cider vinegar: I know, it sounds wild! But this is a classic red velvet move. It reacts with the baking powder for extra lift and gives that signature, subtle tang. You won’t taste it, I promise!
- 4–5 drops red food coloring: The star of the show! For a super vibrant color, use gel food coloring. For a natural route, beet powder is a great alternative, though the color will be more muted.
For the Cream Cheese Frosting:
- 1 tablespoon cream cheese, softened: The non-negotiable crown jewel of any red velvet experience. Make sure it’s soft so it blends into a silky smooth frosting.
- 1 tablespoon powdered sugar: Sweetens and thickens our frosting perfectly. No need to sift!
- Splash of vanilla (optional): A little extra vanilla in the frosting takes it to a whole new level of yummy.
Let’s Build Your Mini Masterpiece!
Ready for the easiest baking session of your life? Follow these steps, and you’ll be diving into a warm, gooey cake in no time. I’ve packed this section with all my favorite chef hacks to ensure your mug cake is absolutely perfect.
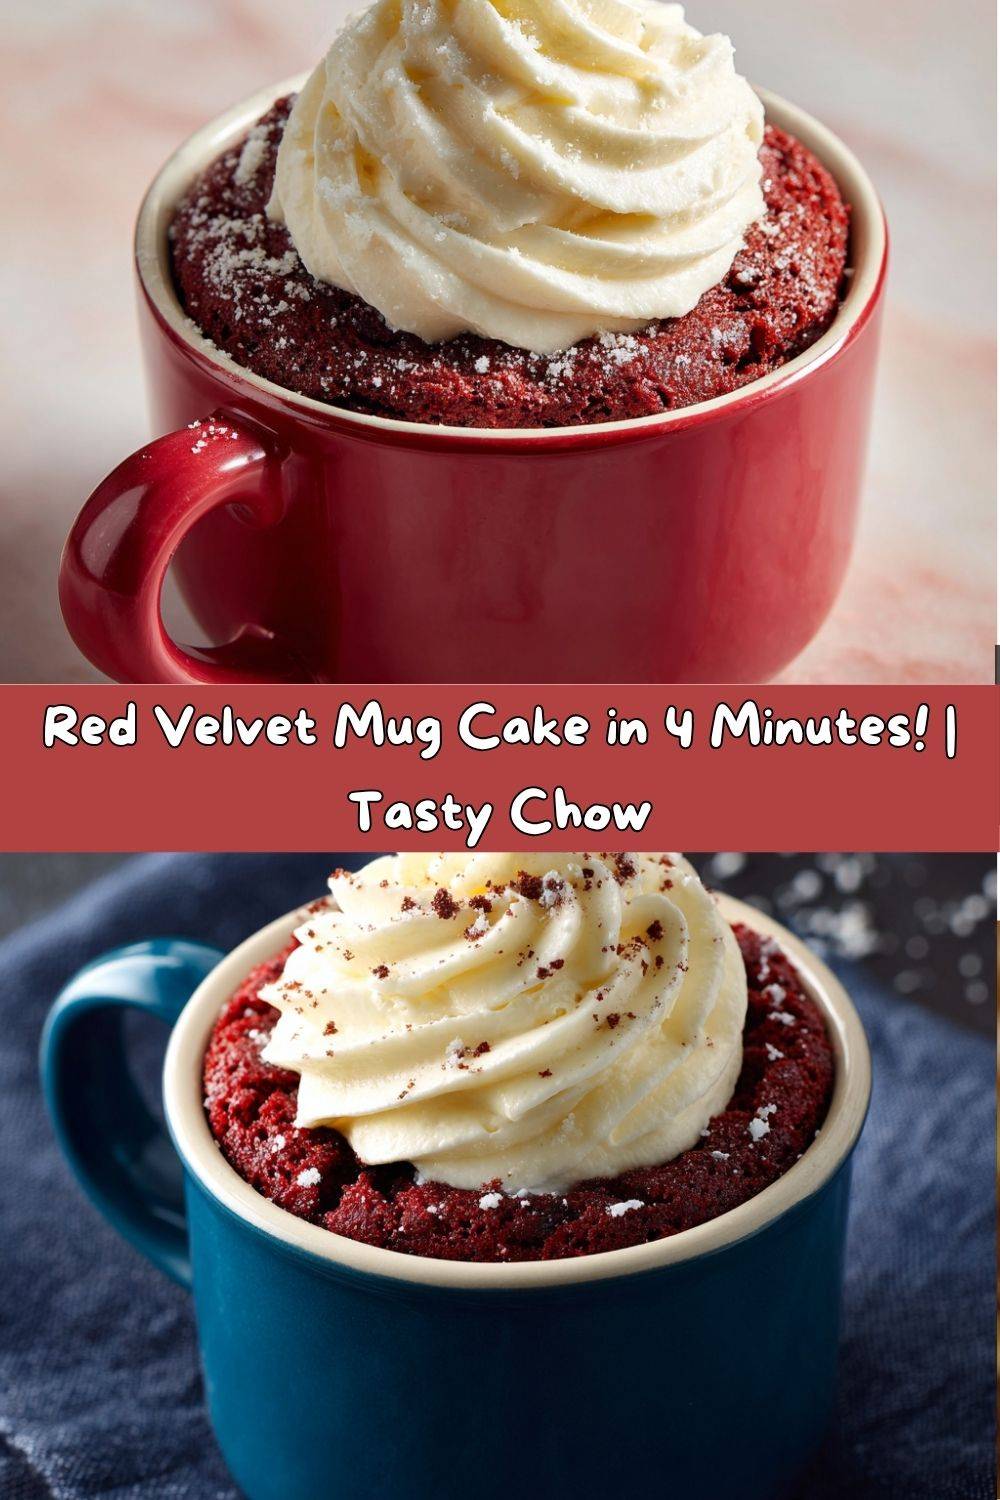
- Choose Your Mug Wisely. Grab a microwave-safe mug that holds at least 10-12 ounces. You need that extra headspace for the cake to rise up proudly without bubbling over. I’m a sucker for a big, cheerful mug—it just makes the whole experience more fun!
- Whisk the Dry Team. In your mug, add the flour, cocoa powder, sugar, baking powder, and that all-important pinch of salt. Take a small whisk or a fork and give them a good, thorough mix. Chef’s Hack: This initial mixing ensures the baking powder is evenly distributed, which means no weird, bitter pockets in your cake—just uniform fluffiness!
- Welcome the Wet Team. Now, pour in the milk, oil, vanilla, apple cider vinegar, and those vibrant red food coloring drops. This is where the magic starts to happen! Watch as the white flour turns into that iconic, bold red batter.
- Mix Until Just Combined. Now, stir everything together until the batter is smooth and you don’t see any more dry streaks of flour. Pro Tip: Don’t over-mix! A few confident stirs are all you need. Over-mixing can make the cake a little tough. A few tiny lumps are totally fine, I promise.
- The Microwave Moment of Truth. Pop your mug into the microwave and cook on high for 60-75 seconds. My microwave is perfect at 70 seconds. The top should look set, and it will be slightly springy to the touch. BIGGEST TIP I CAN GIVE YOU: It’s better to slightly undercook it than to overcook it! An undercooked cake is fudgy and decadent. An overcooked one can become rubbery. If it looks a tiny bit wet in the very center, it will continue to cook from residual heat. Trust the process!
- Whip Up the Frosting. While your cake is cooling for a minute (it’s molten lava hot straight out of the microwave!), take a small bowl and mix your softened cream cheese, powdered sugar, and that optional vanilla splash. Stir until it’s completely smooth and dreamy.
- The Grand Finale. Dollop that glorious cream cheese frosting right on top of your warm cake. You can just plop it in the center, or use a spoon to swirl it around beautifully. As it sits, it will melt just a little, creating a creamy, saucy river of deliciousness.
How to Serve & Savor Your Creation
Okay, the cake is frosted and your spoon is at the ready. Now what? The beauty of a mug cake is its simplicity, but here are a few fun ways to make it feel extra special:
The Classic Dive-In: Grab a spoon and dig right into the mug! I love getting a bit of warm cake, cool frosting, and melty frosting all in one bite. It’s the ultimate comfort food experience.
The Plate-and-Devour Method: For a more “plated dessert” feel, you can run a knife around the edge of the mug and carefully tip the cake out onto a small plate. It looks so elegant, and you get to admire the beautiful color from all sides. Drizzle with a little extra frosting or even a sprinkle of cocoa powder.
Accessorize! Why not? A few fresh raspberries on the side add a lovely tart contrast. A sprinkle of crushed pecans or walnuts on top of the frosting gives you a wonderful crunch. Or, for the ultimate indulgence, a small scoop of vanilla bean ice cream melting over the top is pure heaven.
Mix It Up! 5 Fun Twists on Your Mug Cake
Once you’ve mastered the classic, the mug cake world is your oyster! Here are a few of my favorite ways to play with this recipe:
- Chocolate Chip Red Velvet: Stir a tablespoon of mini chocolate chips into the batter right before microwaving. Because chocolate and more chocolate is always a good idea.
- Mocha Madness: Swap out one tablespoon of the milk for strongly brewed coffee or espresso. It will deepen the chocolate flavor and give you a lovely mocha kick.
- The “No Food Coloring” Natural Beauty: Omit the red food coloring entirely! You’ll get a delicious, classic “velvet” cake that’s a beautiful reddish-brown from the cocoa and vinegar reaction.
- Dairy-Free Delight: Super easy! Use your favorite plant-based milk (oat milk is fantastic here) and a vegan cream cheese alternative for the frosting. The cake itself is already egg-free!
- Funfetti Celebration: Turn this into a birthday cake! Omit the cocoa powder and red food coloring, and add a tablespoon of rainbow sprinkles to the batter. Top with a simple vanilla frosting (just powdered sugar and a tiny bit of milk).
Chef Emily’s Kitchen Confidential
This recipe has been through more kitchen tests than I can count! I once made six of these in one night for my friends, and we had a mug cake tasting party. The biggest lesson learned? Microwaves are like snowflakes—no two are exactly alike! Your perfect time might be 65 seconds or 80. Use my time as a guide and do a little test on your first one. Don’t be afraid if it looks a little moist on top; that’s what makes it so fudgy and wonderful. I also highly recommend using a mug you love. There’s something so joyful about eating a delicious dessert out of your favorite, cheerful piece of pottery. It just tastes better, I swear!
Your Mug Cake Questions, Answered!
I’ve gotten thousands of messages about this recipe over the years, so here are the answers to the most common questions.
Q: My cake came out rubbery. What happened?
A: The most common culprit is overcooking! Microwaves continue to cook for a few seconds after they beep, and the cake sets up as it cools. Try reducing the time by 10-15 seconds next time. Also, make sure you’re measuring your flour correctly—don’t pack it into the cup. Spoon it in and level it off.
Q: Can I make this in the oven?
A: You can! Pour the batter into a small, greased ramekin. Bake in a preheated 350°F (175°C) oven for about 12-15 minutes, or until a toothpick inserted comes out clean.
Q: I don’t have apple cider vinegar. What can I use?
A: No problem! White vinegar or even fresh lemon juice will work just fine in the same amount. It’s all about that acid reaction.
Q: Can I double the recipe?
A> Absolutely! Just double all the ingredients and mix it in a larger, microwave-safe bowl (or two separate mugs). You’ll likely need to increase the cooking time by 20-30 seconds, but keep a close eye on it.
A Quick Peek at the Nutrition
I’m all about balance! This Red Velvet Mug Cake is a treat, and it’s totally okay to indulge mindfully. Here’s a general nutritional breakdown for one serving (including the frosting), to help you fit it into your day. Remember, these are estimates and can vary based on the specific brands of ingredients you use.
- Calories: ~310
- Fat: 16g
- Carbohydrates: 38g
- Sugar: 22g
- Protein: 3g
- Sodium: 190mg
To lighten it up a bit, you can use a lower-fat milk and reduce the sugar in the cake by half a tablespoon. For the frosting, using a light cream cheese is a great option. But sometimes, you just need the real, full-fat, glorious deal—and that’s perfectly wonderful, too!
One Last Bite of Wisdom
And there you have it! Your new go-to recipe for when that sweet tooth strikes with a vengeance. This Red Velvet Mug Cake is more than just a quick fix; it’s a little reminder that you deserve a moment of pure, uncomplicated joy. It’s about treating yourself with kindness, one delicious spoonful at a time.
I truly hope this recipe becomes a beloved staple in your kitchen, just like it is in mine. It’s saved countless movie nights, late-night study sessions, and “I just need something sweet” moments for me and my community.
So, from my messy-apron-wearing kitchen to yours, happy baking! I’d love to see your beautiful creations. Tag me on social @TastyChow so I can cheer you on. Now, go chow down!
With love and a full heart,
Emily