Grinch Cake Mix Cookies: The Easiest, Chewiest Holiday Treat!
Who Says Your Heart Can’t Grow Three Sizes Today?
Hey there, my festive friend! Grab a mug of hot cocoa and pull up a chair. Is there anything better than the smell of cookies baking during the holiday season? I think not. It’s the scent of pure, unadulterated joy. But let’s be real for a second—between gift shopping, decking the halls, and trying to remember where you stored all the wrapping paper, your baking ambitions can sometimes feel… a little Grinchy.
Well, I’m here to tell you that this is the year we change that. This is the year we whip up a batch of cookies that are so festive, so fun, and so incredibly easy, you’ll feel like you’ve stolen Christmas (in the best way possible!). I’m talking about my all-time favorite, can’t-stop-won’t-stop, Grinch Cake Mix Cookies.
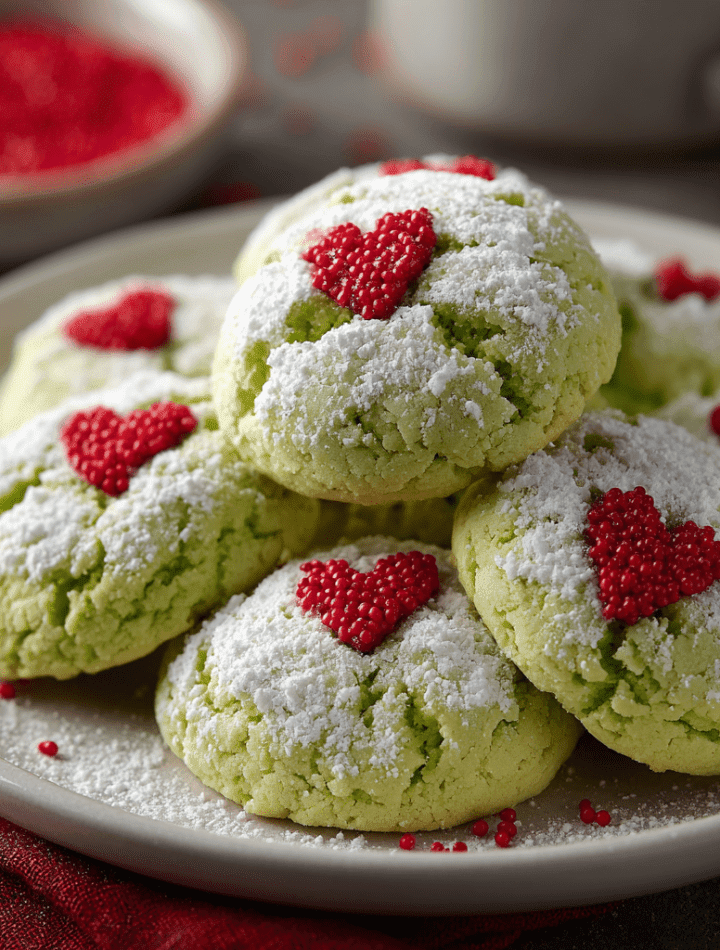
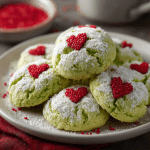
Imagine this: a soft, chewy, melt-in-your-mouth cookie with a vibrant green center, a beautiful “snowy” crackled top from a roll in powdered sugar, and a cute little red heart candy right on top. They’re adorable, they’re delicious, and they capture the spirit of Dr. Seuss’s beloved grump-turned-softie perfectly. The best part? We’re starting with a simple box of cake mix. That’s right! This is my little kitchen hack for creating magic without the stress. So, tie on your favorite messy apron, and let’s make your kitchen the happiest place in Whoville.

The Year My Cookies Stole Christmas (At Least, They Tried To)
This recipe takes me back to one of my first Christmases hosting my whole, wonderfully chaotic family. I was determined to be the hostess with the mostest. I had a menu planned that would make Martha Stewart proud. But my ambitious timeline? It went out the frosted window faster than you can say “presents.”
By the afternoon of Christmas Eve, I was surrounded by flour, I’d somehow gotten butter in my hair, and my grand masterpiece Yule Log had a major crack. I felt my inner Grinch starting to grumble. In a moment of “I need a win, and I need it NOW,” I remembered this super simple cake mix cookie recipe my grandma had scribbled on a notecard for me. I whipped up a batch, dyed the dough a hilarious shade of green, and rolled them in powdered sugar. My niece, who was about five at the time, came into the kitchen, her eyes wide. “Aunt Emmy,” she whispered, “you made Grinch cookies! He’s my favorite!” That single batch of easy, imperfect, but totally joyful cookies became the star of the dessert table and totally saved my holiday spirit. It was a beautiful reminder that the best recipes aren’t about perfection—they’re about the love and the fun you bake into them.
Gathering Your Whoville-Worthy Ingredients
Here’s the beautiful part: you only need a handful of simple ingredients to create this holiday magic. Let’s break them down!
- 1 box (15.25 oz) Vanilla Cake Mix: This is our secret weapon! Using a cake mix gives us a perfectly soft and chewy cookie base every single time, and it’s already pre-measured with flour, sugar, and leavening. No fuss! Chef’s Insight: I prefer vanilla for its neutral canvas, but a white cake mix works beautifully, too.
- ½ cup Vegetable Oil: This is what gives our cookies that wonderfully soft and tender texture, unlike the crispness you’d get from butter. Substitution Tip: You can use melted (and slightly cooled) coconut oil if you love a subtle coconut flavor.
- 2 large Eggs: Our binding agents! They bring the dough together and add structure and richness. Make sure they’re at room temperature for the smoothest dough.
- Green Food Coloring: The fun part! We’re going for a vibrant, “Grinch-green” hue. Chef’s Insight: Gel food coloring is my best friend here. It’s more potent than liquid, so you need less, and it won’t change the consistency of your dough. But liquid works in a pinch—just add a few more drops!
- ½ cup Powdered Sugar: This isn’t for the dough; it’s for the magical “snowy” coating! Rolling the green dough balls in powdered sugar is what creates that classic, crackled look after baking.
- Red Heart Candies or Sprinkles: The final, crucial touch! These represent the Grinch’s growing heart. I typically use the small, edible candy hearts, but red heart sprinkles, M&Ms, or even a dab of red frosting work perfectly.
Let’s Bake Some Holiday Magic: Your Step-by-Step Guide
Ready? This is where the fun really begins. Follow these steps, and you’ll have a tray of perfect Grinch cookies in no time.
- Preheat and Prep. First things first, preheat your oven to a toasty 350°F (175°C). This is a non-negotiable first step for even baking. While it’s warming up, line your baking sheets with parchment paper. Chef’s Hack: Parchment paper is a lifesaver! It prevents sticking and makes cleanup an absolute dream. No parchment? A light spray of non-stick cooking spray will do the trick.
- Create the Cookie Dough. In a large mixing bowl, combine the dry cake mix, vegetable oil, and eggs. Now, grab a wooden spoon or a spatula and mix, mix, mix! You’ll want to stir until everything is just combined and a soft dough forms. Don’t overmix! A few lumps are totally fine. Chef’s Commentary: See? I told you it was easy. We’re already 90% of the way there!
- Get Your Grinch On (The Coloring Part!). Now, for the transformation! Add your green food coloring. I recommend starting with 5-10 drops of gel coloring or about ½ teaspoon of liquid. Mix it in thoroughly. Want a more vibrant, “Grinchier” green? Add more color a few drops at a time until you reach that perfect, festive shade. This is a great step to let the kids help with!
- The Snowball Roll. Place your ½ cup of powdered sugar in a small, shallow bowl. Now, scoop out about 1 tablespoon of dough and roll it between your palms to form a neat 1-inch ball. Roll this green ball generously in the powdered sugar until it’s completely coated. It should look like a little green planet covered in snow! Chef’s Tip: Really coat it well! The thicker the powdered sugar coating, the more dramatic the crackled, snowy effect will be after baking.
- Time to Bake! Place your lovely little snow-covered green dough balls on your prepared baking sheet, making sure to space them about 2 inches apart. They don’t spread a *ton*, but they need a little room to breathe and become perfectly round cookies. Pop the tray into your preheated oven and bake for 8-10 minutes.
- The Perfect Bake. You’ll know they’re done when the edges are just set and the tops are beautifully crackled. The centers might still look a tiny bit soft—that’s exactly what we want! Chef’s Hack: For the ultimate chewy texture, pull them out at the 9-minute mark. They continue to cook on the hot baking sheet, so an under-baked cookie is a chewy cookie!
- The Most Important Step: The Heart! As soon as you pull the baking sheet from the oven, gently press a red heart candy into the center of each cookie. Do this while they’re still warm and soft so the candy adheres perfectly. If you wait until they cool, the hearts will just fall right off.
- Cool and Conquer. Let the cookies cool on the baking sheet for at least 5 minutes. This allows them to firm up enough to handle. Then, carefully transfer them to a wire rack to cool completely. Try to resist eating one straight from the pan… though I can’t promise I always do!
How to Serve These Festive Little Gems
Presentation is part of the fun! These cookies are a showstopper all on their own, but here’s how I love to serve them for maximum holiday impact.
Pile them high on a rustic wooden board or a festive holiday platter. They look absolutely stunning against a red or white plate. For a real “Whoville” tablescape, scatter a few extra red heart candies around the platter. I love serving these with a tall glass of cold milk for the kids, or with a rich, homemade peppermint mocha for the adults. They’re also the perfect edible gift! Tuck a few into a cellophane bag, tie it with a pretty red ribbon, and you’ve got a heartfelt, homemade present for teachers, neighbors, or your postal worker.
Mix It Up! Fun Grinch Cookie Variations
Feel like playing around? This recipe is a fantastic base for all sorts of creative twists!
- Grinch Popcorn Cookies: Fold in 1 cup of popped popcorn and ½ cup of white chocolate chips into the dough for a fun, textured treat that’s a nod to the classic Grinch story!
- Lemon-Grinch Cookies: Use a lemon cake mix instead of vanilla! The bright, tangy lemon flavor pairs amazingly with the sweet, buttery dough. It’s a next-level flavor explosion.
- Who-Pudding Cookies: Add a box of instant vanilla pudding mix (about 3.4 oz) to the dough along with the cake mix. This makes the cookies even softer, thicker, and more cake-like.
- Gluten-Free & Dairy-Free Grinch: You can easily make this recipe for almost any diet! Simply use a certified gluten-free vanilla cake mix. The recipe is naturally dairy-free as written (just double-check your cake mix ingredients and candy hearts to be sure).
- Grinch Thumbprints: Instead of a heart candy on top, make a small indent in the dough ball before baking and fill it with a tiny dollop of red jam (like strawberry or raspberry) after they come out of the oven.
Chef Emily’s Kitchen Notes & Confessions
Over the years, this recipe has become a non-negotiable in my holiday baking lineup. It’s evolved from a “save-the-day” recipe to a tradition. One year, I was in such a hurry that I accidentally used mint extract instead of vanilla (I’d added it to the oil by mistake!). Turns out, it was a delicious accident—peppermint Grinch cookies were a huge hit!
My biggest piece of advice? Have fun with it. Don’t stress if your green isn’t the exact right shade, or if one cookie is slightly bigger than the others. That’s the charm of homemade goodies. These cookies are about spreading joy, not achieving perfection. The messier the kitchen and the more flour on your nose, the better, if you ask me.
Your Grinch Cookie Questions, Answered!
Let’s tackle a few common questions to ensure your baking success!
Q: My cookies came out flat. What happened?
A: The most common culprit is an old cake mix or not enough powdered sugar coating. The powdered sugar creates a barrier that helps the cookie hold its shape. Also, make sure your oven is fully preheated! A too-cool oven can cause spreading.
Q: Can I make the dough ahead of time?
A: Absolutely! You can mix the dough, cover the bowl tightly with plastic wrap, and store it in the fridge for up to 2 days. Let it sit at room temperature for 15-20 minutes before rolling and baking.
Q: My food coloring is staining my hands! Help!
A> Oh, the perils of a vibrant dough! A little trick: rub your hands with a small amount of vegetable oil or wear disposable food-safe gloves before you start rolling the dough balls. It creates a barrier and makes cleanup a breeze.
Q: Can I freeze these cookies?
A> You bet! These cookies freeze beautifully. Once fully cooled, place them in a single layer in a freezer-safe bag or container. They’ll keep for up to 3 months. Thaw at room temperature whenever a Grinch-y craving strikes.
Grinch Cake Mix Cookies
- Total Time: 20 minutes
- Yield: 24 cookies 1x
Description
Soft, chewy, and impossibly easy—these Grinch Cake Mix Cookies bring the holiday spirit in every bite. With bright green centers, snowy powdered sugar, and sweet red hearts on top, they’re festive fun straight from a box mix.
Ingredients
1 box vanilla cake mix (15.25 oz)
½ cup vegetable oil
2 eggs
Green food coloring
½ cup powdered sugar (for rolling)
Red heart candies or sprinkles
Instructions
Preheat oven to 350°F (175°C). Line a baking sheet with parchment paper.
In a large bowl, mix together cake mix, oil, and eggs until smooth.
Add green food coloring until the dough reaches a vibrant Grinch green.
Roll dough into 1-inch balls and coat generously in powdered sugar.
Place on prepared baking sheet, spacing cookies 2 inches apart.
Bake for 8–10 minutes, until edges are set and tops are crackled.
Press a red candy heart gently onto each cookie while still warm.
Cool on the baking sheet for 5 minutes, then transfer to a wire rack.
- Prep Time: 10 minutes
- Cook Time: 10 minutes
Nutrition
- Calories: 130 / Cookie
- Sugar: 12g / Cookie
- Sodium: 110mg / Cookie
- Fat: 6g / Cookie
- Carbohydrates: 18g / Cookie
- Protein: 1g / Cookie
Quick Nutrition Note
Hey, we’re all about balance here at Tasty Chow! While these are a treat, it’s always good to know what you’re enjoying. Please note, this is an approximate calculation and can vary based on specific brands of ingredients you use.
Per Cookie (approx.):
Calories: 130 | Fat: 6g | Carbs: 18g | Sugar: 12g | Protein: 1g | Sodium: 110mg
The main sources of calories are the cake mix (carbohydrates and sugar) and the vegetable oil (fat). For a lighter option, you could try using an applesauce replacement for half of the oil, though the texture will be slightly more cake-like. But remember, it’s the holidays! It’s all about savoring the moments and the flavors you love.
Your New Go-To Holiday Happy-Maker
And there you have it! My foolproof, joy-bringing recipe for Grinch Cake Mix Cookies. I hope this recipe finds its way into your kitchen and becomes a cherished part of your holiday hustle and bustle, just like it has in mine.
Remember, the magic of these cookies isn’t just in their adorable appearance or their deliciously chewy texture. It’s in the fun you have making them, the smiles they bring to the faces of your loved ones, and the reminder that even the simplest things—like a green cookie with a red heart—can hold so much meaning. So, from my messy, flour-dusted kitchen to yours, happy baking! I can’t wait for you to try them.
Be sure to tag me @TastyChowEmily on social media if you make them! I love seeing your creations.
With love and a full cookie jar,
Emily