A Little Sweetness for Your Day: Homemade Butter Mints
Hey there, friend! Emily here, waving from my flour-dusted kitchen. Is there anything more delightfully old-school than a butter mint? You know the ones—those soft, pastel-colored pillows of sweetness that practically melt on your tongue the second they hit it. They’re the quiet heroes of the candy world, showing up at the best parties: wedding receptions, baby showers, holiday open houses, and on your grandma’s best china saucer.
But here’s a little secret I learned in culinary school and have held close ever since: the store-bought version can’t hold a candle to the ones you make yourself. When you make butter mints at home, you’re in control. You get to choose the vibrancy of the color, the intensity of the mint, and the creamy, dreamy texture. They’re not just a candy; they’re a tiny, edible hug.
Today, I’m pulling back the curtain and sharing my absolute favorite, foolproof recipe for these nostalgic gems. We’re talking about a treat that requires no fancy candy thermometer, no terrifying stages of sugar crystallization—just simple ingredients, a little bit of elbow grease (or a trusty stand mixer!), and a whole lot of love. So, tie on your favorite apron, the one with the stains that tell a thousand kitchen stories, and let’s make something wonderfully sweet together.
The Wedding Mint That Started It All
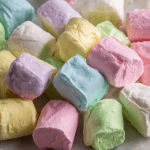
My love affair with butter mints began not in a restaurant, but at my cousin Sarah’s wedding. I was about ten, and I felt incredibly fancy in my frilly dress. But the real magic happened at the reception. Next to the towering, magnificent cake sat a beautiful crystal bowl, heaped with these tiny, pastel pink and green mints. They looked like something from a fairy tale.
I’ll never forget the feeling of popping one in my mouth. It was cool, creamy, and it dissolved into a cloud of sweet peppermint bliss. I was hooked. I may or may not have filled my little clutch purse with a “for-later” stash (a move I do not recommend, unless you want a purse full of sugary confetti!). That memory—the joy of something so simple, so elegant, and so delicious—stuck with me. It’s the feeling I try to bake into every single batch I make today. It’s proof that the smallest treats can leave the biggest impressions.
Gathering Your Butter Mint Brigade
One of the best things about this recipe is its beautiful simplicity. You only need a handful of pantry staples to create pure magic. Here’s what you’ll need:
- 1 stick (½ cup) Unsalted Butter, softened: This is the star of the show, giving our mints that signature creamy, rich texture and name! I always use unsalted butter so we can control the salt level. Chef’s Insight: Your butter needs to be truly softened at room temperature, not melted. You should be able to press a finger into it easily. This is key for a smooth, non-greasy dough.
- 1 tablespoon Whipping Cream (or Heavy Cream): This adds a touch of luxurious moisture and helps bind everything together into a pliable dough. Substitution Tip: If you’re in a pinch, whole milk can work, but the cream gives a richer final product.
- 4 cups Powdered Sugar (Confectioners’ Sugar), sifted: This provides the sweet structure and that classic melt-in-your-mouth quality. Chef’s Hack: I always sift my powdered sugar! It prevents lumps and ensures a silky-smooth dough that won’t have you fighting gritty bits.
- ½ teaspoon Pure Peppermint Extract: This is where the refreshing flavor comes from! I highly recommend using pure extract over imitation for the cleanest, brightest mint taste. Flavor Twist: Feel free to experiment with other extracts like spearmint, wintergreen, or even a tiny dash of vanilla for a more complex flavor profile.
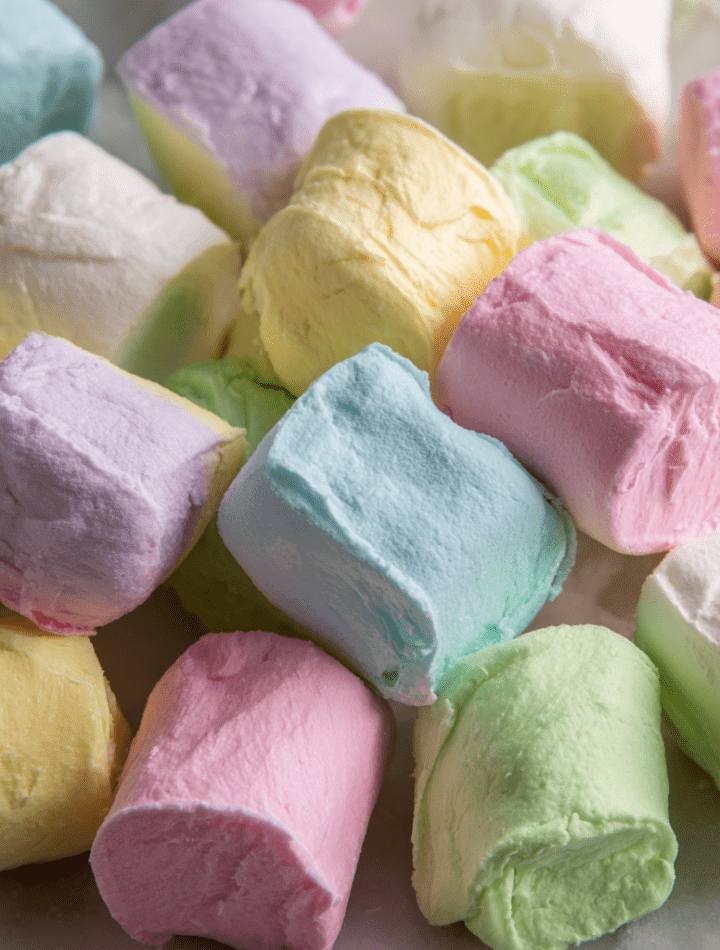
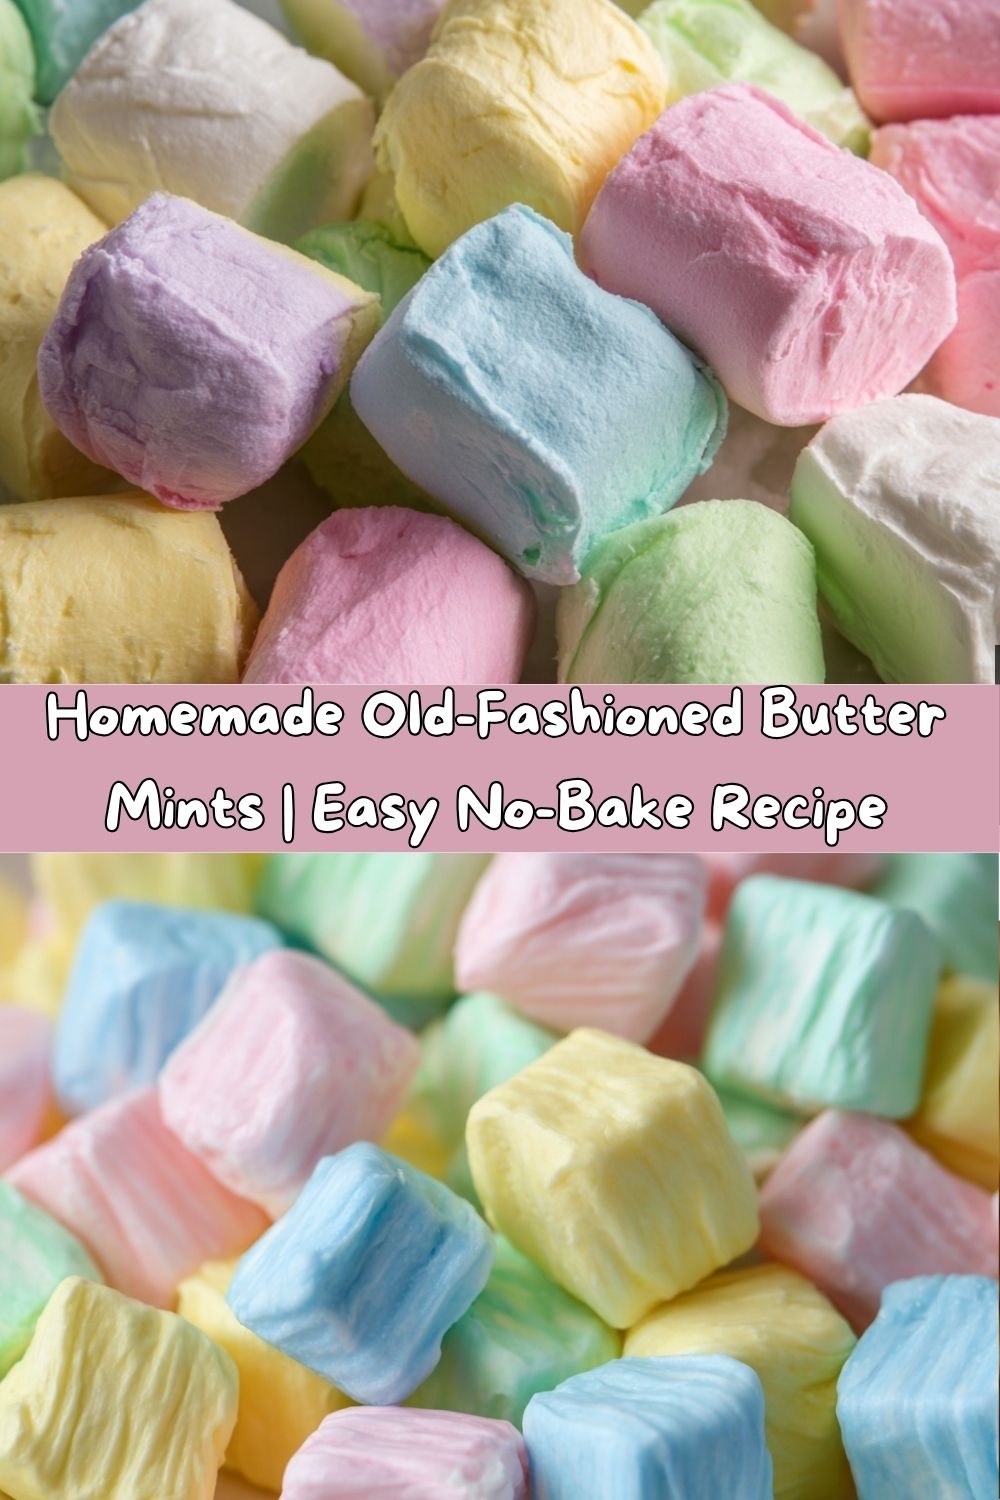
- 1–4 drops Food Coloring (any colors you like!): This is where the fun begins! Go for classic pastels like soft pink, baby blue, mint green, or sunny yellow. Gel food coloring works best as it provides vibrant color without adding extra liquid. Pro Tip: Start with one drop, knead it in, and add more as needed. You can always add more color, but you can’t take it away!
Crafting Your Minty Masterpiece: A Step-by-Step Guide
Ready to get your hands a little dusty (and colorful)? Let’s do this! I’ll walk you through each step with all my favorite chef hacks to ensure your mints are absolutely perfect.
- Cream the Butter Like a Pro. In the bowl of your stand mixer fitted with the paddle attachment (or a large bowl with a hand mixer), beat the softened butter on medium speed for about 1-2 minutes until it’s pale, creamy, and smooth. You’re not just mixing it; you’re aerating it, which will give our mints a lovely light texture. Chef’s Note: Scrape down the sides of the bowl with a spatula halfway through to make sure everything is incorporated evenly.
- Introduce the Wet Ingredients. Reduce your mixer speed to low and add the whipping cream and the ½ teaspoon of peppermint extract. Mix just until combined. The low speed here is your friend—it prevents the cream from splashing all over your kitchen! Give the bowl another quick scrape to catch any rogue butter.
- Gradually Sweeten the Deal. Now, with the mixer still on low, gradually add the sifted powdered sugar, about one cup at a time. Let each cup incorporate fully before adding the next. Watch Out! If you add it all at once, you’ll be greeted by a sweet, powdery cloud—a delicious disaster, but a disaster nonetheless! Once all the sugar is in, the mixture will look crumbly at first, but trust the process.
- Watch the Dough Come Together. After the last cup of sugar is mixed in, turn the mixer up to medium speed and beat for another 1-2 minutes. You’ll see the magic happen as the crumbly mixture transforms into a smooth, pliable dough that pulls away from the sides of the bowl. The Texture Test: Pinch a bit of dough between your fingers. It should be smooth and hold together easily, not sticky or dry. If it’s too dry, add a few more drops of cream. If it’s too sticky, add a tiny bit more powdered sugar.
- Get Creative with Color! This is the fun part! Turn the dough out onto a clean surface dusted lightly with powdered sugar. Divide it into however many colors you want to make. Now, add a drop or two of your chosen food coloring to one portion. Put on some disposable gloves if you don’t want rainbow hands (a lesson I’ve learned the hard way!), and knead the color into the dough until it’s completely even. Repeat with your other colors.
- Shape and Cut Your Mints. Take a small portion of one colored dough and roll it between your hands and the counter into a long, thin rope, about ½-inch in diameter. Don’t make it too thick, or the drying time will take forever! Using a sharp knife or a bench scraper, cut the rope into ½-inch to ¾-inch pieces. You’re making the classic butter mint shape! Place the little pieces in a single layer on a parchment-lined baking sheet.
- The Patience-Paying Part: Drying. This is the only part of the recipe that requires patience. Leave the baking sheet of mints out at room temperature, uncovered, for at least 12 hours, or until they are firm to the touch. They shouldn’t be soft or squishy. This air-drying process is what gives them that perfect, slightly firm exterior and melt-in-your-mouth interior. No baking required!
How to Serve These Pretty Little Mints
Once your mints are perfectly dry and ready to go, the presentation is half the fun! These little beauties deserve to be shown off.
For a party, I love piling them high in a beautiful glass bowl or a vintage candy dish. The different colors all mixed together look so joyful and inviting. You can also sort them by color for a more elegant, monochromatic look on a tiered dessert stand.
Butter mints also make the most heartfelt homemade gift. Pack them into clear cellophane bags tied with a pretty ribbon, or layer them in a mason jar with a custom tag. They’re a wonderful “just because” gift for a neighbor, a thank-you for a hostess, or a sweet surprise for a teacher.
And don’t forget to just keep a little jar of them on your own kitchen counter! A little mint after dinner, or a sweet pick-me-up with your afternoon coffee, is a simple act of everyday joy.
Make It Your Own: Fun Butter Mint Variations
The basic butter mint recipe is a perfect canvas for your creativity. Once you’ve mastered the classic, try one of these delicious twists!
- The Citrus Zing: Swap out the peppermint extract for an equal amount of orange, lemon, or lime extract. Pair them with corresponding food coloring (yellow, light yellow, and green) for a bright, zesty treat.
- The Chocolate Dipped Delight: Once your mints are fully dry, dip half of each one in melted dark, milk, or white chocolate. Place them on a parchment-lined sheet to let the chocolate set. The combination of cool mint and rich chocolate is absolutely divine.
- The Sprinkle Fest: After you’ve cut your mints, but before they dry, gently roll the edges in nonpareils or sanding sugar. It adds a lovely little crunch and a pop of extra color.
- The Floral Touch: For a super elegant twist, use ¼ teaspoon of peppermint extract and ¼ teaspoon of rose or lavender extract. Use a soft pink or lavender food coloring to match. Perfect for a bridal shower!
- The Vegan Swap: You can easily make these dairy-free! Use a high-quality vegan butter stick (make sure it’s the kind that comes solid, not spreadable from a tub) and replace the whipping cream with full-fat canned coconut milk. The flavor will be slightly different but still delicious.
Chef Emily’s Corner: Notes from My Kitchen
This recipe has been a part of my life for so long, it feels like an old friend. I’ve made it for probably a hundred events, and it’s evolved in little ways. I used to be so impatient with the drying time, until the time I tried to package a batch that was still slightly soft… let’s just say I ended up with one giant, minty brick instead of individual candies. A delicious brick, but a brick nonetheless!
I also learned that the weather can be a factor. On a really humid day, the mints might need an extra few hours to dry out properly. Don’t rush it! The wait is always worth it. This recipe is a beautiful reminder that some of the best things in life, and in the kitchen, can’t be rushed.
Butter Mint FAQs: Your Questions, Answered!
Over the years, I’ve gotten a lot of questions about this recipe. Here are the ones that pop up most often!
Q: My dough is too dry and crumbly! What did I do wrong?
A: This usually happens if the butter wasn’t soft enough or if you added a bit too much powdered sugar. The fix is easy! Just add a few more drops of whipping cream, one at a time, and knead it in until the dough comes together smoothly.
Q: My dough is too sticky and soft. Help!
A: No worries! This can happen if your kitchen is warm or if you were a little light on the sugar. Just knead in a little more sifted powdered sugar, a tablespoon at a time, until the dough is no longer sticky and is easy to handle.
Q: Can I speed up the drying time?
A: I don’t recommend it! Air-drying at room temperature is what gives butter mints their perfect texture. Putting them in the oven, even on the lowest setting with the door open, can cause them to sweat, lose their shape, or develop a crust. Patience is key here.
Q: How long do homemade butter mints last?
A> Stored in an airtight container at room temperature, they will keep beautifully for up to 3 weeks! Their flavor might even improve after a day or two. Just make sure they are fully dry before storing to prevent any moisture from building up.
Butter Mints
- Total Time: 12 hours 20 minutes
- Yield: 150–200 small mints 1x
Description
Soft, creamy, and melt-in-your-mouth — these old-fashioned butter mints are a nostalgic treat that still hits all the right notes. They’re simple to make, beautifully colorful, and perfect for weddings, showers, holiday trays, or whenever you want to sweeten the moment with something handmade.
Ingredients
1 stick butter (softened)
1 tbsp whipping cream
4 cups powdered sugar
½ tsp pure peppermint extract
1–4 drops food coloring (any colors you like)
Instructions
In a mixing bowl, beat the softened butter until creamy.
Add whipping cream and peppermint extract. Mix well.
Gradually beat in powdered sugar until a smooth dough forms.
Divide dough into portions and tint each with a drop or two of food coloring. Knead color in until even.
Roll each colored dough into thin ropes and cut into bite-sized pieces.
Let pieces air dry on a baking sheet for at least 12 hours until firm to the touch.
- Prep Time: 20 minutes
- Drying Time: 12 hours
Nutrition
- Serving Size: 6–8 mints.
- Calories: 15 / Mint
- Sugar: 3g / Mint
- Fat: 0.5g / Mint
- Carbohydrates: 3g / Mint
A Quick Note on Nutrition & Prep
Let’s be real, we’re not eating butter mints for their health benefits—we’re eating them for pure, unadulterated joy! But it’s always good to have the info. Since these are portion-controlled little treats, it’s easy to enjoy one or two without overdoing it.
This recipe makes a large batch, about 100-120 mints depending on how small you cut them. The nutritional information is a rough estimate per mint.
- Prep time: 20 minutes (plus shaping time)
- Drying time: 12 hours
- Servings: About 100 mints
- Calories per mint: ~15
- Fat: 0.5g
- Carbohydrates: 3g
- Sugar: 3g
Your New Go-To Sweet Treat
And there you have it! My heart-on-a-platter recipe for the most delightful, creamy, and melt-in-your-mouth homemade butter mints. This is more than just a recipe; it’s a ticket to creating your own sweet memories. Whether you’re prepping for a big celebration or just want to add a little sparkle to a Tuesday, I hope you’ll give these a try.
Making them connects us to a simpler time, to grandmas and weddings and all things sweet. So, have fun with it! Get the kids involved in the coloring and shaping, put on some good music, and enjoy the process. I’d love to see your creations! Tag me on social @TastyChow so I can see all your beautiful, colorful mints.
Now go forth, spread a little sweetness, and as always, chow down!
With love and a full candy dish,
Emily