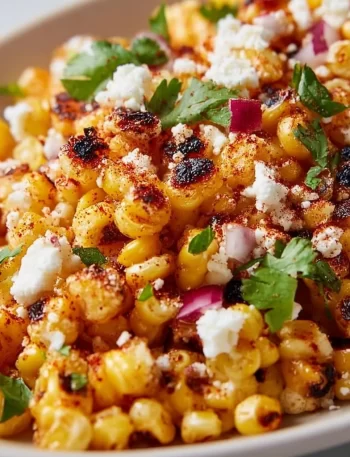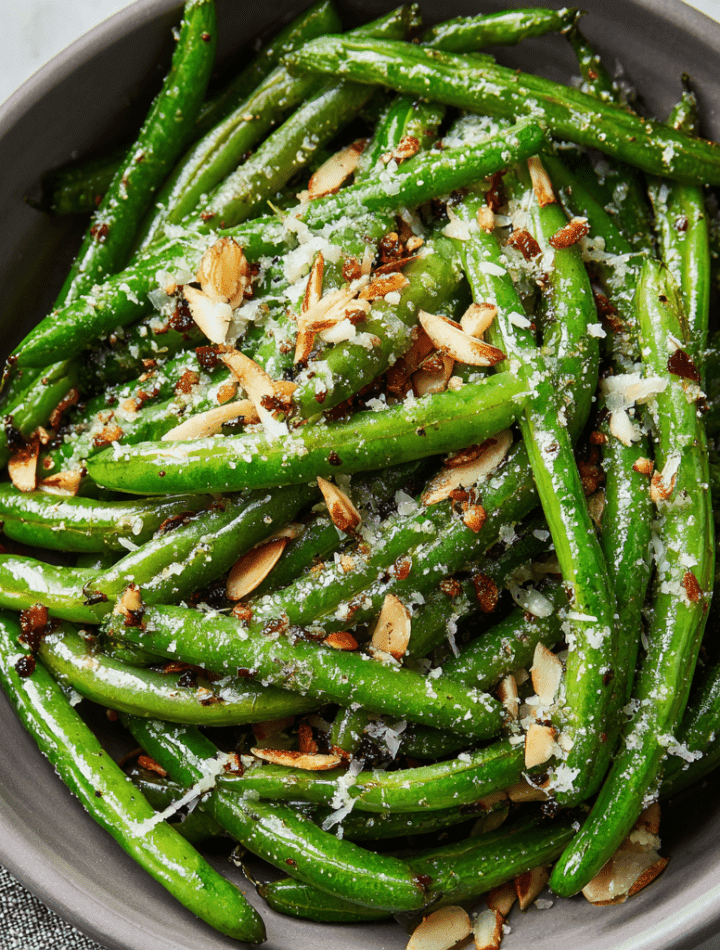
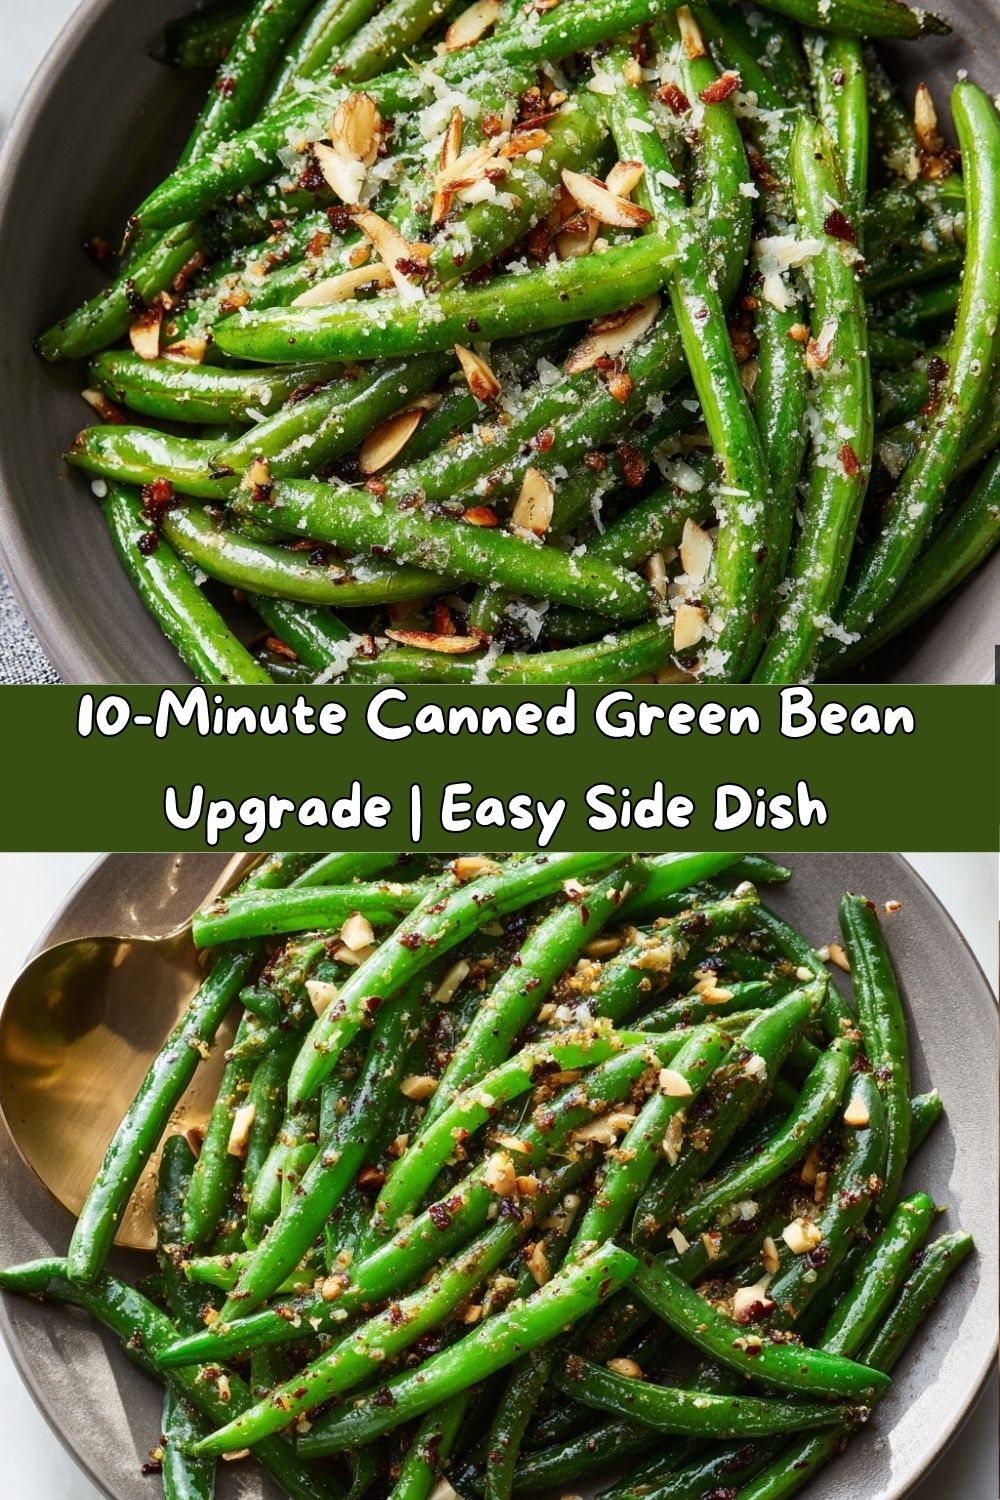
Your New Favorite Side: The 10-Minute Canned Green Bean Upgrade
From Pantry Staple to Party Hero
Hey there, friend! Let’s have a real kitchen chat for a second. We’ve all been there. It’s 5:30 PM, the family is getting hangry, and you’re staring into the pantry abyss, willing a delicious side dish to magically appear. Your eyes land on that humble can of green beans. It’s reliable, it’s easy, but let’s be honest… it can be a little… blah.
What if I told you that in the same 10 minutes it takes to microwave a sad, steamed pile of beans, you could be serving up a buttery, garlicky, perfectly seasoned sensation that has everyone asking for seconds? This isn’t just a recipe; it’s a kitchen revolution. We’re taking that trusty canned workhorse and giving it a glow-up so spectacular, it might just upstage the main course.
I’m all about recipes that are fun, flavorful, and totally doable, and this one is the undisputed champion of busy weeknights. With a few simple pantry staples and a hot skillet, we’re transforming the ordinary into the extraordinary. So, grab that can opener and let’s make some magic happen together. Your taste buds (and your busy schedule) will thank you.
A Can of Beans and a Whole Lot of Love
This recipe takes me right back to my grandma’s kitchen. It wasn’t a fancy, five-star affair, but it was always filled with the most incredible smells. She was the queen of making something out of nothing. One evening, I was “helping” her get dinner ready (which mostly meant licking the spoon from the mashed potatoes), and I watched her take a simple can of green beans and perform what my kid-self thought was pure wizardry.
With a generous slab of butter and a fearless shake of her mysterious seasoning tin, she turned those pale, watery beans into a vibrant, savory dish that I couldn’t get enough of. She’d always wink and say, “Emily, a little love is the best ingredient you’ve got.” That lesson stuck with me. It’s not about the fanciest ingredients; it’s about the intention you put into them. This recipe is my modern, slightly spiced-up homage to her—a quick pour of love for any night of the week.
Gathering Your Flavor Arsenal
Here’s the beautiful part: you probably have most of this already. This is where we build the flavor foundation!
- 2 cans (15 oz each) Green Beans, drained and rinsed: This is our star! Draining and rinsing is crucial—it washes away that super-salty canning liquid, giving us a clean slate for our own delicious seasonings.
- 2 tbsp Olive Oil: We’re using this along with the butter to create our cooking base. The oil raises the smoke point of the butter, preventing it from burning while we get a nice sauté on the beans. Extra virgin olive oil adds a lovely fruitiness.
- 4 tbsp (½ stick) Butter: This is where the rich, decadent flavor comes in. Butter makes everything better, and it creates a luxurious sauce that clings to every bean. For a dairy-free version, a high-quality vegan butter works wonderfully.
- 1 tsp Onion Powder & ½ tsp Garlic Powder: Our dynamic duo of flavor! These powders dissolve perfectly into the buttery sauce, giving us a consistent, all-over savoriness without the chopping. It’s the ultimate weeknight hack.
- ½ tsp Salt & ½ tsp Black Pepper: The essential seasonings! We’re starting with this amount, but you are the boss of your beans. Always taste and adjust at the end.
- ½ tsp Red Pepper Flakes (optional): My little chef’s secret for a touch of warmth. It doesn’t make the dish spicy, per se, just gives it a lovely, subtle kick that wakes up all the other flavors. Highly recommended!
Let’s Get Cooking: Your 10-Minute Countdown
Ready? This is where the magic happens. Put on your favorite apron (the messy one is always the best), and let’s do this!
- Heat the Pan: Grab a large skillet and place it over medium heat. Add the olive oil and butter. We’re letting them melt and mingle together. You’ll know it’s ready when the butter is foaming slightly and the whole kitchen starts to smell like a dream. Chef’s Tip: Don’t crank the heat to high! We want to gently toast the beans and infuse the flavors, not burn the butter.
- Sauté the Beans: Carefully add your drained and rinsed green beans to the skillet. They might sizzle—that’s the sound of flavor being made! Cook them for 5-7 minutes, stirring occasionally. We’re looking for them to get heated through and for some of them to pick up a little golden-brown color. This caramelization is pure flavor gold. Chef’s Tip: Don’t overcrowd the pan. If your skillet is on the smaller side, cook one can at a time for the best browning.
- The Flavor Shower: Now, sprinkle in all your seasonings—the onion powder, garlic powder, salt, black pepper, and those optional red pepper flakes. Stir everything around so that every single bean gets coated in that beautiful, buttery, seasoned goodness. If you’re using any of the instant flavor twists from the list below (like lemon zest or parmesan), add them now too.
- The Final Dance: Let the beans cook for another 1-2 minutes. This short time allows the seasonings to “bloom” and really bond with the beans and butter. Give one a taste. Need more salt? More pepper? Now’s the time to adjust!
- Finish and Serve: Take the skillet off the heat. If you’re using a crunchy topping like toasted almonds or bacon bits, now is the moment to scatter them generously over the top. This adds a fantastic contrast in texture. Serve immediately while they’re hot and glorious!
Plating Your Masterpiece
How you serve these beans can make them feel even more special! For a family-style dinner, I love pouring them directly into a warm, colorful serving bowl, making sure to get all that delicious buttery sauce from the bottom of the pan. The vibrant green against a white or rustic ceramic bowl just pops.
If you’re plating individual servings, use a pair of tongs to create a neat, elegant little bundle on the side of the plate next to your main. Drizzle a little extra sauce over the top and don’t be shy with those crunchy toppings—they’re the jewel on the crown! These beans are the ultimate team player. They pair beautifully with a simple roasted chicken, a juicy steak, a pile of creamy mashed potatoes, or even alongside weeknight pasta. They bring a bright, savory element that ties the whole plate together.
Make It Your Own: Endless Flavor Twists
The fun doesn’t stop here! This recipe is a blank canvas for your culinary creativity. Here are a few of my favorite ways to mix it up:
- The Bright & Zesty: Stir in 1 tsp of fresh lemon zest and a squeeze of lemon juice right at the end. The acidity cuts through the richness of the butter and makes the whole dish taste incredibly fresh.
- The Cheesy Comfort: As you take the pan off the heat, sprinkle in 1 tbsp of grated parmesan cheese. Let it melt into the buttery sauce for a salty, umami-packed treat. Pecorino Romano also works amazingly well here.
- The Umami Bomb: Swap out 1 tsp of the salt and add 1 tsp of soy sauce or Worcestershire sauce with the other seasonings. This adds a deep, savory, complex flavor that is absolutely addictive.
- The Crunchy Upgrade: Top your finished beans with 2 tbsp of toasted slivered almonds or crunchy bacon bits. The textural contrast between the tender beans and the crunchy topping is a game-changer.
- The Herbaceous Garden: In the last minute of cooking, stir in a tablespoon of freshly chopped herbs like dill, parsley, or chives. It adds a beautiful color and a burst of fresh flavor.
From My Kitchen to Yours
I can’t tell you how many times this recipe has saved my dinner plans. It’s evolved from my grandma’s simple butter-and-salt version to my own “what’s-in-the-pantry?” experiments. One night, I accidentally added a splash of soy sauce instead of Worcestershire (those bottles look similar in a dim pantry!), and a new family favorite was born.
The beauty of this dish is its flexibility. It’s a forgiving recipe that encourages you to play. Don’t have onion powder? Use a pinch of celery salt. No red pepper flakes? A dash of smoked paprika is fantastic. Treat this less like a rigid formula and more like a trusted friend you can always count on, no matter what.
Your Questions, Answered!
Let’s tackle some common questions so you can cook with total confidence.
- Can I use frozen green beans instead? Absolutely! You’ll get the best results if you thaw the frozen beans first and pat them very dry with a paper towel. This prevents them from steaming and getting soggy in the pan, allowing them to get that nice sautéed texture.
- My beans turned out a bit watery. What happened? This usually means we didn’t get enough water evaporated off. Next time, make sure to drain and rinse the canned beans very well. You can even let them sit in the colander for a minute or two. Also, ensure your pan is hot enough before adding them so the water sizzles and cooks off quickly.
- Can I make this ahead of time? You can! While they are truly best served immediately, you can make them up to a day ahead. Store them in an airtight container in the fridge and gently reheat in a skillet over medium heat. The texture will be a little softer, but the flavor will still be great.
- Is there a way to make this recipe vegan? Yes, and it’s delicious! Simply swap the butter for your favorite plant-based butter alternative. Just make sure it’s one that browns well for that rich, buttery flavor.
A Note on Nourishment
I believe food should feed both the body and the soul, and it’s great to know what’s going into our meals! This green bean upgrade is a fantastic way to get a serving of vegetables in a way that feels indulgent. Green beans themselves are a low-calorie food packed with fiber, Vitamin C, Vitamin K, and folate.
The majority of the fat and calories in this dish come from the heart-healthy olive oil and butter, which we use to carry all that amazing flavor. By controlling the salt ourselves (instead of relying on the canning liquid), we also keep the sodium in a much better place. It’s a side dish that brings joy to the table without any guilt. Remember, these are estimates and can vary based on the specific brands you use and any customizations you make.
Your New Go-To Side is Ready!
And there you have it! You’re now armed with the secret to turning a humble can of green beans into a side dish that deserves a standing ovation. This recipe is proof that you don’t need hours or expensive ingredients to put a delicious, home-cooked, and seriously satisfying meal on the table.
I hope this becomes a trusty, grease-splattered favorite in your kitchen, just like it is in mine. The next time you see that can in your pantry, I want you to smile, knowing you’re just 10 minutes away from something truly tasty.
I’d love to hear how you make it your own! Did you add the lemon? Go crazy with the parmesan? Tag me on social @TastyChow so I can see your creations. Now, go forth and chow down!
With love and a full skillet,
Emily