The Snack Mix That Will Steal Your Heart (And Your Afternoon)
Hey there, friend! Let’s be real for a second. We’ve all been there. It’s 3:17 PM. Your stomach lets out a tiny, dramatic growl. You’re not looking for a full meal, but you need something. Something crunchy. Something with a little sweetness, a little saltiness, and a whole lot of personality. You open the pantry and stare, hoping for inspiration to strike. But all you see are the same old bags of chips and lonely boxes of cereal.
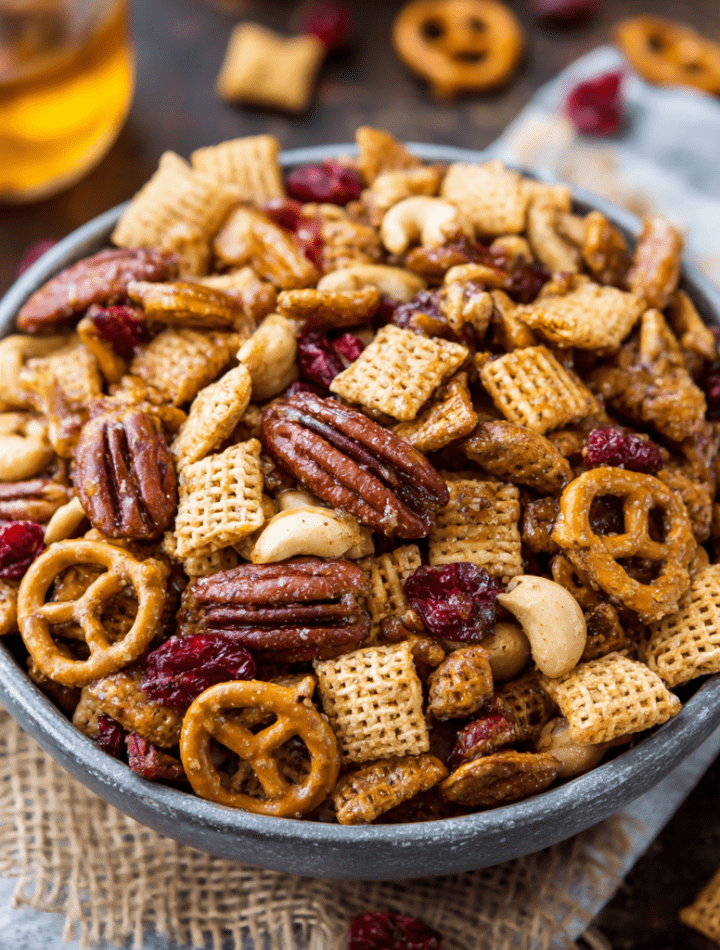
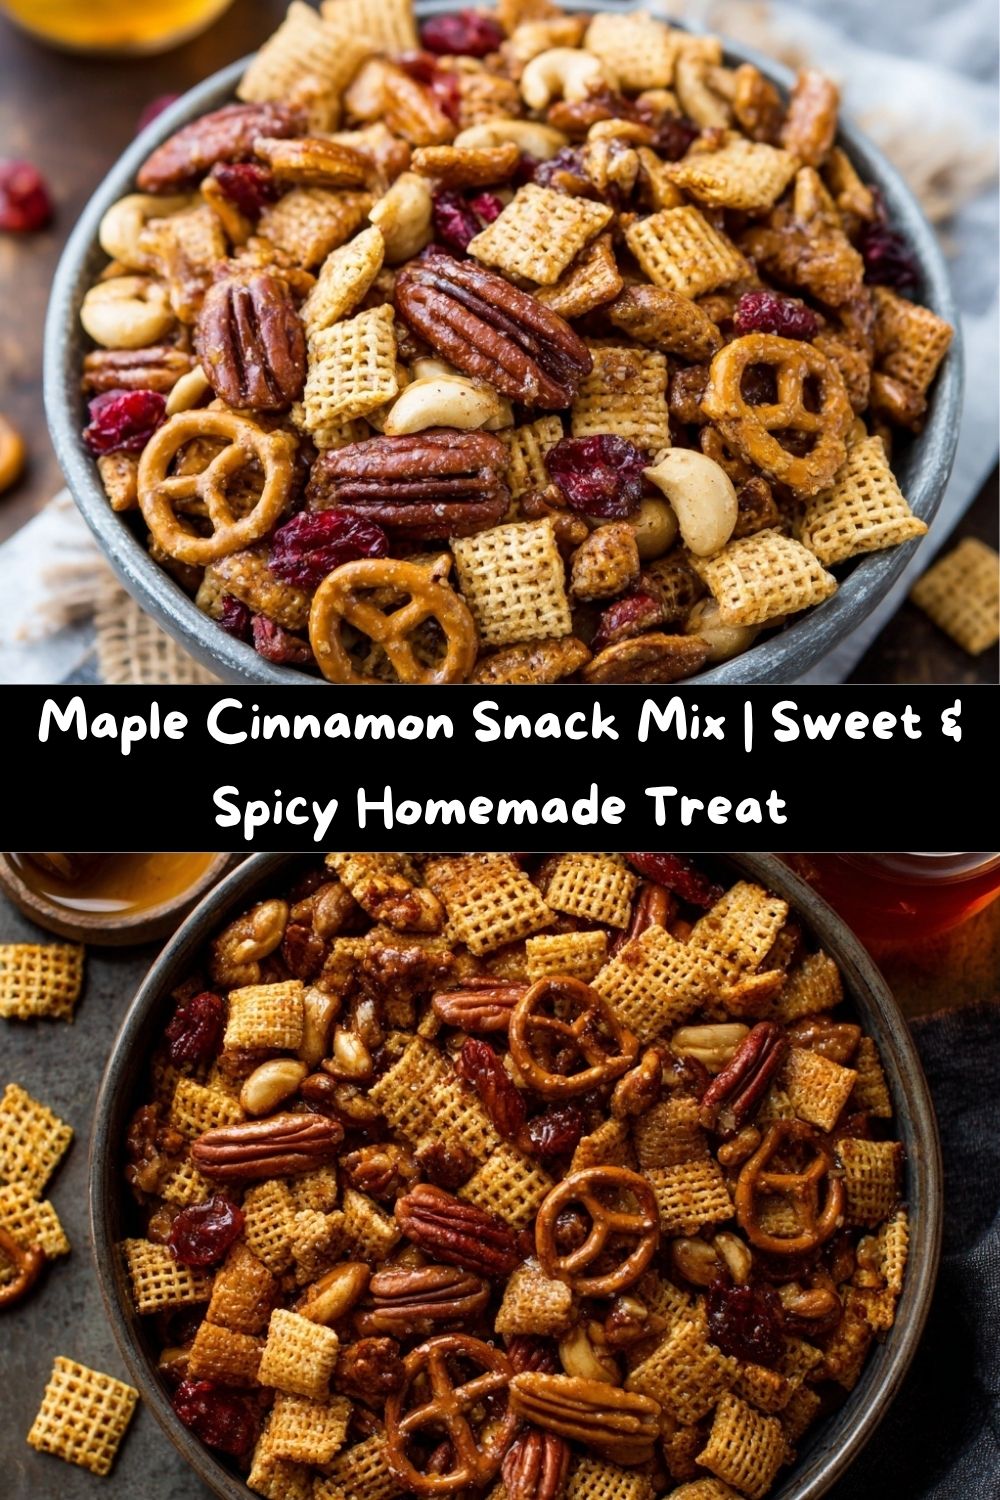
Well, I’m here to rescue your snack time. I’m talking about my Maple Cinnamon Snack Mix – a cozy, crave-worthy, and totally addictive blend that’s about to become your new best friend. This isn’t just a snack; it’s a mood. It’s the perfect balance of buttery pretzels, toasty nuts, and crispy cereal, all wrapped up in a warm, sweet-and-spicy maple cinnamon glaze that toasts up to a beautiful, golden crunch.
I make big batches of this stuff weekly. It’s my go-to for movie nights, my secret weapon for last-minute hostess gifts, and my trusty sidekick for long afternoons of recipe testing. It’s the kind of snack that makes people hover around the bowl, trying to pick out all the pecans (we all have that friend, and it might be me). So, tie on your favorite apron—the one with the cute pockets, you know the one—and let’s make something incredibly delicious together.
A Pinch of Nostalgia: Where This Recipe Really Came From
This recipe feels like a warm hug from my past. It all started in my Grandma’s kitchen, a place that always smelled like ginger and forgiveness. She was the queen of “clearing out the pantry.” Every few weeks, she’d pull out every half-empty bag of nuts, the last cup of cereal, and the straggler pretzels from the bottom of the bag. With a wink, she’d call it her “Kitchen Sink Special.”
She didn’t have fancy maple syrup; she’d use a simple butter and sugar syrup. But the magic was in the toasting. That incredible, nutty aroma filling her sunny kitchen is a core memory for me. I’ve taken her brilliant “waste-not, want-not” spirit and given it a little Chef Emily upgrade with pure maple syrup and a more intentional blend of warm spices. Every time I pull a tray of this snack mix out of the oven, I’m ten years old again, sitting at her formica table, waiting for the “good bits” to cool down enough to eat. It’s more than a snack; it’s a delicious little time machine.
Gathering Your Cast of Crunchy Characters
This is the fun part! The beauty of a snack mix is its flexibility, but let’s start with the dream team lineup. Here’s what you’ll need to create this magic.
- 3 cups rice or corn cereal squares (like Chex): These are the light, crispy foundation. They have tons of nooks and crannies to catch the glaze. Chef’s Insight: I love a mix of both corn and rice Chex for a more dynamic texture and color!
- 2 cups pretzels: They bring the essential salty contrast and a sturdy crunch. I like the classic mini twists, but sticks or even tiny pretzel squares work great.
- 1 cup pecans: Their rich, buttery flavor is a match made in heaven with maple. If you’re not a pecan person, more almonds or walnuts are a fine swap.
- 1 cup almonds: I like using whole raw almonds for a hearty crunch. They toast up beautifully in the oven.
- ½ cup walnuts: These add a slightly more robust, earthy flavor. Feel free to use all one type of nut if that’s what you have on hand!
- ⅓ cup pure maple syrup: This is the star, so please use the real stuff! The deep, complex flavor of pure maple syrup is irreplaceable. The imitation pancake syrup will make the mix overly sweet and sticky.
- ¼ cup brown sugar: This works with the maple to create a deeper, caramel-like sweetness and helps create that gorgeous, crackly coating.
- 4 tablespoons unsalted butter: Butter is the vehicle for our flavors and gives the glaze its rich, luxurious mouthfeel. Using unsalted lets you control the final salt level.
- 1½ teaspoons ground cinnamon: The warm, cozy spice that defines this mix. Don’t be shy with it!
- ½ teaspoon salt: This is crucial for balancing all that sweetness. It makes the flavors pop!
- Optional twist: A tiny pinch (think 1/8 teaspoon) of cayenne pepper adds a fantastic, subtle warmth that lingers after each bite. And tossing in ½ cup of dried cranberries or cherries after baking gives you little bursts of chewy, tart goodness.
Let’s Get Mixing! Your Step-by-Step Guide to Snack Perfection
Ready? This is where the magic happens. It’s incredibly simple, but a few chef-approved tips will take your snack mix from “good” to “can-you-please-send-me-the-recipe-immediately” great.
- Preheat and Prep: First things first, get that oven preheating to a gentle 300°F (150°C). A lower temperature is key here—it allows the mix to dry out and get crispy without burning the sugar in our glaze. While it’s warming up, line a large, rimmed baking sheet with parchment paper. Chef’s Hack: The rim is important! It keeps all our precious ingredients safely on the tray. The parchment paper is a non-negotiable for easy cleanup. Trust me on this.
- The Big Toss: In a large bowl—and I mean large—combine your cereal, pretzels, and all the nuts. Give them a gentle toss with your hands or a spatula to mingle everyone together. Seeing all that potential crunch in one bowl is already so satisfying, isn’t it?
- Create the Glaze: Now, for the liquid gold. In a small saucepan over medium heat, combine the maple syrup, brown sugar, butter, cinnamon, and salt. Melt it together, stirring frequently with a whisk or silicone spatula. Let it bubble gently for just about a minute once everything is melted. Chef’s Tip: You’ll know it’s ready when it’s smooth, fragrant, and slightly thickened. This quick bubbling helps the sugar fully dissolve and the flavors meld.
- The Coating Ceremony: Working quickly, carefully pour the warm glaze over your dry mix. Immediately start tossing and folding. I like to use a sturdy silicone spatula at first, then I often just get in there with my hands (wearing clean disposable gloves if the glaze is still super hot) to ensure every single piece gets a beautiful, glossy coat. Don’t rush this step! An even coat means every bite is perfect.
- Spread and Bake: Dump your beautifully coated mix onto your prepared baking sheet and spread it out into a fairly even layer. Chef’s Secret: Try not to overcrowd or pile it too high. We want the hot air to circulate and toast everything evenly.
- The Slow Toast: Pop the tray into your preheated oven and bake for 35-40 minutes. Here’s the most important part: you must stir it halfway through! Set a timer for 18 minutes, pull the tray out, and give everything a good shuffle. This prevents the edges from burning and ensures a uniform, golden-brown crispness across the entire batch.
- The Patience Test: When the timer goes off, your kitchen will smell like heaven. The mix will look deep golden and feel dry to the touch. Now, for the hardest part: you have to let it cool completely on the baking sheet. Do not try to eat it while it’s warm! It will be soft and sticky. As it cools, the glaze hardens into that irresistible, snappy crunch we’re after.
How to Serve Your Masterpiece
Okay, it’s cool. It’s crunchy. It’s perfect. Now what? The possibilities are endless!
For a casual snack, I just pour it into a big, beautiful wooden bowl and leave it on the counter. Watch how fast it disappears. For gifting, this stuff is pure gold. I pack it into clear cellophane bags, tie them with a rustic piece of twine or a cute ribbon, and attach a little handwritten tag. It’s the most thoughtful (and delicious) hostess, teacher, or neighbor gift.
Pairing-wise, it’s a dream. A handful of this mix with a hot cup of coffee or a cold glass of milk is my ultimate afternoon ritual. It’s also the star of any party spread. Put it out with cheese boards, next to a punch bowl, or as a pre-dinner nibble to get everyone’s appetites going. It’s the snack that wears many hats, and it wears them all beautifully.
Get Creative! Fun Flavor Twists to Try
Once you’ve mastered the classic, the kitchen playground opens up! Here are a few of my favorite ways to mix things up.
- Salty-Sweet Supreme: Add ½ cup of roasted, salted pumpkin seeds (pepitas) and ½ cup of mini peanut butter chips tossed in after baking. The combo of maple and peanut butter is legendary.
- “Everything Nice” Spice: Along with the cinnamon, add ¼ teaspoon of ground nutmeg and a tiny pinch of ground cloves. It tastes like Christmas in a bowl!
- Tropical Escape: Swap the walnuts for 1 cup of macadamia nuts. After baking, toss in ½ cup of dried coconut flakes and ½ cup of chopped dried mango.
- Double Chocolate Chunk: For the chocoholics! After the mix is completely cool, stir in ½ cup of dark chocolate chunks and ½ cup of white chocolate chips. The residual heat might melt them a little, creating delicious chocolate streaks.
- Vegan-Friendly Version: This is an easy one! Simply swap the butter for a high-quality vegan butter stick (they melt and behave just like dairy butter). And just like that, it’s plant-based perfection.
From My Kitchen to Yours: A Few Parting Thoughts
This recipe has evolved so much from my Grandma’s original “clear-out-the-pantry” special. I’ve learned a few things along the way. For instance, I once tried to rush the cooling process by putting the warm tray on a cold stovetop. The result was a sticky, chewy mess that welded itself to the parchment paper. We had to literally break it apart with a knife! So, learn from my mistakes—patience is a key ingredient here.
I also love how this recipe is a living thing in my kitchen. Sometimes I add a big spoonful of orange zest to the glaze for a bright, sunny note. Other times, I’ll use smoked almonds for a deeper, almost savory undertone. Don’t be afraid to make it your own. That’s the true joy of cooking.
Your Questions, Answered!
Over the years, I’ve gotten a few repeat questions about this snack mix. Here are the answers to help you nail it every single time.
Q: My snack mix turned out sticky, not crunchy. What did I do wrong?
A: The most common culprit is not letting it cool completely on the baking sheet. It will crisp up as it cools! If it’s still sticky after cooling, it might have been slightly under-baked. Next time, add another 5 minutes to the baking time, and make sure you’re stirring halfway through for even cooking.
Q: Can I make this ahead of time? How do I store it?
A: Absolutely! This is a fantastic make-ahead snack. Once completely cool, store it in an airtight container at room temperature. It will stay perfectly crisp for up to 2 weeks! If you live in a humid climate, you might want to add a small food-safe silica gel packet to the container to keep extra moisture at bay.
Q: I want to make a big batch for a party. Can I double the recipe?
A: You can, but here’s my pro-tip: use two baking sheets. It’s essential that the mix is spread in a single, even layer. If you pile it too high on one sheet, it will steam instead of toast, and you’ll end up with a soggy, not crunchy, mix. So, double the ingredients, but divide them between two trays. You’ll just need to rotate the trays in the oven halfway through baking.
Q: Are there any nut-free substitutions?
A> Of course! For a nut-free version, simply replace the 2.5 cups of nuts with an equal amount of other crunchy things. I love using a combo of more cereal, pretzels, roasted chickpeas, sunflower seeds, and even bagel chips broken into pieces.
A Quick Note on Nutrition
While this is definitely a treat, it’s made with wholesome ingredients that offer more than just empty calories. Let’s break it down a bit. The nuts are a fantastic source of healthy fats, protein, and fiber, which help keep you feeling satisfied. Pure maple syrup contains antioxidants and minerals like manganese and zinc, unlike refined white sugar. And because we’re toasting everything, we’re not deep-frying, which keeps the overall fat content in check.
As a general guide, a serving (about ½ cup) has approximately:
Calories: ~230 | Fat: 14g | Carbs: 22g | Sugar: 10g | Protein: 4g | Sodium: ~140mg
Remember, this is a snack meant to be enjoyed mindfully. A little goes a long way in satisfying those crunchy, sweet-and-salty cravings!
Your New Go-To Snack Awaits
And there you have it! My everything-you-could-possibly-need guide to creating the most addictive, delicious, and shareable Maple Cinnamon Snack Mix. This recipe is a testament to the fact that the best food often comes from a place of love, nostalgia, and a little bit of kitchen creativity.
I truly hope this recipe finds its way into your regular rotation and creates some happy, crunchy memories of your own. When you make it, I’d be absolutely thrilled if you tagged me on social @TastyChow so I can see your beautiful creations! Now, go forth, make a mess, and enjoy every last bite.
With a full heart and a happy crunch,
— Emily