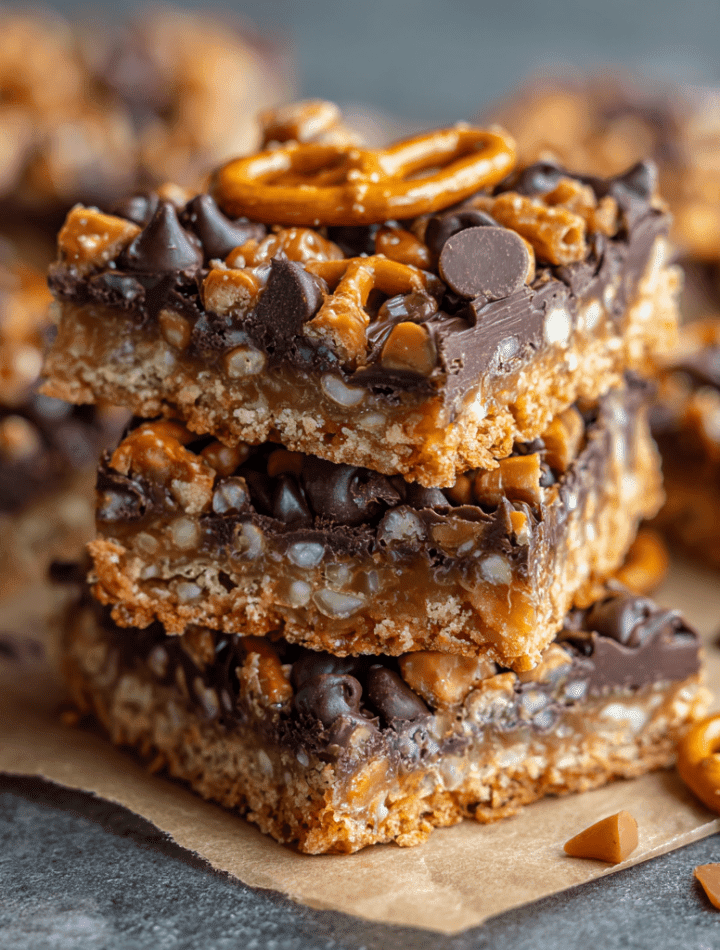
Caramel Pretzel Crack Bars – Easy No-Fail Dessert with Sweet and Salty Crunch
Hey there, my fellow flavor fanatic! Let’s talk about a little magic trick I like to keep up my apron sleeve. It’s a recipe so dangerously delicious, so utterly moreish, that it has literally caused a flurry of “OMG, WHAT IS THIS?!” texts among my friends. I’m talking about my legendary Caramel Pretzel Crack Bars.
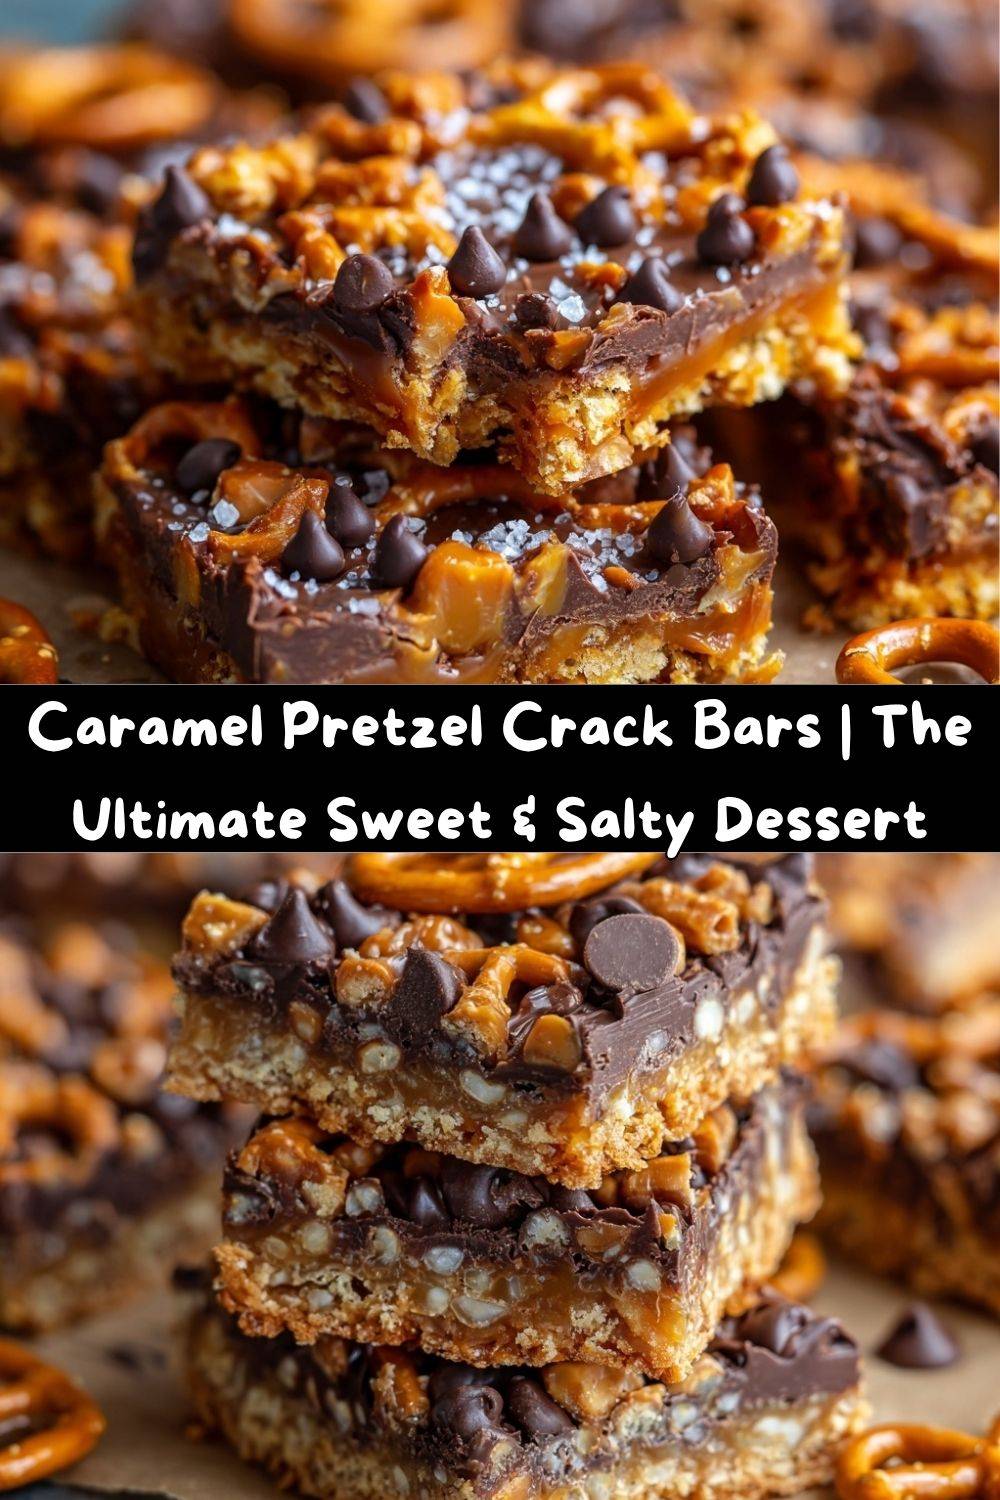
Now, I know the name “Crack Bar” is a bit bold, but trust me, it’s earned. These bars are the holy grail of no-fuss desserts. We’re talking about a crispy, salty pretzel base, smothered in a rich, buttery homemade caramel, and finished with a blanket of melty chocolate. The contrast of sweet and salty isn’t just a trend; it’s a full-blown love affair for your taste buds, and these bars are the ultimate celebration.
I’ve made these for everything from last-minute potlucks to fancy holiday parties, and the reaction is always the same: pure, unadulterated joy. People can’t quite figure out how something so simple can be so spectacularly addictive. The best part? You probably have most of the ingredients in your pantry right now. So, tie back your hair, preheat that oven, and let’s create a little kitchen magic that will make you a certified snack hero.
The Great Bake Sale Debacle of 2015
I’ll never forget the first time I truly understood the power of these bars. It was for my daughter’s school bake sale. I, the culinary school graduate, had spent hours on delicate French macarons and intricate palmiers. And what was the star that sold out in under ten minutes? A pan of these humble, chunky, gloriously imperfect Caramel Pretzel Bars.
A sweet little boy, clutching a dollar bill, looked up at me and said, “My mom says I have to try the ‘crack thingy’.” We both laughed, but it was a lightbulb moment. It wasn’t about being the most technically perfect dessert; it was about the feeling. The sheer, unapologetic joy of that first crunchy, chewy, chocolatey bite. It reminded me of my grandma’s kitchen—not fancy, but always full of the most soul-satisfying treats. That’s the spirit I want to bring to your kitchen. Perfection is overrated; flavor is forever.
Gathering Your Sweet and Salty Squad
Here’s your shopping list for sheer deliciousness! This is where the fun begins. Let’s break down the cast of characters that make this recipe sing.
- 2 cups pretzel sticks, crushed: I love using sticks for an easy, even crush, but any pretzel shape works! The saltiness is the star here, cutting through the sweetness. Chef’s Insight: Don’t pulverize them into dust! We want a variety of textures, from fine crumbs to small chunks, for that satisfying crunch.
- 1 cup unsalted butter: This is the foundation of our caramel, so use the good stuff! Unsalted lets you control the final salt level. Substitution Tip: If you only have salted butter, that’s totally fine! Just reduce or omit any additional salt you might add later.
- 1 cup packed brown sugar: Pack it firmly into your measuring cup! The molasses in the brown sugar gives our caramel a deep, complex flavor and that gorgeous chewy texture. Light or dark brown sugar works—dark will give you a richer, more caramel-like taste.
- 1/2 teaspoon vanilla extract: A splash of vanilla is the secret weapon that rounds out all the flavors and adds a warm, aromatic note. It’s the hug in the middle of all that salty-sweet intensity.
- 1 1/2 cups semi-sweet chocolate chips: The classic choice for a perfect balance. They aren’t too sweet, which lets the caramel and pretzel shine. Chef’s Insight: The heat from the caramel layer will melt the chips perfectly, creating a dreamy, spreadable chocolate blanket.
- 1/2 cup toffee bits or chopped caramel candies (optional): This is where you can get creative! Toffee bits add a fantastic buttery crunch, while soft caramel candies create delightful chewy pockets. This is optional, but highly recommended for an extra layer of texture and decadence.
Let’s Build Some Magic: Step-by-Step
Ready? This is the fun part. I’ll walk you through each step, sharing all my messy-kitchen secrets to ensure your bars are absolutely perfect.
- Preheat and Prep: First things first, get that oven heating to a cozy 350°F (175°C). Now, grab your 9×13-inch baking pan. This is my #1 pro-tip: line it with parchment paper, leaving some overhang on the sides. This isn’t just for easy cleanup (though that’s a huge bonus!); it’s your golden ticket to lifting the entire slab of bars out of the pan for pristine, crack-free slicing later. Trust me on this!
- Create Your Crunchy Base: Take your crushed pretzels and scatter them evenly across the bottom of your prepared pan. You don’t need to press them down firmly—just a gentle, even layer. We want the caramel to seep into all the nooks and crannies, creating a cohesive base without making it too dense.
- Conjure the Caramel: This is the only part that requires your full attention, but it’s easier than you think! In a medium saucepan over medium heat, combine the butter and packed brown sugar. My key hack: stir it constantly with a wooden spoon or heatproof spatula. You’ll watch it go from grainy to smooth and bubbly. Once it comes to a full, rolling boil, set a timer for 3 minutes and let it bubble away without stirring. This is crucial for the caramel to thicken slightly. You’ll see it darken a shade and smell like buttery heaven. Remove it from the heat and immediately stir in that glorious vanilla extract. It might bubble up—that’s a good sign!
- The Great Pour: Working quickly but carefully (that caramel is hot!), pour the mixture evenly over the pretzel base. Use a spatula to gently guide it into all the corners. Don’t worry if it doesn’t cover every single pretzel speck—it will settle as it bakes.
- Bake and Melt: Pop the pan into your preheated oven and bake for 10 minutes. You’ll see the caramel bubbling enthusiastically. When you pull it out, immediately sprinkle the entire surface with the chocolate chips. Walk away for 2-3 minutes. Let the residual heat work its magic, softening the chips until they’re glossy and ready to be spread. Then, take a spatula and gently swirl the melted chocolate into a smooth, even layer.
- Top, Chill, and Set: This is your final flourish! While the chocolate is still soft, sprinkle on your toffee bits or an extra pinch of crushed pretzels for looks and texture. Now, the hardest part: patience. Let the pan cool completely on a wire rack, then transfer it to the refrigerator for at least one hour (or up to two) to fully set. This ensures you get clean, sharp cuts and that perfect snap when you bite into them.
- Slice and Celebrate: Using the parchment paper sling, lift the entire block of deliciousness out of the pan and onto a cutting board. Use a sharp knife to slice them into bars or squares. Wiping the knife between cuts gives you the cleanest edges. Then, all that’s left to do is serve them up and wait for the applause!
How to Serve These Show-Stopping Bars
You can absolutely just grab a bar and run (no judgment here!), but if you want to make them extra special for a gathering, here are a few of my favorite ways to present them.
For a party platter, I love cutting them into smaller, bite-sized squares and arranging them on a beautiful slate board or a vintage cake stand. They look stunning next to other treats like mini cheesecakes or fruit tarts. The contrast is gorgeous!
If you’re gifting them (and what a wonderful gift they make!), stack them in a cellophane bag tied with a rustic ribbon, or layer them in a festive tin between sheets of parchment paper. They travel like a dream.
And for the ultimate at-home experience? Serve a slightly chilled bar alongside a scoop of high-quality vanilla bean ice cream. The cold, creamy ice cream against the crunchy, cool bar is a textural masterpiece. It’s a dessert that truly has it all.
Make It Your Own: Delicious Twists & Swaps
One of the best things about this recipe is its versatility. Feel like playing? Here are some of my favorite riffs on the classic:
- The Peanut Butter Paradise: Swap the semi-sweet chocolate chips for peanut butter chips, or drizzle melted peanut butter over the chocolate layer before adding the toffee bits. It’s a Reese’s Cup lover’s dream come true.
- The White Chocolate Wonder: Use white chocolate chips instead of semi-sweet and sprinkle with dried cranberries or chopped pistachios for a festive, colorful, and wonderfully sweet-tart bar.
- The “Everything but the Kitchen Sink”: Go full trail mix! Fold a handful of mini marshmallows, chopped nuts (pecans are divine!), and even a few potato chips in with the pretzel base for an epic sweet-and-salty bomb.
- The Sea Salt Sophisticate: After you spread the chocolate, give the top a very light sprinkling of flaky sea salt (like Maldon). It amplifies the salty notes and makes the whole thing feel incredibly gourmet.
- Gluten-Free Friendly: This is an easy one! Simply use your favorite certified gluten-free pretzels, and ensure your other ingredients (like toffee bits) are GF. The method stays exactly the same.
Emily’s Kitchen Confessions
I’ll let you in on a secret: this recipe was born from a “clean out the pantry” moment. I had a bag of pretzels that had gone a little stale, half a bag of chocolate chips, and a serious craving. The first version was… well, let’s just say I learned the hard way that you MUST let the caramel boil for the full three minutes. The first batch was a delicious but soupy mess! Over the years, I’ve added the vanilla, played with toppings, and perfected the chill time. It’s a living recipe, and I encourage you to make it your own. The biggest lesson? The messier your hands get making these, the better they taste. It’s a scientific fact. (Okay, it’s not, but it should be.)
Your Questions, Answered!
I’ve gotten a lot of questions about these bars over the years, so here are the answers to the most common head-scratchers.
- Q: My caramel seperated/got greasy. What happened? A: This usually means the heat was a bit too high, causing the butter to separate from the sugar. Don’t panic! It will still taste amazing, but the texture might be a little off. Next time, use a medium heat and stir constantly until it boils, then stop stirring for the 3-minute boil.
- Q: Can I use store-bought caramel instead? A: You can! For a super quick version, you can melt down about 40-50 store-bought soft caramels with a tablespoon or two of cream or milk until smooth, then pour that over the pretzels. Skip the baking step, top with chocolate, and just let the residual heat melt it. It’s a great shortcut, though I adore the flavor of the homemade version.
- Q: How should I store these, and how long do they last? A: Always store them in an airtight container in the refrigerator. They are best enjoyed within 5-7 days. The cold keeps the chocolate firm and the bar perfectly snappy. You can also freeze them for up to 3 months! Just thaw in the fridge before serving.
- Q: My chocolate didn’t melt enough to spread. Help! A: No worries! Just pop the pan back into the warm (but turned off) oven for another minute. Or, you can use a hairdryer on a low setting to gently warm the chocolate until it’s spreadable. Easy fix!
A Little Note on Nutrition
Let’s be real, friends: these are a treat, through and through. I’m a big believer in enjoying indulgent food joyfully and without guilt. Each bar is a rich, satisfying bite. The estimated nutritional info per bar (based on 24 bars) is around 200 calories, with 12g of fat, 22g of carbs, 15g of sugar, and 2g of protein. The pretzels provide a little iron, and the joy they bring is 100% calorie-free! As always, these are estimates, and the best recipe is one that brings a smile to your face and your loved ones’ faces. Enjoy every single bite.
Go Forth and Create Deliciousness!
And there you have it! My not-so-secret, totally addictive recipe for Caramel Pretzel Crack Bars. This is more than just a dessert; it’s a conversation starter, a memory maker, and a guaranteed way to bring a little bit of messy, joyful, and incredibly delicious fun into your kitchen.
I hope you feel empowered to whip up a batch, to get your hands a little dirty, and to share them with someone you love. Remember, the best recipes aren’t about perfection—they’re about the connection and the sheer pleasure of a darn good bite.
With love and a full heart (and an even fuller belly),
Emily