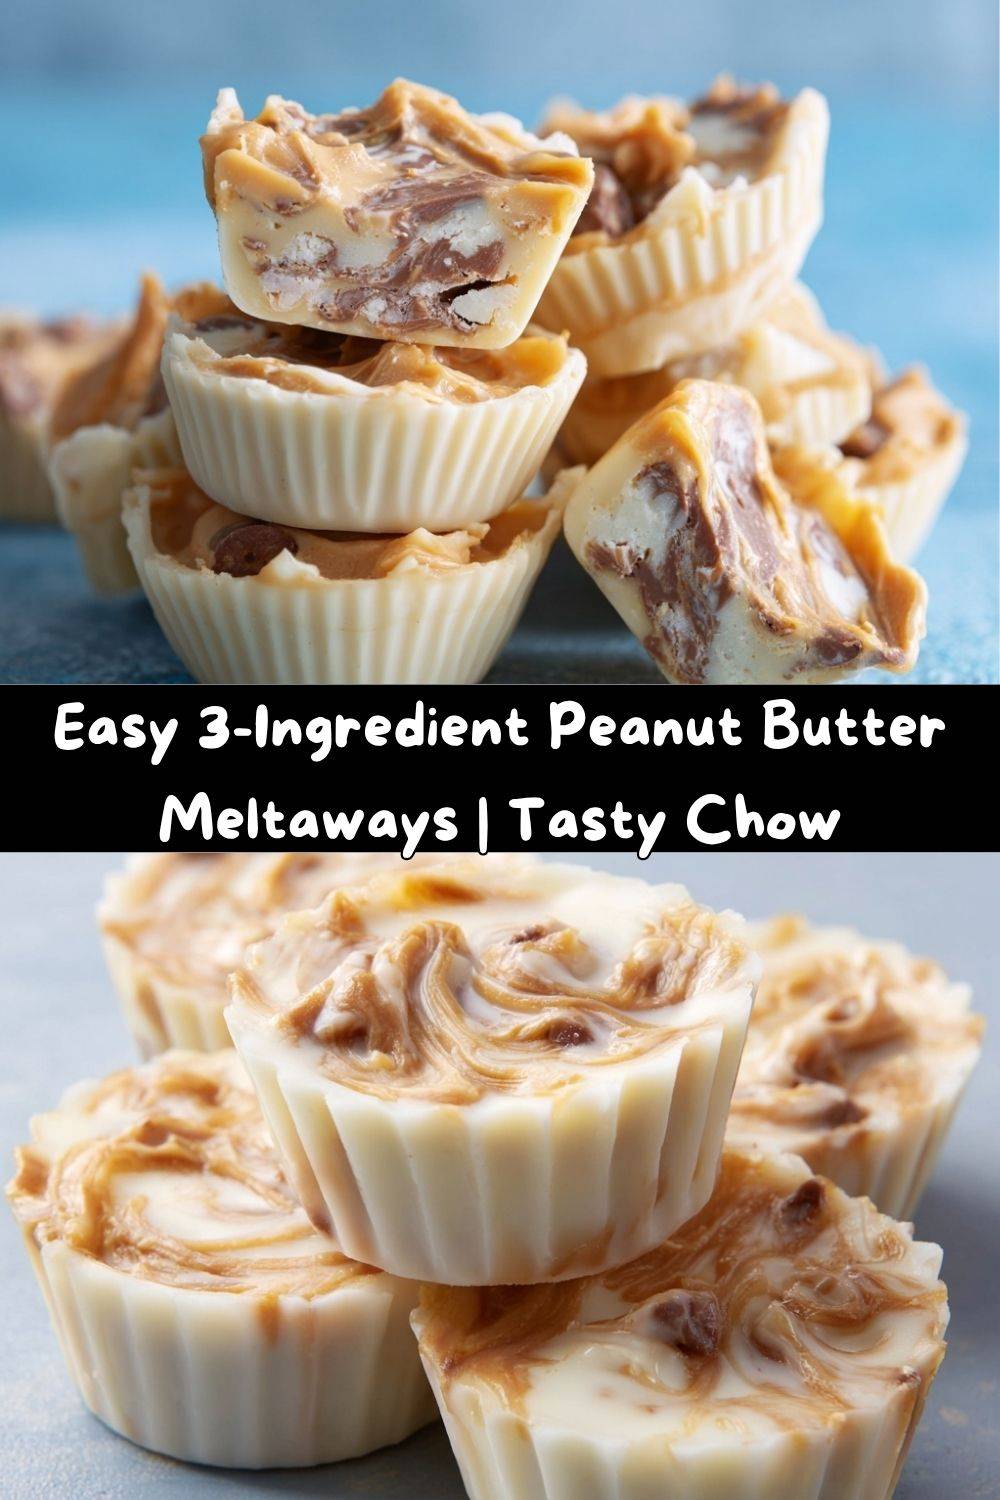
Easy Peanut Butter Meltaways – 3-Ingredient Holiday Candy Recipe
Hey there, friend! Pull up a chair and let’s talk about one of life’s simplest, most joyful pleasures: homemade candy. I’m not talking about the fussy, thermometer-and-prayer kind of confectionery. Oh no. I’m talking about the kind of magic you can whip up in 15 minutes flat, with just three ingredients, that will have everyone convinced you’re a bonafide candy-making genius.
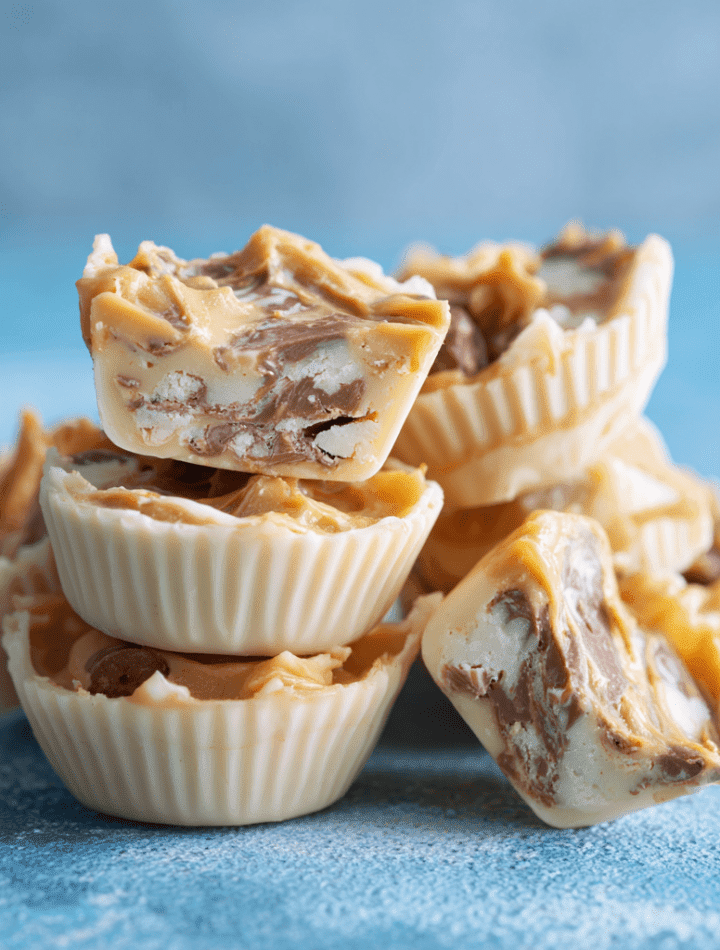
I’m so excited to share my recipe for Peanut Butter Meltaways. Picture this: a perfect, bite-sized piece of candy that holds a silky-smooth, creamy peanut butter heart, all wrapped up in a luxurious swirl of milk and white chocolate. The moment it hits your tongue, it truly does melt away, leaving behind nothing but pure, unadulterated bliss.
These little gems are the superheroes of the holiday season. They’re perfect for gifting, incredible for potlucks, and absolutely essential for those moments when you need to sneak a sweet treat while hiding in the pantry. They’re no-bake, incredibly forgiving, and so much fun to make. So, tie on your favorite apron (the messy one with the fun pattern, of course), and let’s create some sweet, shareable magic together.
The Meltaway That Stole My Heart
My love affair with these meltaways started long before I ever put on a chef’s coat. It was my Aunt Carol, my grandma’s whirlwind of a sister, who first introduced me to them. She’d show up every Christmas Eve, her arms laden with tins, her laugh booming through the house. She wasn’t a precise cook; she was a “pinch of this, dash of that” kind of wizard. But these candies? She made them with a solemn, focused precision that fascinated me.
I’ll never forget the year she let me help. I was maybe eight years old, standing on a step-stool, carefully spooning the glossy, peanut-buttery chocolate into little star-shaped molds. She taught me to tap the tray gently on the counter to release any air bubbles, calling it “waking up the fairies.” As we pulled the set candies from the freezer, watching them pop out perfectly, she’d always say, “Look at that, Em. We just made a little bit of happiness.” That feeling—the joy of creating something beautiful and delicious to share—is the very heart of this recipe for me. Every time I make them, I think of her, and I hope you’ll make your own sweet memories with them, too.
Gathering Your Magical Trio
See? I told you it was simple! Just three powerhouse ingredients come together to create pure magic. Here’s what you’ll need and my best chef-y insights for each one.
- 1.5 lbs Milk Chocolate Chips or Chopped Milk Chocolate Bar: This is the base of our flavor, providing that classic, creamy chocolate taste we all adore. Chef’s Tip: While chips are super convenient, if you really want to elevate your meltaways, use a good-quality chocolate baking bar (like Ghirardelli or Baker’s) and chop it yourself. It has a lower cocoa butter content and is specifically formulated to melt and set beautifully. If you’re a dark chocolate fan, feel free to swap this portion out for a semi-sweet or dark chocolate—it creates a wonderful contrast to the sweet peanut butter!
- 1.5 lbs White Chocolate Chips or Chopped White Chocolate: The white chocolate balances the richness of the milk chocolate and gives our meltaways that gorgeous swirled appearance. Heads up! Make sure you’re using real white chocolate, which will list cocoa butter as an ingredient. Avoid “white baking morsels” or “white candy coating” for this recipe, as they don’t melt as smoothly with the other ingredients and can lead to a grainier texture.
- 1 (16 oz) Jar Creamy Peanut Butter: The star of the show! This is what gives our candies that unforgettable, melt-in-your-mouth quality. Pro Insight: I highly recommend using a standard, store-bought creamy peanut butter like Jif or Skippy. Their stabilizers help the candy set up perfectly. Natural peanut butter (the kind you have to stir) can be too oily and might prevent your meltaways from firming up correctly. If you’re dealing with a nut allergy, sunflower seed butter is a fantastic 1:1 substitute that works beautifully!
Let’s Make Some Magic: The Step-by-Step
Ready? This is where the fun begins. I’ll walk you through every step, sharing all my favorite kitchen hacks to ensure your meltaways are absolutely perfect.
- Melt the Chocolate Together. Place both the milk chocolate and white chocolate into a large, heat-safe bowl. Now, you have two options here. The Double Boiler Method is my go-to for maximum control. Simply place the bowl over a pot of gently simmering water (make sure the bottom of the bowl isn’t touching the water!) and stir frequently until smooth. The Microwave Method is quicker: heat in 30-second bursts on medium power, stirring vigorously between each interval. My #1 Tip: Do NOT overheat the chocolate! It’s a delicate diva. If it gets too hot, it can “seize” and become a grainy mess. Low and slow is the name of the game. The residual heat is often enough to finish the melting process as you stir.
- Welcome the Peanut Butter. Once your chocolate mixture is completely smooth and glossy, take it off the heat. Now, dump in that entire, glorious jar of creamy peanut butter. Start stirring! You’ll see the colors start to marble together into a beautiful, creamy dream. Keep stirring until no streaks of peanut butter remain and the whole mixture is homogenous. It will be thick, luscious, and smell like heaven.
- Get Ready to Mold. This is the perfect time to enlist little helpers or just unleash your inner artist. You’ll need silicone candy molds—they’re flexible, non-stick, and make unmolding a breeze. I love using seasonal shapes like trees and snowflakes, but simple rectangles or circles are just as elegant. Kitchen Hack Alert! For the cleanest, easiest filling, transfer your melted mixture into a large squeeze bottle or a piping bag (or even a heavy-duty zip-top bag with a corner snipped off!). This gives you so much more control and makes the process incredibly tidy.
- Fill and Freeze. Carefully pipe or spoon the mixture into each cavity of your mold, filling them to the top. Gently tap the entire mold firmly on the countertop a few times. This releases any trapped air bubbles and ensures a smooth, professional-looking finish on the back of your candies. Once filled, pop the entire tray into the freezer. They’ll set up in just 5-10 minutes! The freezer is key here—it’s much faster than the fridge and gives them the perfect snap.
- The Big Reveal: Unmolding! After their quick chill, pull the molds from the freezer. Now for the truly satisfying part. Flex the silicone mold backwards, and your beautiful, perfect little peanut butter meltaways should just pop right out! If they’re being a little stubborn, give them another minute or two in the freezer.
Sharing the Sweetness: How to Serve & Gift
Okay, you’ve created a masterpiece—now what? The beauty of these candies is in their versatility. For serving at home, pile them high on a beautiful ceramic platter for your holiday party. They look stunning mixed with other cookies and treats.
But where they truly shine is as a homemade gift. Layer them in a cellophane bag tied with a pretty ribbon, or stack them carefully in a decorative tin between layers of parchment paper. I love making a big batch and dividing them into several small tins—one for the mail carrier, one for my kid’s teacher, one for the neighbors. It’s a personal, heartfelt gift that says, “I think you’re wonderful,” in the most delicious way possible. They store beautifully in an airtight container in the refrigerator for up to two weeks (if they last that long!).
Get Creative! Flavor Twists & Swaps
Once you’ve mastered the classic, feel free to play with the formula! Here are a few of my favorite ways to mix things up:
- The Nutty Professor: Swap the creamy peanut butter for crunchy peanut butter for a delightful textural surprise in every bite. You can also use almond butter or cashew butter for a different flavor profile.
- Cookie Dunk Dream: Stir in ½ cup of crushed sandwich cookies (like Oreos) or graham crackers into the melted mixture for a fun, textured candy that tastes like your favorite milkshake.
- Salty-Sweet Supreme: After filling the molds, sprinkle the top of each candy with a tiny pinch of flaky sea salt. This enhances all the flavors and makes them utterly irresistible.
- Festive Confetti: Add a tablespoon of festive sprinkles to the mixture right before molding for a pop of holiday color and fun.
- All-Out Dark Chocolate: For a more sophisticated, less sweet treat, replace both the milk and white chocolate with high-quality dark chocolate chips or bars. The intense cocoa flavor paired with the peanut butter is a match made in heaven.
Chef Emily’s Corner: Notes from My Kitchen
This recipe has been a part of my life for so long, it’s practically a member of the family. Over the years, I’ve learned a few things. The first time I made them by myself, I was so impatient I didn’t let the chocolate melt all the way. I had tiny, unmelted chip chunks in my final candy! Not the end of the world, but a good lesson in patience.
I’ve also found that this recipe is incredibly forgiving. If your mixture seems too thick to pipe, you can let it sit in a warm spot for a minute or two to loosen up. If it’s too thin, a few minutes in the fridge will thicken it right up. The goal is a smooth, pipeable consistency that’s not runny. Most of all, have fun with it! Cooking is about joy, not perfection. If a few end up lopsided, consider it a chef’s treat and eat them immediately for quality control.
Your Questions, Answered!
Let’s tackle a few common questions to make sure your candy-making is stress-free.
- Q: My chocolate got thick and clumpy after I melted it! What happened?
A: Ah, you’ve encountered “seized” chocolate. This usually happens if a tiny bit of steam or water got into the chocolate during melting. Don’t panic! You can often save it by vigorously stirring in a teaspoon of neutral oil (like vegetable or coconut oil) at a time until it becomes smooth again. - Q: Can I use natural peanut butter?
A: I don’t recommend it for this specific recipe. Natural peanut butters tend to be much oilier and can separate, leading to a greasy candy that doesn’t set properly. The stabilizers in conventional creamy peanut butter are your friend here, helping to create that perfect, creamy texture. - Q: How long do these last, and how should I store them?
A: These meltaways are best stored in an airtight container in the refrigerator. They’ll keep their perfect texture and flavor for up to two weeks. You can also freeze them for up to three months! Just let them thaw in the fridge before serving. - Q: I don’t have candy molds. What can I use instead?
A: No problem! You can line an 8×8 or 9×9 inch baking pan with parchment paper and spread the entire mixture in evenly. Once set, you can lift the whole slab out and cut it into small squares with a sharp knife.
A Quick Nutritional Glance
Now, we all know these are a treat, and that’s exactly what they should be—enjoyed mindfully and with delight! Here’s a basic breakdown per piece (based on a batch of 100), but please remember this is just an estimate as ingredients can vary.
Estimated Per Piece: Calories: ~90 | Fat: 6g | Carbs: 7g | Protein: 2g
The primary ingredients are chocolate and peanut butter, so these are an energy-dense treat. The fats come from the cocoa butter in the chocolate and the natural oils in the peanut butter. They are a wonderful source of a little quick energy and joy! As with all good things, the secret is in the portion. One or two of these rich, satisfying candies is often all you need to hit the sweet spot.
Final Thoughts from My Kitchen to Yours
And there you have it! My go-to, never-fail, always-impresses recipe for Peanut Butter Meltaways. I hope this recipe brings as much laughter and satisfaction to your kitchen as it has to mine over the years. It’s more than just candy; it’s a vehicle for connection, a simple project that creates joy, and a reminder that the best things in life are often the simplest.
So, from my messy apron to yours, thank you for spending this time with me. I can’t wait for you to try these. When you do, I’d love to hear all about it! Tag me on social @TastyChow or leave a comment on the blog. Now, go forth and make something delicious!
With love and a full tin of candy,
Emily