Your New Favorite Kitchen Escape: No-Bake Energy Bites
Hey there, friend! Let me paint you a picture. It’s 3 PM. Your energy is dipping faster than a cookie in milk, your to-do list is laughing at you, and you’re staring into the fridge abyss hoping for a magical, delicious, and actually good-for-you snack to appear.
Sound familiar? Oh, I’ve been there more times than I’ve burnt garlic bread (which is saying something). You don’t want to turn on the oven, you don’t have time for a complicated recipe, but you also don’t want to reach for a sugary bar that leaves you crashing an hour later.
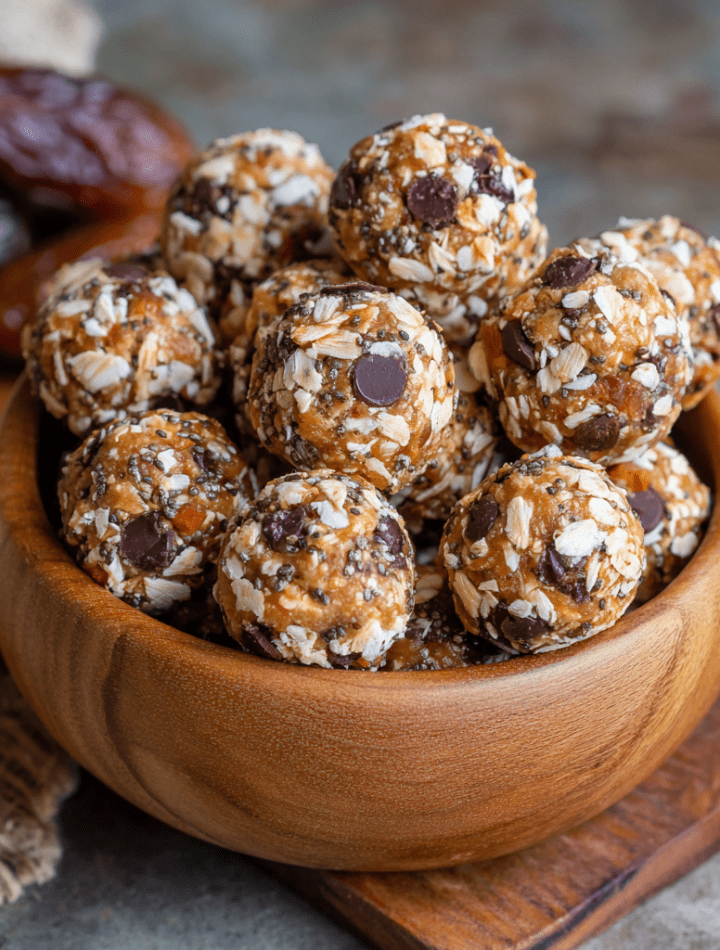
Well, get ready to meet your new kitchen bestie: my No-Bake Easy Energy Bombs. These little power-packed spheres of joy are the ultimate solution to your snack-time woes. They taste like a treat, but they fuel your body with wholesome ingredients. They require zero baking, just a bowl, a spoon, and about ten minutes of your time. And the best part? You can customize them a million different ways to suit your cravings and what you have in your pantry.
Think of them as the friend who always shows up with coffee and a hug. They’re reliable, delightful, and they just make everything better. So, let’s ditch the afternoon slump and make something truly delicious together!
A Sticky-Fingered Memory: Where My Love for Energy Bites Began
My love for these no-bake wonders didn’t start in a fancy culinary school kitchen. Nope, it started on a hiking trail with my Grandma. She was, and still is, the queen of practical, packable food. I’ll never forget the time she pulled a slightly crumpled wax-paper package from her knapsack, unveiling these lumpy, oat-y, fruit-studded balls.
“Trail cookies,” she declared. They were sticky, a little messy, and absolutely perfect. We sat on a sun-warmed rock, overlooking a valley, munching on these hearty bites. My hands were covered in a fine layer of oat dust and honey, and I remember thinking, “This is the best cookie I’ve ever had.” It wasn’t just the flavor—though the combo of chewy dates and nutty oats was a revelation—it was the feeling. It was fuel. It was love. It was a moment of pure, simple joy, shared over food made with intention.
My version is a slightly more polished take on Grandma’s “trail cookies,” but the soul is the same. Every time I roll a batch, I’m transported back to that trail, reminded that the best food isn’t about perfection; it’s about the feeling it gives you.
Gathering Your Happy Ingredients
Here’s the beautiful part: you probably have most of this in your kitchen right now! This recipe is incredibly forgiving, so don’t stress if you’re missing an item. I’ve got substitution ideas for you.
- ⅓ cup Honey or Maple Syrup: This is our natural sweetener and binding agent! Honey gives a floral sweetness, while maple syrup offers a deeper, richer flavor. For a vegan option, maple syrup is your go-to. If your honey is crystallized, just warm it slightly for easier mixing.
- ½ cup Peanut Butter (or Almond Butter): The star of the show! It adds healthy fats, protein, and that classic, creamy flavor. I love using a natural, drippy peanut butter for the best texture. Almond butter or sunflower seed butter (for a nut-free version) work wonderfully too.
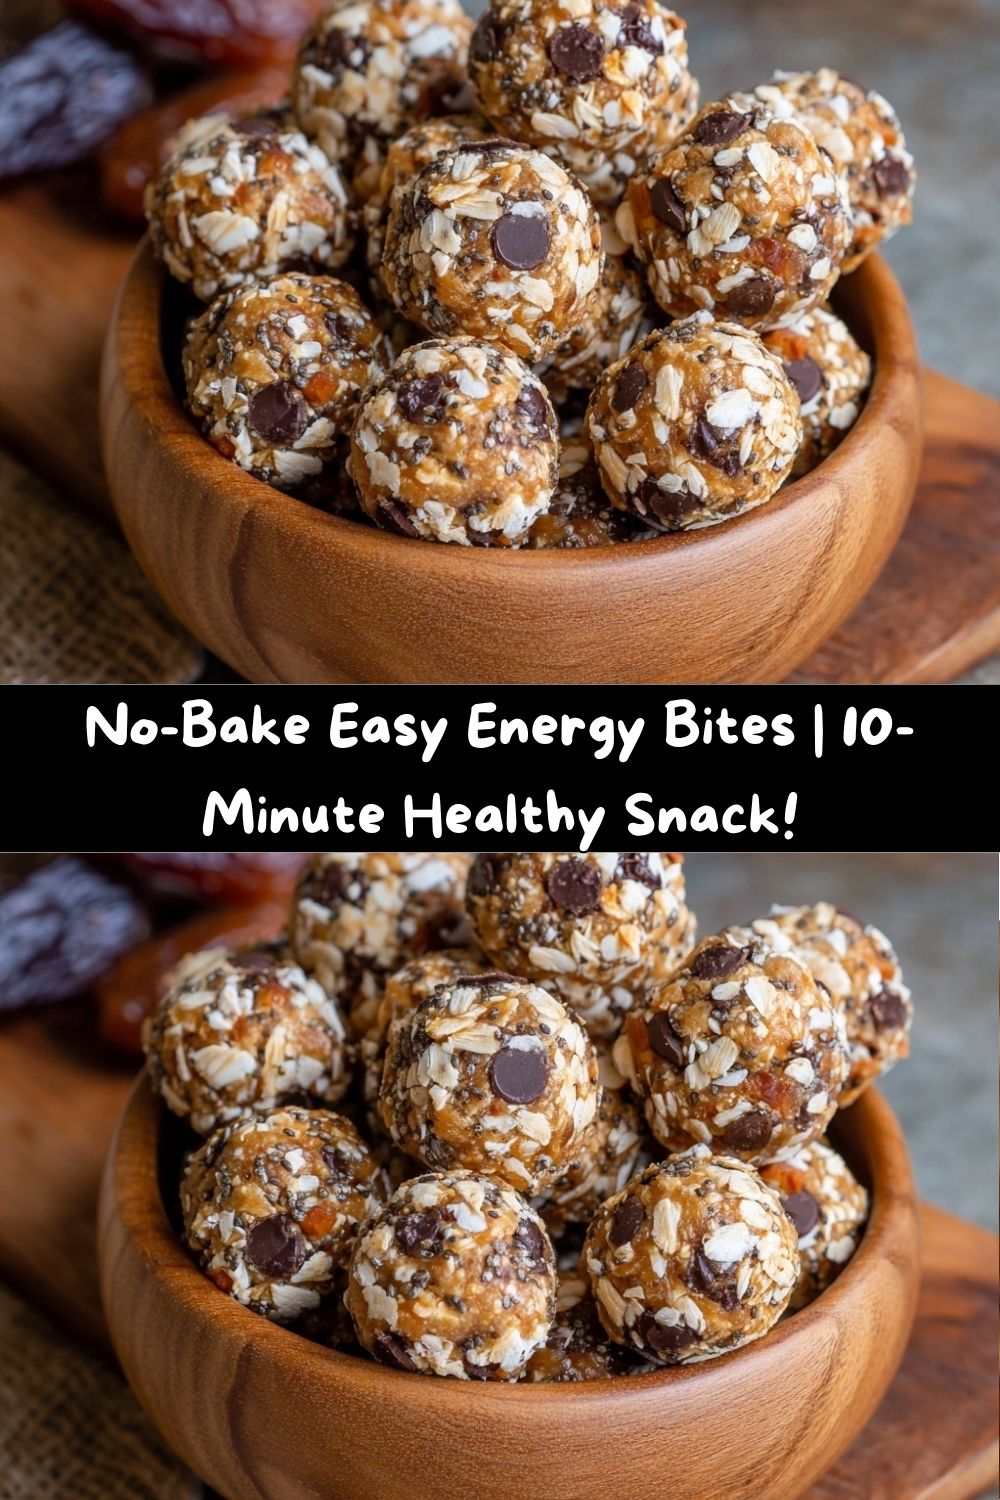
- 1¼ cups Rolled Oats (Old-Fashioned): The hearty base that gives these bites their satisfying chew. Rolled oats are key here—they hold their texture. Chef’s Tip: If you’re gluten-free, just make sure your oats are certified GF!
- 1 tsp Pure Vanilla Extract: A splash of vanilla is like a warm hug for your taste buds. It rounds out all the flavors and makes the whole kitchen smell amazing.
- 2 tbsp Chia Seeds, Flaxseeds, or Hemp Seeds: A tiny addition with a massive nutritional punch! These little powerhouses add fiber, omega-3s, and a subtle crunch. I use whatever I have on hand—they’re all fantastic.
- ¼ cup Chopped Dates or Dried Cranberries: Our chewy, fruity burst! Dates are naturally sweeter and richer, while cranberries bring a lovely tartness. Chopped dried apricots or raisins are also delicious.
- ¼ cup Chocolate Chips: Because life is just better with chocolate. I use semi-sweet, but dark chocolate or mini chips are great too. For a healthier twist, cacao nibs provide a serious chocolate crunch without the added sugar.
Let’s Get Rolling: Your Foolproof Steps to Energy Bomb Bliss
Ready? This is the easiest “cooking” you’ll do all week. Put on some good music, and let’s get our hands a little messy!
- The Big Mix. Grab a large mixing bowl. Seriously, go for the big one. You’ll thank me later. Now, dump everything in—the honey, peanut butter, oats, vanilla, seeds, dried fruit, and chocolate chips. No need for a fancy order; we’re all friends here. Chef’s Hack: If your nut butter is super thick or cold, microwave it with the honey for 15-20 seconds to make it easier to stir. Just don’t get it hot!
- Stir Until You Can’t Stir No More. Arm workout, engaged! Use a sturdy spoon or spatula and mix, mix, mix until every single oat is coated in that glorious, sticky, sweet mixture. You’ll know it’s ready when there are no dry spots left. It should hold together when you press a bit between your fingers.
- The All-Important Chill Session. This step is non-negotiable, my friend. Pop the whole bowl, uncovered, into the fridge for at least 30 minutes. This allows the oats to soften slightly and absorb the moisture, and it firms up the fats, making the mixture MUCH easier to handle. Trying to roll warm mixture is a sticky, frustrating mess. Let the fridge do the hard work for you!
- Scoop and Roll! After your patience has been rewarded, take the bowl out of the fridge. Using a small cookie scoop (my #1 tool for uniformity!), a tablespoon, or just your hands, scoop out about a tablespoon of the mixture. Roll it firmly between your palms into a neat(ish) ball. Don’t worry if they aren’t perfect spheres—a little rustic charm is a good thing! Place each finished ball on a plate or baking sheet lined with parchment paper.
- Store for Snacking Success. Once all your energy bombs are rolled, you can store them in an airtight container. They’ll keep happily in the fridge for up to 2 weeks, or you can freeze them for up to 3 months. I like to keep a stash in the freezer for emergency cravings!
How to Serve & Savor Your Energy Bombs
Okay, you’ve made these gorgeous little bites. Now what? The possibilities are endless!
I love packing 2-3 in a small reusable container and tossing them in my bag for a mid-morning or afternoon pick-me-up. They’re perfect for a pre-workout snack or a post-yoga refuel. My husband sneaks them as a “dessert” with his afternoon coffee.
For the kids (or the kid in you!), try rolling the finished balls in a fun coating. A light dusting of cinnamon, a roll in shredded coconut, or even a dip in crushed nuts or extra mini chocolate chips makes them feel extra special. Presentation is part of the fun!
These are also a fantastic, healthy addition to a lunchbox or a post-school snack. They’re far more satisfying and nutritious than a packaged granola bar, and you know exactly what’s inside.
Get Creative! 5 Fun Twists on the Classic Energy Bomb
The real magic of this recipe is its flexibility. Once you’ve mastered the base, the flavor world is your oyster! Here are a few of my favorite variations to get your creative juices flowing:
- Tropical Vacation: Swap the peanut butter for coconut butter, use chopped dried mango and pineapple, and mix in 2 tablespoons of shredded coconut. Close your eyes, and you’re on a beach!
- Cookie Dough Delight: Use almond butter and add a pinch of cinnamon. Swap the dried fruit for 2 tablespoons of sprinkles! It tastes just like edible cookie dough.
- Nut-Free Neapolitan: For school-safe or allergy-friendly bites, use sunflower seed butter. Divide the mixture into three parts. Mix 1 tbsp cocoa powder into one part, 1 tbsp freeze-dried strawberry powder into another, and leave the last part plain. You get three flavors in one batch!
- Double Chocolate Cherry: Because more chocolate is always the answer. Use cocoa powder in the base mixture, swap the dried fruit for chopped dried cherries, and use dark chocolate chips.
- Protein Power-Up: Add a scoop of your favorite vanilla or chocolate protein powder to the mix. You may need to add a teaspoon or two of milk (dairy or plant-based) to help it combine if it gets too dry.
Chef Emily’s Kitchen Confidential
This recipe has been a living, evolving thing in my kitchen. The first time I made them, I was so impatient I skipped the chilling step. Let’s just say I ended up with more “energy blob” than “energy bomb.” It was delicious, but not exactly pretty. The chill time is your secret weapon—trust me!
I also love that this is a fantastic “clean out the pantry” recipe. Have a handful of walnuts left? Chop ‘em up! A few tablespoons of pumpkin seeds? Toss ‘em in! A half-eaten bag of different dried fruits? Perfect. This recipe celebrates kitchen improvisation, and I encourage you to make it your own.
Your Questions, Answered!
Over the years, I’ve gotten a lot of questions about these energy bites. Here are the most common ones to ensure your success!
Q: My mixture is too dry and crumbly! What did I do wrong?
A: No worries! This usually means your nut butter was a bit too thick. The fix is easy: just add a tiny bit more liquid. A teaspoon of maple syrup, honey, or even milk (any kind) at a time until the mixture comes together when pressed.
Q: My mixture is too wet and sticky! Help!
A: This can happen if your nut butter is very runny. The solution is to balance it out with more dry ingredients. Add an extra tablespoon or two of rolled oats or your seed mix until the texture is firm enough to roll.
Q: Can I make these without a nut butter?
A: Absolutely! Sunflower seed butter is my top nut-free recommendation. Tahini (sesame seed paste) also works, but it will give a more savory, halva-like flavor, which is delicious in its own right!
Q: How long do they really last?
A: In a sealed container in the fridge, they are perfect for 2 weeks. In the freezer, they’ll stay fresh for 3 months. I often just grab them straight from the freezer—they thaw in minutes!
A Little Note on Nutrition
While I’m not a nutritionist, I am a chef who believes in fueling my body with real, whole foods. I love that these energy bombs are a balanced snack all on their own!
The rolled oats and seeds provide complex carbohydrates and fiber for sustained energy. The healthy fats from the nut butter and seeds keep you feeling full and satisfied. The natural sugars from the honey and dried fruit give you a quick energy lift without the crash of refined sugar. And the protein from the nut butter and seeds helps with muscle repair and keeps hunger at bay.
Each ball is a little powerhouse, averaging around 110 calories, 3g of protein, 2g of fiber, and 6g of healthy fats. It’s a snack you can truly feel good about eating!
Your New Go-To Snack Awaits
And there you have it! Your complete guide to making the easiest, most delicious, and endlessly customizable no-bake snack on the planet.
I hope this recipe becomes a staple in your kitchen, just like it is in mine. I hope it saves you from countless 3 PM slumps and gives you a moment of sweet, satisfying joy in your busy day. Most of all, I hope it inspires you to play in the kitchen and create something that makes you and your loved ones happy.
With love and a full container of Energy Bombs,
Emily