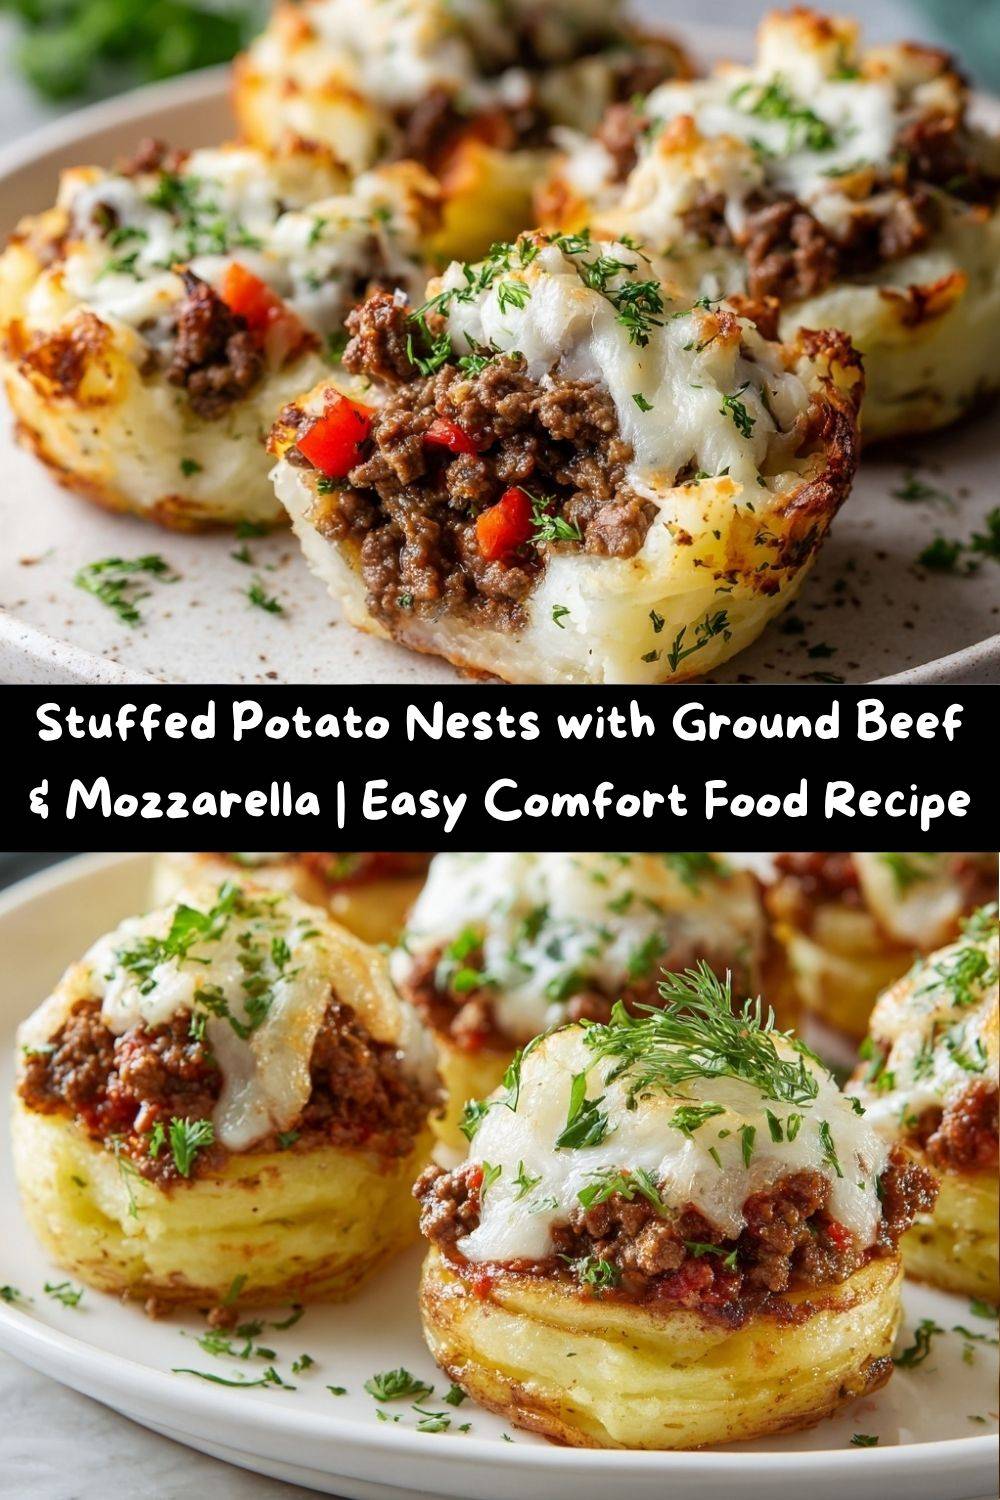
Stuffed Potato Nests with Ground Beef and Cheese – Comfort Food Made Easy
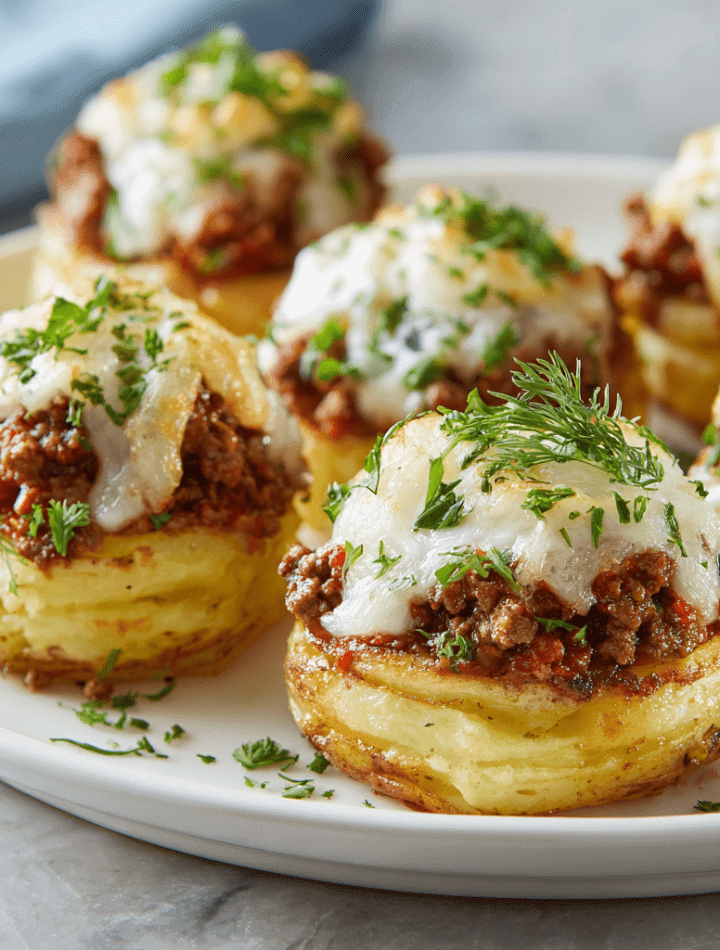
Hey there, friend! Let me paint you a picture: Imagine a cloud of the fluffiest, most buttery mashed potatoes you’ve ever tasted. Now, shape that cloud into a cozy little nest. Fill it to the brim with a savory, herby ground beef and veggie filling that’s sizzling with flavor. And then, because we believe in joy, crown the whole thing with a blanket of golden, bubbling, stretchy mozzarella cheese.
Are you drooling yet? I know I am just thinking about them!
This, my friend, is the magic of my Stuffed Potato Nests. They are the ultimate all-in-one comfort food package. Every single bite delivers creamy potato, rich beef, and melty cheese in perfect harmony. They’re fun to make, absolutely gorgeous to look at on a plate, and they solve the eternal “what’s for dinner?” question with a resounding, “Something amazing!”
Whether you’re feeding a hungry family on a busy Tuesday or need a show-stopping appetizer for your next game day spread, these little nests are your secret weapon. They feel fancy but are built from simple, humble ingredients. So, tie on your favorite apron (the messy one is always the best), and let’s create some kitchen magic together.
The Story Behind the Nests: A Happy Kitchen Accident
I have to confess, these potato nests were born from a happy little kitchen accident. It was a chilly Sunday evening, and I was staring into my fridge, facing the classic dilemma: leftover mashed potatoes from last night’s roast and a package of ground beef. I could have made shepherd’s pie, but I wanted something… different. Something fun.
I remembered my grandma shaping potato pancakes with her hands, and a lightbulb went off. What if I made a thicker, sturdier potato cake and pressed a well into the center? A vessel for all that deliciousness! I mixed some fresh dill into the potatoes for a bright, herby lift, formed my little nests, and crossed my fingers. Twenty minutes later, I pulled a baking sheet of golden, cheesy, savory masterpieces from the oven. My husband wandered in, sniffing the air, and said, “Whoa, what are those? They look incredible.” And just like that, a new family favorite was born. It goes to show you that sometimes the best recipes aren’t planned—they’re discovered with a little creativity and a willingness to play with your food.
Gather Your Ingredients: Let’s Build Flavor!
Here’s everything you’ll need to create these cozy nests. I’ve included some of my favorite chef insights and swaps so you can make this recipe your own!
For the Potato Nests:
- 3–5 large Russet or Yukon Gold potatoes, peeled and boiled: Russets are my go-to for a fluffy, dry mash that holds its shape beautifully. Yukon Golds will give you a slightly creamier, richer nest—also delicious!
- 3.5 tbsp (50g) butter: The key to luxurious mashed potatoes. It adds richness and helps the nests get a lovely golden edge.
- A bunch of fresh dill, chopped: Dill is the secret weapon here! Its bright, slightly anise-like flavor cuts through the richness of the beef and cheese. If you’re not a dill fan, fresh chives or parsley work wonderfully.
- Salt, smoked paprika, black pepper, oregano (to taste): Don’t be shy! Season your potato base well. The smoked paprika adds a subtle, smoky depth that plays so nicely with the beef.
For the Savory Beef Filling:
- 1.1 lbs (500g) ground beef (80/20 blend is ideal): A little fat means a lot of flavor. For a leaner option, ground turkey or chicken works great, just add a touch of olive oil to the pan.
- 1 onion, finely chopped: The sweet, aromatic foundation of our filling.
- 2 garlic cloves, minced: Because what’s a savory dish without garlic? Feel free to add an extra clove if you’re a garlic fiend like me.
- 1 red bell pepper, diced: Adds a sweet crunch and a pop of color. Any color bell pepper will do!
- 1 large tomato, chopped: This adds a touch of freshness and acidity that balances the dish.
- 2.5 oz (70g) tomato paste: This is our flavor concentrator! It gives the filling a deep, rich, umami backbone.
- A bunch of fresh parsley, chopped: Adding fresh herbs at the end brightens everything up.
For the Cheesy Topping:
- 3.5 oz (100g) mozzarella cheese, shredded: I love the classic melt of mozzarella, but a sharp cheddar, Monterey Jack, or even a provolone would be dreamy here.
Let’s Get Cooking: Building Your Nests, Step-by-Step
Okay, team! This is where the fun begins. I’ll walk you through each step with all my favorite chef hacks to ensure your nests are perfect.
- Prep Your Potatoes: First, get your peeled and chopped potatoes into a pot of cold, salted water. Bring them to a boil and cook until they are fork-tender. Chef’s Tip: Starting them in cold water ensures they cook evenly throughout! Drain them really well—any extra water will make your nests soggy. Return them to the warm pot for a minute to let any residual steam evaporate.
- Create the Nest Base: Now, mash those potatoes! I use a good old-fashioned potato masher. You don’t want them gummy, so avoid over-mixing. Once they’re smooth, mash in the butter, chopped dill, and all your seasonings (salt, pepper, smoked paprika, oregano). Give it a taste—this is your moment to adjust the seasoning. Let the mixture cool for about 10-15 minutes until it’s easy to handle. Chef’s Hack: Cooler potatoes are less sticky and much easier to shape!
- Form the Nests: Preheat your oven to 375°F (190°C) and line a baking sheet with parchment paper. Using your hands, take a generous scoop of the potato mixture (about the size of a large meatball) and form it into a ball. Place it on the baking sheet and gently press down to flatten it slightly. Then, use your thumb or the back of a spoon to press a deep, wide well into the center, creating your “nest.” Make sure the bottom and sides are thick enough to hold the filling. Repeat with the remaining potato.
- Cook the Beef Filling: While the nests are holding their shape on the baking sheet, let’s make the filling. In a large skillet over medium heat, sauté the chopped onion until it’s soft and translucent, about 5 minutes. Add the minced garlic and cook for another minute until fragrant. Now, add the ground beef, breaking it up with your spoon, and cook until it’s nicely browned. Drain off any excess grease. Stir in the diced bell pepper, chopped tomato, and that all-important tomato paste. Cook for another 5-7 minutes, until the vegetables have softened and the mixture has thickened. Stir in the fresh parsley and season generously with salt and pepper.
- Assemble with Love: Now for the satisfying part! Spoon the warm beef filling into each potato nest, dividing it evenly among them. Don’t be afraid to pile it high! Finally, top each one with a generous handful of the shredded mozzarella cheese.
- Bake to Perfection: Pop the baking sheet into your preheated oven and bake for 15-20 minutes. You’re looking for the cheese to be completely melted, bubbly, and have those gorgeous golden-brown spots. The edges of the potato nests should also be slightly golden.
How to Serve These Savory Masterpieces
Presentation is part of the fun! I love serving these nests right on a big wooden board or a large platter, sprinkled with a little extra fresh dill or parsley for a pop of green. They are a complete meal all on their own, but if you want to round things out, here are a few of my favorite pairings:
- For a Fresh Contrast: A simple, crisp green salad with a tangy vinaigrette is the perfect counterpoint to the rich, cheesy nests.
- For Extra Veggie Power: Some steamed green beans, roasted broccoli, or glazed carrots would be lovely on the side.
- For the Ultimate Comfort Food Spread: Serve them alongside a bowl of creamy tomato soup for dipping—trust me on this one!
Let them cool for just a minute or two after they come out of the oven—that cheese is molten lava!
Get Creative! Flavor Twists & Dietary Swaps
One of the best things about this recipe is how adaptable it is. Don’t be afraid to play around and make it work for you!
- Tex-Mex Fiesta: Swap the dill for cilantro in the potatoes. For the filling, use ground chicken or beef and season it with a packet of taco seasoning instead of the herbs. Use pepper Jack cheese and top with a dollop of sour cream and avocado after baking.
- Italian Inspired: Mix a tablespoon of pesto into the potato base. For the filling, use Italian sausage (casings removed) and stir in a tablespoon of your favorite marinara sauce. Top with a mix of mozzarella and parmesan.
- Breakfast for Dinner: Fill the potato nests with a mixture of scrambled eggs, crumbled cooked bacon or sausage, and chopped spinach. Top with cheddar cheese and bake until bubbly.
- Vegetarian Delight: Replace the ground beef with a cup of cooked lentils or a plant-based ground “meat.” Sauté mushrooms with the onions for an extra meaty, umami flavor.
- Spicy Kick: Add a finely chopped jalapeño to the beef filling or a pinch of red pepper flakes to the potato mixture for a nice bit of heat.
Chef Emily’s Kitchen Notes
Over the many times I’ve made these, I’ve learned a few things. The first time, I was so impatient I tried to form the nests with piping hot potatoes. Let’s just say I had more potato on my hands than on the baking sheet! Letting them cool is a non-negotiable game-changer. I’ve also found that a light spray of cooking oil on the nests before baking gives them an even crispier, golden exterior. And my funniest fail? I once forgot to put the parchment paper down. The cheese that oozed out created a delicious, but very stubborn, crispy cheese skirt that welded the nests to the pan. We still ate them, of course, but we had to chisel them off! Learn from my mistakes, friends.
Your Questions, Answered!
I know you might have a question or two, so I’ve tackled the most common ones right here.
Q: Can I make these ahead of time?
A: Absolutely! You can assemble the entire dish—nests filled and topped with cheese—cover it tightly, and refrigerate it for up to 24 hours. When you’re ready, just pop them in the oven. You may need to add 5-10 minutes to the baking time since they’ll be going in cold.
Q: My potato mixture is too wet/sticky. What did I do wrong?
A> This usually happens if the potatoes are still too hot or weren’t drained thoroughly. Let them cool completely. If they’re still sticky, you can add a tablespoon or two of breadcrumbs or grated parmesan cheese to the mixture to help it bind and dry out a bit.
Q: Can I freeze the stuffed potato nests?
A: You can, but with a caveat. The texture of the mashed potatoes can become a little grainy upon thawing. For best results, I recommend freezing them before baking. Assemble, freeze solid on the baking sheet, then transfer to a freezer bag. Bake from frozen, adding 10-15 minutes to the baking time.
Q: What’s the best way to reheat leftovers?
A> To maintain the crispy edges, reheat them in the oven or an air fryer at 350°F until warm. The microwave will work in a pinch, but it will make the potato soft.
Nutritional Information (A Quick Note!)
Hey, I’m all about balance! While this is a hearty comfort food dish, it’s also packed with real, wholesome ingredients. Here’s a rough breakdown per nest (assuming this recipe makes 6 servings):
- Calories: ~360
- Protein: 24g (Fantastic for keeping you full and satisfied!)
- Carbohydrates: 22g (Complex carbs from the potatoes for energy.)
- Fat: 20g
- Fiber: 3g (Thanks to the potatoes, onions, and peppers!)
- Sodium: ~430mg
Remember, these are estimates. You can easily lighten it up by using lean ground beef, reducing the butter slightly, or using a low-fat cheese. But sometimes, your soul needs the full, comforting version, and that’s perfectly okay, too!
Final Thoughts from My Kitchen to Yours
Well, there you have it! My beloved Stuffed Potato Nests in all their cheesy, comforting glory. This recipe is a testament to the fact that the best food doesn’t have to be complicated. It’s about taking simple ingredients, putting them together with a little love and creativity, and creating something that truly warms the heart and belly.
I truly hope this recipe becomes a star in your home kitchen, creating its own happy memories around your table. If you make them (and you totally should!), I’d be absolutely thrilled if you tagged me on social @TastyChow so I can see your beautiful creations. Now, go forth and get nesting! Happy cooking!
With love and a full belly,
Emily