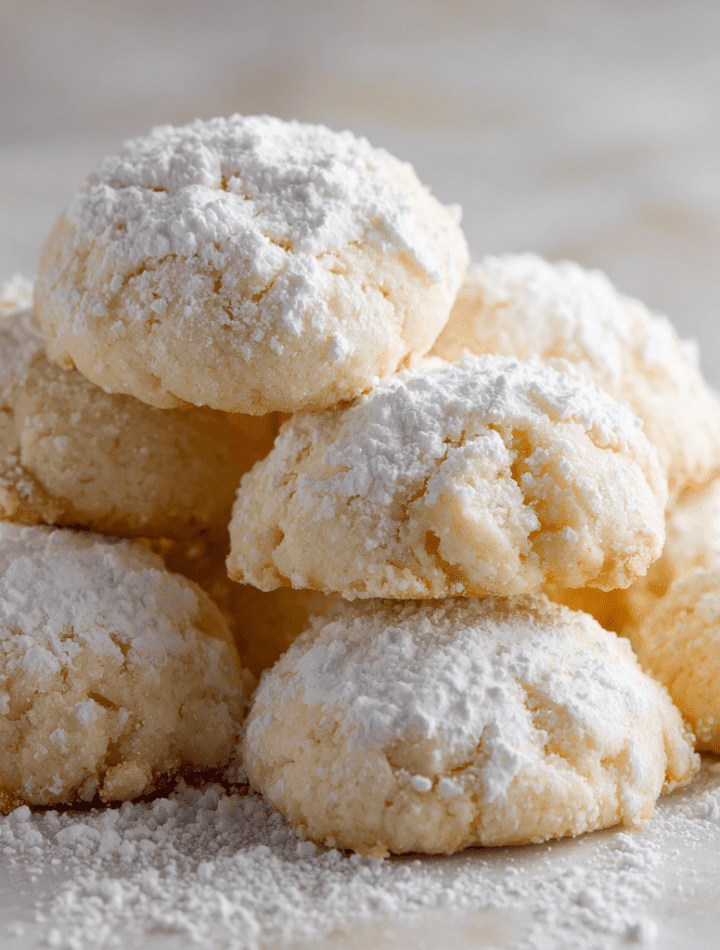
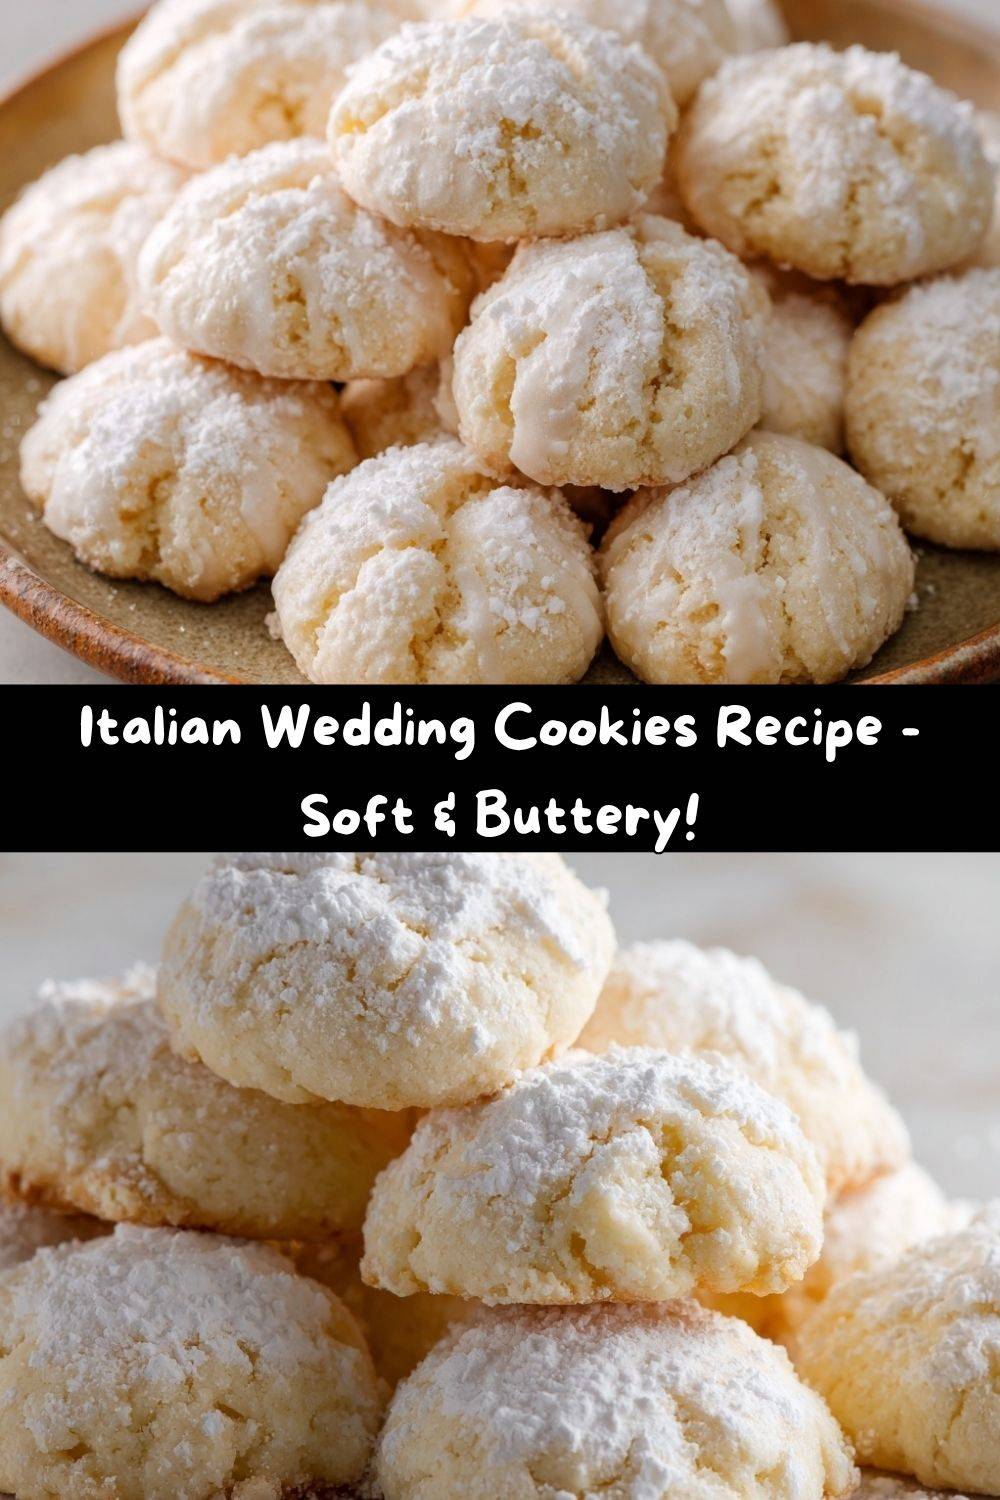
Italian Wedding Cookies – Traditional Butter Cookie Recipe with Glaze
Hey there, friend! Can you smell that? That’s the smell of pure, unadulterated happiness wafting from my kitchen today. It’s the warm, buttery, and subtly sweet aroma of one of my all-time favorite treats: Italian Wedding Cookies.
Now, if you’ve never had one of these delicate, melt-in-your-mouth wonders, you are in for a serious treat. And if you have, you know exactly the cloud-nine feeling I’m talking about. These aren’t your average, crunch-through-a-sawdust-dry cookie. Oh no. These are soft, rich, and tender little puffs of joy, traditionally dressed in a simple, elegant glaze that adds just the right touch of sweetness.
Despite the name, you don’t need a wedding invitation to enjoy them! In Italian culture, these cookies, often called ‘Biscotti Italiani’ or ‘Pizzelle’ (though those are a different wafer-like cookie), are the stars of any celebration—from christenings and holidays to Sunday dinners where the whole family piles around the table. They represent love, tradition, and the simple act of sharing something made with care.
I’m so excited to guide you through this recipe. It’s a classic for a reason, and I’ve packed this post with all my best chef hacks, ingredient insights, and fun twists to make it your own. So, tie on your favorite apron (the one with the flour smudges, of course), and let’s bake up a little piece of tradition together.
The Cookie That Built a Bridge
My love affair with these cookies didn’t start in a fancy pastry shop. It started in a bustling, loud, and wonderfully chaotic kitchen belonging to my friend Sophia’s nonna. I was about 19, fresh out of high school and thinking I knew a thing or two about cooking. Then I met Nonna Maria.
She didn’t speak much English, and my Italian was, well, non-existent. But we found our common language in flour, butter, and eggs. She’d gesture, I’d watch. She’d pat my hand if I was mixing too fast, and she’d beam with a radiant smile when I finally shaped a dough ball that met her approval. We didn’t need words. The scent of vanilla and baking dough did all the talking. That day, I learned that the most powerful recipes aren’t just lists of ingredients; they’re stories, history, and connection, all kneaded together. Every time I make these cookies, I’m right back in that warm kitchen, learning from a master, building a bridge one butter cookie at a time.
Gathering Your Cookie Crew: The Ingredients
One of the beautiful things about this recipe is its simplicity. We’re working with pantry staples to create something truly magical. Here’s your shopping list, complete with my chef-y notes to set you up for success.
For the Cookies:
- 2 sticks (1 cup) butter, softened: This is the heart and soul of the cookie, providing that rich flavor and tender crumb. Chef’s Tip: “Softened” means cool to the touch but able to hold an indent when you press it. Don’t melt it! For the best flavor, I always use unsalted butter so I can control the salt level.
- 2 cups sugar: Sweetens the deal and helps create a light, airy texture when creamed with the butter.
- 6 eggs: They act as the binder and add structure and richness. We’re using the whole egg here, which gives these cookies their characteristic soft, cake-like texture.
- 3 teaspoons vanilla extract: Our primary flavor agent! Don’t be shy with it. For a truly next-level flavor, try using a high-quality vanilla bean paste. Substitution: You can use almond extract here if you prefer.
- 7 cups all-purpose flour: The backbone of our dough. We’ll add it gradually to get the perfect consistency.
- 2 tablespoons baking powder: This is our leavening agent, and it’s what gives these cookies their lovely, soft lift. Make sure yours is fresh for the best results!
For the Icing:
- 1 cup powdered sugar: Creates a smooth, sweet, and beautiful glaze.
- 1 tablespoon milk: Thins the powdered sugar to a drizzling consistency. Substitution: You can use lemon juice, water, or even a little heavy cream for a richer icing.
- 1 teaspoon lemon or almond extract: This is where you can personalize your cookies! Lemon extract gives a bright, zesty finish, while almond extract offers a classic, nutty warmth that pairs perfectly with the buttery dough.
Let’s Get Baking: The Step-by-Step Dance
Ready to make some magic? Follow these steps, and you’ll have a batch of perfect wedding cookies in no time. I’ve sprinkled in my favorite tips to make the process smooth and fun.
- Cream the Butter and Sugar: In a large bowl, cream together your softened butter and sugar until the mixture is light, pale, and fluffy. This should take about 3-4 minutes with a stand or hand mixer. Chef’s Hack: Don’t rush this step! Creaming incorporates air into the dough, which is key for a soft, tender cookie. Think of it as building a tiny air-pocket foundation for deliciousness.
- Incorporate the Eggs and Vanilla: Add the eggs one at a time, beating well after each addition. This ensures each egg is fully emulsified into the butter mixture, giving you a smooth, creamy base. Now, mix in your vanilla extract. Your bowl should smell incredible already!
- Combine the Dry Ingredients: In a separate bowl, whisk together your flour and baking powder. This little pre-mix ensures the baking powder is evenly distributed, so every cookie rises uniformly.
- Bring the Dough Together: Gradually add the dry ingredients to the wet mixture, mixing on low speed. I like to add the flour in three or four parts. Watch closely here! The dough will start out soft and become quite stiff and dry as you add the last of the flour. This is totally normal! When it becomes too much for your mixer, don’t force it—ditch the beaters and use your hands to finish mixing. If the dough feels at all sticky, add a tablespoon or two more of flour until it’s smooth and pliable.
- Preheat and Shape: Preheat your oven to 350°F (175°C). Now for the fun part! Pinch off small pieces of dough (about 1 tablespoon each) and roll them into smooth balls. You can also get creative and shape them into ovals, little logs, or even simple rings. The key is to make them all roughly the same size for even baking. Place them about an inch apart on an ungreased cookie sheet. Why ungreased? These cookies have enough butter that they won’t stick, and a bare sheet helps them bake up perfectly.
- Bake to Perfection: Bake for 8-10 minutes, depending on the size of your cookies. You’re looking for the bottoms to be just lightly golden and the tops to look “set.” They should not brown on top. Chef’s Secret: They continue to firm up as they cool, so a slightly underdone look is perfect for that soft, melt-in-your-mouth texture.
- Cool and Ice: Let the cookies cool on the baking sheet for 5 minutes before transferring them to a wire rack to cool completely. Once they’re cool, whisk together your icing ingredients. You’re aiming for a consistency that will drizzle nicely but isn’t too runny. Drizzle it artistically over the cookies with a spoon, or carefully dip the tops of the cookies directly into the bowl. Let the icing set completely before storing.
Sharing the Love: How to Serve Your Masterpieces
Presentation is part of the fun! These cookies are beautiful all on their own, but a little styling makes them extra special.
For a classic look, arrange them on a simple white platter or a beautiful vintage cake stand. The white icing against the pale cookie just pops. Scatter a few edible flowers or a light dusting of extra powdered sugar over the top for a truly elegant touch—perfect for a bridal shower or holiday party.
For a more rustic, family-style feel, pile them high in a woven basket lined with a checkered napkin. They look so inviting and homey this way. However you serve them, the best accompaniment is a hot cup of coffee, a glass of cold milk, or a sweet dessert wine like Moscato d’Asti. The contrast of the sweet cookie with a bitter or bubbly drink is absolute heaven.
Make It Your Own: Delicious Recipe Variations
Once you’ve mastered the classic, the kitchen playground opens up! Here are a few of my favorite ways to riff on this timeless recipe.
- The Citrus Burst: Add the zest of one lemon or orange to the cookie dough along with the vanilla. Pair it with the matching citrus glaze for a sunny, bright flavor.
- Anisette Toast Style: Love that classic Italian flavor? Replace the vanilla in the dough with 2 teaspoons of anise extract. The flavor is distinctive and wonderfully traditional.
- Colorful Celebration: Separate your icing into small bowls and add a drop or two of natural food coloring. Use pastel pinks, blues, and yellows for a baby shower, or red and green for Christmas.
- Sprinkle Happy: Immediately after icing the cookies, sprinkle them with nonpareils, sanding sugar, or chopped pistachios for a fun, colorful crunch.
- Gluten-Free Swap: You can make these with a 1:1 gluten-free all-purpose flour blend. The texture might be slightly more crumbly, but they will be just as delicious!
Emily’s Kitchen Notebook
This recipe has been a living, evolving thing in my kitchen. I remember one time, early on, I got impatient and used melted butter. The dough spread into one giant, buttery puddle in the oven! It was a delicious, crumbly mess, but a mess nonetheless. It was a great lesson in patience and the science of baking.
Over the years, I’ve found that letting the shaped dough balls rest on the counter for 10-15 minutes before baking helps them hold their shape even better. And my biggest secret? I almost always double the icing recipe. Why? Because a little extra drizzle never hurt anybody, and it makes them look so professionally pretty. Don’t be afraid to get your hands dirty when mixing the dough—it’s the best way to feel the texture and know when it’s just right.
Your Questions, Answered!
Q: My dough is really sticky. What did I do wrong?
A: Don’t panic! This can happen based on the humidity or the size of your eggs. Just add more flour, one tablespoon at a time, and knead it in by hand until the dough is smooth and no longer sticks to your fingers.
Q: Can I make the dough ahead of time?
A: Absolutely! You can wrap the dough tightly in plastic wrap and refrigerate it for up to 2 days. Let it come to room temperature for about 30 minutes before shaping and baking. You can also freeze the shaped, unbaked dough balls on a tray, then transfer them to a freezer bag. Bake straight from frozen, adding 1-2 minutes to the baking time.
Q: Why are my cookies dry or tough?
A: The most common culprit is over-measuring the flour. The best way to measure flour is to spoon it into your measuring cup and level it off with a knife, rather than scooping the cup directly into the bag. Scooping packs the flour in and can lead to using too much.
Q: My icing is too runny/thick. How do I fix it?
A> Too runny? Add more powdered sugar, a tablespoon at a time. Too thick? Add more milk (or lemon juice), just a teaspoon at a time, until it reaches a smooth, drizzling consistency.
A Quick Nutritional Glance
I believe all foods can fit into a happy, balanced life, and that includes these delightful little cookies! Here’s a general estimate per cookie (based on a yield of about 5 dozen). Remember, these are treats, meant to be savored and enjoyed in moments of celebration and connection.
- Calories: ~90
- Fat: 4g
- Carbohydrates: 12g
- Protein: 1g
A Sweet Tradition to Keep
And there you have it! Your very own guide to creating a batch of soft, nostalgic, and utterly delicious Italian Wedding Cookies. I hope this recipe brings as much warmth and joy to your kitchen as it has to mine. It’s more than a cookie; it’s a way to slow down, to create something beautiful with your hands, and to share a piece of edible love with the people who matter most.
I’d love to hear how your cookie adventure goes! Did you go with lemon or almond? Did you add sprinkles? Tag me on social @TastyChow with your beautiful creations. Now, go forth and bake! Your kitchen is waiting to be filled with the best smell in the world.
With a full heart and a flour-dusted nose,
— Emily