Old-Fashioned Soft Molasses Cookies: Your New Favorite Comfort Cookie
Hey there, friend! Emily here, from my flour-dusted kitchen to yours. Is there anything in the world that smells more like pure, unadulterated comfort than a batch of molasses cookies baking in the oven? That warm, spicy, slightly sweet aroma that wraps around you like a well-loved quilt? It’s the scent of holiday magic, of cozy Sunday afternoons, and of generations of home bakers sharing something truly special.
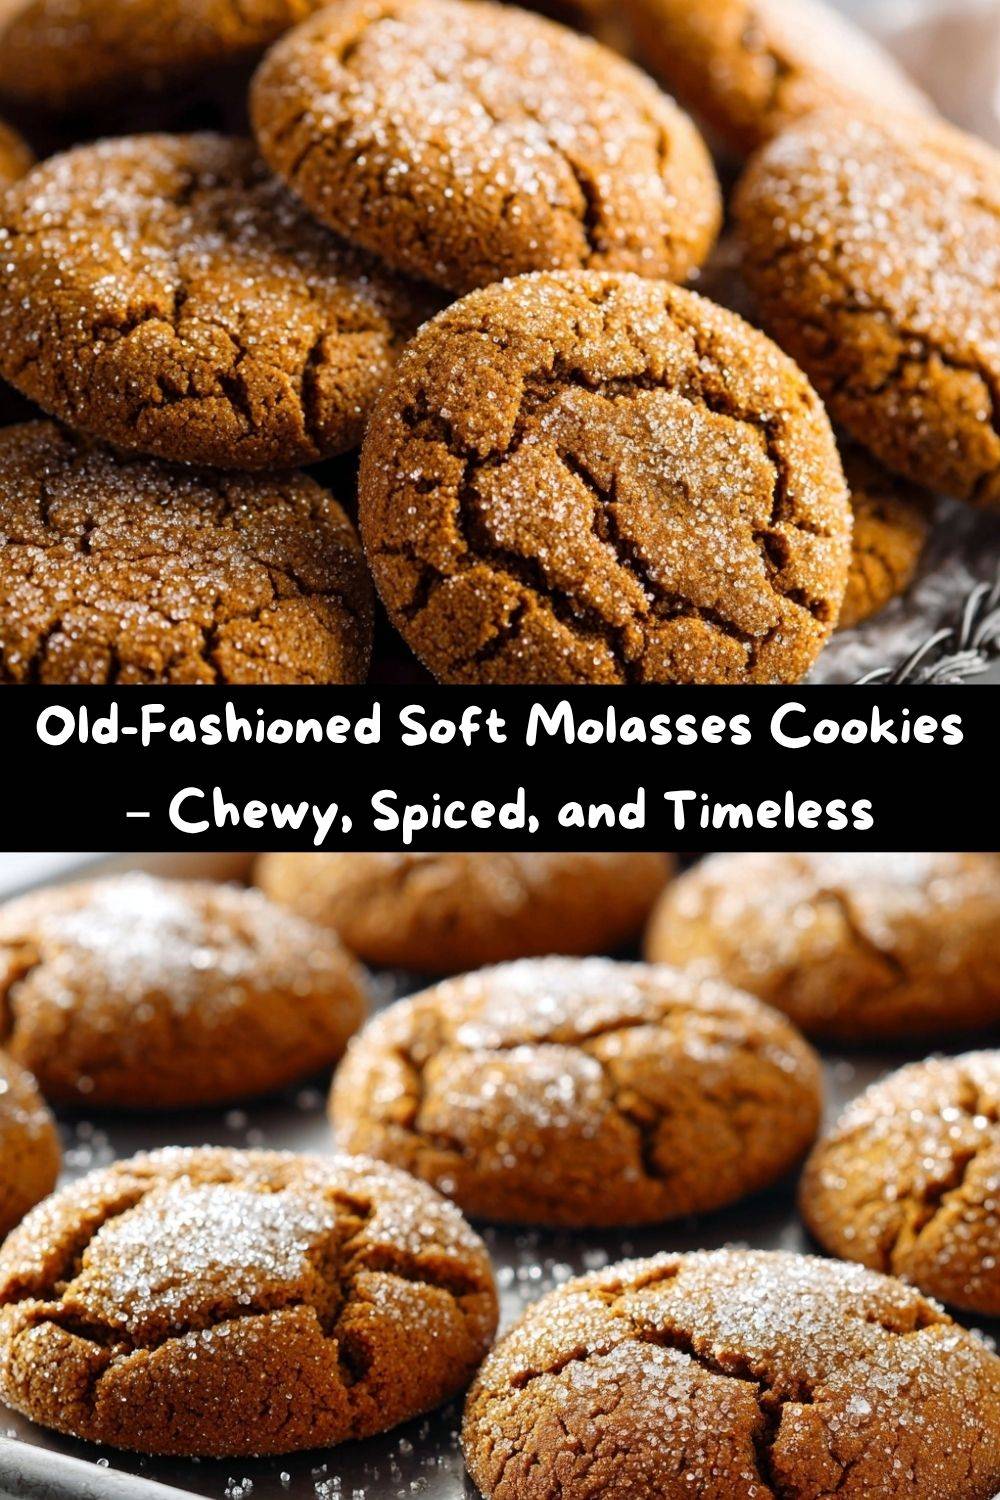
Today, we’re diving headfirst into one of my all-time favorite recipes: Old-Fashioned Soft Molasses Cookies. These aren’t just any cookies. They’re the kind of cookie that makes you close your eyes and sigh with happiness after the first bite. They have a delicate, sparkly crust from a quick roll in sugar, which gives way to a fantastically soft, chewy, and deeply spiced center. They’re sturdy enough for a cookie jar but elegant enough for your holiday platter. This recipe is a true classic for a reason—it’s absolutely foolproof and delivers that nostalgic flavor we all crave. So, tie on your favorite apron (the messy one with all the character!), and let’s make some magic happen.
A Spoonful of Molasses and a Dash of Memory
Every time I crack open a jar of molasses, I’m instantly eight years old again, standing on a wobbly wooden stool in my Grandma Eleanor’s kitchen. Her house always smelled like a delightful mystery—a mix of fresh linens, peppermint, and whatever baking project was underway. But molasses cookie day was my favorite. She’d let me pour the thick, dark molasses from the big glass jar, always warning me with a wink, “Slow and steady, Em, or it’ll run away from you!”
I remember the sheer, sticky joy of licking the spoon, my face scrunching up at the intense, almost bitter flavor before it melted into a deep, complex sweetness. She’d patiently show me how to roll the soft dough into perfect little spheres, my small hands making lopsided balls next to her perfectly round ones. We’d coat them in sugar, creating a tiny snowstorm on the countertop, and then we’d wait. The agonizing, wonderful wait for that first warm, soft cookie to come out of the oven. That first bite was more than just a cookie; it was love, patience, and a whole lot of family history. This recipe is my homage to her, to that stool, and to that unforgettable smell. It’s my hope that it becomes a part of your family’s story, too.
Gathering Your Cookie Crew: The Ingredients
Before we start, let’s get familiar with our team players. Baking is a science, but it’s also an art, and knowing your ingredients is the first step to creating a masterpiece. Here’s what you’ll need:
- 1 cup packed brown sugar: Packing the brown sugar is non-negotiable for that rich, moist chewiness we’re after. The molasses in the brown sugar itself is the first hint of the deep flavor to come. Light brown sugar works, but dark brown sugar will give you an even deeper, more caramel-like note.
- 1 cup (2 sticks) butter, softened: I use unsalted butter to control the salt level. “Softened” is key here! It should be pliable but not melted. A quick test: press your finger into the butter. It should leave an indent without sinking all the way through. This creams perfectly with the sugar for a light and airy cookie.
- 1/4 cup dark molasses: This is the star of the show! I strongly recommend using “robust” or “dark” molasses for the most authentic, bold flavor. Don’t use blackstrap, as it’s too bitter. The molasses is what gives these cookies their signature deep color and complex, almost smoky sweetness.
- 1 large egg: Our binding agent, bringing everything together. Make sure it’s at room temperature to emulsify smoothly into the butter and sugar mixture.
- 1 tsp vanilla extract: The flavor enhancer. It might seem simple, but a good quality vanilla adds a warm, floral note that complements the spices beautifully.
- 2 1/2 cups all-purpose flour: The foundation of our cookie. I spoon and level my flour to avoid packing too much in. Too much flour is the number one reason cookies turn out cakey and dry instead of soft and chewy.
- 2 tsp baking soda: Our leavening agent. This is what gives the cookies their perfect lift and that lovely crackly surface. Make sure your baking soda is fresh for the best rise!
- 1 tsp ground cinnamon & 1 tsp ground ginger: The dynamic spice duo! Cinnamon brings warmth, while ginger adds that signature little “kick” at the end. Feel free to be generous here.
- 1/2 tsp salt: The flavor superhero. Salt doesn’t make things taste salty; it makes them taste *more*. It balances the sweetness and makes all the other flavors pop.
- 1/4 cup granulated sugar (for rolling): This is our finishing touch! Rolling the dough balls in sugar creates that delicate, sparkly, slightly crisp crust that contrasts magically with the soft interior.
Let’s Get Baking: The Step-by-Step Magic
Okay, team! Let’s turn these beautiful ingredients into the cookies of your dreams. Follow these steps, and you really can’t go wrong. I’ve sprinkled in all my favorite chef hacks along the way.
- Preheat and Prep. First things first, preheat your oven to 325°F (165°C). This might seem low, but trust me, a slightly lower temperature is the secret to a perfectly soft, chewy cookie that doesn’t spread too much. While it’s heating, line a large baking sheet with parchment paper. Chef’s Hack: Parchment paper is a lifesaver! It prevents sticking and makes cleanup an absolute dream. No parchment? A silicone baking mat works wonderfully too.
- Cream the Good Stuff. In a large bowl, add your softened butter and packed brown sugar. Using a hand mixer or a stand mixer with the paddle attachment, beat them together on medium speed for about 2-3 minutes. You’re not just mixing; you’re creaming! This process incorporates tiny air bubbles into the dough, which helps the cookies rise and gives them a lighter texture. The mixture should become pale, fluffy, and oh-so-creamy. Now, beat in the molasses, egg, and vanilla until everything is beautifully combined and smooth.
- Whisk the Dry Team. In a separate, medium-sized bowl, grab a whisk. Add your flour, baking soda, cinnamon, ginger, and salt. Whisk them together for a good 30 seconds. Chef’s Insight: Whisking the dry ingredients does two crucial things: it evenly distributes the baking soda and spices so you don’t get a bitter bite, and it aerates the flour, making your final cookie texture more tender.
- Combine with Care. Now, with your mixer on low speed, gradually add the dry ingredients to the wet ingredients. Mix just until the flour streaks disappear and a soft dough forms. Do not overmix! Overmixing develops the gluten in the flour, which can lead to tough cookies. A few remaining flour patches are okay; you can fold them in by hand with a spatula at the end.
- Shape and Sugar-Coat. Here comes the fun part! Scoop out portions of dough (about 1 tablespoon each) and roll them between your palms into smooth balls. Now, roll each ball generously in the granulated sugar until it’s completely coated. This sugary coat is what gives them that classic, sparkling, crackly top.
- Bake to Perfection. Place the sugar-coated dough balls on your prepared baking sheet, leaving about 2 inches between them. They will spread a little as they bake. Pop them into your preheated oven and bake for 13-15 minutes. Chef’s Pro Tip: The cookies are done when the edges look set and the tops appear crackled. They might still look a tiny bit soft in the center—that’s exactly what you want! They will firm up as they cool. For the ultimate chewiness, err on the side of under-baking.
- The Cool Down. As soon as you take the baking sheet out of the oven, let the cookies rest on the hot sheet for exactly 1 minute. This allows them to set just enough to handle. Then, carefully transfer them to a wire rack to cool completely. This step is crucial for achieving that perfect chewy texture, as it stops the cooking process and prevents the bottoms from getting soggy.
How to Serve These Spiced Gems
Okay, the hardest part is over: waiting for them to cool! Now, how do we serve these beauties? Honestly, they are sublime all on their own, still slightly warm from the oven. But if you want to elevate them into a full-blown experience, here are my favorite ways to serve them:
The Classic Comfort Combo: Place a couple of cookies on a vintage plate alongside a tall, cold glass of milk. It’s a timeless pairing for a reason—the cool milk is the perfect counterpart to the warm, spicy cookie.
The Ultimate Dessert Platter: Arrange these molasses cookies on a wooden board with other holiday favorites like gingerbread men, shortbread, and a few pieces of dark chocolate. They add a wonderful soft texture and deep flavor to the mix.
Gourmet Ice Cream Sandwich: Let your cookies cool completely, then sandwich a scoop of high-quality vanilla bean ice cream or, for a truly next-level treat, cinnamon or caramel swirl ice cream between two cookies. Press gently, wrap in parchment, and freeze for an hour. Absolute heaven!
With a Warm Beverage: These cookies are a match made in heaven with a hot cup of coffee, a chai latte, or even a spicy herbal tea. The flavors harmonize and create the coziest moment imaginable.
Get Creative! Fun Recipe Variations
I love a classic recipe, but I also love playing in the kitchen! Once you’ve mastered the original, feel free to get creative and make this recipe your own. Here are a few of my favorite twists:
- Spiced Orange Twist: Add the zest of one large orange to the wet ingredients. The bright, citrusy notes cut through the richness of the molasses and create a beautifully complex flavor profile.
- Ginger Lover’s Dream: For an extra kick, add 1/4 cup of finely chopped crystallized ginger to the dough along with the dry ingredients. It gives you little pockets of sweet, spicy heat!
- Dairy-Free Delight: This recipe is super easy to make dairy-free! Simply swap the butter for an equal amount of high-quality vegan butter (the kind that comes in sticks works best). The result is just as soft and chewy.
- “Everything Nice” Spice Blend: Feel like channeling your inner gingerbread house architect? Add a pinch (about 1/4 tsp each) of ground cloves and allspice to the dry ingredients. It deepens the spice flavor wonderfully.
- Sugar & Spice Roll: Instead of rolling in plain sugar, mix the 1/4 cup granulated sugar with an extra 1/2 teaspoon of cinnamon before coating the dough balls. It adds an extra layer of flavor and a gorgeous color.
Chef Emily’s Kitchen Notes
This recipe has been with me through culinary school, countless bakery shifts, and many, many happy kitchen experiments at home. Over the years, I’ve learned a few things. The biggest lesson? Don’t stress! Cookies are meant to be fun. So what if your dough balls aren’t perfectly round? That’s called “rustic charm.”
I once, in a frantic pre-holiday baking marathon, accidentally used a whole cup of molasses instead of a quarter cup. Let me tell you, the resulting cookies were… intense. Dense, dark, and a little bitter. My husband, bless him, still ate three and said they were “interesting.” We now call them The Molasses Misadventure. The moral of the story? Measure your molasses carefully, friends! But also, even the “failures” are usually still pretty tasty.
Your Questions, Answered!
I’ve gotten so many wonderful questions about this recipe over the years. Here are the most common ones, answered just for you.
Q: My cookies spread too much and turned out flat. What happened?
A: This is almost always a butter issue! If your butter was too warm or melted, the cookies will spread. Make sure it’s just softened. Another culprit could be an old or inaccurate oven thermometer—if the oven is too cool, the butter melts before the structure sets. Finally, double-check your baking soda; if it’s expired, it won’t provide the necessary lift.
Q: Can I make the dough ahead of time?
A: Absolutely! You can cover the bowl of dough and refrigerate it for up to 2 days. Let it sit at room temperature for about 30 minutes before scooping and rolling, as it will be quite firm. You can also scoop and roll the dough balls, freeze them on a baking sheet, and then transfer them to a freezer bag. Bake straight from frozen, adding 1-2 minutes to the baking time.
Q: My cookies are cakey instead of chewy. Why?
A> The most common reason for cakey cookies is over-measuring the flour. Remember to spoon the flour into your measuring cup and level it off with a knife—don’t scoop the cup directly into the bag. Overmixing the dough after adding the flour can also develop too much gluten, leading to a cake-like texture.
Q: What’s the difference between molasses types?
A> Great question! Light or Original Molasses is sweet and mild. Dark/Robust Molasses is less sweet, darker, and has a stronger flavor—this is my go-to for this recipe. Blackstrap Molasses is very thick, dark, and bitter from being boiled three times; it’s packed with minerals but is not recommended for this cookie recipe.
A Quick Bite on Nutrition
While I’m all about indulgence and joy in baking, I know some of you like to keep track of what you’re enjoying. Here’s a general breakdown per cookie (this is an estimate and can vary based on specific ingredients and sizing). Remember, food is about nourishment for the soul, too!
Approximate Nutrition per Cookie:
Calories: 130 | Fat: 6g | Saturated Fat: 3.5g | Carbohydrates: 18g | Sugar: 10g | Protein: 1g | Sodium: 90mg | Fiber: 0.5g
These cookies get their rich, deep flavor from the molasses, which is a byproduct of sugar refining. Unlike refined white sugar, molasses actually retains some vitamins and minerals from the sugar cane, including iron, calcium, magnesium, and potassium. So, while it’s still a treat, you’re getting a little extra nutritional boost with every delicious, chewy bite!
Final Thoughts from My Kitchen to Yours
Well, my friend, we’ve reached the end of our molasses cookie journey, and if your kitchen smells anything like mine right now, you’re in for something special. These Old-Fashioned Soft Molasses Cookies aren’t just a treat—they’re a warm hug in cookie form, the kind that wraps you in nostalgia and reminds you that simple, homemade baking still holds all the magic in the world.
As you pull your tray from the oven and that cozy, spiced aroma fills the air, take a second to slow down. Baking, to me, has always been about more than ingredients—it’s about connection. Connection to the people who came before us, who baked without timers or fancy mixers, just intuition and love. Connection to the people around us now, who will smile when you hand them one of these sugar-crusted gems. And maybe, connection to yourself, in that quiet moment when you sneak a cookie warm off the rack before anyone notices.
These cookies are the kind of recipe that becomes part of your story. They’re the ones you’ll bake when the air turns crisp, when you’re missing home, or when you just need something to remind you that sweetness still exists in the simplest of places. So pour yourself a cup of something warm, grab a soft molasses cookie, and take a bite of pure, old-fashioned comfort.
From my cozy kitchen to yours—keep baking with heart, with patience, and with joy.
– Emily