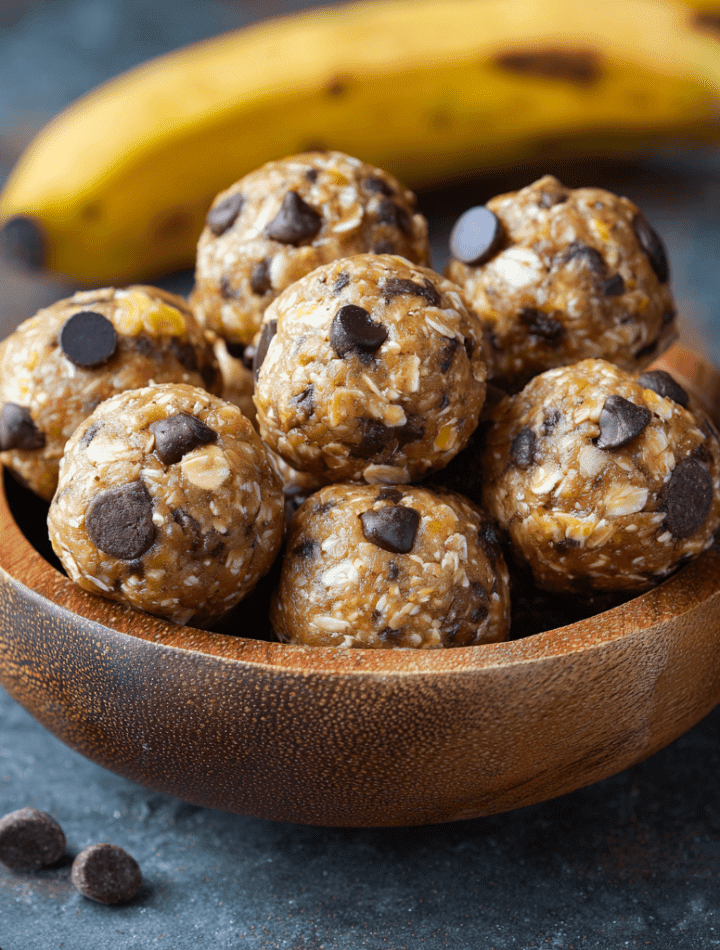
Banana Bread Energy Bites: Your New Favorite Grab-and-Go Power-Up!
Hey there, friend! Let’s be real for a second. How many times has that mid-afternoon slump hit you like a ton of bricks, leaving you staring into the fridge, hoping a magical, energizing, and delicious snack will just appear? Or maybe you’re rushing out the door, breakfast forgotten, and your stomach is growling louder than my mixer when I’m whipping up a triple-batch of cookie dough. I’ve been there more times than I can count!
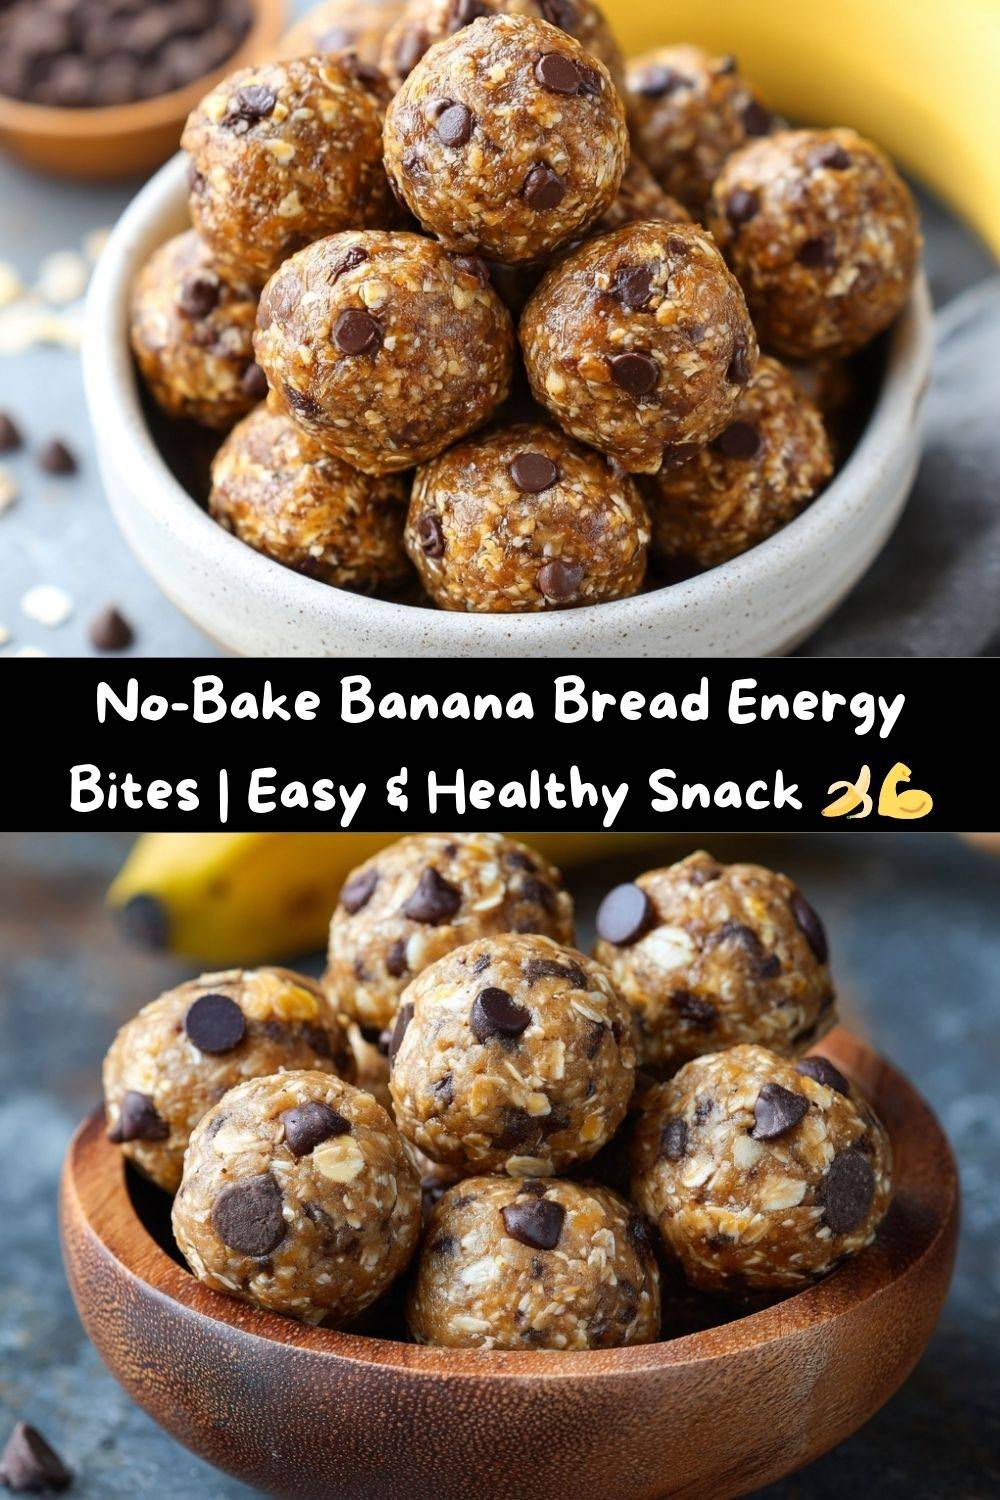
That’s exactly why I became obsessed with creating the perfect, no-fuss, fuel-you-up snack. And let me tell you, these Banana Bread Energy Bites are the absolute champion of my kitchen these days. They’re like your favorite, cozy slice of banana bread decided to get a gym membership, packed itself with protein, and transformed into a no-bake, pop-in-your-mouth power ball. The best part? You don’t even have to turn on your oven.
We’re talking soft, a little chewy, bursting with that warm cinnamon-banana bread flavor we all adore, and studded with melty little pockets of chocolate chips. They’re the ultimate fusion of wholesome ingredient goodness and “oh-my-gosh-this-tastes-like-dessert” joy. Whether you need a pre-workout boost, a lunchbox hero, or just a sweet little treat that won’t leave you crashing, these bites have got your back. So, grab your favorite mixing bowl and let’s make a batch of edible energy together!
A Spoonful of Nostalgia and a Dash of Modern Life
This recipe honestly feels like a full-circle moment for me. It all goes back to my grandma’s kitchen, where the scent of baking banana bread was basically a member of the family. That woman never, ever let a spotty banana go to waste. She’d see those brown freckles and her eyes would light up. “Time for a treat, Emily!” she’d say, and I’d pull a chair up to the counter, wooden spoon in hand, ready to “help.”
That warm, spiced aroma filling the house felt like a hug. It was pure, simple comfort. But these days? Well, my life looks a little different. It’s less about waiting patiently for a loaf to bake and more about juggling recipe testing, photoshoots, and trying to remember to water my plants. I needed that soul-warming banana bread flavor, but in a form that could keep up with my beautifully chaotic, on-the-go life.
So, I took that cherished memory, that timeless flavor combo, and I gave it a modern, energetic twist. These no-bake bites are my love letter to Grandma’s classic, repackaged for our busy world. They give me that same heartwarming feeling, but they’re ready in 15 minutes and can power me through even the craziest of days. It’s the best of both worlds, and I think that’s pretty sweet.
Gathering Your A-Team: The Ingredients
One of the best things about this recipe is its flexibility. You probably have most of this in your pantry right now! Here’s the dream team that makes these bites so magical, along with a few of my chef-y insights.
- 2 cups natural creamy peanut butter: This is our superstar binder! Using natural peanut butter (the kind that’s just peanuts and maybe salt) is key. It’s runnier and mixes in beautifully, creating that perfect, rollable texture. If you only have the shelf-stable kind, that’s okay, but your mixture might be a bit thicker.
- ½ cup mashed ripe banana: The riper, the better! Those almost-black bananas are sugar-sweet and pack the most intense banana flavor. This is their glorious second act.
- 1 cup honey: Our natural sweetener and another binding agent. Honey adds a lovely floral sweetness that pairs perfectly with the banana. For a vegan version, maple syrup works like a charm!
- 4 teaspoons vanilla extract: Don’t be shy with the vanilla! It deepens all the other flavors and makes the whole thing taste more bakery-style.
- 2 teaspoons cinnamon: This is what gives it that true “banana bread” soul. That warm, spicy note is non-negotiable for me!
- 1 cup vanilla protein powder: This is our secret weapon for a protein punch. It also helps soak up moisture and firm things up. Any brand you love works—whey, plant-based, collagen, you name it!
- 4 cups rolled oats: Please use old-fashioned rolled oats, not quick oats. They have more texture and hold their shape, giving our bites a satisfying chew. They’re the sturdy, wholesome base of the whole operation.
- 2 ½ teaspoons salt: Trust me on this! Salt makes the chocolate sweeter, the banana brighter, and cuts through the richness of the peanut butter. It’s a flavor enhancer, not a salty addition.
- 1 cup mini chocolate chips: Because joy is mandatory! The mini chips distribute themselves perfectly in every single bite. I prefer semi-sweet to balance the sweetness.
Optional, but Highly Encouraged Twists:
- ½ cup chopped walnuts or pecans: For that classic banana bread crunch and a boost of healthy fats.
- ¼ cup ground flaxseed or chia seeds: An invisible fiber and omega-3 upgrade! You won’t taste them, but your body will thank you.
- ¼ cup dried chopped dates or raisins: For little pockets of extra, natural chewiness and sweetness.
Let’s Get Rolling: Your Foolproof Steps to Energy Bite Bliss
Ready? This is the easiest “cooking” you’ll do all week. No fancy equipment needed—just a big bowl, a sturdy spoon, and a little bit of love.
- Create Your “Glue.” In a large mixing bowl, combine the peanut butter, mashed banana, honey, vanilla extract, and cinnamon. Now, channel your inner mixer and stir, stir, stir until it’s one smooth, dreamy, and incredibly fragrant mixture. Chef’s Hack: If your peanut butter is super thick or cold, pop the jar in the microwave for 15-20 seconds first to make it easier to mix.
- Incorporate the Powders. Now, sprinkle in the protein powder and salt. Mix it in really well. At first, it might look a bit dry and crumbly, but don’t panic! You’re building the structure. Make sure there are no dry pockets of protein powder hiding at the bottom of the bowl.
- Bring in the Oats. Time for the main event! Dump in all those glorious rolled oats. Use a folding motion to incorporate them. You’ll feel the mixture start to thicken and come together into a cohesive, slightly sticky dough. This is exactly what you want!
- The Fun Part: Mix-Ins! Finally, stir in the mini chocolate chips and any of your optional add-ins like nuts or seeds. Fold them in until they’re evenly distributed. Try not to eat all the chocolate chips straight from the bag while you do this (a challenge I fail every single time).
- Roll, Roll, Roll Your Bites! Now for the slightly messy, totally therapeutic part. I like to use a small cookie scoop (about 1 tablespoon size) for perfectly uniform bites. Scoop up some mixture and then roll it firmly between your palms into a tight ball. Chef’s Hack: If the mixture is too sticky, lightly wet your hands with water. This creates a non-stick barrier and makes rolling a breeze!
- The Chill Out. Place all your beautifully rolled bites on a baking sheet lined with parchment paper. Don’t let them touch! Now, pop the whole tray into the fridge for at least 20-30 minutes. This crucial step allows the oats to soften slightly and all the ingredients to firm up, transforming them from sticky dough into perfect, portable snacks.
- Store for Snacking Success. Once they’re set, transfer your energy bites into an airtight container. They’ll live happily in the fridge for up to a week, or you can be a snack superhero and freeze them for up to 3 months!
How to Serve & Savor Your Creation
Okay, they’re made, they’re chilled, and they look amazing. Now what? The beauty of these bites is their versatility! Here are a few of my favorite ways to enjoy them:
The On-the-Go Power-Up: Literally just grab a couple on your way out the door. Toss them in a small container or a reusable baggie for a commute snack, a pre-gym boost, or a pick-me-up between meetings.
The Packed Lunch Superstar: Tuck 2-3 into a lunchbox (for you or the kids!). They’re a much healthier and more exciting alternative to a packaged granola bar, and they add a sweet finish to any meal.
The “Fancy” Plated Dessert: Who says these are just for snacking? Arrange a few on a cute plate, dust them with a tiny bit of cocoa powder, and serve them with coffee after dinner. Your guests will think you’re a genius!
The Yogurt Bowl Game-Changer: Crumble one or two energy bites over a bowl of Greek yogurt and fresh berries. It’s like having granola and dessert all in one delicious, protein-packed breakfast.
Get Creative! 5 Tasty Twists on the Classic
Once you’ve mastered the basic recipe, the flavor world is your oyster! Here are a few of my favorite variations to keep things exciting.
- Tropical Escape: Swap the peanut butter for almond butter. Use ½ cup shredded coconut and ¼ cup chopped dried pineapple instead of the chocolate chips. A little taste of vacation!
- Double Chocolate Decadence: For all my chocoholics! Use chocolate protein powder instead of vanilla, and add 2 tablespoons of cocoa powder to the wet mixture. Keep the chocolate chips, because more is more.
- Cookie Dough Delight: Feeling indulgent? Use cashew butter, omit the banana and cinnamon, and add an extra teaspoon of vanilla. You’ll have safe-to-eat “cookie dough” bites that are secretly good for you.
- Nut-Free Neapolitan: For allergy-friendly needs, use sunflower seed butter! It works perfectly and gives a lovely, mild flavor. Keep the vanilla and chocolate chips for that classic combo.
- Apple Pie Bites: Swap the mashed banana for unsweetened applesauce and the cinnamon for apple pie spice. Add ¼ cup of finely chopped dried apples for extra texture. Fall in a bite!
Chef Emily’s Kitchen Confidential
This recipe has been through more iterations than my hairstyle! The first time I made them, I was too impatient to chill them and ended up with more of a “Banana Bread Energy Puddle” than a bite. Lesson learned: patience is a culinary virtue.
I’ve also found that the texture can change slightly depending on the brand of protein powder or peanut butter you use. If your mixture seems too dry and won’t hold together, add a tiny bit more honey or peanut butter, one tablespoon at a time. If it’s too wet, add a few more tablespoons of oats. You’ve got this! Cooking is about feeling, not just following.
And my final, most important note? Always, always lick the spoon. It’s the chef’s privilege.
Your Questions, Answered!
Q: My mixture is too dry and crumbly! It won’t stick together when I try to roll it. Help!
A: No worries, this is a common fix! It usually means your peanut butter was a bit thick. Simply add a little more liquid binder. A tablespoon of honey or maple syrup, or even a teaspoon of milk (dairy or non-dairy both work), should do the trick. Mix it in and try rolling again.
Q: Can I make these without protein powder?
A: Absolutely! The protein powder does help with texture, but if you don’t have it, you can substitute it with ½ cup of additional oats and ½ cup of almond flour or oat flour. The bites will be a bit softer but just as delicious.
Q: Why do I have to use rolled oats? Can I use quick oats?
A> You can use quick oats in a pinch, but the texture will be different. Quick oats are more powdery and absorb more moisture, which can make the bites denser and less chewy. Rolled oats give you that perfect, hearty texture we’re after.
Q: How long will these really last?
A> In an airtight container in the fridge, they are perfect for 1-2 weeks. Because of the fresh banana, I don’t recommend keeping them at room temperature for more than a day. For long-term storage, freeze them! They’ll keep for up to 3 months, and you can grab them frozen—they thaw in minutes.
Let’s Talk Nutrition & Nourishment
While I’m all about the flavor first, I love that these bites are little powerhouses of goodness! Here’s the scoop on what they bring to the table (approximately, as ingredients can vary).
Per Bite (approx.):
- Calories: ~100
- Protein: ~4g (Thanks, peanut butter and protein powder!)
- Carbohydrates: ~10g (A balanced mix of complex carbs from oats and natural sugars from honey and banana for sustained energy.)
- Fat: ~5g (Mostly the healthy, satisfying fats from peanut butter.)
They’re a fantastic source of sustained energy, thanks to the combo of complex carbs, protein, and healthy fats. The oats and any added seeds provide a nice bit of fiber to keep you full and satisfied. They’re a much smarter choice than reaching for a sugar-loaded candy bar when that 3 PM slump hits. Think of them as edible fuel that also happens to taste like a treat!
Final Thoughts from My Kitchen to Yours
Well, my friend, we did it! You’re now the proud creator of a batch of the most delicious, convenient, and feel-good snacks around. I hope these Banana Bread Energy Bites become a staple in your kitchen, just like they are in mine. They’re proof that eating well doesn’t have to be complicated, time-consuming, or boring.
This recipe is a testament to what I truly believe: that food should be fun, flavorful, and make you feel amazing. It’s about taking a beloved classic and giving it a twist that fits your life. So, here’s to less stress, more energy, and snacks that taste like a warm hug from my grandma’s kitchen.
With a full heart and a happy belly,
Emily