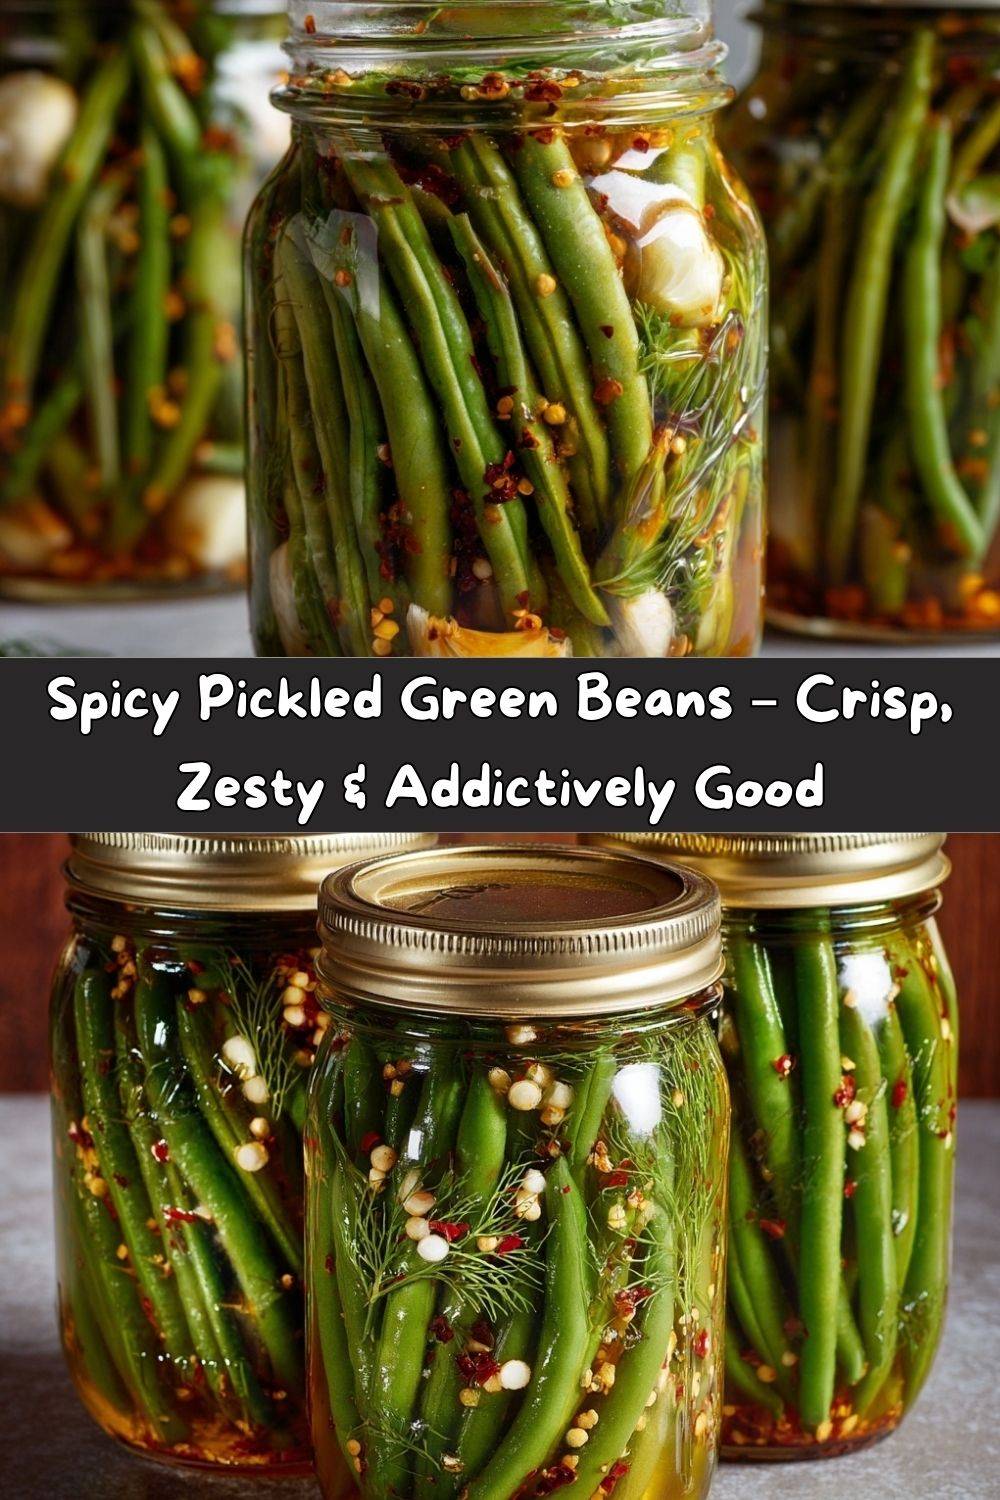
Spicy Pickled Green Beans: Your New Crunchy, Zippy Obsession
Hey there, fellow food lover! Tell me if this sounds familiar: you’re staring at a beautiful, abundant bunch of fresh green beans from the garden or farmers’ market, and you think, “There’s no way we can eat all of these before they go soft.” Or maybe you’re just craving a snack that’s equal parts crisp, tangy, and boldly satisfying. Well, my friend, you’ve just stumbled upon your new kitchen project—and trust me, it’s a game-changer.
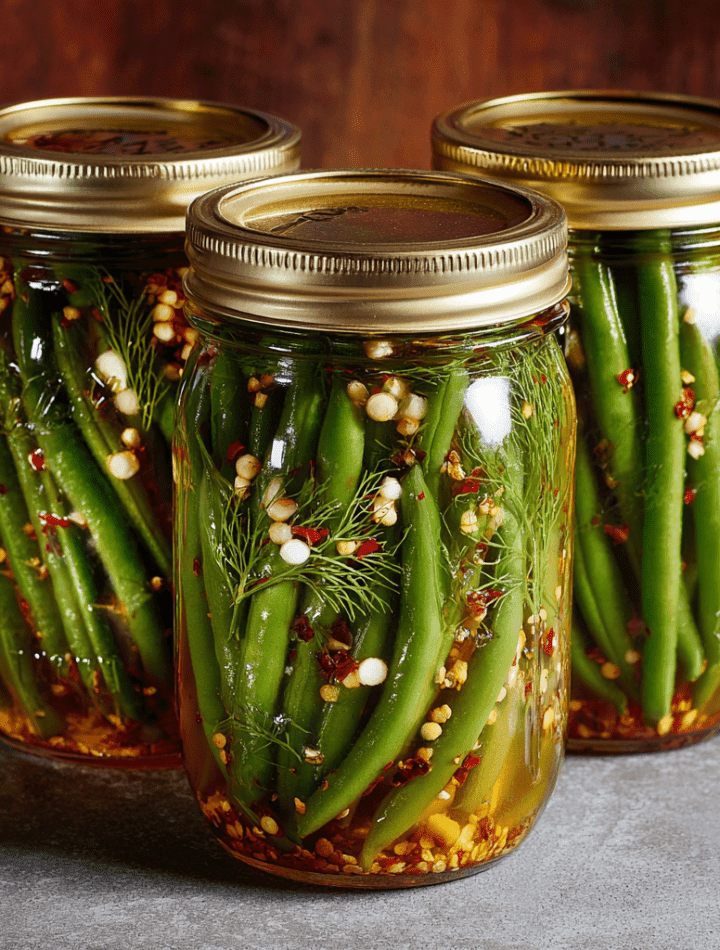
Today, we’re making Spicy Pickled Green Beans. This isn’t just another pickle recipe; this is your ticket to a jar of pure, unadulterated joy. We’re talking about garden-fresh beans transformed into crisp, zippy, garlicky spears with a serious kick of heat. They’re the kind of snack that makes you open the fridge just to peek at them, the perfect garnish that elevates a simple cocktail to a gourmet experience, and the crunchy, punchy side dish your charcuterie board has been desperately missing.
The best part? This recipe is surprisingly simple. If you can boil water, you can make these pickles. We’re using the classic water bath canning method to make them shelf-stable, meaning you can preserve that summer harvest (or that grocery store haul) to enjoy for months to come. But let’s be real—with a flavor this addictive, they rarely last that long in my house. So, tie on your favorite apron (the messy one is always the best), and let’s create something deliciously crunchy together.
The Snap That Started It All: My Pickle Epiphany
My love affair with pickled beans started not in a fancy restaurant, but in my Grandma Eleanor’s basement. It was a magical, slightly spooky place lined with shelves upon shelves of jewel-toned jars—strawberry jam, peach preserves, and these mysterious tall jars holding what looked like green sticks. One hot summer afternoon, she grabbed one, popped the lid with that satisfying thwump, and handed me a bean. “Try this, Em,” she said with a wink.
I took a tentative bite. CRUNCH. Then, a wave of vinegar and dill, followed by a slow, building heat that made my eyes widen. It was a flavor explosion I never knew I needed. Grandma just laughed. “That’s the cayenne,” she whispered, as if it were our little secret. From that moment, I was hooked. We’d sneak down for a “pre-dinner snack,” and I’d listen to her stories of pickling with her own mother. Now, every time I pack beans into a jar, I’m right back in that basement, surrounded by love and the promise of a perfectly pickled snack. It’s more than preserving food; it’s preserving a feeling.
Gather Your A-Team: The Ingredients
This is where the magic begins! Using simple, high-quality ingredients is the secret to a phenomenal pickle. Here’s what you’ll need and why each one matters.
- 2 lbs fresh, crisp green beans, trimmed: This is your star! Look for firm, slender beans that snap cleanly when bent. Avoid any that are limp or have brown spots. A crisp raw bean equals a crisp pickled bean. Chef’s Insight: Trimming them to fit your jars standing upright isn’t just for looks; it helps pack them tightly so they don’t float!
- 4 cups white vinegar (5% acidity): The backbone of our brine. Its clean, sharp tang is the classic pickle flavor we all love. Substitution Tip: You can use apple cider vinegar for a slightly fruitier, milder tang, but stick with 5% acidity for safe canning.
- 4 cups water: This balances the sharpness of the vinegar for a perfectly tangy brine.
- 4 tbsp pickling salt: Not all salt is created equal! Pickling salt is pure sodium chloride with no anti-caking agents or iodine, which can cloud your brine or give an off-flavor. Chef’s Plea: Please don’t use table salt! Sea salt or kosher salt without additives will work in a pinch.
- 4 garlic cloves, peeled: Hello, flavor! Garlic infuses the brine with a robust, savory depth that pairs perfectly with the spice.
- 2 tsp cayenne pepper (or to taste): This is where the “spicy” comes in! Two teaspoons gives a solid, slow-building heat. Spice Level Hack: For a milder batch, use 1 tsp. For face-melting heat, go for 3 tsp or add the optional chili flakes!
- 2 tsp mustard seeds: These little gems add a subtle, nutty warmth and complexity to the background flavor.
- 2 tsp dill seeds (or 4 fresh dill sprigs): The classic pickle flavor. Dill seeds offer a more concentrated, aromatic flavor, while fresh dill sprigs provide a brighter, herbaceous note. You can’t go wrong with either!
- 1 tsp black peppercorns: They add a layer of earthy, pungent spice that rounds out the flavor profile beautifully.
- Optional: 1-2 tsp red chili flakes for extra heat: For my heat-seekers! This adds an extra layer of fiery flavor and looks stunning in the jar.
Let’s Get Pickling: Your Step-by-Step Guide
Ready to transform those raw ingredients into crunchy perfection? Follow these steps, and I’ll walk you through every bubble and boil.
- Sterilize Your Jars & Lids: Start by washing 4 pint-sized canning jars and their lids in hot, soapy water. To sterilize, you can submerge them in your boiling water canner and let them simmer for 10 minutes, or run them through a hot cycle in your dishwasher. Keep them hot until you’re ready to use them. Chef’s Hot Tip: Hot jars meeting hot brine prevent thermal shock (aka, cracking), so don’t skip this!
- Pack Those Jars Like a Pro: Take your trimmed green beans and pack them tightly into the hot, sterilized jars, standing upright. Really get them in there! This prevents them from floating and ensures every bean is submerged in that glorious brine.
- Divide the Flavor Boosters: This is the fun part! To each jar, add 1 peeled garlic clove, ½ tsp of cayenne pepper, ½ tsp of mustard seeds, ½ tsp of dill seeds (or 1 fresh dill sprig), and a quarter of the black peppercorns. If you’re using red chili flakes, add a pinch to each jar now.
- Create the Brine: In a large, non-reactive pot (stainless steel or enameled is perfect), combine the white vinegar, water, and pickling salt. Bring it to a rolling boil over high heat, stirring just until the salt dissolves. Chef’s Nose Warning: The vinegar steam is potent! Don’t lean in for a deep inhale.
- The Big Pour: Carefully pour the hot brine over the green beans in each jar, leaving a ½ inch of headspace (that’s the space between the top of the liquid and the rim of the jar). I love using a canning funnel for this—it’s a lifesaver that keeps your jar rims clean.
- Seal the Deal: Take a clean, damp paper towel or cloth and carefully wipe the rims of the jars. Any residue left on the rim can prevent a proper seal. Place the sterilized lids on top and screw on the bands until they are fingertip-tight—that means snug, but don’t Hulk-smash them on.
- Water Bath Time: Using your jar lifter, gently lower the filled jars into your boiling water canner, ensuring they are covered by at least 1-2 inches of water. Process them for 10 minutes (start the timer once the water returns to a full boil).
- The Cool Down: After 10 minutes, turn off the heat and carefully remove the jars. Place them on a towel-lined countertop, away from drafts. Now, for the best sound in the world: listen for the POP! POP! POP! as the jars seal over the next few hours. It’s the sound of success!
- The Hardest Part: The Wait: Let the jars cool completely for 12-24 hours. Check that the lids are sealed (they should not flex up and down when pressed). Then, store them in a cool, dark place. For the flavor to fully develop, you must wait at least 2 weeks before tasting. I know, it’s torture, but it’s worth it!
So Many Ways to Chow Down: Serving Suggestions
Okay, the two weeks are up. You’ve twisted open that jar and gotten that whiff of tangy, spicy goodness. Now what? Let’s get these beans out into the world!
- The Straight-Up Snack: My personal favorite. Just grab a few straight from the jar for a low-calorie, high-flavor crunch when you need a pick-me-up.
- The Bloody Mary Game-Changer: Forget the celery stick! The ultimate garnish for a Bloody Mary is one of these spicy, crunchy beans. It’s a stirrer and a snack in one.
- Charcuterie Board Superstar: Arrange a bunch of these beans next to your favorite cheeses, cured meats, and crackers. Their acidity and crunch cut through the richness beautifully.
- Salad & Grain Bowl Booster: Chop them up and toss them into potato salad, a classic Cobb salad, or a hearty grain bowl for an instant flavor and texture upgrade.
- The Gibson’s Best Friend: Elevate your cocktail hour by using one of these beans as the garnish in a Gibson martini. Pure sophistication with a spicy kick.
Make It Your Own: Recipe Variations
Once you’ve mastered the classic, feel free to play with the flavors! Here are a few of my favorite twists.
- Garlic Lover’s Dream: Double the garlic! Add 2-3 extra cloves per jar for an intensely savory, pungent punch.
- Dilly Bean Classic: Amp up the dill flavor by using both dill seeds and a large fresh dill sprig in each jar. This is the classic “Dilly Bean” we all know and love.
- Sweet Heat: Add a teaspoon of sugar or a slice of sweet onion to the brine in each jar. The subtle sweetness beautifully balances the heat and vinegar tang.
- Gluten-Free & Vegan Friendly: Good news! This recipe is naturally all of those things. Just always double-check your vinegar labels if you have strict dietary needs.
- Pickle Medley: Don’t have enough green beans? Pack your jars with a mix of green beans, carrot sticks, cauliflower florets, and onion slices for a spicy pickled vegetable mix.
From My Messy Apron to Yours: Chef’s Notes
This recipe has evolved so much since my first batch, which I lovingly call “The Salt Bomb of 2012.” I misread the recipe and used double the salt. Let’s just say we had to use those beans as brine, not as snacks! It was a hilarious lesson in paying attention. Over the years, I’ve found that the type of salt truly matters, and that letting them rest for the full two weeks is non-negotiable for flavor melding. These beans have become my go-to holiday gift for neighbors and friends. There’s something so special about handing someone a jar of something you made with your own two hands. It’s a little jar of happiness.
Your Pickling Questions, Answered!
New to canning? No worries! Here are answers to the most common questions I get.
- Q: My beans turned out soft, not crisp. What happened?
A: This is usually due to one of three things: 1) The beans weren’t fresh and crisp to begin with. 2) They were overcooked during the water bath processing. Stick to the 10-minute timer! 3) Adding a grape leaf or a pinch of calcium chloride (like Pickle Crisp) to each jar can help maintain crunch, but starting with the freshest beans is the #1 rule.
- Q: Do I HAVE to process them in a water bath? Can’t I just refrigerate them?
A: You absolutely can! This is called making “refrigerator pickles.” Simply follow all the steps but skip the water bath processing. Let the jars cool on the counter and then pop them directly into the fridge. They’ll be ready to eat in about 3-5 days and will keep for 2-3 months, refrigerated.
- Q: How long do these last on the shelf?
A: Properly canned and sealed jars are safe for 12-18 months. But for the best flavor and texture, I recommend enjoying them within a year. Once opened, store in the refrigerator and consume within a month.
- Q: The liquid in my jar is cloudy. Is that okay?
A: Cloudiness can happen! It’s often caused by minerals in hard water or anti-caking agents in table salt. While it’s not necessarily a sign of spoilage, always check for other signs like a broken seal, bubbling, or an off smell. If in doubt, throw it out.
The Healthy Crunch: Nutritional Info
Let’s talk about the good stuff! Pickling is a fantastic way to preserve vegetables without losing their nutritional value. Here’s the lowdown on what you’re getting in every satisfying crunch:
- Low in Calories: With only about 15 calories per serving (5-6 beans), these are a guilt-free snack you can enjoy anytime.
- Zero Fat & Low Carb: They’re naturally fat-free and contain only 3g of carbohydrates per serving, making them a great option for many eating plans.
- A Source of Fiber: Each serving provides 1g of fiber, which is great for digestive health.
- Probiotic Potential (Unprocessed): If you make these as refrigerator pickles and don’t process them in a water bath, the live, beneficial bacteria (probiotics) from the fermentation process can be good for your gut health. The water bath process we use here creates a shelf-stable product but cooks those probiotics.
- Watch the Sodium: The main thing to be mindful of is the sodium content (around 230mg per serving), which comes from the pickling salt. If you are on a sodium-restricted diet, enjoy these in moderation.
Please note: Nutritional information is an estimate and may vary based on specific ingredients used.
Your New Kitchen Staple Awaits
And there you have it! You’re now fully equipped to fill your pantry with jars of these crisp, zippy, and utterly irresistible Spicy Pickled Green Beans. Each jar is a burst of summer sunshine—bright, bold, and packed with personality. Whether you’re preserving your garden harvest, creating unique homemade gifts, or just satisfying that craving for something tangy and crunchy, this recipe is the perfect blend of tradition and adventure.
Every time you hear that satisfying pop as a jar seals, you’ll know you’ve bottled a little piece of love and craftsmanship. These beans aren’t just a side dish—they’re a conversation starter, a snack that surprises, and a reminder that the simplest recipes often bring the most joy.
So grab that jar lifter, channel your inner kitchen alchemist, and start your own pickling tradition. The first batch might be for the pantry—but don’t be surprised if the second batch is already half gone before the week’s out.
Here’s to good crunch, good company, and good times around your table. Now go make some magic—one spicy, snappy green bean at a time.