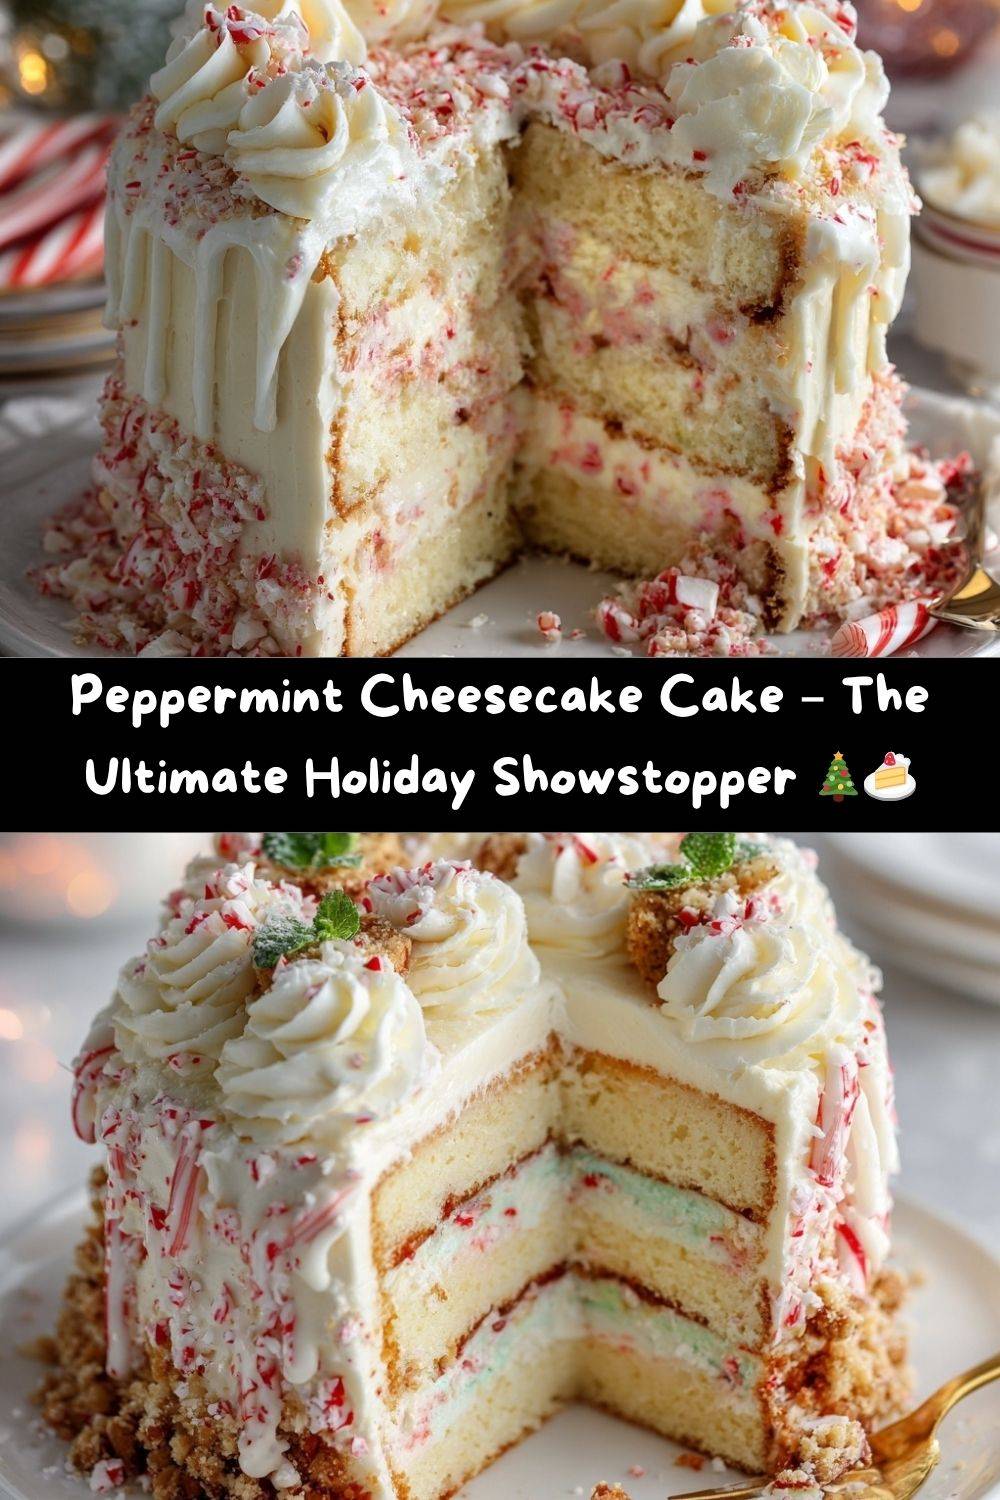
Decadent Peppermint Cheesecake Cake: Your New Holiday Showstopper!
Hey there, my fellow food lover! Emily here, from my flour-dusted kitchen to yours. Tell me, have you ever been to a holiday party, taken one bite of a dessert, and immediately thought, “I NEED this recipe in my life forever?” That’s the exact magic I’m bringing you today. Forget choosing between a slice of creamy, dreamy cheesecake and a fluffy, festive layer cake. Why not have the best of both worlds, all wrapped up in a beautiful, peppermint-kissed package?
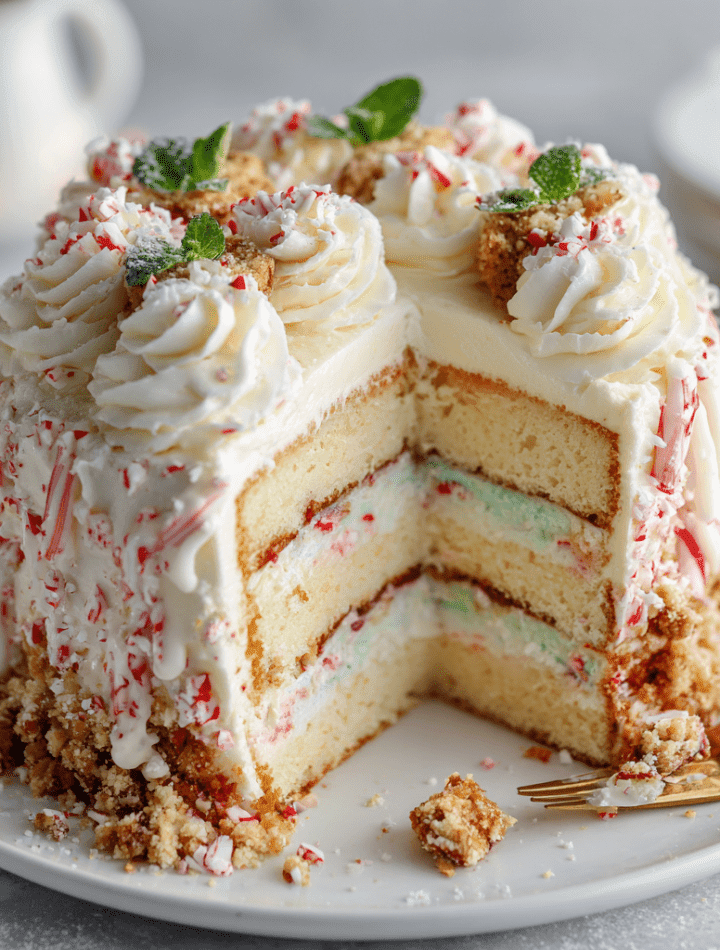
This Peppermint Cheesecake Cake is the ultimate holiday showstopper. Imagine this: two layers of soft, pillowy white cake hugging a thick, velvety layer of peppermint-infused cheesecake. The whole glorious creation gets enveloped in a cloud of light, minty whipped frosting and finished with a sparkly crown of crushed candy canes and crunchy peppermint cookies. It’s cool, it’s creamy, it’s bursting with festive flavor, and it’s guaranteed to make everyone at your table gasp with delight.
I know layered desserts can seem a little intimidating, but I promise, we’re going to walk through every single step together. This recipe is a labor of love, but it’s a *fun* one. It’s the kind of project that fills your house with the most incredible holiday scents and gives you that proud-chef feeling when you present your masterpiece. So, tie on your favorite apron (the messy one with the stories!), preheat your oven, and let’s make something absolutely unforgettable.
A Sweet Slice of Memory
This cake takes me right back to my Grandma Jean’s kitchen, the very heart of my food journey. Every December, she’d make her famous “Snowball Cake,” a simple white cake with fluffy frosting and coconut. It was my absolute favorite. One particularly chaotic Christmas Eve, I was “helping” her (which, at age seven, meant mostly licking spoons). In a whirl of excitement, I knocked over a bottle of peppermint extract right into her pristine batter. I burst into tears, sure I’d ruined everything.
But Grandma just laughed her warm, rumbling laugh, gave me a hug, and said, “Well, honey, I guess we’re making a new tradition.” We folded in some crushed candy canes, and that “mistake” became the most requested dessert for years to come. This Peppermint Cheesecake Cake is my grown-up, extra-indulgent homage to her and that happy kitchen accident. It’s a reminder that the best recipes often come from a little bit of love and a willingness to embrace the sweet surprises.
Gathering Your Ingredients
Here’s your grocery list for this festive masterpiece. Read through my little chef notes—they’ll help you understand the “why” behind each ingredient and give you some handy swaps!
For the Cake Layers:
- 2 White Cake Recipes (or two 15.25 oz boxed mixes): I’m a firm believer in using what works for you! Homemade is wonderful, but a good quality box mix is a fantastic, reliable shortcut. No judgment here—we’re all about delicious results.
For the Peppermint Cheesecake Layer:
- 40 oz (five 8-oz blocks) Cream Cheese, softened: This is the heart of our cheesecake. Pro-Tip: Take it out of the fridge at least 2 hours before you start. Room temp cream cheese blends smoothly and prevents a lumpy batter.
- 1 ½ cups Granulated Sugar: Sweetens and helps create that classic creamy texture.
- 1 tbsp Pure Vanilla Extract: The flavor backbone that makes everything taste richer and more homemade.
- ½ tsp Coarse Salt: Trust me! Salt is the secret weapon that makes the sweet and minty flavors pop without making it taste salty.
- 4 large Eggs, at room temperature: They incorporate much more easily into the batter when they’re not cold, giving you a smoother, more uniform cheesecake.
- 1 cup Sour Cream, at room temperature: This is my magic ingredient for the creamiest, most luxurious cheesecake texture imaginable. It adds a slight tang that balances the sweetness perfectly.
- 3 cups Crushed Peppermint Candies: We’re going for a serious peppermint punch! I use a food processor to get a fine crumb, but a zip-top bag and a rolling pin work just as well (and is a great way to relieve some holiday stress!).
For the Frosting & Decoration:
- 3–4 cups Pastry Pride (or stabilized whipped topping): I love Pastry Pride because it’s stable, not overly sweet, and holds its shape beautifully. You can use Cool Whip, but make sure it’s thoroughly thawed. For a from-scratch option, see the variations below!
- 2 tsp Peppermint Extract: We’re layering that minty flavor right into the frosting. It’s a flavor explosion!
- Extra Crushed Peppermint & Peppermint Joe-Joe’s (or similar cookies): This is where the wow-factor comes in! The crunch and color make it a true centerpiece.
Let’s Build This Beauty: Step-by-Step
Ready? Let’s do this! We’ll tackle this in stages: cake, cheesecake, then the grand assembly. Read through all the steps before you begin—it’s my number one tip for a smooth, stress-free baking experience.
- Bake the Cake Layers:Prepare your white cake batter according to your chosen recipe or the box mix directions. Chef’s Hack: I like to add an extra teaspoon of vanilla extract to the batter for an even more decadent flavor. Divide the batter evenly between two greased and parchment-lined 9-inch round cake pans. Bake as directed, and let the cakes cool in the pans for about 10 minutes before turning them out onto a wire rack to cool completely. Once cool, use a serrated knife to level the tops. This creates a flat, stable surface for our cheesecake layer to sit on. Don’t toss those cake scraps! They’re your official baker’s treat.
- Create the Peppermint Cheesecake Layer:Preheat your oven to 325°F (160°C). Grab a 9-inch springform pan—this is essential for getting the cheesecake out cleanly! Line the bottom with a round of parchment paper and lightly grease the sides.
In a large bowl, beat the softened cream cheese and sugar together on medium speed until it’s completely smooth, creamy, and free of lumps. This is the most important step for a silky texture—don’t rush it! Scrape down the bowl. Beat in the vanilla and salt. Now, add the eggs one at a time, beating just until each yolk disappears into the batter. Over-mixing after adding the eggs can incorporate too much air and lead to cracking.
Gently mix in the sour cream until it’s fully combined. Finally, switch to a spatula and gently fold in the 3 cups of crushed peppermint candies. Pour this beautiful pink batter into your prepared springform pan and smooth the top.
Bake for 50-60 minutes. The edges should look set, but the center will still have a slight jiggle—like Jell-O. This is perfect! It will firm up as it chills. Turn the oven off, crack the door open, and let the cheesecake cool inside for about an hour. This gradual cooling helps prevent major cracking. Then, transfer it to the refrigerator to chill for at least 4 hours, but overnight is even better.
- The Grand Assembly:Time for the fun part! Place one of your cooled white cake layers on a cake stand or serving plate. Carefully remove the chilled cheesecake from the springform pan. If it’s sticking, you can run a thin knife under hot water, dry it, and run it around the edge. Gently place the entire cheesecake layer on top of the cake base. It’s okay if it’s a little wobbly—the frosting will lock everything in place. Top it all with the second white cake layer. Now you have a glorious cake-cheesecake-cake tower!
- Frost It Up!In a chilled bowl, whip your Pastry Pride (or whipped topping) with the 2 teaspoons of peppermint extract until it’s fluffy and holds soft peaks. Using an offset spatula, generously frost the top and sides of the entire cake. Don’t worry about it being perfectly smooth—a slightly rustic, “cloud-like” swirl looks gorgeous and inviting.
- Decorate for the Holidays:This is where you get to be an artist! Gently press the extra crushed peppermint candies onto the sides of the cake. Pile more in the center of the top and artfully arrange the Peppermint Joe-Joe’s cookies or cookie crumbles. Step back and admire your handiwork. You just created a holiday masterpiece!
How to Serve Your Showstopper
Presentation is part of the fun! For the cleanest slices, I highly recommend dipping a sharp knife in hot water and wiping it dry between each cut. The heat glides right through the cold cheesecake layer, giving you picture-perfect pieces.
Serve this cake chilled. The contrast between the cool, creamy cheesecake and the soft cake is pure heaven. I love pairing each slice with a hot cup of dark roast coffee or a glass of cold milk to balance the sweetness. For the adults, a little glass of peppermint schnapps or a rich hot chocolate on the side turns dessert into a full-blown celebration.
And remember, this is a rich dessert! A modest slice is surprisingly satisfying. (But hey, no one will judge you if you go back for seconds… I definitely will!)
Make It Your Own: Fun Flavor Twists!
Love the idea but want to switch it up? This recipe is a fantastic canvas for creativity!
- Chocolate Lover’s Dream: Swap the white cake for a rich chocolate cake mix or recipe. The combination of chocolate and peppermint is a classic for a reason!
- From-Scratch Frosting Fan? Use my go-to: whip 2 cups of heavy cream with 1/2 cup powdered sugar and 2 tsp peppermint extract until stiff peaks form. It’s light, not too sweet, and absolutely divine.
- Cookies & Cream: Fold 1 cup of crushed Oreos into the cheesecake batter instead of the peppermint candies, and use crushed Oreos for the decoration.
- Festive Fudge Ribbon: Before baking the cheesecake, drizzle 1/2 cup of hot fudge sauce over the batter and swirl it in with a knife for a marbled effect.
- Dairy-Free Delight: Use your favorite dairy-free cream cheese, sour cream, and whipped topping alternatives. The results are still fantastic!
Chef Emily’s Kitchen Notes
This recipe has evolved in my kitchen over many holiday seasons. The first time I made it, I was so nervous about the cheesecake cracking that I baked it in a water bath. It worked, but it was a hassle! I’ve since found that the slow, cool-down method in the oven works just as well for me and is one less pot to wash. The beauty of this cake is that even if your cheesecake layer develops a tiny crack, the frosting covers it completely—it’s our delicious little secret!
One of my favorite kitchen memories is the year my dog, Biscuit, managed to snag a single peppermint Joe-Joe from the counter while my back was turned. He looked so guilty, with red and white crumbs all over his snout, that I couldn’t even be mad. We just took it as a sign of how irresistible this dessert truly is!
Your Questions, Answered!
Here are answers to some common questions to ensure your baking success.
- Can I make this ahead of time? Absolutely! In fact, I highly recommend it. You can bake the cake layers and cheesecake layer up to 2 days in advance. Wrap the cooled cake layers tightly in plastic wrap and keep the cheesecake covered in the fridge. Assemble and frost the cake the day you plan to serve it.
- My cheesecake layer cracked! What did I do wrong? First, don’t panic! This happens to the best of us. Over-mixing, a sudden temperature change, or just an oven with hot spots can cause cracks. The wonderful news is that our fluffy frosting is the perfect fix-it tool. It will cover any and all imperfections beautifully.
- Can I freeze this Peppermint Cheesecake Cake? You can, but with a caveat. The assembled cake with the whipped frosting doesn’t freeze super well, as the frosting can become watery when thawed. Your best bet is to freeze the individual components. Wrap the baked cake layers and the cooled, baked cheesecake layer separately in plastic wrap and foil. They will freeze perfectly for up to 2 months. Thaw in the fridge overnight before assembling and frosting.
- The cake layers are domed and won’t sit flat. Help! No worries! This is why we level the cakes. Simply take a long, serrated knife and gently slice off the domed top to create a flat surface. (Again, baker’s treat!)
Nutritional Information*
Let’s be real—this is a celebratory dessert, and it’s meant to be enjoyed as a special treat! Here’s a general breakdown per slice (assuming 16 servings), but please note this can vary based on the specific brands of ingredients you use.
- Calories: ~520
- Carbohydrates: 48g
- Fat: 34g
- Protein: 7g
- Sugar: 35g
*This information is an estimate provided for informational purposes only. I’m a chef, not a registered dietitian!
Final Sweet Thoughts
And there you have it, friend! Your guide to creating the most talked-about dessert of the holiday season. This Peppermint Cheesecake Cake is more than just a recipe; it’s an experience. It’s the joy of creating something with your own hands, the anticipation as it chills, and the pure happiness of sharing it with people you love.
I am so incredibly proud of you for taking on this baking adventure. Remember, cooking and baking are all about the journey—the little messes, the happy accidents, and the triumphant final product. I hope this cake becomes a cherished part of your holiday traditions, just like my Grandma Jean’s “mistake” cake did for me.
If you make it (and I truly hope you do!), I’d be over the moon if you tagged me @TastyChowEmily on social media so I can see your beautiful creation. Now, go forth and bake with joy! Sending you and your kitchen all the warm, festive vibes.
With love and a sprinkle of peppermint,
Emily