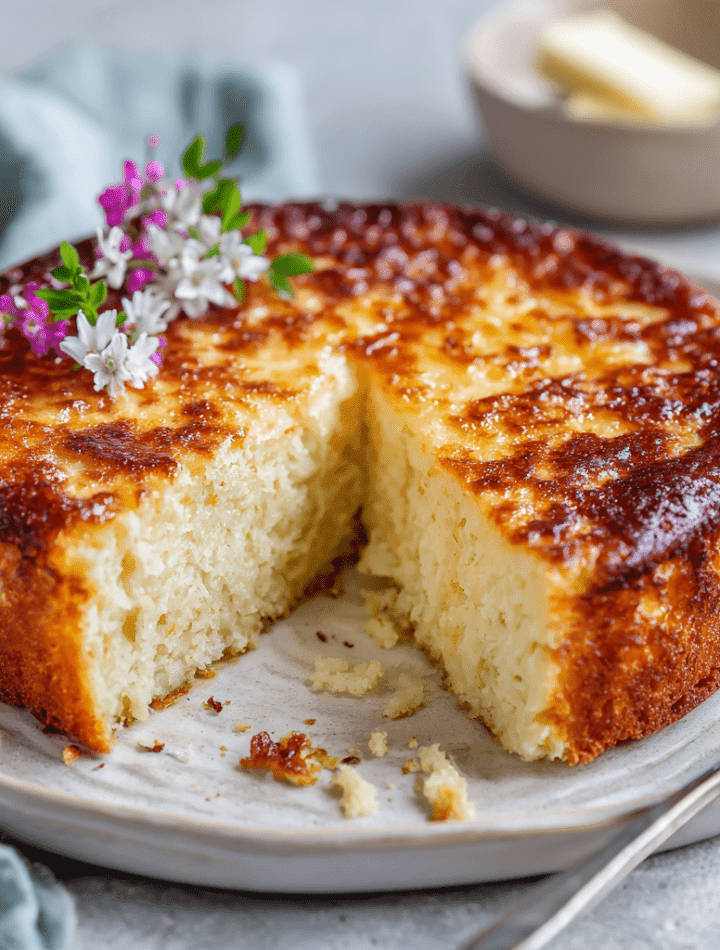
3-Ingredient Creamy Yogurt Cake – The Miracle Dessert Everyone’s Talking About
Hey there, friend! Let’s get real for a second. Have you ever had one of those days where a serious sugar craving hits, but the thought of hauling out the stand mixer, softening butter, and separating eggs feels like running a culinary marathon? Or maybe you’re staring into your fridge, wondering what on earth to make for that last-minute potluck, and all you see is a tub of yogurt staring back at you.
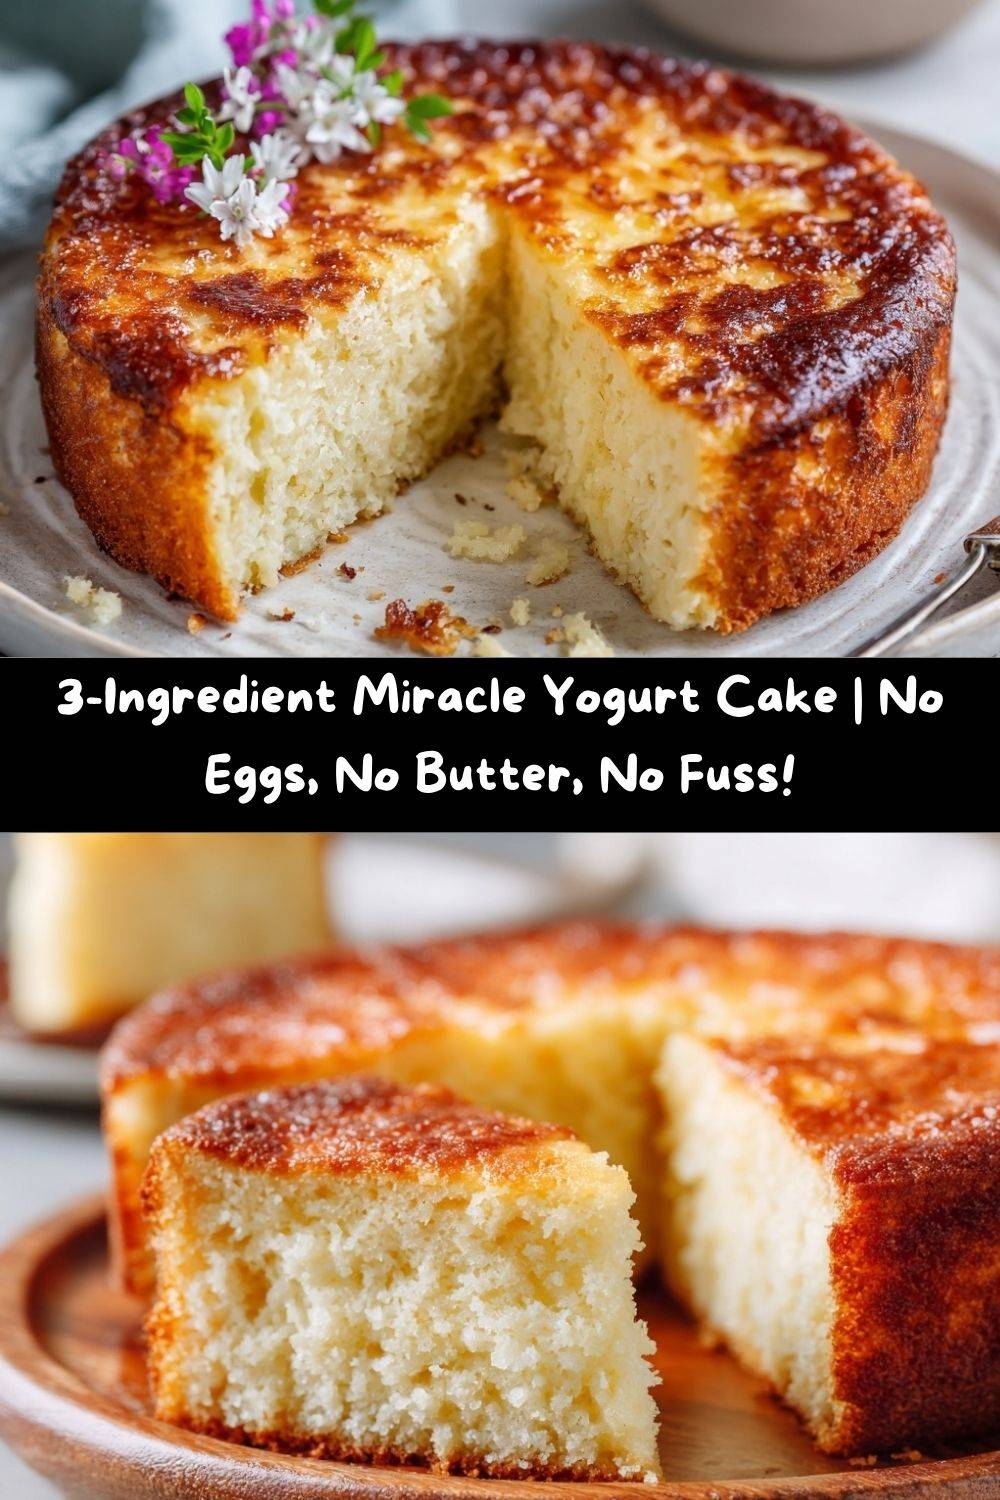
Well, consider this your kitchen fairy godmother moment. I’m about to let you in on a little secret that’s been taking home kitchens by storm: the miraculous 3-Ingredient Creamy Yogurt Cake. Yes, you read that right. Three ingredients. No eggs, no butter, no oil, and absolutely no fuss. This isn’t just a recipe; it’s a baking revolution, and it’s here to save your day.
This cake is the epitome of simple, wholesome magic. It bakes up into a soft, tender crumb with a subtle tang that will have everyone asking, “What’s your secret?” It’s sweet without being cloying, moist without being heavy, and so incredibly versatile that it becomes a blank canvas for your wildest dessert dreams. So, if you’ve ever doubted your baking skills, or if you’re just a busy human who loves a good, easy treat, this is your sign. Grab that yogurt, and let’s make some magic together.
The Day My Fridge Betrayed Me (And This Cake Saved Dinner)
I’ll never forget the first time I stumbled upon this recipe. It was a few years ago, and I was hosting a casual dinner for a few friends. I had the entire menu planned out—a gorgeous herb-roasted chicken, some crispy potatoes, a bright salad—but I had completely, utterly forgotten to plan dessert. A cardinal sin for a chef, I know!
I did a frantic fridge and pantry scan. No eggs. My butter was frozen solid. I was out of vanilla extract. It was a baker’s nightmare. But there, sitting on the top shelf, was a nearly full container of plain Greek yogurt my husband used for his morning smoothies. I looked at it, then at my bag of sugar, then at my canister of self-rising flour. A wild, “what-if” idea sparked.
With nothing to lose, I mixed them together, poured the batter into a pan, and sent up a little prayer to the baking gods. 35 minutes later, I pulled out this gorgeous, golden, perfectly domed cake. It was a total Hail Mary that worked. My friends devoured it, raving about its delicate texture and asking for the “complicated” recipe. I just smiled and passed around another slice. It was a powerful reminder that the best recipes aren’t about complexity; they’re about heart, a little ingenuity, and the magic of simple ingredients.
Gather Your Trio of Heroes
This is the beautiful part. You likely have everything you need already. Let’s break down our three superstars:
- 1 cup Plain Yogurt – This is the heart of our cake! It provides moisture, a lovely tang, and the fat and protein that usually come from eggs and butter. Chef’s Insight: Use full-fat Greek yogurt for an incredibly rich, dense, and protein-packed crumb. For a lighter, fluffier cake, standard plain yogurt works wonders. The yogurt cup itself becomes your measuring tool for the other ingredients—how clever is that?
- 1 cup Granulated Sugar – This sweetens the deal and helps create a tender texture. Substitution Tip: You can play with different sugars here! Coconut sugar will give it a deep, caramel-like flavor, and I’ve had great success with monk fruit sweetener for a lower-carb version. The cake will be slightly darker in color if you use a darker sugar, but just as delicious.
- 2 cups Self-Rising Flour – This is the all-in-one powerhouse that gives our cake its lift and structure. It already contains baking powder and salt, so we don’t need to add any. Chef’s Hack: No self-rising flour? No problem! For every 1 cup of all-purpose flour, add 1 ½ teaspoons of baking powder and ¼ teaspoon of salt. Whisk it together thoroughly, and voilà—you’ve made your own!
Let’s Bake This Beauty: Your Foolproof Guide
Ready to see the magic happen? Follow these steps, and you’ll be a believer in under an hour.
- Preheat and Prep. Fire up your oven to 350°F (180°C). Now, grab an 8-inch round cake pan or a standard loaf pan. Grease it lightly with butter or cooking spray, or line it with parchment paper for an absolutely foolproof release. Chef’s Tip: I love using a round pan for a more traditional cake look, but a loaf pan gives you beautiful, sliceable portions that feel a bit more rustic.
- The Yogurt & Sugar Tango. In a medium-sized mixing bowl, plop in your yogurt and pour in the sugar. Now, take a spatula or a whisk and mix them together. You’re not just combining them; you’re letting the sugar granules dissolve slightly into the yogurt. You’ll see the mixture go from grainy to smooth and become just a bit thicker. This is the foundation of our batter! Little Chef Hack: Let this mixture sit for 2-3 minutes before you add the flour. This gives the sugar more time to melt in, resulting in a less grainy final texture.
- The Gentle Fold. Here is the single most important step for a tender cake: do not overmix! Add your self-rising flour to the bowl. Using your spatula, gently fold the flour into the wet ingredients. Use a sweeping motion, turning the bowl as you go. Mix just until the last streak of white flour disappears. A few tiny lumps are totally fine—I promise! Overmixing develops the gluten in the flour and will give you a tough, dense cake, and we are all about that soft, delicate crumb.
- Into the Pan It Goes. Pour your beautifully simple batter into your prepared pan. Use the spatula to smooth out the top. Chef’s Commentary: The batter will be thick and luxurious, almost like a very thick pancake batter. Don’t worry, that’s exactly what we want!
- Bake to Golden Perfection. Slide the pan into your preheated oven and let it work its magic for 30-35 minutes. You’ll know it’s done when the top is a lovely golden brown, the edges are just starting to pull away from the pan, and a toothpick or cake tester inserted into the center comes out clean. Watchful Eye Tip: Ovens can be sneaky, so start checking at the 25-minute mark. If the top is browning too quickly, you can loosely tent it with a piece of aluminum foil.
- The All-Important Cool Down. Once baked, pull the cake from the oven and let it cool in the pan for about 10 minutes. This allows the structure to set. Then, run a knife around the edges and carefully transfer it to a wire rack to cool completely. Confession: I have zero willpower and often slice into this cake while it’s still warm. It’s sublime, with a comforting, pudding-like quality.
How to Serve Your Masterpiece
This cake is a chameleon! It’s delicious completely naked, but a little dressing up never hurt anybody. Here’s how I love to serve it:
For a Simple, Elegant Treat: Let the cake cool completely, then dust the top with a generous snowfall of powdered sugar. A handful of fresh berries on the side makes it look like you slaved away for hours.
For a Decadent Dessert: Turn it into a shortcake! Slice the cake into squares, split them horizontally, and pile on macerated strawberries and a dollop of freshly whipped cream. Absolute heaven.
For Breakfast or a Snack (no judgment here!): A warm slice with a pat of good butter melting into its crevices is pure comfort. A drizzle of honey or a smear of your favorite fruit jam works wonderfully too.
Pro-Plating Tip: For a dinner party, serve a slice on a plate with a zigzag of chocolate or caramel sauce and a sprig of mint. It instantly elevates this humble cake to restaurant-worthy status.
5 Fun Ways to Shake Up Your Yogurt Cake
The fun doesn’t stop with the basic recipe! This cake is a blank slate waiting for your personal touch. Here are a few of my favorite twists:
- Lemon-Zested Sunshine Cake: Add the zest of one large lemon to the sugar and rub it together with your fingers before mixing with the yogurt. This releases the lemon oils and fills the entire cake with a bright, sunny flavor.
- Vanilla Bean & Berry Bliss: Fold 1 teaspoon of vanilla extract and ¾ cup of fresh or frozen blueberries (tossed in a tablespoon of flour to prevent sinking) into the batter right before pouring it into the pan.
- Chocolate Chip Cookie Dough Vibe: This is a crowd-pleaser! Simply fold in ½ to ¾ cup of semi-sweet chocolate chips. The pockets of melted chocolate take this simple cake to a whole new level of yum.
- Almond Citrus Glaze: Bake the cake as directed. While it cools, whisk together 1 cup of powdered sugar, 2 tablespoons of fresh orange or lemon juice, and ½ teaspoon of almond extract. Drizzle this glaze over the top for a beautiful, flavorful finish.
- Dairy-Free & Vegan-Friendly: You can absolutely make this cake vegan! Simply use a plain, unsweetened plant-based yogurt (almond, coconut, or soy work great) and ensure your sugar is certified vegan (most are). The method remains exactly the same.
Chef Emily’s Notebook Scribbles
Over the years, this recipe has become my go-to “emergency cake.” I’ve made it for birthday parties when a layer cake fell, for new parents who needed a quick pick-me-up, and for myself on more than one stressful Tuesday. It has never, ever let me down.
One of my favorite kitchen memories is of my then 5-year-old nephew making this cake almost entirely by himself. He was so proud of his “three-thing cake,” and it was a beautiful reminder that baking should be joyful and accessible to everyone, no matter their skill level. This recipe proves that you don’t need a pantry stocked with a hundred ingredients to create something truly wonderful and shareable. It’s a little lesson in simplicity, and I think we could all use more of that.
Your Questions, Answered!
Q: My cake turned out a bit dense. What happened?
A: The number one culprit for a dense yogurt cake is overmixing! Remember, once you add the flour, you want to gently fold it in just until combined. Also, double-check that your self-rising flour is fresh. If the baking powder in it is old, it won’t provide enough lift.
Q: Can I use flavored yogurt?
A: You can, but be cautious! Flavored yogurts (like vanilla or fruit-on-the-bottom) often contain added sugars and stabilizers. If you use one, you may want to slightly reduce the granulated sugar in the recipe, and know that the texture might be slightly different. I find it’s best to start with plain and add your own flavors.
Q: How should I store this cake?
A> Because it’s so moist, it stores beautifully! Just keep it in an airtight container at room temperature for up to 2 days, or in the fridge for up to 5 days. You can also freeze the whole cake or individual slices for up to 3 months. Just wrap it tightly in plastic wrap and then foil.
Q: My cake didn’t rise much. Why?
A> If you used all-purpose flour without adding baking powder and salt, that’s the reason! This recipe relies on the leavening agents in self-rising flour. If you made your own, ensure you added the correct amount of baking powder (1 ½ tsp per cup of flour). Also, make sure your oven was fully preheated before the cake went in.
A Quick Peek at the Nutrition
Now, I’m a firm believer that dessert is for the soul, but I know many of you are curious about the nutritional side of things. Here’s a general breakdown per serving (based on 8 servings, using full-fat Greek yogurt):
- Calories: ~215
- Protein: 5g (Thanks, Greek yogurt!)
- Carbohydrates: 38g
- Fat: 4g
- Sugar: 17g
Compared to a traditional butter-and-egg laden cake, this version is naturally lower in fat and calories, while the Greek yogurt packs a nice protein punch. It’s a wonderfully balanced treat you can feel good about enjoying. Remember, these are estimates, and the exact numbers will vary based on the specific brands of ingredients you use.
Your New Go-To Recipe Awaits
And there you have it, my friend! The secret is out of the bag. This 3-Ingredient Creamy Yogurt Cake is more than just a recipe; it’s a trusty sidekick for your busy life, a beacon of hope for baking beginners, and a delicious reminder that the simplest things are often the best.
It’s the cake you’ll make on a whim, the recipe you’ll pass on to your friends, and the treat that will make you feel like a kitchen wizard every single time. So, what are you waiting for? Grab that yogurt container, and let’s make something delicious together. I can’t wait to hear how you make it your own!
With love and a sprinkle of sugar,
Emily
