Your New Favorite Chicken Dinner is Here!
Hey there, friend! Let me ask you a question. Have you ever stared into your fridge, willing dinner to magically appear, only to be met with the silent, slightly daunting gaze of a package of chicken breasts? I’ve been there more times than I’d like to admit. You want something easy, something delicious, something that feels like a warm hug on a plate, but you’re fresh out of culinary mojo.
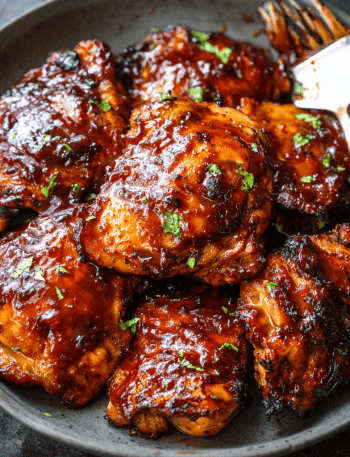
Well, get ready to banish those “blah chicken” blues for good. Today, we’re making my absolute go-to, my never-fail, my “I-need-to-impress-someone-but-also-have-zero-time” hero: Garlic Butter Baked Chicken Breast.
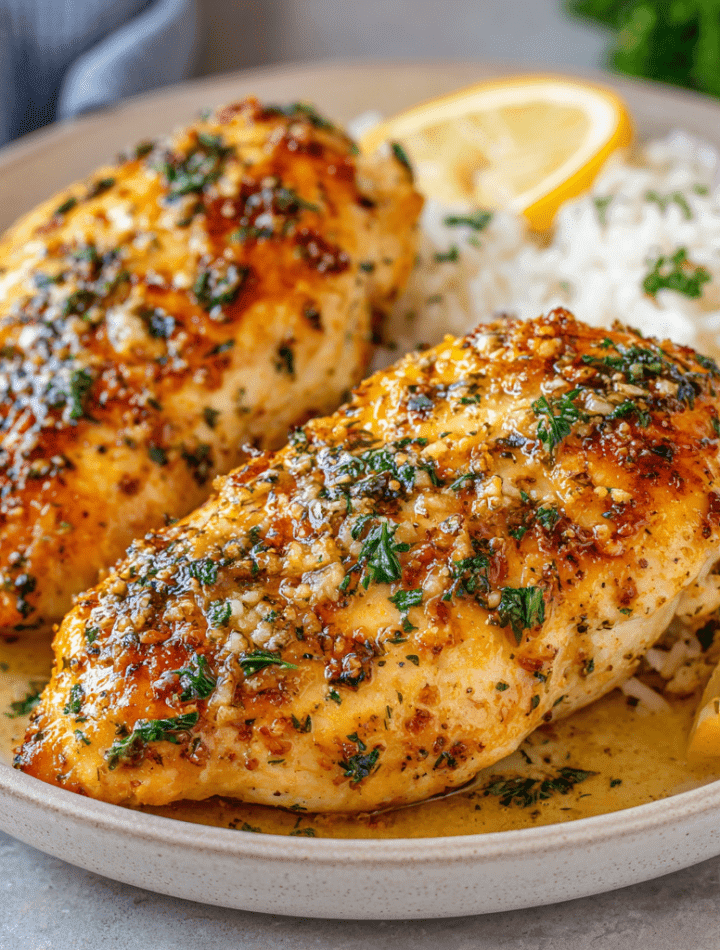
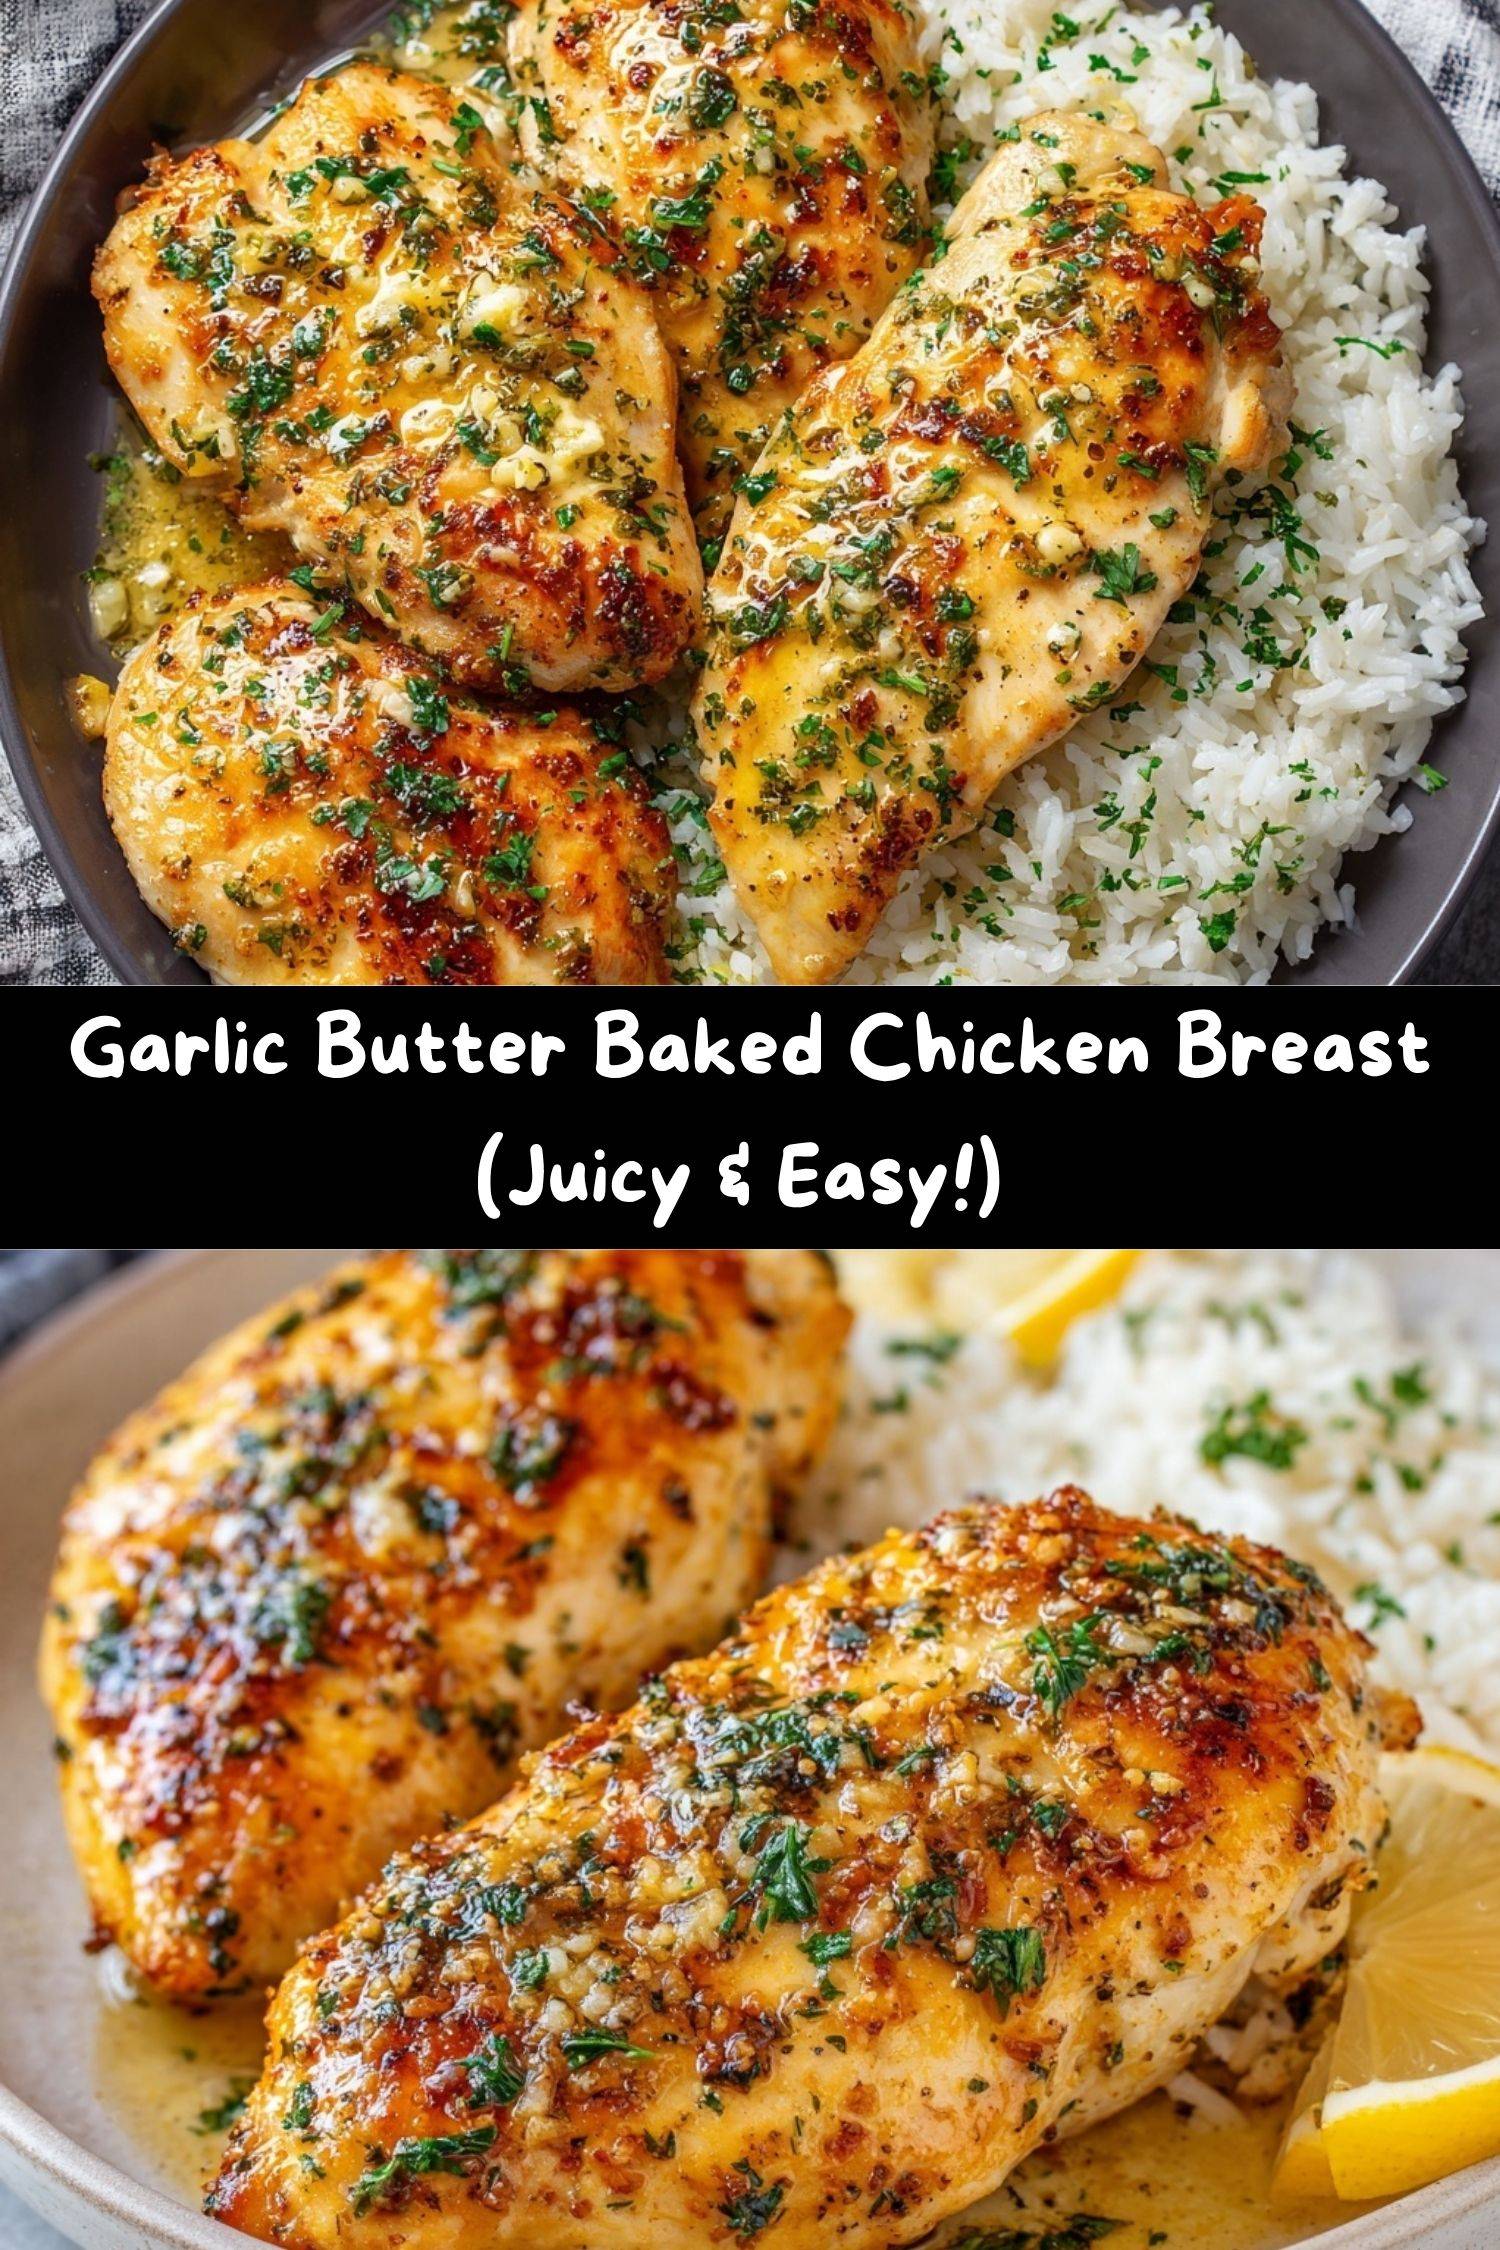
This isn’t just any baked chicken. This is the juiciest, most flavorful, melt-in-your-mouth chicken you’ll ever make. The secret? A glorious, simple bath of golden garlic butter that bakes right into the chicken, creating a succulent interior and a beautifully golden, aromatic exterior. It’s the kind of recipe that makes you look like a kitchen rockstar with about 10 minutes of active effort. So, tie on your favorite apron (the messy one is always the best), and let’s make something truly delicious together.
The Little Recipe That Could
This recipe takes me right back to my first tiny apartment after culinary school. My kitchen was about the size of a postage stamp, and my budget was even smaller. I lived on pasta, rice, and, you guessed it, chicken breasts. I’d tried pan-searing them, grilling them, and yes, I’d even committed the cardinal sin of baking them plain, leading to a sad, dry result that even my dog looked at with pity.
One rainy Tuesday, feeling particularly uninspired, I remembered my grandma’s mantra: “Butter and garlic make everything better, sweetheart.” I had a stick of butter, a head of garlic, and a dream. I whisked them together, poured it over the chicken, and crossed my fingers. The smell that wafted from my oven 25 minutes later was nothing short of magical. It smelled like a fancy bistro, not a struggling chef’s studio apartment. That first bite? Pure, unadulterated joy. It was juicy, bursting with flavor, and it single-handedly restored my faith in simple, humble ingredients. This recipe became my culinary security blanket, and now, I’m so thrilled to share it with you.
Gathering Your Flavor Arsenal
One of the best things about this recipe is the short, sweet ingredient list. You probably have most of this in your pantry right now! Here’s what you’ll need and a little “chef’s insight” on each one.
- 4 boneless, skinless chicken breasts: Look for breasts that are roughly the same size so they cook evenly. If yours are real whoppers (we call those “turkey breasts” in disguise), you might want to slice them in half horizontally to create thinner cutlets. This is my #1 tip for preventing dry chicken!
- 4 tbsp unsalted butter, melted: The rich, creamy base of our sauce. Using unsalted lets you control the sodium level perfectly. If you only have salted, just ease up on the added salt later.
- 4 garlic cloves, minced: Don’t be shy! Fresh is best here, as it provides a bright, pungent kick that mellows beautifully in the oven. In a pinch, 1 teaspoon of jarred minced garlic can work, but fresh really makes a difference.
- 1 tsp dried parsley (or 1 tbsp fresh chopped parsley): This adds a subtle, fresh herbaceous note. I use dried in the butter for its reliability, but a fresh parsley garnish at the end is a gorgeous, vibrant touch.
- 1 tsp dried thyme: This is the secret flavor weapon! Thyme has a lovely, earthy complexity that pairs perfectly with chicken and garlic. Rubbed sage or a pinch of dried rosemary would also be lovely here.
- ½ tsp paprika: This isn’t just for color (though it gives the chicken a beautiful golden hue)! It adds a smidge of sweet, smoky depth. Smoked paprika would be an incredible twist here.
- Salt and freshly ground black pepper, to taste: The dynamic duo of seasoning. Please, please season your chicken generously! This is the foundation of flavor.
- Optional: Lemon wedges for serving: Highly recommended! A squeeze of fresh lemon juice right before serving cuts through the richness and makes all the flavors pop.
Let’s Get Cooking! Your Foolproof Steps to Juicy Chicken
Ready to work some magic? Follow these steps, and you’ll have a perfect chicken dinner in no time. I’ve packed this section with all my favorite chef hacks to ensure your success.
- Preheat your oven to 400°F (200°C). A properly hot oven is crucial! It sears the outside of the chicken quickly, locking in all those precious juices. Chef’s Tip: While the oven heats, take your chicken out of the fridge and let it sit on the counter for 15-20 minutes. Cooking cold chicken straight from the fridge can lead to uneven cooking!
- Prep the chicken. Pat the chicken breasts completely dry with paper towels. This might be the most important step for getting a beautiful sear and preventing a steamy, boiled texture. Once dry, season both sides generously with salt, pepper, paprika, and thyme. Rub those seasonings in like you’re giving the chicken a little massage!
- Whisk together the glorious garlic butter. In a small bowl, combine the melted butter, minced garlic, and dried parsley. Give it a good whisk until it’s fragrant and homogenous. Take a whiff—this is the smell of happiness.
- Assemble in your baking dish. Arrange your seasoned chicken breasts in a single layer in a baking dish. A ceramic or glass dish works great. Now, pour that heavenly garlic butter sauce over each breast, making sure they’re all nicely coated. I like to use a spoon to baste them a little right at the start. Chef’s Hack: For extra flavor, you can lightly sauté the minced garlic in the melted butter for 60 seconds before adding the parsley. This takes the raw edge off the garlic and deepens its flavor!
- Bake to perfection. Pop the dish into your preheated oven and bake for 20-25 minutes. The cook time depends on the thickness of your chicken. The only way to know for sure it’s done? Use a meat thermometer! Insert it into the thickest part of the breast—it should read 165°F (74°C). Chef’s Secret: I pull my chicken out at about 160°F. The residual heat will carry it over to 165°F as it rests, ensuring it doesn’t overcook.
- Optional, but highly recommended: The Broil. If you want a gorgeous, crispy, golden-brown top, switch your oven to broil for the last 2-3 minutes. Watch it like a hawk! It can go from perfectly golden to slightly charred in seconds. This step adds fantastic texture.
- REST YOUR CHICKEN! I’m saying this in all caps because it’s that important. Once out of the oven, transfer the chicken to a clean plate or cutting board and let it rest for 5 full minutes. This allows the muscle fibers to relax and reabsorb all the juices. If you cut into it right away, all those beautiful juices will run out onto the cutting board, leaving you with dry chicken.
How to Serve Your Masterpiece
Okay, the hard part is over (and it wasn’t even hard!). Now, let’s talk about turning this beautiful chicken into a complete meal. The pan juices left in the baking dish are liquid gold—don’t you dare throw them out! Spoon them right over the chicken and your sides.
Here are a few of my favorite ways to serve it:
- The Classic Comfort Plate: A generous slice of chicken served alongside creamy mashed potatoes and roasted green beans or asparagus. The garlic butter juices act as an instant gravy.
- The Bright & Fresh Bowl: Fluffy jasmine or basmati rice, the garlic butter chicken sliced on top, and a quick side salad with a lemony vinaigrette. The perfect balanced meal.
- The Low-Carb Dream: Serve over a bed of cauliflower rice sautéed with spinach, or alongside zucchini noodles (“zoodles”). The sauce coats them beautifully.
And don’t forget those lemon wedges! A squeeze of fresh lemon right at the end brightens everything up and makes the flavors sing.
Shake It Up! Fun Flavor Twists
Once you’ve mastered the basic recipe, the world is your oyster! This garlic butter base is a fantastic canvas for other flavors. Here are a few of my favorite variations:
- Creamy Parmesan Spinach: About 5 minutes before the chicken is done, pull it out and top each breast with a handful of fresh spinach and a generous sprinkle of grated Parmesan cheese. Return to the oven to finish baking. The spinach wilts and the cheese gets beautifully golden.
- Sun-Dried Tomato & Basil: Add 2 tablespoons of chopped sun-dried tomatoes and 1 teaspoon of Italian seasoning to the garlic butter. After baking, garnish with fresh basil ribbons.
- Spicy Cajun Kick: Swap the paprika and thyme for 1.5 teaspoons of your favorite Cajun seasoning blend. It adds a wonderful smoky heat.
- Mushroom Lover’s Delight: Before adding the chicken to the baking dish, sauté 8 oz of sliced mushrooms in a pan. Scatter them around the chicken in the dish. They’ll soak up all the garlic butter and become insanely delicious.
- Dairy-Free/Vegan Option: Use a high-quality plant-based butter (I love Miyoko’s or Melt brands) and serve over roasted chickpeas or crispy tofu instead of chicken. The sauce is just as incredible!
From My Kitchen to Yours: A Few Final Thoughts
This recipe has been with me for over a decade, and it’s evolved in tiny ways. I used to be scared of salt, but now I’m a firm believer in seasoning with confidence. I’ve learned that the 5-minute rest is non-negotiable. And I’ve discovered that this dish is just as beloved by my 5-year-old goddaughter as it is by my food-snob chef friends (a true testament to its power!).
The funniest kitchen fail I ever had with this was the time I was filming a video for Instagram and, in my excitement, I used garlic powder instead of paprika. I didn’t realize it until I took a bite and was hit with an overwhelming, slightly bitter garlic punch. We dubbed it “Double Dragon Garlic Chicken” and laughed about it for weeks. The moral of the story? Even a chef messes up sometimes! The beauty of cooking is in the journey, mistakes and all.
Your Questions, Answered!
I’ve gotten a lot of questions about this recipe over the years, so I’ve compiled the most common ones here to help you out.
Q: My chicken is always dry. What am I doing wrong?
A: The most common culprits are overcooking and not resting. A meat thermometer is your best friend—cook to 165°F, no higher. And please, let it rest! Also, if your breasts are very thick, pounding them to an even ½-inch thickness ensures they cook quickly and evenly.
Q: Can I use chicken thighs instead?
A: Absolutely! Bone-in, skin-on thighs would be divine. You may need to increase the bake time to 30-35 minutes to ensure they cook through and the skin gets crispy. The higher fat content in thighs makes them incredibly forgiving and juicy.
Q: How do I store and reheat leftovers?
A: Store leftover chicken in an airtight container in the fridge for up to 4 days. To reheat, don’t use the microwave if you can avoid it! It will make the chicken rubbery. Instead, place it on a baking sheet, cover it with foil, and warm it in a 325°F oven for 10-15 minutes, or until heated through.
Q: Can I make this ahead of time?
A: You can! Assemble the whole dish—season the chicken and pour the garlic butter over it—cover tightly, and refrigerate for up to 8 hours before baking. You may need to add 2-3 extra minutes to the bake time since it’s going into the oven cold.
Nourishing Your Body & Soul
I’m a big believer that food should be both delicious and nourishing. While I’m not a registered dietitian, I love breaking down what’s in our food. This Garlic Butter Baked Chicken Breast is a fantastic source of lean protein, which is essential for building and repairing muscles and keeping you feeling full and satisfied.
The butter adds fat, which helps your body absorb the fat-soluble vitamins from the other ingredients and, let’s be real, makes it taste amazing. Using a reasonable amount, as we do here, is part of a balanced diet. The garlic isn’t just a flavor powerhouse; it also contains beneficial compounds like allicin.
Approximate Nutritional Info (Per Serving):
Calories: 310 | Protein: 32g | Fat: 18g | Carbs: 2g | Sugar: <1g | Sodium: 260mg
Remember, these are estimates and can vary based on the exact size of your chicken breasts and the specific brands of ingredients you use. Pair it with lots of colorful veggies for a wonderfully balanced meal!
You Did It! Now, Go Forth and Cook
Well, my friend, there you have it. Your guide to never, ever having to suffer through a dry, boring chicken breast again. This recipe is more than just a list of ingredients and steps; it’s a promise of a stress-free, incredibly satisfying dinner that will have everyone asking for seconds.
I hope this Garlic Butter Baked Chicken brings as much joy and ease to your kitchen as it has to mine. It’s a testament to the fact that you don’t need fancy techniques or a million ingredients to create something truly special. All you need is a little butter, a lot of garlic, and a whole lot of heart.
I’d love to hear how it turns out for you! Tag me on Instagram @TastyChowEmily so I can see your beautiful creations. Now, grab a fork, get cozy, and let’s chow down!
With love and a full heart,
Emily