Your New Favorite 10-Minute Lunch is Here!
Hey there, friend! Let’s be real for a second. We’ve all had those days. You know the ones. It’s lunchtime, your stomach is doing its best impression of a grumpy bear, and you’re staring into the fridge hoping a delicious, satisfying meal will magically assemble itself. The siren call of takeout is strong, but your wallet (and maybe your well-being) is begging for a better option.
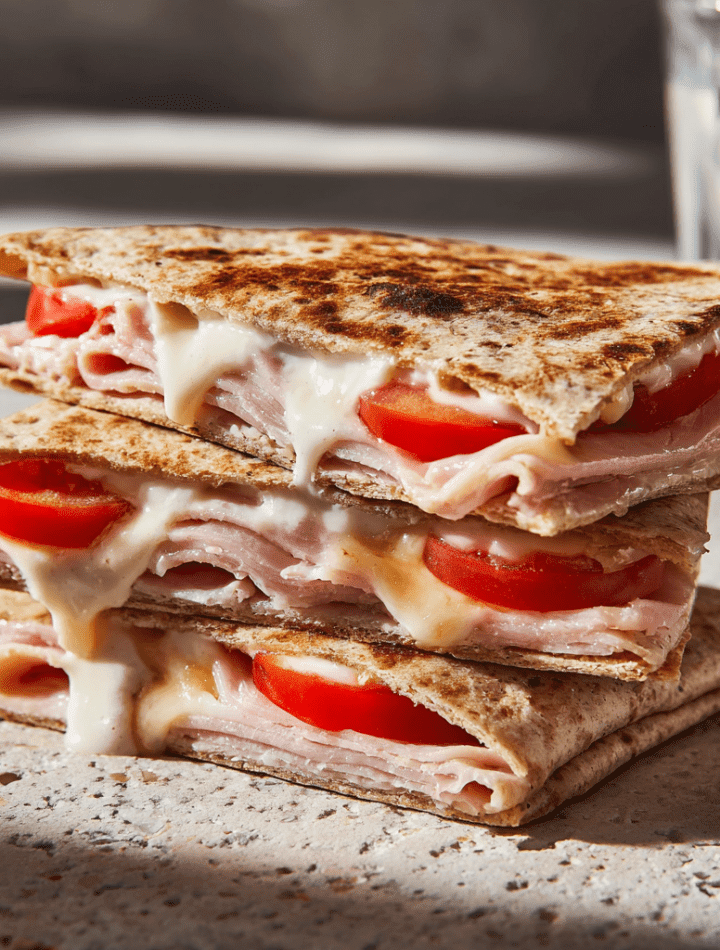
Well, get ready to do a little happy dance, because I’m about to share one of my all-time favorite, go-to, lifesaver recipes: the Easy Turkey Melt Wrap. This isn’t just a sandwich; it’s a warm, crispy, cheesy hug in edible form. We’re talking golden-brown tortillas, savory slices of turkey, and a glorious river of melty cheese, all jazzed up with a zingy swipe of Dijon mustard. The best part? From fridge to plate, it takes about 10 minutes flat.
I make these for a quick solo lunch, for my family on busy sports nights, and I even pack them (cooled slightly) in lunchboxes. They are the ultimate proof that “quick and easy” doesn’t have to mean “boring.” So, let’s ditch the lunchtime dilemma and make something truly tasty together. Your future self, enjoying this crispy, cheesy masterpiece, will thank you!

The Little Grilled Cheese That Started It All
This recipe always takes me right back to my grandma’s linoleum-floored kitchen. After school, she’d often whip up her “fancy” grilled cheese for me. It was never just bread and cheese. Sometimes it had a whisper of apple butter, other times a thin slice of ham. She’d press it in her heavy cast-iron skillet until it was impossibly crisp and the cheese oozed out the sides, creating these lacy, delicious cheese crisps.
One rainy Tuesday, we were out of bread. Undeterred, Grandma looked at me with a twinkle in her eye, grabbed a flour tortilla, and said, “We’re going on an adventure, Em.” She piled on the turkey and cheese, rolled it up like a burrito, and toasted it in the skillet. The result was a revelation—a perfectly portable, infinitely customizable, and utterly delicious wrap. It was my first taste of what would become this recipe, a reminder that the best kitchen creations often come from a little bit of love and a willingness to improvise. This Turkey Melt Wrap is my homage to her—a simple, joyful solution for any hungry person, just like I was.
Gathering Your Wrap-tastic Ingredients
This is where the magic starts! The beauty of this recipe is its simplicity, but each ingredient plays a starring role. Here’s what you’ll need and why it matters.
- 4 Large Flour Tortillas: The vessel for our delicious cargo! I like the burrito-sized ones for maximum filling potential. Chef’s Insight: Let your tortillas sit at room temperature for a few minutes—they’re much more pliable and less likely to tear when you roll.
- 8–12 Slices Deli Turkey: The savory star. I prefer oven-roasted turkey for its flavor, but honey-roasted or smoked turkey works beautifully too! Substitution Tip: Don’t have turkey? Rotisserie chicken, ham, or even sliced roast beef are fantastic swaps. For a veggie option, mashed chickpeas or sliced tofu work wonders.
- 4 Slices Cheddar or Swiss Cheese: The glue that holds our happiness together! Cheddar gives you that classic, sharp melt, while Swiss offers a nuttier, more sophisticated flavor. Chef’s Insight: Don’t be shy—shredded cheese also works and melts incredibly evenly! A Monterey Jack and cheddar blend is my personal favorite.
- 2–3 tsp Dijon Mustard: This is our secret weapon! It cuts through the richness of the cheese and adds a wonderful, tangy depth. Substitution Tip: Not a Dijon fan? Try whole-grain mustard for texture, a smidge of mayonnaise for creaminess, or even a drizzle of ranch dressing.
- 1 tbsp Butter or Olive Oil: For achieving that perfect, golden-brown, crispy exterior. Butter gives you that irresistible, rich flavor, while olive oil offers a lighter, equally crisp result.
Let’s Build & Sizzle: Your Step-by-Step Guide
Ready to create some kitchen magic? Follow these simple steps, and you’ll be a wrap-making pro in no time. I’ve packed each one with my favorite little hacks to ensure your success!
- Lay the Foundation: Lay your four tortillas out on a clean work surface. Imagine a line running down the center of each one. Spread about ½ to ¾ teaspoon of Dijon mustard along this center line. Chef’s Hack: Leave a 1-inch border at the top and bottom of the line without mustard. This will be our “glue-free” zone, making the final folding step much cleaner and easier!
- Pile on the Goodness: Layer 2-3 slices of turkey right on top of the mustard. Then, place your beautiful slice of cheese (or a hearty sprinkle of shredded cheese) directly on the turkey. Chef’s Tip: If you’re using a slice of cheese, try tearing it in half and placing the pieces side-by-side. This helps it melt more evenly and prevents a big, unmelted chunk in the middle.
- The Art of the Roll: This is the only tricky part, but you’ve got this! Think of it like folding a burrito. First, fold the left and right sides of the tortilla inward over the filling. Then, starting from the bottom edge closest to you, tightly roll the tortilla upwards, tucking the filling in as you go, until you have a neat, sealed package. Pro-Tip: The key word is tightly. A loose roll means filling can fall out during toasting. Give it a good, firm (but gentle) roll.
- Heat the Stage: Place a large non-stick or cast-iron skillet over medium heat. Add your butter or olive oil and let it heat up. You’ll know it’s ready when a little piece of tortilla sizzles upon contact. Chef’s Insight: Don’t rush this! If the pan isn’t hot enough, your wraps will steam and become soggy instead of crisping up beautifully.
- Toast to Perfection: Carefully place your wraps in the hot skillet, seam-side down. This is crucial—it seals the wrap shut. Toast for 2-3 minutes, until the bottom is a deep, golden brown with lovely crispy spots. Then, using a spatula, gently flip each wrap and toast the other side for another 2-3 minutes. Chef’s Hack: If you have a panini press or a George Foreman grill, you can use it here! Just brush the outside of the wraps with a little oil or melted butter and press until golden.
- The Grand Finale: Remove your gorgeous, crispy wraps from the skillet and let them rest on a cutting board for just a minute. This allows the cheese to set slightly, so it doesn’t all gush out when you cut it. Then, slice them in half on a diagonal (because everything tastes better when it’s cut on a diagonal, right?) and serve immediately!
How to Serve Your Masterpiece
Presentation is part of the fun! While these wraps are absolutely magnificent all on their own, a few simple sides can turn them into a full-blown meal.
For a classic lunch counter feel, serve them with a big, crunchy dill pickle spear and a handful of your favorite potato chips or crispy sweet potato fries. If you’re feeling a bit fancy, a simple side salad with a bright lemon vinaigrette is the perfect contrast to the warm, rich wrap. For the kids (or the kid in you!), a little cup of warm tomato soup for dipping is pure, unadulterated bliss.
I love serving these sliced in half on a big wooden board for a casual family dinner, letting everyone just grab and go. They’re also a huge hit at parties—just slice them into smaller pinwheels and watch them disappear!
Mix It Up! 5 Delicious Twists on the Classic
Once you’ve mastered the basic blueprint, the world is your wrap! Here are a few of my favorite ways to shake things up.
- The “Ranch Club” Twist: Swap the Dijon for a layer of ranch dressing. Add crispy cooked bacon (real or vegetarian), some chopped romaine lettuce, and a slice of tomato. It’s like a club sandwich in a wrap!
- The “Cranberry Thanksgiving” Wrap: Use leftover Thanksgiving turkey! Spread a layer of cream cheese on the tortilla first, then add the turkey and a spoonful of whole-berry cranberry sauce. Use provolone or Swiss cheese. It’s a holiday flavor explosion.
- The “Southwest Fiesta” Version: Replace the Dijon with a smear of chipotle mayo or plain sour cream. Use pepper jack cheese and add a spoonful of black beans and corn. Serve with salsa for dipping!
- The “Pizza My Heart” Wrap: Kids (and adults!) adore this one. Use a smear of pizza sauce instead of mustard. Add turkey pepperoni and a generous handful of shredded mozzarella cheese. You can even add a sprinkle of Italian seasoning to the outside before toasting.
- The “Garden Veggie” Delight (Vegetarian): Skip the meat and load up on veggies! Sautéed sliced mushrooms, spinach, bell peppers, and red onions are incredible. Add a slice of provolone or melty mozzarella. The key is to cook the veggies first so they don’t release water and make the wrap soggy.
Chef Emily’s Kitchen Notes
This recipe has been a work-in-progress for years! It started as a simple “what’s in the fridge” scramble and has evolved into this beloved staple. I’ll never forget the time I was filming a video for these and, in my excitement, I flipped one wrap a little too enthusiastically… right onto the floor. My dog, Biscuit, was the happiest creature on earth that day, and we had to start the shot over. A good reminder that cooking should be fun, not perfect!
Over time, I’ve learned that the type of skillet matters. A well-seasoned cast-iron gives the most incredible, even crispness, but a non-stick skillet is absolutely foolproof and my go-most of the time. Don’t be afraid to play with the fillings—some of the best recipes are born from a happy accident!
Your Turkey Melt Wrap Questions, Answered!
I’ve gotten thousands of messages about this recipe over the years. Here are the most common questions and how to fix any little hiccups.
- Q: My wrap is soggy! What did I do wrong?
A: Sogginess usually comes from two places: 1) The pan wasn’t hot enough, causing the wrap to steam instead of toast. Make sure your fat is sizzling before adding the wrap. 2) You’re using wet ingredients (like fresh tomatoes or lettuce) inside. If you want these, add them *after* cooking, just before serving. - Q: The cheese isn’t melting by the time the outside is brown.
A: This is a common one! The fix is simple: 1) Make sure your cheese is at room temperature before assembling. 2) After you flip the wrap, you can add a lid to the skillet for a minute. This traps steam and helps melt the cheese perfectly without burning the tortilla. - Q: Can I make these ahead of time?
A: You can assemble them ahead of time (without toasting), wrap them tightly in plastic wrap, and keep them in the fridge for up to 8 hours. Toast just before serving for the best crispness. I don’t recommend toasting and then reheating, as they can lose their wonderful texture. - Q: My wrap keeps unrolling in the pan!
A: Two tricks! First, make sure you’re placing it seam-side down *first* and not moving it for the first minute so it can seal. Second, don’t overfill it. Too much filling puts pressure on the seams and can cause it to burst open.
Nutritional Breakdown (A Quick Peek!)
Hey, I’m all about balance! While I firmly believe that the joy of eating is a nutrient in itself, I know many of you like to keep track. Here’s a general nutritional estimate for one basic turkey melt wrap (using 2 slices of turkey, 1 slice of cheddar, a 10-inch flour tortilla, and 1 tsp of butter). Remember, this can vary based on your specific brands and ingredients!
- Calories: ~320
- Carbohydrates: ~22g
- Protein: ~18g
- Fat: ~18g
Want to lighten it up? It’s easy! Use a low-carb whole wheat tortilla, opt for low-fat cheese, and use a light spritz of olive oil cooking spray instead of butter. The protein from the turkey and the satisfying crispness will keep you full and happy for hours!
Final Tasty Thoughts
And there you have it! The humble, glorious, and endlessly adaptable Turkey Melt Wrap. It’s more than just a recipe; it’s a tool for taming hunger, bringing a little joy to a busy day, and creating something delicious with your own two hands.
I hope this recipe becomes a trusted friend in your kitchen, just like it is in mine. It’s a testament to the fact that you don’t need fancy equipment or hours of time to eat well. You just need a few simple ingredients, a hot skillet, and a willingness to get a little cheesy.
So, what are you waiting for? Go forth and wrap! And when you make it, I’d love to see your creation. Tag me @TastyChow on social media so I can cheer you on. Happy cooking, my friend!
With love and a full belly,
Emily