Chili’s Second Act: The Coziest, Cheesiest Burritos & Quesadillas You’ll Ever Make
Hey there, my fellow food lover! Chef Emily here, waving at you from my flour-dusted kitchen counter. Can I tell you a secret? Sometimes, the best meal of the week isn’t the grand, Sunday night feast. Nope. It’s the magical, spur-of-the-moment creation you whip up a day or two later, using whatever deliciousness is waiting for you in the fridge.
And if there’s one superstar leftover that deserves a standing ovation, it’s a big, beautiful pot of chili. We’ve all been there, right? You make a giant batch, it’s incredible on night one, but by night three… you’re just staring into the pot, thinking, “Again?”
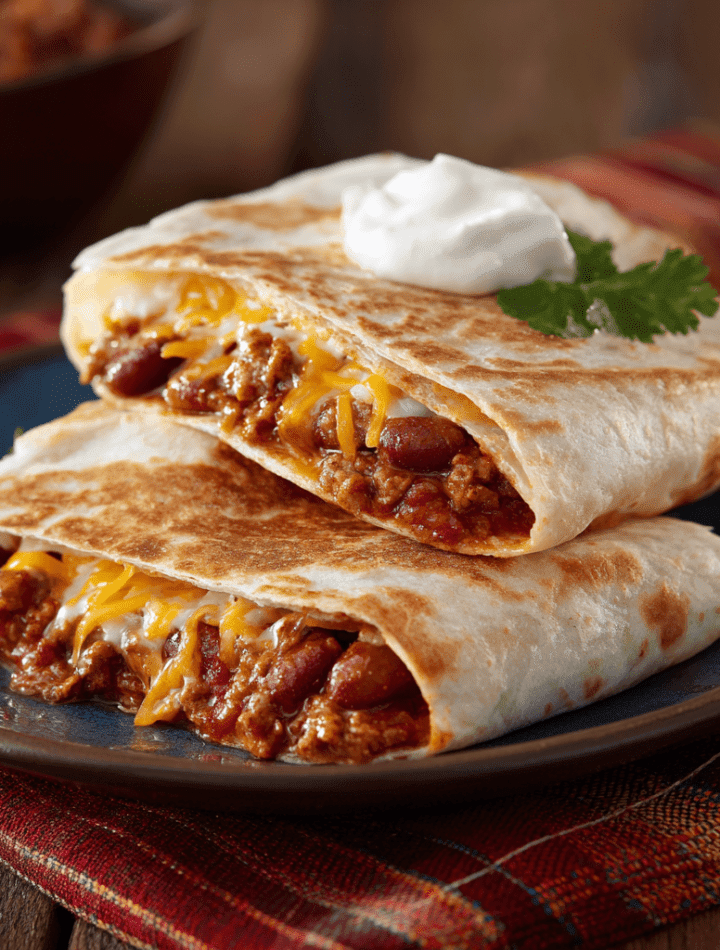
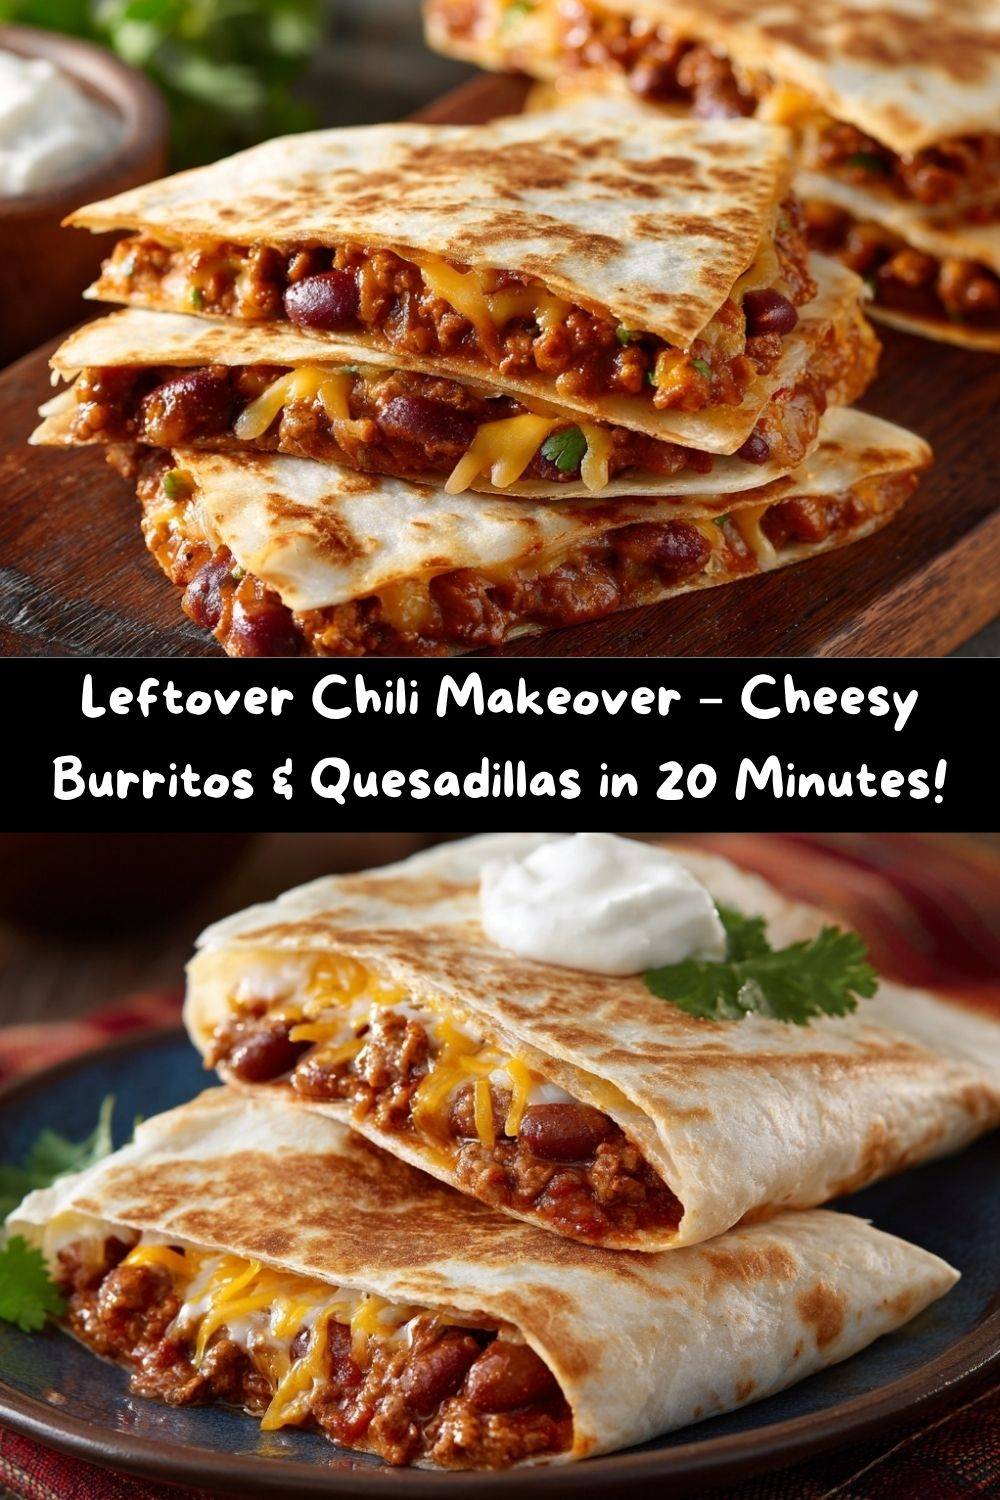
Well, my friend, I’m here to banish leftover boredom forever. We’re giving that chili a glorious second act, transforming it into two of the coziest, cheesiest, most satisfying meals you can possibly imagine: Chili Burritos and Chili Quesadillas.
Think about it: all that rich, savory, beany goodness, hugged by a warm, soft tortilla and sealed with a layer of perfectly melted cheese. It’s a flavor explosion waiting to happen, and it’s on your table in under 20 minutes. This isn’t just “using up leftovers”—this is a deliberate upgrade. It’s a fast, filling, and fantastically fun meal that proves a little kitchen creativity can turn the familiar into something unforgettable. So, grab that container of chili and let’s get this party started!
The Happy Accident That Started It All
This whole brilliant idea was born out of a classic “Emily-in-a-hurry” moment. Picture it: a chilly Tuesday night, me racing home from culinary school, with a hungry roommate and an even hungrier ego. The only thing in the fridge was a single, lonely Tupperware of my “Five-Alarm” chili from two nights prior.
I was too tired to cook anything new, but the thought of just reheating a bowl felt… sad. Then, I saw it. A bag of flour tortillas and a block of cheddar cheese, sitting right next to each other on the shelf, just begging to be involved. In a moment of pure, hungry genius, I slapped that chili and a handful of cheese between two tortillas and threw it in a hot skillet.
The sizzle was promising. The smell was divine. But the moment I cut into that golden-brown, crispy-on-the-outside, molten-on-the-inside quesadilla and took a bite? Pure magic. My roommate’s eyes went wide. We devoured it in seconds, declaring it one of the best “accidental” meals we’d ever had. From that day on, leftover chili was never just chili again—it was potential. It was the starting line for a quick, delicious, and deeply comforting meal. And now, I’m so excited to share that potential with you.
Your Flavor-Packed Toolkit: What You’ll Need
Here’s the beautiful part: you already have the star of the show! The rest is just about building texture and adding your own personal touch. This recipe is a fantastic template—feel free to play around and make it your own.
- 2 cups of Chili (homemade or store-bought): This is your foundation! Whether it’s a beefy, beany classic, a lean turkey chili, or a hearty vegetarian version, it will work beautifully. Chef’s Insight: Thicker chili works best here, as it won’t make your tortilla soggy. If your chili is on the soupy side, just simmer it for a few extra minutes to thicken it up before assembling.
- 4 Large Flour Tortillas (burrito-size): The cozy blanket for our filling. I prefer flour for their flexibility, but if you’re team corn, just warm them up first so they don’t crack. Substitution Tip: For a lighter option, use whole wheat or low-carb tortillas. They work just as well!
- 1 cup cooked Rice (optional, for burritos): This is my secret weapon for the perfect burrito. It soaks up any extra chili moisture, adds a lovely fluffy texture, and helps bulk it out into a truly satisfying meal. Chef’s Insight: Plain white or brown rice is perfect, but if you have cilantro-lime rice or Spanish rice? Even better!
- 1 ½ cups Shredded Cheddar or Mexican Blend Cheese: The glue that holds everything together and provides that iconic, gooey, cheesy pull. Substitution Tip: Pepper jack will add a nice kick, Monterey Jack is super melty, or a vegan shred works perfectly for a dairy-free version.
- ½ cup Diced Onions (optional): For a fresh, sharp crunch that cuts through the richness. I love red onions for their color and mild bite. Chef’s Insight: If raw onion is too strong for you, quickly pickle them in a little lime juice for 10 minutes to mellow them out!
- Butter or Oil for Grilling: This is what gives our quesadillas and burrito exteriors that gorgeous, golden-brown, crispy finish. I’m a butter-for-flavor gal, but a neutral oil like avocado or canola works great, too.
For the Grand Finale (Toppings & Sides):
- Salsa: The classic. A bright, chunky pico de gallo or a smooth roasted salsa verde are both winners.
- Sour Cream or Greek Yogurt: A cool, creamy dollop to balance the spice.
- Guacamole or Sliced Avocado: Because everything is better with avocado.
- Pickled Jalapeños: For my heat-seekers! That tangy, spicy punch is everything.
- Fresh Cilantro: A sprinkle of fresh green herbiness makes the whole dish sing.
Let’s Get Cooking: Your Step-by-Step Guide to Deliciousness
Ready to transform that chili? Follow these simple steps, and I’ll walk you through all my favorite chef hacks to ensure absolute perfection.
For the Ultimate Chili Burritos:
- Warm Everything Up: In a saucepan over medium heat, gently warm your leftover chili until it’s steaming. If you’re using rice, warm that up too. Chef’s Hack: Cold fillings in a cold tortilla are a one-way ticket to a sad, lukewarm burrito. Warming everything ensures a hot, melty, cohesive final product.
- Prep Your Tortilla Station: Lay a flour tortilla flat on a clean work surface. I like to give mine a quick 15-second warm-up in a dry skillet or the microwave—this makes them much more pliable and less likely to tear when you roll.
- The Art of the Layering: This is crucial! Don’t just dump everything in the center. Imagine a horizontal line across the middle of your tortilla. Start with a layer of rice (if using), then a generous scoop of chili, followed by a hefty handful of cheese, and finally, your diced onions. Chef’s Hack: Leave a 1-2 inch border around the edges. This gives you the clean, folded space you need for a perfect roll.
- The Perfect Burrito Roll: Here’s the part that can feel intimidating, but I promise it’s easy! Fold the left and right sides of the tortilla inward over the filling. Then, starting from the bottom edge closest to you, tightly roll the burrito away from you, tucking the filling in as you go. You want a snug, secure cylinder.
- The Crispy Finish (Optional but Highly Recommended): Heat a skillet or griddle over medium heat with a little butter or oil. Place your burritos seam-side down first. Grill for 2-3 minutes per side, until beautifully golden brown and crispy. This not only adds fantastic texture but also seals the seam, so your burrito doesn’t fall apart on you!
For the Crispy, Cheesy Chili Quesadillas:
- Heat the Skillet: Place a large non-stick or cast-iron skillet over medium heat. Add a small pat of butter or a drizzle of oil and let it melt, swirling to coat the pan.
- Assemble in the Pan: Place one tortilla in the hot skillet. Quickly, spread a thin, even layer of chili over one half of the tortilla, leaving a small border around the edge. Chef’s Hack: Spreading the filling on only one half makes flipping a breeze! Top the chili with a generous sprinkling of cheese.
- Fold and Grill: Use a spatula to fold the bare half of the tortilla over the filled half, creating a perfect half-moon shape. Press down gently with your spatula.
- Wait for the Gold: Let it cook for 2-3 minutes, until the bottom is golden brown and crispy. Don’t peek too often—let that magic happen! You’ll know it’s ready to flip when the cheese on the inside has started to melt and glue everything together.
- The Flip: Carefully slide your spatula under the quesadilla and flip it over with confidence! Grill for another 2-3 minutes on the second side until it’s equally golden and the cheese is fully melted and glorious.
- Slice and Serve: Transfer your masterpiece to a cutting board and let it rest for just a minute (this helps the cheese set slightly). Then, use a sharp knife or pizza cutter to slice it into 2 or 3 wedges. Serve immediately while it’s hot and crispy!
Plating Up: How to Serve Your Masterpiece
Presentation is part of the fun! You’ve put in the work, now let’s make it look as good as it tastes.
For the burritos, I love to place one on a plate and slice it dramatically down the middle at a slight angle. This showcases all the beautiful, colorful layers inside. Pile a generous spoonful of guacamole and a dollop of sour cream right alongside it, and maybe a sprinkle of fresh cilantro for a pop of green. A side of tortilla chips for scooping up any runaway toppings is always a good call.
For the quesadillas, after you’ve sliced them into wedges, fan them out on a plate. This is where a “deconstructed” topping bar shines. Place little bowls of salsa, sour cream, and pickled jalapeños right on the table and let everyone dive in and customize their own perfect bite. It’s interactive, it’s fun, and it makes a simple weeknight meal feel like a festive occasion.
Get Creative! 5 Fun Twists on the Classic
Once you’ve mastered the basic formula, the world is your oyster (or, you know, your burrito). Here are a few of my favorite ways to mix things up:
- The “Fiesta” Burrito Bowl: Skip the tortilla altogether! Crumble a baked burrito or a few quesadilla wedges over a bed of crisp romaine lettuce. Top with all your favorite fixings—corn, black beans, tomatoes, and a creamy cilantro-lime dressing.
- Breakfast for Dinner: Add a couple of scrambled eggs to your chili and cheese filling before you roll or grill. It’s a hearty, protein-packed powerhouse that’s perfect for any time of day.
- The “Green Goddess” Vegetarian Delight: Use a vibrant vegetarian chili, and add sautéed spinach, kale, or zucchini to the filling. A sprinkle of cotija cheese and a drizzle of avocado-tomatillo salsa takes it over the top.
- Spicy Southwest Kick: Mix a tablespoon of chopped chipotle peppers in adobo sauce into your chili before assembling. Use pepper jack cheese and top with a spicy mango or peach salsa for a sweet-heat sensation.
- The “Everything but the Kitchen Sink” Quesadilla: Raid your fridge! Got some leftover roasted corn? Toss it in. A few black olives? Why not! Some crumbled bacon? Absolutely. This is a fantastic way to reduce food waste and create a uniquely delicious meal.
From My Kitchen to Yours: A Few Parting Thoughts
This recipe has been a staple in my life for years, evolving from that first desperate dorm-room experiment into a dish I’m genuinely proud to serve to friends and family. I’ve learned that the best meals aren’t always the most complicated ones. They’re the ones made with a little bit of love and a whole lot of resourcefulness.
One of my favorite kitchen memories is of my niece, who is a notoriously picky eater, devouring one of these chili quesadillas and asking for seconds. She had no idea she was eating a vegetable-packed turkey chili—she just knew it was cheesy, crispy, and delicious. That’s the power of a good recipe disguise! It’s a reminder that food is joy, connection, and sometimes, a very happy surprise.
Your Questions, Answered!
I’ve made these a thousand times, so I’ve tackled most of the common hiccups. Here’s the inside scoop:
Q: My burrito keeps falling apart when I try to roll it! Help!
A: No worries! This is usually one of two things. First, you might be overfilling it. Be generous, but leave yourself that crucial border for folding. Second, make sure your tortilla is warm and pliable. A cold tortilla from the fridge will crack every time. A quick warm-up is the key to a flexible, rollable tortilla.
Q: My quesadilla is soggy instead of crispy. What am I doing wrong?
A: Sogginess is almost always a heat issue. Your pan might not be hot enough when you add the quesadilla, causing it to steam rather than sear. Make sure your skillet is properly preheated over a solid medium heat. Also, double-check that your chili isn’t too watery. A thicker filling leads to a crispier shell!
Q: Can I make these ahead of time and reheat them?
A: You can, but with a caveat. For the best texture, I highly recommend eating them fresh. If you must, assemble the burritos (without grilling), wrap them tightly in foil, and freeze. Reheat from frozen in the oven. Quesadillas are best fresh, but you can reheat slices in a toaster oven or air fryer to recrisp them.
Q: What’s the best kind of chili to use for this?
A> Honestly, any kind you love! A classic beef chili is phenomenal, but a white chicken chili makes for an incredible, lighter-tasting quesadilla. Vegetarian black bean chili? Absolutely. The beauty of this recipe is its versatility. Use what you have and what makes your taste buds happy.
A Quick Bite on Nutrition
As a chef (and a firm believer that comfort food can still fit into a balanced life), I love sharing what’s really going on in each bite. Of course, the numbers will vary based on your ingredients—whether your chili is loaded with beef and beans or packed with veggies—but here’s a good ballpark breakdown so you can enjoy with confidence.
-
Chili Burrito (1 serving): ~450–500 calories | 22g protein | 18g fat | 42g carbs
Packed with protein from the chili and cheese, and complex carbs from the tortilla (and rice, if you add it). Want to lighten it up? Use a low-carb wrap, skip the rice, or try Greek yogurt instead of sour cream for dipping. -
Chili Quesadilla (½ of one large quesadilla): ~380–420 calories | 20g protein | 21g fat | 28g carbs
Still indulgent and satisfying, but portion-friendly! You’ll get a perfect mix of cheesy comfort and hearty chili richness in every crispy bite.
💡 Chef’s Tip:
Balance your plate with a side of fresh veggies—think a crisp salad with lime dressing or grilled peppers and onions. That pop of freshness helps cut through the richness and keeps the meal feeling light yet cozy.
At the end of the day, this isn’t just about numbers—it’s about savoring the food you love while feeling good doing it. These Chili Burritos and Quesadillas are proof that a quick, cheesy dinner can hit all the right notes—flavor, comfort, and nourishment.