The Ultimate Guide to Crispy Homemade French Fries
Hey there, my fellow food lover! Let’s have a little heart-to-heart. Is there anything in this world more universally comforting than a perfect French fry? I’m talking about the kind that snaps with a satisfying crunch when you bite into it, revealing a cloud-like, fluffy interior that just melts in your mouth. The kind that makes you close your eyes for a second and just… sigh with happiness.
For the longest time, I thought that kind of fry magic only happened under the golden arches or in the bustling kitchens of gastropubs. My at-home attempts were… well, let’s just call them a lesson in humility. They’d either be pale and soggy or burn to a crisp before the insides even had a chance to cook. I almost gave up and resigned myself to a life of frozen, lackluster shoestrings.
But then, I learned the secret. And my friend, it’s a game-changer. It’s not a fancy ingredient or a thousand-dollar appliance. It’s all about the technique. Today, I’m pulling back the curtain and sharing everything I’ve learned. We’re making the most incredible, golden, crispy homemade French fries you’ve ever tasted, and I promise, they are totally doable. Once you master this method, you’ll never look at a bag of frozen fries the same way again. So, tie on that apron, and let’s make some magic happen!
A Fry-Day Tradition: My Grandma’s Kitchen
My love affair with fries started not in a restaurant, but in my Grandma Eleanor’s wonderfully chaotic kitchen. Every other Friday was “Fry-Day.” It wasn’t just about the food; it was an event. The air would grow thick with the scent of hot oil and anticipation. My job, as her official “little chef,” was to carefully pat dry every single potato stick after its long, cold soak. I’d stand there at the counter, a tower of paper towels next to me, taking my job incredibly seriously.
Grandma would hum an old tune, her hands moving with a practiced ease as she lowered the first batch into the cast-iron pot. The sound was a glorious, furious sizzle—the sound of happiness. The rule was you got to eat the very first fry out of the oil, dusted with nothing but a pinch of salt. It was blisteringly hot, impossibly crisp, and tasted like pure love. That memory, of standing on my tiptoes waiting for that first perfect fry, is woven into the very fabric of my food journey. It taught me that the best recipes aren’t just about feeding the body; they’re about creating moments that feed the soul. This recipe is my homage to those Fry-Days.
Gathering Your Fry-Making Squad: The Ingredients
Beautifully simple, right? That’s the magic. With just a handful of humble ingredients, you’re on your way to fry heaven. Here’s the breakdown:
- 4 large Russet Potatoes: These are our MVPs! Russets (also called Idaho potatoes) are high in starch and low in moisture, which is the perfect combo for achieving that fluffy inside and crispy outside. Chef’s Insight: Don’t be tempted by waxy potatoes like Red Bliss or Yukon Golds for classic fries—they hold more water and won’t get as crisp.
- Cold Water (for soaking): This is our secret weapon! Soaking the cut potatoes pulls out the excess surface starch, which is what can cause them to stick together and become gummy. Pro Tip: For extra-crispy fries, add a handful of ice cubes to the water to keep it extra cold.
- Vegetable Oil (for frying): You’ll need enough to fill your pot by a few inches. I prefer a neutral oil with a high smoke point. Canola, peanut, or vegetable oil blends are perfect. Substitution Tip: If you’re not feeding a crowd or want to use less oil, you can use an air fryer for the second fry! The results are fantastic, though the texture will be slightly different from deep-frying.
- Salt (to taste): Simple, classic, non-negotiable. Use fine sea salt or kosher salt for the best adherence. Chef’s Insight: Seasoning immediately after the final fry is crucial—the hot oil helps the salt stick like a magnet.
- Optional Seasonings: This is where you get to play! Garlic powder, smoked paprika, cayenne for heat, a sprinkle of black pepper, or even some finely chopped fresh rosemary or parsley are all amazing. The world is your seasoning shaker!
Crafting Perfection: The Step-by-Step Fry Method
Okay, friends, here we go! This two-fry method might seem like an extra step, but trust me, it’s the key to unlocking fry nirvana. The first fry at a lower temperature cooks the potato through, and the second fry at a high temperature creates that gorgeous, golden, crispy crust. Let’s do this!
- Peel & Cut: First, give your potatoes a good scrub. You can peel them for a classic fry, or leave the skin on for a more rustic, hearty fry (I love the extra fiber and flavor!). Using a sharp knife, slice the potato into ½-inch thick slabs, then cut those slabs into ½-inch thick sticks. Try to keep them as uniform as possible so they cook evenly. Chef’s Hack: If you have a mandoline with a fry cutter attachment, this is its time to shine! Just watch those fingers.
- The Soak (Patience is a Virtue!): As you cut the potatoes, immediately place them into a large bowl filled with cold water. Swirl them around with your hand—you’ll see the water get cloudy. That’s the starch leaving the building! Let them soak for at least 30 minutes, but up to 2 hours is even better. This step is non-negotiable for maximum crispiness.
- Dry, Dry, Dry! This might be the most important step people skip. Drain your potatoes and then lay them out on a clean kitchen towel or a stack of paper towels. Pat them DRY. I mean, really, really dry. Any lingering water will cause the oil to splatter and steam the fries instead of crisping them. Chef’s Commentary: I’m not kidding about this. Be ruthless in your drying mission!
- The First Fry (The Blanch): Heat your oil in a large, heavy-bottomed pot (like a Dutch oven) to 325°F (160°C). Use a thermometer for accuracy! Carefully add a single layer of potatoes—don’t overcrowd the pot; fry in batches. They will cook for 4-5 minutes. They won’t be brown yet, but they should be soft and slightly translucent around the edges. Remove them with a slotted spoon or spider strainer and let them drain on a wire rack set over a baking sheet. Pro Tip: Frying on a rack prevents them from getting soggy on the bottom, which can happen with paper towels.
- The Rest (The Intermission): Let your par-cooked fries cool down and take a breather for at least 10-15 minutes, or up to an hour. This allows the starches to set up, which is another secret to a crispier final product. You can even do this first fry ahead of time and leave them at room temperature for a few hours!
- The Second Fry (The Grand Finale): Now, crank that heat! Bring your oil temperature up to 375°F (190°C). Working in batches again, fry the potatoes for the second time for 2-3 minutes, until they are deeply golden brown and irresistibly crispy. Keep a close eye on them—they can go from perfect to overdone in seconds!
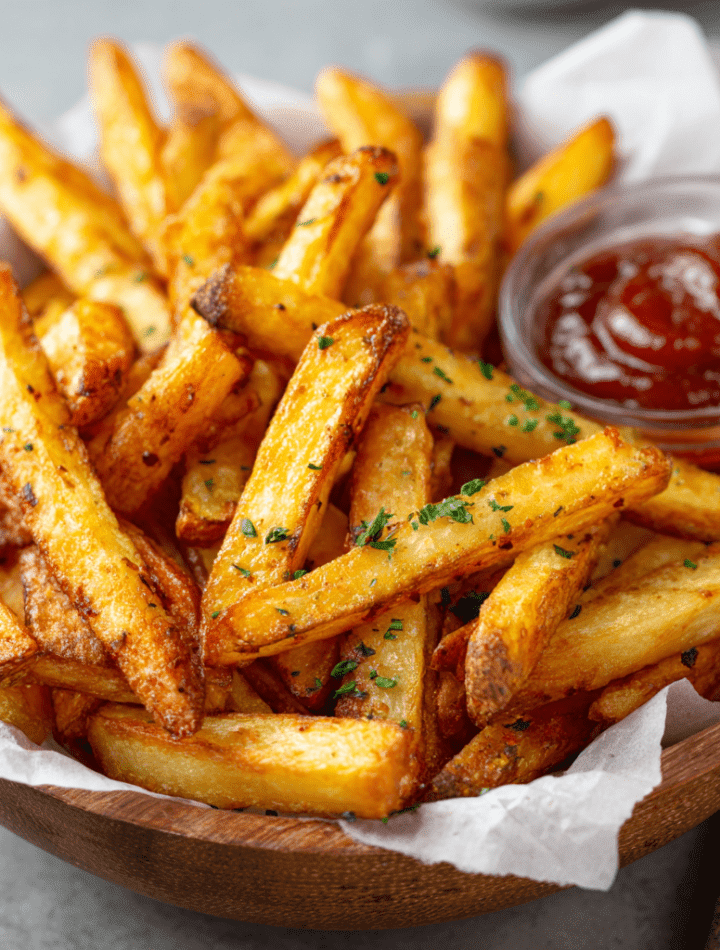
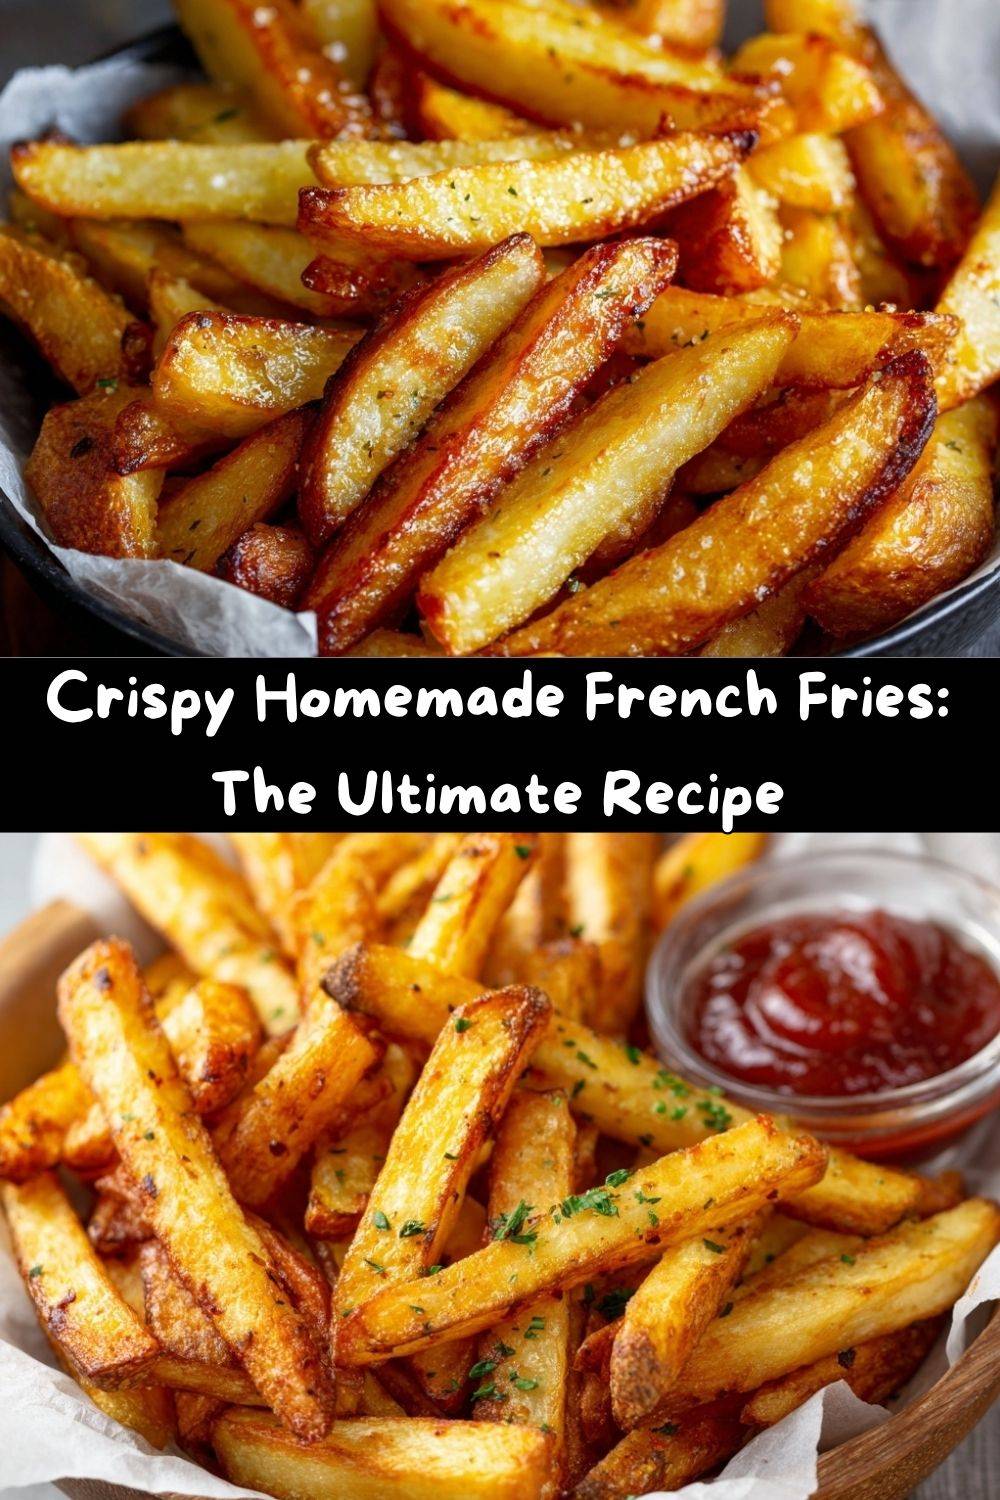
- Season Immediately: As soon as the fries come out of the oil, dump them into a large, clean bowl and toss them with your salt and any other seasonings. The hot oil acts like a glue, ensuring every nook and cranny is perfectly seasoned. Serve immediately—these wait for no one!
Let’s Chow Down! Serving Your Masterpiece
You’ve done it! You’ve created a bowl of golden, crispy perfection. Now, how to serve them? Obviously, they are a star all on their own, piled high in a rustic wire basket or a simple ceramic bowl. But let’s get creative!
For the ultimate classic experience, serve them alongside a juicy burger or a perfectly grilled steak. They are also the BFF to fried chicken, sandwiches, and hot dogs. Don’t forget the dipping sauces! While ketchup is a classic for a reason, why not whip up a quick garlic aioli (mayo + minced garlic + lemon juice), a smoky chipotle mayo, or a tangy comeback sauce? For a real “pub at home” vibe, smother them in cheese curds and gravy for a killer Poutine. If you’re feeling extra, top them with some shredded braised short ribs and a dollop of horseradish sour cream for the most epic loaded fries of your life.
Shake Things Up! Fun Flavor Twists
Once you’ve mastered the classic, the world is your potato! Here are a few of my favorite ways to mix it up:
- Garlic Parmesan Fries: Right after seasoning with salt, toss the hot fries with a tablespoon of minced fresh garlic (or garlic powder), a generous handful of finely grated Parmesan cheese, and a tablespoon of chopped fresh parsley.
- Smoky Paprika & Herb: A combo of smoked paprika, garlic powder, onion powder, and a pinch of dried oregano will give you fries that taste like they came straight from a Spanish tapas bar.
- Truffle Fries: For a decadent treat, drizzle the finished fries with a tiny amount of white truffle oil (a little goes a long way!) and toss with flaky sea salt and more Parmesan.
- Loaded Wedge Fries: Cut the potatoes into thick wedges instead of sticks. After the second fry, load them up with crispy bacon bits, cheddar cheese, green onions, and a big dollop of sour cream.
- Air Fryer Method: To make a lighter version, after the soaking and thorough drying steps, toss the raw potato sticks with just 1-2 tablespoons of oil. Air fry at 380°F (190°C) for 15-20 minutes, shaking the basket halfway through, until golden and crispy.
From My Kitchen to Yours: Chef’s Notes
This recipe has been a living, breathing thing in my kitchen for years. It started as a desperate attempt to recreate my grandma’s magic and has evolved through countless batches, a few small kitchen fires (always have a fire extinguisher handy!), and many happy taste-testers. I’ve learned that the type of potato truly matters, that drying them is more important than I ever thought, and that the “rest” between fries is not just a suggestion—it’s a commandment for crispiness.
The funniest evolution? My “one for the bowl, one for me” habit during the frying process. I swear, by the time a batch is done, I’ve almost eaten a full serving just from “quality control.” Some habits, especially the delicious ones, are hard to break!
Fry FAQ: Your Questions, Answered!
Q: My fries are soggy. What did I do wrong?
A: Sogginess is almost always due to one of three things: 1) The potatoes weren’t dried thoroughly enough before frying, 2) The oil temperature was too low, causing them to steam and absorb oil instead of crisp up, or 3) You overcrowded the pot, which drops the oil temperature. Be patient with your batches and use a thermometer!
Q: Can I just fry them once to save time?
A: You can, but you’ll be sacrificing that perfect texture. The single-fry method will give you a fry that’s either soft all the way through (if fried low and slow) or burnt on the outside/raw on the inside (if fried hot and fast). The double-fry is the professional secret for a reason—it’s foolproof!
Q: What’s the best oil for frying?
A: You want a neutral-flavored oil with a high smoke point. My top picks are peanut oil, canola oil, or a vegetable oil blend. Avoid olive oil (low smoke point, strong flavor) and butter (it will burn instantly).
Q: Can I prepare these ahead of time?
A> Absolutely! You can do the first fry (the blanching step at 325°F) up to a few hours ahead. Let the par-cooked fries cool completely and leave them at room temperature on the wire rack. When you’re ready to eat, just heat your oil to 375°F and do the second fry. This is a fantastic party trick!
Let’s Talk Nutrition (No Judgment, Just Facts!)
Let’s be real—we’re not eating French fries for their kale-like health properties. They are a treat, a celebration, a comfort food. And that’s perfectly okay! Food is about joy, too. That said, being informed is always a good thing.
A serving of these homemade fries (about one large potato’s worth) will have significantly less sodium and no mysterious preservatives compared to fast-food or frozen versions. Because you’re controlling the oil and salt, you can make choices that fit your lifestyle. The primary macronutrients come from the carbohydrates in the potato and the fat from the oil used for frying. Potatoes themselves are a good source of potassium and Vitamin C. To make a slightly lighter version, the air fryer variation is a fantastic option that significantly reduces the amount of added oil. Remember, it’s all about balance. Enjoy your glorious, crispy homemade fries mindfully and without an ounce of guilt!
Your New Go-To Fry Recipe
And there you have it, my friend! The complete, no-secrets-held-back guide to achieving French fry glory in your own kitchen. It might seem like a process, but each step is simple, and the result is so, so worth it. This recipe is a testament to the idea that the best foods aren’t complicated—they’re made with care, a little bit of knowledge, and a whole lot of love.
I hope this recipe becomes a staple in your home, creating your own messy, joyful, and delicious kitchen memories. I’d love to hear how it turns out for you! Tag me on social @TastyChow with your golden creations so I can see the magic you’re making.
Now go forth and fry with confidence! Sending you crispy, golden vibes from my kitchen to yours.
With love and a full fry basket,
Emily