Say Hello to Your New Favorite Kitchen Hack
Hey there, friend! Let’s have a little heart-to-heart about one of life’s great kitchen dilemmas: what on earth to do with that cup of sourdough discard staring back at you from the counter. I get it. Pouring it down the drain feels like a tiny culinary crime, but feeding it just to make another loaf of bread can be… a lot.
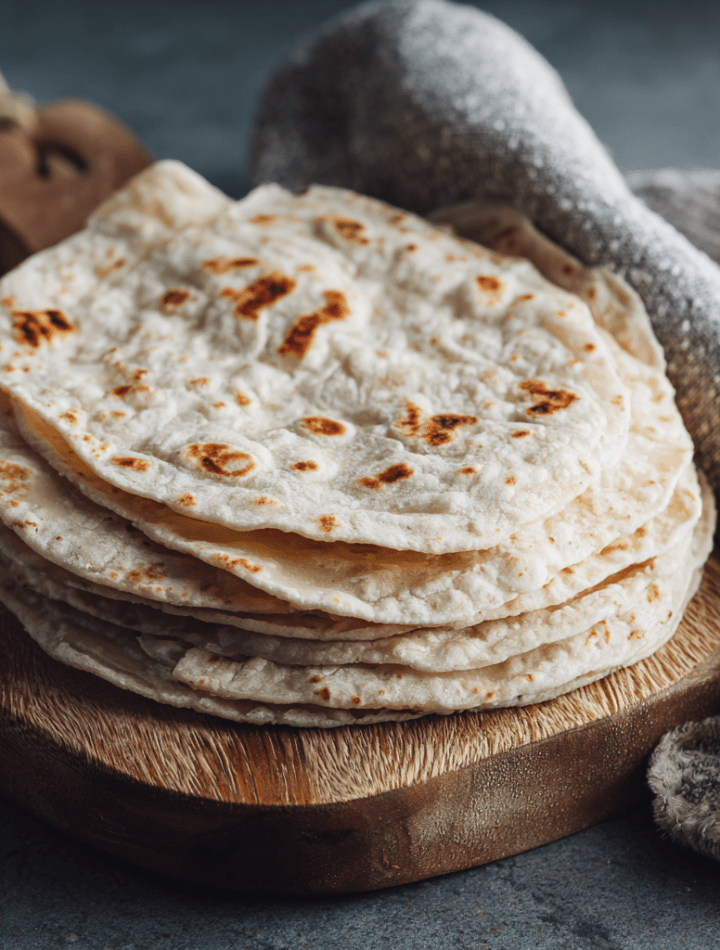
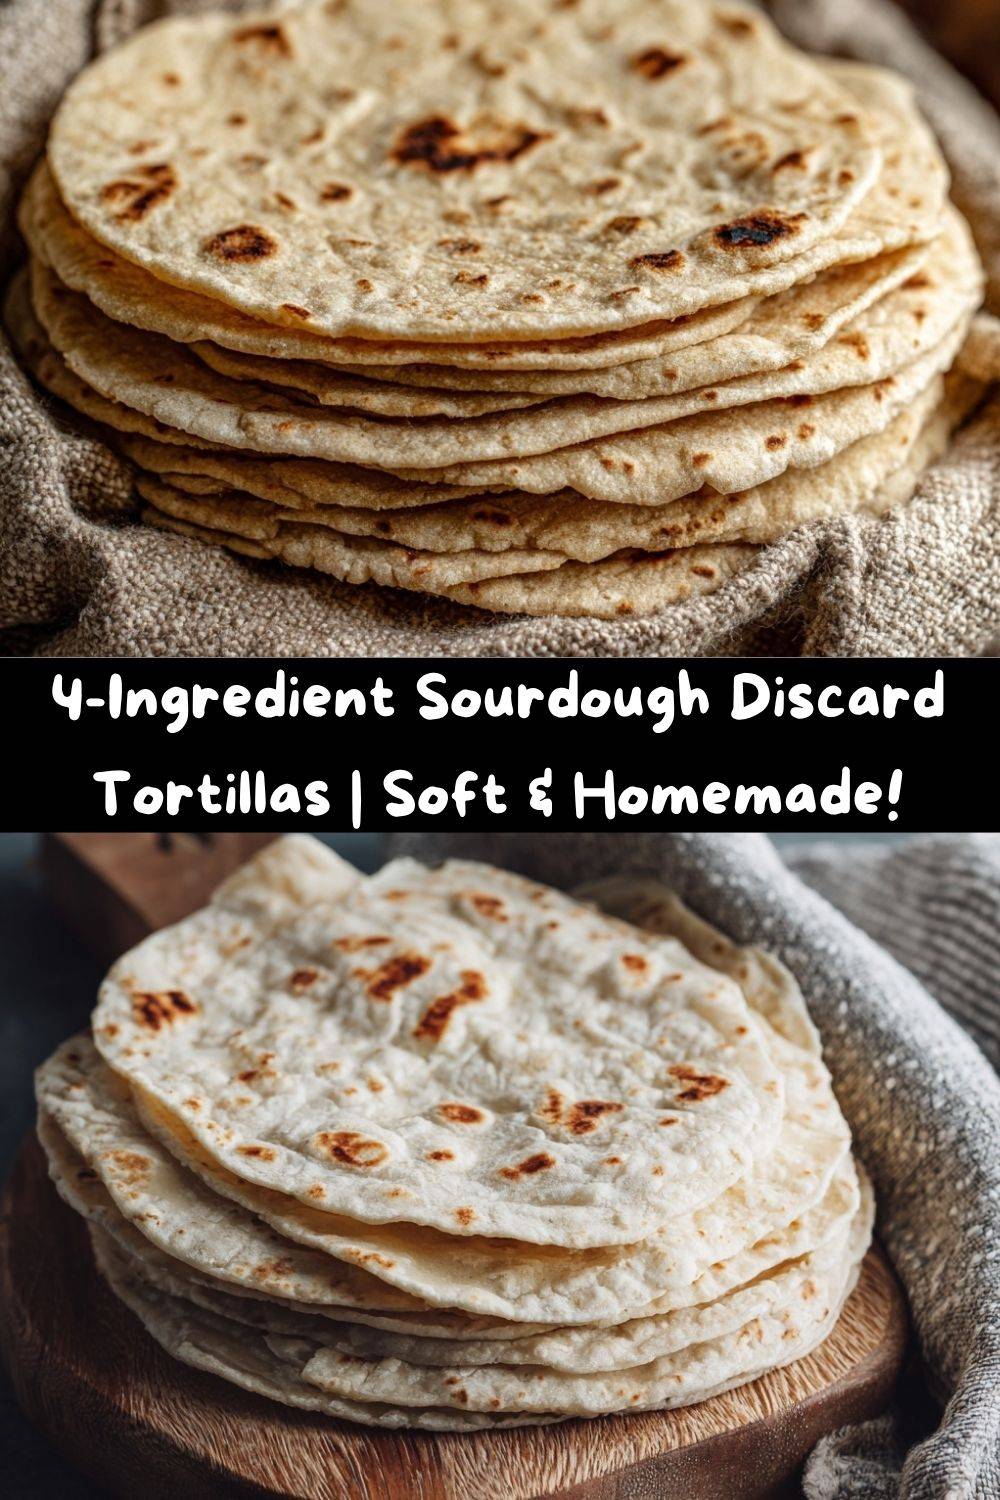
Well, get ready to fall in love, because I’m about to share one of my all-time favorite, life-changing recipes. These 4-Ingredient Sourdough Discard Tortillas are my weekly go-to, my secret weapon for turning taco night into a standing ovation. They’re soft, they’re pliable, they have this subtle, irresistible tang that makes store-bought versions taste, well, sad. And the best part? They come together in about 20 minutes flat. No yeast, no rising time, no fancy equipment—just you, a bowl, and a skillet.
Think about it: warm, homemade tortillas, fresh off the griddle, just begging to be stuffed with your favorite fillings. Whether you’re wrapping up some sizzling fajita veggies, crafting the ultimate breakfast burrito, or just slathering them with butter, these little discs of joy are about to become a non-negotiable part of your cooking routine. Let’s turn that discard into something delicious!
The Tortilla That Started It All
My love affair with homemade tortillas started not in a fancy culinary school kitchen, but in my best friend Maria’s bustling home kitchen when we were in college. I’d never seen anyone make a tortilla from scratch before, and I watched, mesmerized, as her abuela effortlessly patted a ball of dough into a perfect circle that puffed up like a pillow over the flame. The smell was intoxicating—toasty, warm, and deeply comforting.
When I bit into one, still steaming and slightly blistered, it was a revelation. It was nothing like the stiff, plasticky tortillas I’d known from a package. This was food with a soul. I’ve been chasing that feeling ever since. Years later, in the midst of my own sourdough obsession, I had a “eureka!” moment. What if I could capture that same soulful, homemade magic *and* solve my discard problem? After a few happy, flour-dusted experiments, this recipe was born. It’s my little nod to Maria’s abuela, a perfect fusion of her tradition and my need for a quick, brilliant kitchen hack.
Gather Your Simple Ingredients
See? I told you it was simple! Just four humble ingredients are all you need to create tortilla magic. Here’s the breakdown:
- 2 cups All-Purpose Flour: This is our trusty foundation. It gives the tortillas the perfect structure and a lovely, soft chew. Chef’s Tip: If you want to play around, you can substitute up to 1 cup with whole wheat flour for a nuttier flavor and extra fiber. The texture will be a bit more dense, but still delicious!
- 1 cup Sourdough Discard (unfed): This is the star of the show! Your discard adds that wonderful, subtle tang and makes the tortillas incredibly tender. Don’t worry about it being “active”—thick or thin, fresh from the fridge or room temp, it all works beautifully here.
- ¼ cup Olive Oil: This is our secret to soft, pliable tortillas that don’t crack. The fat creates a beautifully supple dough. Chef’s Insight: I love the fruity note of olive oil, but avocado oil is a fantastic neutral alternative. Melted butter or even lard would be wonderfully traditional and rich!
- ½ teaspoon Salt: Never, ever skip the salt! It’s not just for flavor; it tightens the gluten structure, giving our tortillas the perfect strength to hold a hefty burrito filling without tearing.
- Optional: 1-2 tablespoons Warm Water: Depending on the thickness of your discard and the humidity in your kitchen, your dough might need a tiny splash of water to come together. Don’t be afraid to use it!
Let’s Make Some Tortillas!
Ready to get your hands a little dusty with flour? This process is so satisfying and quick. Follow these steps, and you’ll be a tortilla-making pro in no time.
- Combine & Create Shaggy Dough: In a large mixing bowl, whisk together your flour and salt. This little aerating action helps ensure everything is evenly distributed. Now, plop in your sourdough discard and pour in the oil. I like to use a fork at first to start bringing it all together. It will look a bit like a shaggy, messy mess—that’s exactly what you want! Chef’s Hack: If the dough seems too dry and isn’t coming together, this is your moment to add that tablespoon of warm water, one splash at a time.
- Knead to Smooth Perfection: Lightly flour your counter and turn that shaggy dough out. Now, we knead! Use the heels of your hands to push the dough away from you, then fold it back over. Give it a quarter turn, and repeat. Do this for just 3-5 minutes. You’re not looking for the super-stretchy windowpane of bread dough; you just want a smooth, soft, and slightly elastic ball that’s no longer sticky. Chef’s Commentary: Think of this as a mini arm workout with a delicious payoff. Don’t overthink it! A little love here makes for a much more tender tortilla.
- Divide & Conquer: Now, we portion our dough. You can make 8 larger tortillas (great for burritos) or 10 smaller ones (perfect for street tacos). Use a sharp knife or a bench scraper to divide the dough ball into equal pieces. Roll each piece into a smooth, tight little ball between your palms. Place them on a plate and cover them with a damp kitchen towel to prevent them from drying out.
- Roll ‘Em Out: On a lightly floured surface, take one of your dough balls and flatten it slightly with your hand. Using a rolling pin, roll from the center outwards, turning the dough a quarter turn after each roll. Keep going until you have a thin, even circle, about 6-8 inches across. Chef’s Pro-Tip: Don’t worry if they’re not perfect circles! Rustic, hand-made shapes have character. A little irregularity just proves they’re homemade with love.
- Cook to Bubbly Bliss: Heat a dry, heavy-bottomed skillet or cast-iron griddle over medium-high heat. No oil needed! When the pan is hot, carefully lay your rolled-out tortilla onto the surface. Cook for 30-60 seconds. You’ll see little steam bubbles start to form and the top will look dry. Flip it! Cook for another 30-60 seconds on the second side, until you see some beautiful golden-brown spots. Chef’s Secret: If you press the tortilla gently with a spatula right after flipping, you can encourage it to puff up like a pita, creating a wonderful pocket!
- Keep ‘Em Warm & Soft: As your tortillas finish cooking, transfer them to a plate or bowl and cover them with a clean kitchen towel. Stacking them and covering them traps the steam, which keeps them incredibly soft and pliable until you’re ready to serve.
How to Serve Your Homemade Masterpieces
Oh, the possibilities! A warm, homemade tortilla is a blank canvas for your culinary dreams. Here are a few of my favorite ways to enjoy them:
- Taco Night Triumph: This is the obvious one, and for good reason! They are the absolute star of taco night. Fill them with grilled chicken, carnitas, black beans, and all the fresh pico de gallo and guacamole your heart desires.
- The Ultimate Breakfast Burrito: Scrambled eggs, crispy potatoes, a little cheese, and a dash of hot sauce, all wrapped up in one of these tangy tortillas? That’s what weekend mornings are made for.
- Simple Snack Attack: Sometimes, the best way is the simplest. Just slather a warm tortilla with a generous layer of good butter and a sprinkle of flaky sea salt. Fold it and eat it. Pure, unadulterated joy.
- Quesadilla Queen: These tortillas make the most incredible, crispy-on-the-outside, melty-on-the-inside quesadillas. The sourdough tang is a perfect partner for gooey cheese.
Get Creative! Fun Flavor Twists
Once you’ve mastered the basic recipe, have some fun with it! Here are a few easy ways to mix things up:
- Herb & Garlic: Knead 1 teaspoon of garlic powder and 2 tablespoons of finely chopped fresh herbs (like cilantro or parsley) right into the dough. Perfect for wraps and chicken sandwiches.
- Everything Bagel: Before cooking, sprinkle the rolled-out tortilla with an “Everything Bagel” seasoning blend. Trust me on this one—it’s a game-changer for breakfast wraps.
- 100% Whole Wheat: Swap the all-purpose flour for an equal amount of whole wheat flour. You’ll get a heartier, nuttier tortilla packed with extra fiber.
- Spicy Chipotle: Add 1 teaspoon of chipotle powder to the dry ingredients for a smoky, spicy kick that’s amazing with grilled meats or in a black bean burrito.
- Gluten-Free Version: You can try using a 1:1 gluten-free all-purpose flour blend. The texture will be a bit more delicate, so handle with care when rolling and flipping.
More Chef’s Notes & Kitchen Confessions
This recipe has been a living, evolving thing in my kitchen. I’ve made it in a rush with a too-thin discard, and I’ve made it leisurely with a thick, bubbly one. It’s incredibly forgiving. One of my favorite kitchen memories is of my dog, Biscuit, sitting like a perfect statue, watching every single tortilla get flipped, convinced that one would surely be for him. (Spoiler: he usually got a tiny, un-salted piece.)
The beauty of this recipe is its simplicity. It started as a way to avoid waste and has turned into a weekly ritual that makes even a simple Tuesday night dinner feel special. Don’t stress about perfection. Your first tortilla might be a little thick, your third might be a little lopsided—they will all taste incredible because you made them.
Your Questions, Answered!
Q: My dough is too sticky! What did I do wrong?
A: No worries! This usually means your sourdough discard was a bit more hydrated. Just sprinkle a little extra flour onto your work surface and onto the dough itself as you knead until it becomes smooth and no longer sticks to your hands.
Q: Can I make the dough ahead of time?
A> Absolutely! After you’ve divided the dough into balls, you can place them in a sealed container in the fridge for up to 2 days. When you’re ready, let them sit at room temp for 20-30 minutes to warm up slightly before rolling and cooking.
Q: Why are my tortillas tough and not soft?
A> This usually points to two things: either you added too much flour during the kneading/rolling process, or you overcooked them. Remember, you just need a light dusting of flour when rolling, and you only need to cook them until they have some light brown spots, not until they are crispy and browned all over.
Q: Can I freeze these tortillas?
A> Yes, and I do this all the time! Let the cooked tortillas cool completely. Then, stack them with a small piece of parchment paper between each one (so they don’t stick together) and pop them in a freezer bag. They’ll keep for 3 months. To use, just thaw at room temp or warm gently in a skillet or microwave.
Nutritional Lowdown
Now, I’m a chef, not a dietitian, but I love knowing what’s going into my food! Here’s a general breakdown per tortilla (assuming the recipe makes 8). Remember, these are estimates and can vary based on your specific ingredients.
- Calories: ~180
- Protein: 4g
- Fat: 6g
- Carbohydrates: 28g
- Fiber: 1g
- Sugar: 0g
- Sodium: 120mg
Compared to many store-bought tortillas, you’re getting a product with no preservatives, no weird additives, and the potential benefits of the prebiotics from the fermented sourdough starter. They’re a wholesome, satisfying base for a balanced meal.
You Did It! Now, Go Enjoy the Fruits of Your Labor
Look at you! You’ve just transformed a handful of simple ingredients and a cup of “waste” into something truly magical. You’ve filled your kitchen with that incredible, toasty aroma and created a staple that will level up your meals for days to come. That’s something to be seriously proud of.
This recipe is a perfect example of what I love most about cooking: it doesn’t have to be complicated to be extraordinary. It’s about resourcefulness, a little bit of love, and the simple joy of creating something with your own two hands.
So, from my messy, flour-covered apron to yours, I hope these tortillas bring as much happiness to your table as they have to mine. Now, go chow down! And be sure to tag me on social media if you make them—I love seeing your creations!
With love and a full belly,
Emily