Forget the Fuss, Let’s Talk Flavor
Hey there, my fellow food lover! Let me paint you a picture. It’s a cozy evening, maybe it’s the middle of a busy week, or perhaps you’re planning a special, intimate date night at home. You want a dessert that feels elegant, tastes incredible, and whispers “you fancy thing, you” without requiring you to turn on the oven or spend hours on your feet. Sound like a dream? Well, pull up a stool, my friend, because I’m about to introduce you to your new dessert soulmate: Raspberry Tiramisu Cups.
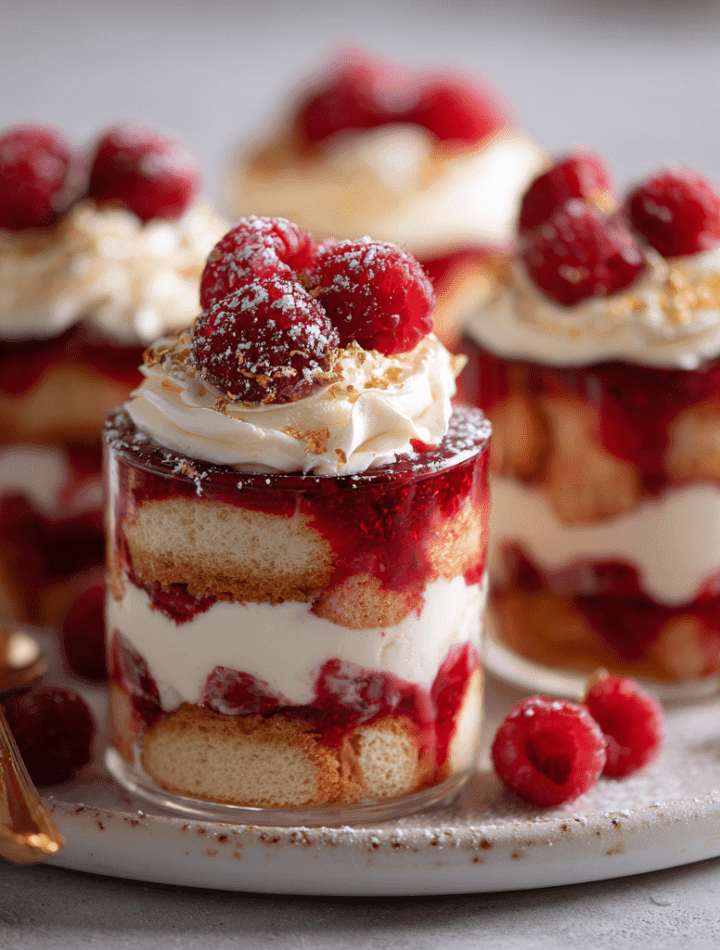
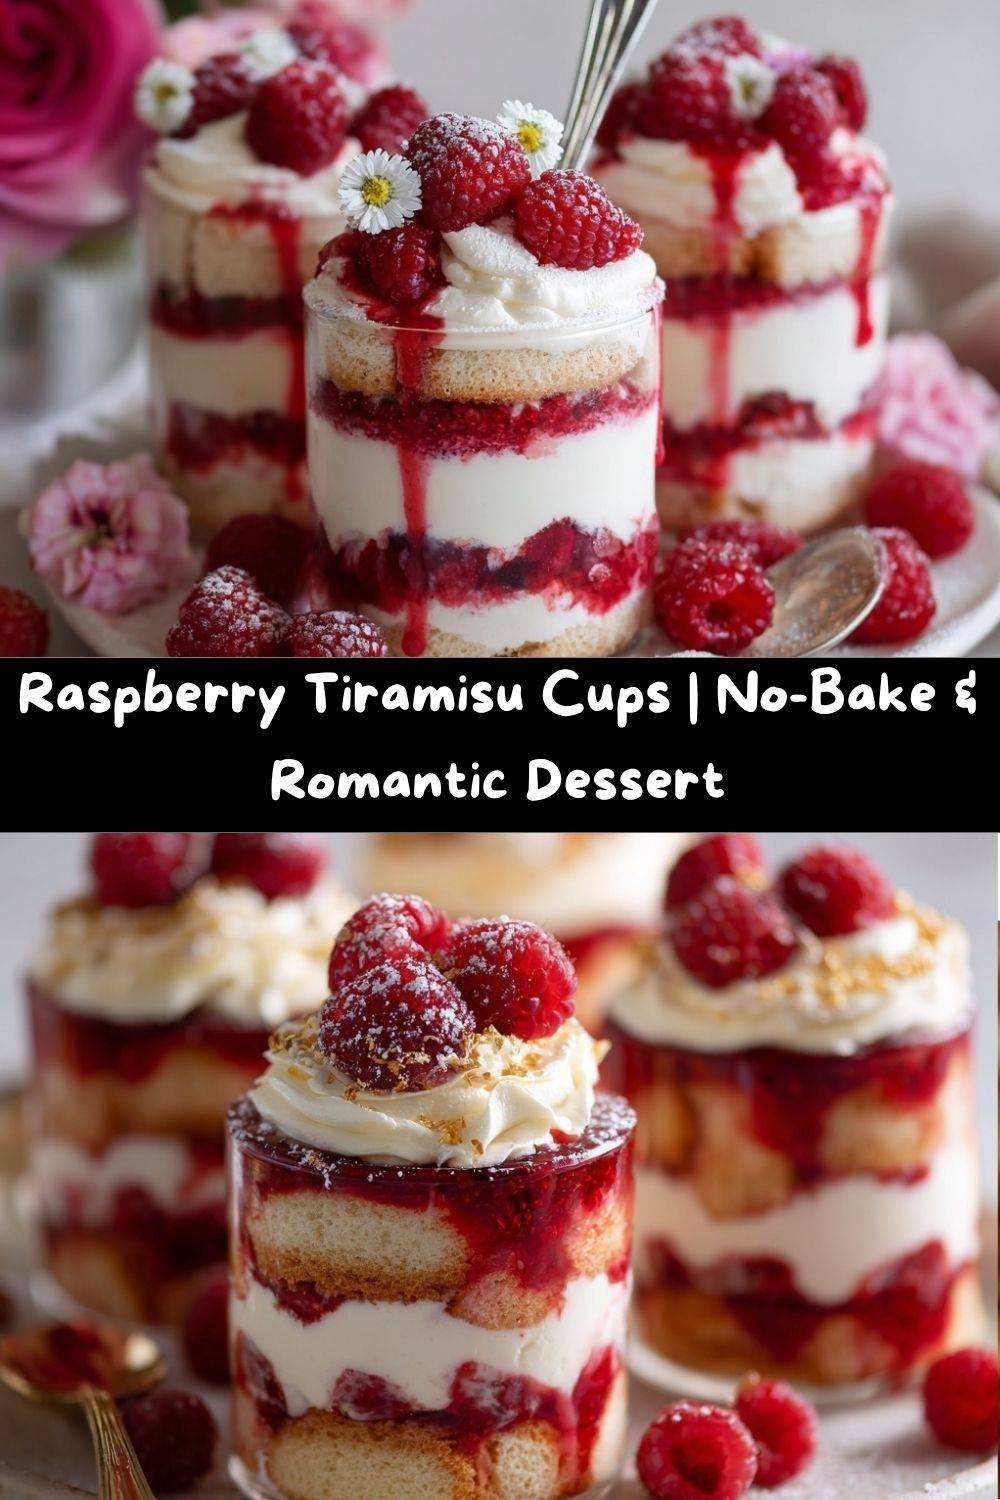
We’re taking all the rich, creamy, coffee-soaked magic of a classic tiramisu and giving it a vibrant, fruity twist. Imagine layers of soft ladyfingers soaked in a tangy-sweet raspberry syrup, piled high with a cloud-like mascarpone cream that’s so dreamy you’ll want to eat it with a spoon straight from the bowl (no judgment here, I’ve done it!). These individual cups are not just delicious; they’re a whole vibe. They’re perfect for sharing (or not sharing, I won’t tell), look stunning on the table, and come together with minimal effort for maximum “wow” factor. So, let’s ditch the complicated recipes and make something truly, joyfully delicious together.
The Tiramisu That Started It All
This recipe actually has its roots in a little bit of a kitchen disaster—or what felt like one at the time. Years ago, when I was still in culinary school and thought I knew everything (oh, the hubris!), I volunteered to make dessert for a big family dinner. I decided on a grand, traditional tiramisu. I was so focused on perfecting the espresso soak and the zabaglione that I completely forgot to check my pantry. No coffee liqueur. And my sister, a coffee purist, had used the last of the espresso beans.
Panic set in. But then, I saw it: a bag of frozen raspberries in the freezer and a lone lemon on the counter. In a moment of “what’s the worst that could happen?” inspiration, I whipped up a quick raspberry syrup. The result? A dessert that was so unexpectedly delightful, so bright and refreshing, it completely upstaged my original plan. It was a beautiful reminder that some of the best creations come from happy accidents and a willingness to pivot. That night, with my family scraping their bowls clean, this raspberry tiramisu was born.
Gathering Your Flavor Arsenal
One of the best things about this recipe is the short, sweet ingredient list. We’re using simple, high-quality components that do all the heavy lifting for us. Here’s what you’ll need to make about 4-6 gorgeous cups:
- 1 cup raspberries (fresh or frozen): This is our star! Frozen berries are a fantastic, budget-friendly option and work perfectly for the syrup. If you’re using fresh, save a few pretty ones for garnish!
- ¼ cup water: This helps the berries break down into a beautiful, syrupy consistency.
- 2 tablespoons sugar (or honey): We’re just using a touch to sweeten the tart berries. Honey adds a lovely floral note if you want to mix it up.
- 1 teaspoon lemon juice: A tiny squeeze is our secret weapon! It brightens up the entire syrup and makes the raspberry flavor pop.
- 8–10 ladyfingers (savoiardi): These dry, finger-shaped cookies are the classic base for tiramisu. They’re like little sponges, ready to soak up all that gorgeous raspberry goodness.
- ¾ cup mascarpone cheese: The heart of our cream! This rich, creamy, and slightly tangy Italian cheese is what gives the filling its luxurious texture. Make sure it’s at room temperature for easy mixing.
- ½ cup whipping cream (heavy cream): We’re whipping this to soft peaks to fold into the mascarpone, creating a light and airy cloud of deliciousness.
- 2 tablespoons powdered sugar: It dissolves instantly into our cream, preventing any grittiness. Plus, it helps stabilize the whipped cream a bit.
- ½ teaspoon vanilla extract: The warm, aromatic backbone that makes any dessert taste like home.
Let’s Build Some Delicious Layers!
Ready to create some magic? This is the fun part. We’re going to work in three simple stages: the syrup, the cream, and the grand assembly. Put on some good music, and let’s get started!
- Create Your Raspberry Syrup: Grab a small saucepan and combine your raspberries, water, granulated sugar (or honey), and lemon juice. Bring it to a gentle simmer over medium heat. Let it bubble away for 5-6 minutes, using a wooden spoon to gently mash the berries as they soften. You’ll know it’s ready when the berries have completely broken down and the liquid is a deep, vibrant red. Now, pour the mixture through a fine-mesh strainer into a bowl, pressing down on the solids to get all that good juice out. Chef’s Hack: Don’t throw away the seedless pulp! It’s amazing swirled into yogurt or oatmeal. Let the syrup cool completely before using—this is crucial so it doesn’t melt our beautiful cream later.
- Whip Up the Dreamy Mascarpone Cream: In a medium mixing bowl, combine the room-temperature mascarpone, whipping cream, powdered sugar, and vanilla extract. Using a hand mixer (or a whisk and some serious elbow grease!), beat the mixture on medium-high speed until it becomes thick, fluffy, and holds soft peaks. Chef’s Tip: Don’t over-whip! You want it to be pillowy and smooth, not grainy or buttery. When you lift the beaters, the peak should gently curl over—that’s your cue to stop.
- The Grand Assembly – Let’s Layer! Now for the artistic part! Grab your serving glasses—I love using clear glasses or even vintage coupes to show off the beautiful layers. Take your ladyfinger halves and give each one a very quick dip in the cooled raspberry syrup. I mean quick—just a one-second in-and-out. They are thirsty cookies and will turn to mush if you leave them in too long! Place a few of the syrup-kissed ladyfinger pieces at the bottom of each glass to form your first layer. Next, spoon or pipe a layer of the mascarpone cream over the ladyfingers. Drizzle a little of the extra raspberry syrup right over the cream. Repeat the layers once more: dipped ladyfingers, cream, and a final drizzle. You’ve just built a flavor skyscraper!
- The (Hardest Part) Chill Time: Pop your beautiful creations into the refrigerator, uncovered, for at least 1-2 hours, but ideally 4 hours or overnight. This waiting period is non-negotiable, I promise! It allows the ladyfingers to soften perfectly into a cake-like texture and lets all the flavors get to know each other and become best friends.
How to Serve These Stunning Cups
The moment of truth has arrived! Pull those gorgeous cups out of the fridge. They already look incredible, but a little garnish goes a long way in making them restaurant-worthy. Here are a few of my favorite ways to finish them:
- The Classic: Top with a few fresh, whole raspberries and a light dusting of powdered sugar using a fine-mesh sieve.
- The Chocoholic’s Dream: Add a few fresh raspberries and then use a vegetable peeler to shave some dark or white chocolate right over the top. The contrast is just *chef’s kiss*.
- The Elegant Touch: A single, perfect mint leaf adds a beautiful pop of green and a fresh aroma.
Serve them straight from the fridge with a small spoon. They’re a dreamy end to a romantic dinner, a perfect make-ahead dessert for a girls’ night, or a special treat to make a Tuesday feel like a celebration.
Make It Your Own! Fun Flavor Twists
I love this recipe because it’s a fantastic canvas for your own creativity. Feel like playing? Here are some delicious ways to mix it up:
- Lemon Blueberry Bliss: Swap the raspberry syrup for a blueberry one (simmer blueberries with water, sugar, and a strip of lemon zest). It’s sunshine in a cup!
- Tropical Escape: Use a pureed mango or passion fruit pulp (strained) for the syrup. It’s like a vacation for your taste buds.
- Chocolate Raspberry Heaven: Add a tablespoon of sifted cocoa powder or melted and cooled dark chocolate to the mascarpone cream layer for a double chocolate hit.
- Boozy & Bold: For an adult-only version, add a tablespoon of Chambord (raspberry liqueur), Grand Marnier, or amaretto to the cooled raspberry syrup. So good!
- Dairy-Free Delight: Use a firm, chilled coconut cream instead of whipping cream and a dairy-free mascarpone alternative. It works like a charm!
A Few More Kitchen Confessions
Over the years, I’ve made this recipe more times than I can count, and it’s evolved in little ways. I used to be so precise with my layers, but now I sometimes just spoon everything in more rustically—it tastes just as amazing. The biggest lesson? Always make extra raspberry syrup. I like to keep a little jar of it in the fridge. It’s incredible drizzled over pancakes, swirled into sparkling water, or even as a topping for vanilla ice cream. Also, don’t stress if your cream layer isn’t perfectly smooth or your layers aren’t straight. I promise, the second someone takes a bite, all they’ll care about is the incredible flavor. Food is love, not perfection.
Your Questions, Answered!
I’ve gotten a lot of questions about this recipe over time, so here are the answers to the most common ones!
Q: My mascarpone cream is runny! What happened?
A: This usually happens for one of two reasons. First, your mascarpone or cream might have been too warm. Everything should be cool for best whipping results. Second, you might have under-whipped the cream. Make sure you’re beating it until it holds those soft peaks. If it’s a little soft, just pop the whole bowl into the fridge for 20 minutes to firm up before assembling.
Q: Can I make this a day ahead?
A: Absolutely! In fact, I highly recommend it. Making it the day before allows the flavors to meld together perfectly. Just hold off on adding any fresh berry garnishes until right before you serve so they don’t get mushy.
Q: My ladyfingers got too soggy. How can I prevent that?
A: The key is the speed of the dip! Think “dip and flip,” not “soak and sink.” You just want to moisten them, not saturate them. They will continue to soften and absorb moisture from the cream as they chill.
Q: I can’t find mascarpone. Is there a substitute?
A> You can make a decent stand-in by beating together 1 block (8 oz) of full-fat cream cheese with 1/4 cup of sour cream and 2 tablespoons of heavy cream until smooth. The flavor will be a bit tangier, but still delicious!
A Quick Note on Nutrition & Prep
While we’re all about indulgence here, I know some of you like to have the info! This is a rough estimate per serving (assuming 4 servings) and can vary based on your specific ingredients.
- Prep Time: 15 minutes
- Chill Time: 1-2 hours (minimum)
- Total Time: ~1 hour 15 minutes (mostly hands-off chilling)
- Servings: 4-6 cups
Estimated per serving: ~220-250 calories, 15g fat, 20g carbs, 3g protein. This dessert is rich, so a little goes a long way! It’s a treat that’s meant to be savored. Store any leftovers covered in the fridge and enjoy within 2-3 days for the best texture.
You Did It! Now, Savor the Moment.
And there you have it! You’ve just created a dessert that’s as kind to your schedule as it is to your taste buds. I hope these Raspberry Tiramisu Cups bring as much joy to your kitchen as they have to mine. They’re proof that you don’t need fancy equipment or complicated techniques to make something truly special. All you need is a few good ingredients and a heart full of love.
I’d love to hear how your creation turns out! Did you try any fun variations? Tag me on social @emilywalker_tastychow so I can see your beautiful work. Now, go grab a spoon, find a cozy spot, and chow down on your well-deserved treat.
With love and a full heart,
Emily