Crispy Boneless Chicken Wings – Your New Favorite Snack is Here!
Hey there, friend! Let me paint a picture for you. It’s game day. Or maybe it’s just a Tuesday. The craving hits—a powerful, undeniable need for something crispy, juicy, and slathered in your favorite sauce. You think about picking up the phone and ordering takeout, but then you remember: the delivery fees, the wait, the sometimes-soggy results. Ugh.
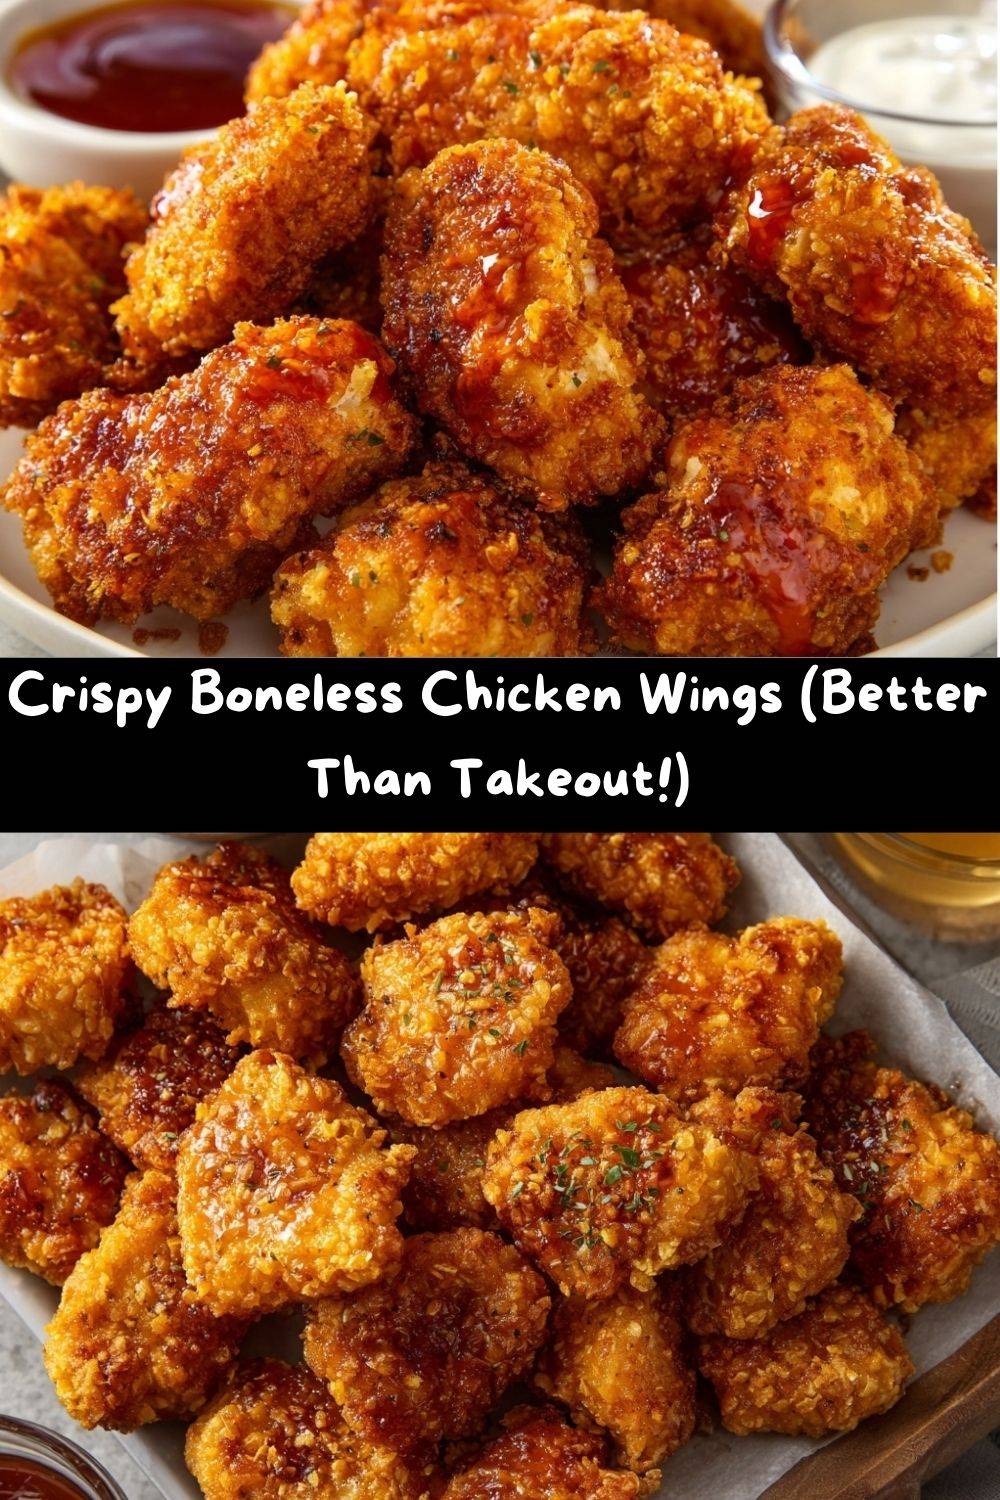
What if I told you that you can create something infinitely better, fresher, and more satisfying right in your own kitchen? Enter my recipe for Crispy Boneless Chicken Wings that are, and I say this with all the confidence of a woman who has taste-tested approximately one million wings, better than takeout.
We’re skipping the deep fryer and the fussy bones, focusing instead on bite-sized pieces of tender chicken, coated in a shatteringly crisp crust, and baked or air-fried to absolute perfection. They’re the ultimate vehicle for buffalo sauce, BBQ glaze, or whatever flavor adventure your heart desires. This isn’t just a recipe; it’s your ticket to becoming the hero of your own snack time. So, tie on your favorite apron (the messy one is always the best), and let’s make some magic happen.
The Night We Fell in Love with Boneless “Wings”
My love affair with this style of chicken didn’t start in a fancy restaurant or culinary school. Oh no. It started in my first tiny apartment, during a particularly dramatic playoff game with my now-husband. We were broke, the local wing place was closed, and our cravings were at an all-time high. Desperation, as it so often does, became the mother of invention.
I stared into our nearly empty fridge: some chicken breasts, a carton of buttermilk I’d bought for pancakes, and a half-empty bag of panko breadcrumbs. “I can make this work,” I declared, with the unwavering confidence of a 22-year-old who had just watched one too many cooking shows. What emerged from our dinky little oven that night was nothing short of a miracle. They were golden, they were crunchy, they were incredibly juicy, and when we tossed them in a hastily mixed buffalo sauce, we both looked at each other with wide eyes. “These are BETTER,” he said, through a mouthful of glorious chicken. That messy, impromptu kitchen experiment became our go-to for every celebration, big or small, and I’ve been perfecting the method ever since.
Gathering Your Flavor Arsenal
Here’s everything you’ll need to create this crispy masterpiece. Don’t just think of these as ingredients; think of them as your team players, each bringing a unique skill to the game.
- 1.5 lbs boneless, skinless chicken breasts or thighs: This is your MVP! Breasts give you that classic, lean bite, while thighs are my personal favorite for their guaranteed juiciness and richer flavor. You truly can’t go wrong. Cut them into 1 to 1.5-inch bite-sized pieces for the perfect pop-in-your-mouth experience.
- 1 cup buttermilk: This is the secret to incredibly tender, moist chicken. The gentle acidity in buttermilk works magic on the protein, breaking it down just enough to ensure every bite is succulent. Chef’s Hack: No buttermilk? No problem! Make your own by stirring 1 tablespoon of lemon juice or white vinegar into a cup of regular milk. Let it sit for 5 minutes until it curdles slightly. Good as gold!
- 1 teaspoon garlic powder & 1 teaspoon paprika: We’re building flavor from the inside out! The garlic powder adds that savory, umami backbone, while the paprika gives a subtle sweetness and a beautiful golden color to the finished crust. Smoked paprika is a fantastic twist here for a hint of smokiness.
- Salt and pepper to taste: The fundamentals! Season generously. Remember, this is your chance to season the chicken itself, not just the coating.
- 1 ½ cups panko breadcrumbs: The KEY to the CRUNCH. Panko is a Japanese-style breadcrumb that’s flakier and airier than traditional crumbs, resulting in a lighter, crispier texture that doesn’t get soggy. Do not substitute with fine, sandy breadcrumbs if you can help it—the texture will be completely different.
- ½ cup all-purpose flour: Our trusty binder. The flour helps the final crispy coating cling to the juicy chicken inside, creating a perfect, cohesive bite.
- Cooking spray or oil for baking/frying: A light spritz of avocado oil, canola oil, or even olive oil cooking spray is all you need to help the crust turn that irresistible golden-brown. It mimics the effect of frying without all the oil.
Let’s Get Cooking: Your Path to Crispy Perfection
Ready? This process is simple, fun, and a little messy—just how cooking should be! Follow these steps, and you’ll be a boneless wing master in no time.
- The Flavor Soak (Marinating): In a medium bowl, combine your buttermilk, garlic powder, paprika, salt, and pepper. Give it a good whisk. Now, plop all your beautiful chicken pieces into this flavorful bath, making sure every nook and cranny is submerged. Pop a lid on it or cover it with plastic wrap and let it hang out in the fridge for at least 30 minutes. This is non-negotiable for tenderness! For life-changing results, let it go overnight. The longer, the better.
- Heat Things Up (Preheating): When you’re ready to cook, preheat your oven to 425°F (220°C). If you’re using an air fryer, preheat that bad boy to 400°F (200°C). Giving your appliance time to get properly hot is the secret to that initial “sear” and crispiness. No one likes a lukewarm oven for crispy chicken!
- Create the Crunch Station (Coating): In a shallow dish (a pie plate works perfectly!), whisk together the panko breadcrumbs and flour. This is your crispy jacket station. I like to add a little extra pinch of salt and pepper here, too, because we believe in layers of flavor.
- The Dredge Dance (Coating the Chicken): Using one hand, take a piece of chicken from the buttermilk, letting the excess drip off. Drop it into the panko-flour mixture. Now, with your OTHER hand (this is the pro tip for avoiding “club hand”!), gently press the coating onto the chicken, ensuring it’s thoroughly covered. This pressing action is crucial—it helps the crumbs adhere so they don’t fall off during cooking. Place the coated piece on a wire rack set over a baking sheet (this promotes air circulation for ultimate crispiness) or directly into your air fryer basket.
- The Golden Touch (Spraying): Once all your chicken is coated and arranged with a little space between each piece (crowding is the enemy of crispiness!), give them a generous, even spritz with your cooking spray. This will help them brown and get that satisfying crunch.
- The Main Event (Cooking):
- For Oven Baking: Bake for 20-25 minutes, flipping each piece halfway through. You’re looking for a deep, golden brown color and an internal temperature of 165°F (74°C).
- For Air Frying: Cook for 14-16 minutes, shaking the basket or turning the pieces halfway through. The air fryer will give you an extra-crispy result in less time—it’s a fantastic option!
- The Grand Finale (Saucing): THIS IS IMPORTANT. Do not toss your crispy chicken in the sauce until the very last second before serving. I repeat, do not sauce them and then let them sit! You worked hard for that crunch—protect it at all costs. Toss the hot, freshly cooked chicken pieces in a bowl with your desired sauce until evenly coated, and serve immediately.
How to Serve These Crispy Little Clouds of Joy
Presentation is part of the fun! Pile these saucy, crispy boneless wings high on a big platter. They are the undisputed star of the show, so let them shine.
Now, what to put beside them? You need something to cool the palate if you’re going spicy, or to add a fresh contrast. My go-is a big bowl of cool, creamy ranch dressing or blue cheese dip. For the veggie lovers, a hefty portion of celery sticks and carrot batons is a must—it makes the whole meal feel balanced and vibrant.
Thinking bigger? These wings are the perfect centerpiece for a game-day spread. Serve them alongside loaded nachos, a simple green salad, or even tucked into a soft brioche bun for the most epic chicken sandwich of your life. For a fun “wing bar” experience, serve the plain crispy chicken and set out three or four different sauces (buffalo, BBQ, honey garlic) so everyone can customize their own plate.
Mix It Up! 5 Delicious Twists on the Classic
Once you’ve mastered the basic method, the world is your flavor oyster! Here are a few of my favorite ways to keep things exciting.
- Nashville Hot Style: After cooking, toss the wings in a mixture of 2-3 tablespoons of the hot oil from the pan (or melted butter) and 1-2 tablespoons of cayenne pepper, a teaspoon of brown sugar, and a pinch of paprika. Fiery and fantastic!
- Lemon Herb Parmesan: Add the zest of one lemon and 1/4 cup of finely grated Parmesan cheese to the panko mixture. After cooking, toss with a squeeze of fresh lemon juice and a sprinkle of chopped fresh parsley. Bright, cheesy, and irresistible.
- Asian-Inspired Glaze: Instead of classic sauces, toss your cooked wings in a glaze made from soy sauce, honey, minced garlic, ginger, and a splash of rice vinegar. Sprinkle with sesame seeds and sliced green onions.
- Gluten-Free & Keto-Friendly: You can still enjoy the crunch! Simply replace the all-purpose flour with a 1:1 gluten-free flour blend and swap the panko for crushed pork rinds or grated Parmesan cheese for a low-carb, ultra-crispy coating.
- Extra Spicy Buffalo: Kick the heat up a notch by adding a teaspoon of cayenne pepper to the buttermilk marinade. Then, when making your buffalo sauce, mix in a tablespoon of your favorite hot sauce or a pinch of ghost pepper powder for the brave.
From My Kitchen to Yours: A Few Chef’s Secrets
This recipe has been my trusty sidekick for years, and it’s evolved with every batch. I once tried to save time by skipping the buttermilk soak and just using egg—never again. The tenderness is just not the same. I’ve also learned that patience with the preheating step is a virtue. Rushing that is the difference between crispy and merely “browned.”
The biggest laugh I ever had was the time I decided to “make it rain” sauce over the entire batch while they were still on the baking sheet, thinking I could just pop them back in for a minute. Friends, I created a sticky, caramelized, mess that welded the chicken to the pan. It was a delicious, hilarious disaster. Now I always toss in a separate bowl, right before serving. Learn from my messy mistakes!
Your Questions, Answered!
Over the years, I’ve gotten a lot of questions about this recipe. Here are the answers to the most common ones!
Q: My coating is falling off! What did I do wrong?
A: This usually happens for one of two reasons: 1) You didn’t press the coating on firmly enough. Really get in there and make those crumbs stick! 2) You didn’t let the excess buttermilk drip off, creating a too-thick, slippery layer that prevents the coating from adhering. A good drip and a firm press are your best friends.
Q: Can I make these ahead of time?
A> You can do the prep ahead! You can marinate the chicken (up to 24 hours) and even coat it in the panko mixture. Keep the coated chicken on a parchment-lined tray in the fridge for a few hours before cooking. However, for the crispiest results, cook them fresh and serve immediately after saucing.
Q: Why are my wings not crispy?
A> The usual suspects are crowding the pan (steam is the enemy of crispness!), not using enough cooking spray, or having an oven that isn’t properly preheated. The wire rack trick is a game-changer here, as it allows hot air to circulate all around the chicken.
Q: Can I really double-coat them for extra crunch?
A> YES! This is my favorite pro-tip for an ultra-thick, crunchy crust. After the first dredge in the panko mixture, dip the chicken back into the buttermilk and then into the crumbs for a second time. It creates a fantastic, pub-style coating that holds up beautifully to any sauce.
Nutritional Information (Because Knowledge is Power!)
I’m a big believer in enjoying delicious food without guilt, and it’s always helpful to know what you’re eating! This nutritional breakdown is an estimate for about 4-5 pieces of oven-baked chicken, prepared without sauce. Remember, sauces will add additional calories, sodium, and sugar.
- Calories: ~230
- Protein: 22g (Fantastic for keeping you full and satisfied!)
- Carbohydrates: 14g
- Fat: 10g
- Fiber: 1g
Compared to traditional deep-fried, bone-in wings or takeout versions, this baked or air-fried method significantly reduces the overall fat and calorie content while maximizing flavor and satisfaction. By controlling the ingredients, you’re also avoiding unnecessary preservatives and excess sodium. It’s a win-win!
You’ve Got This!
And there you have it! Your complete guide to making insanely delicious, Crispy Boneless Chicken Wings that will have your friends and family begging for the recipe. This is more than just a list of ingredients and steps; it’s a formula for creating memorable, happy, and downright tasty moments right at home.
You have the power to make something incredible. So, don’t be intimidated by the craving for crispy, saucy chicken. You are the chef of your own kitchen, and you are fully equipped to create something better than any takeout box could ever deliver.
I’d love to hear how your wings turn out! Tag me on social @TastyChow with your creations so I can see the magic you’re making. Now, go forth and get crispy!
With love and a fully stocked spice rack,
Emily