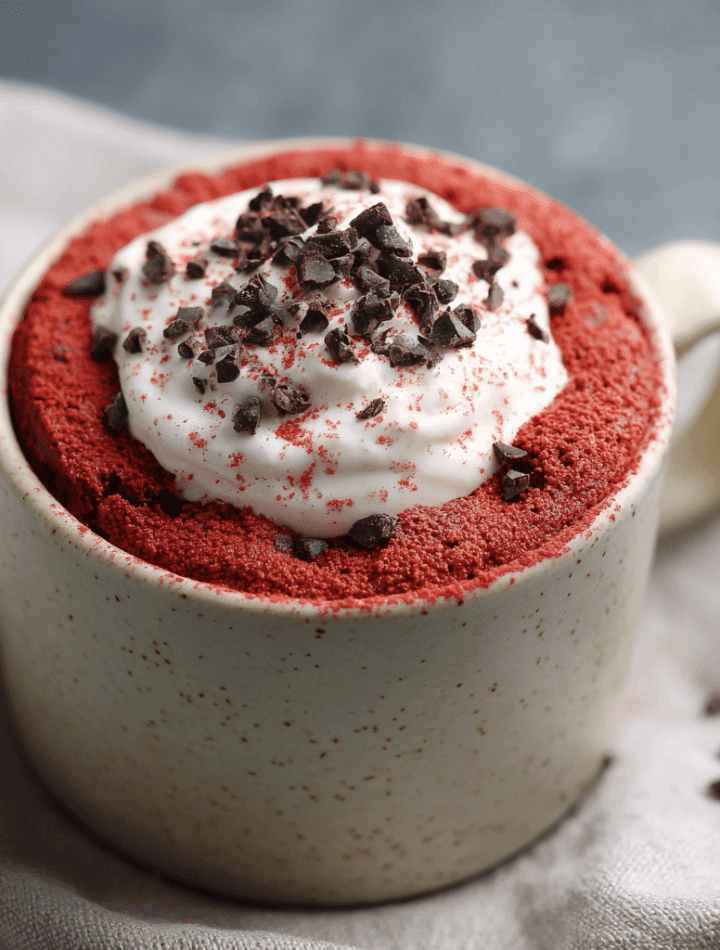
1-Minute Red Velvet Protein Mug Cake (No Oven Needed!)
Hey, friend. Can we talk about cravings for a second? You know the ones. It’s 8:37 PM, you’ve had a day, and your brain suddenly flashes an image of something specific, decadent, and red velvet. The thought of preheating the oven, pulling out the mixer, and committing to a whole cake feels… impossible. But the craving is real. What if I told you that in the time it takes to find your favorite cozy socks, you could be diving a spoon into a warm, fluffy, utterly delicious red velvet cake that’s actually packed with protein and made for one?
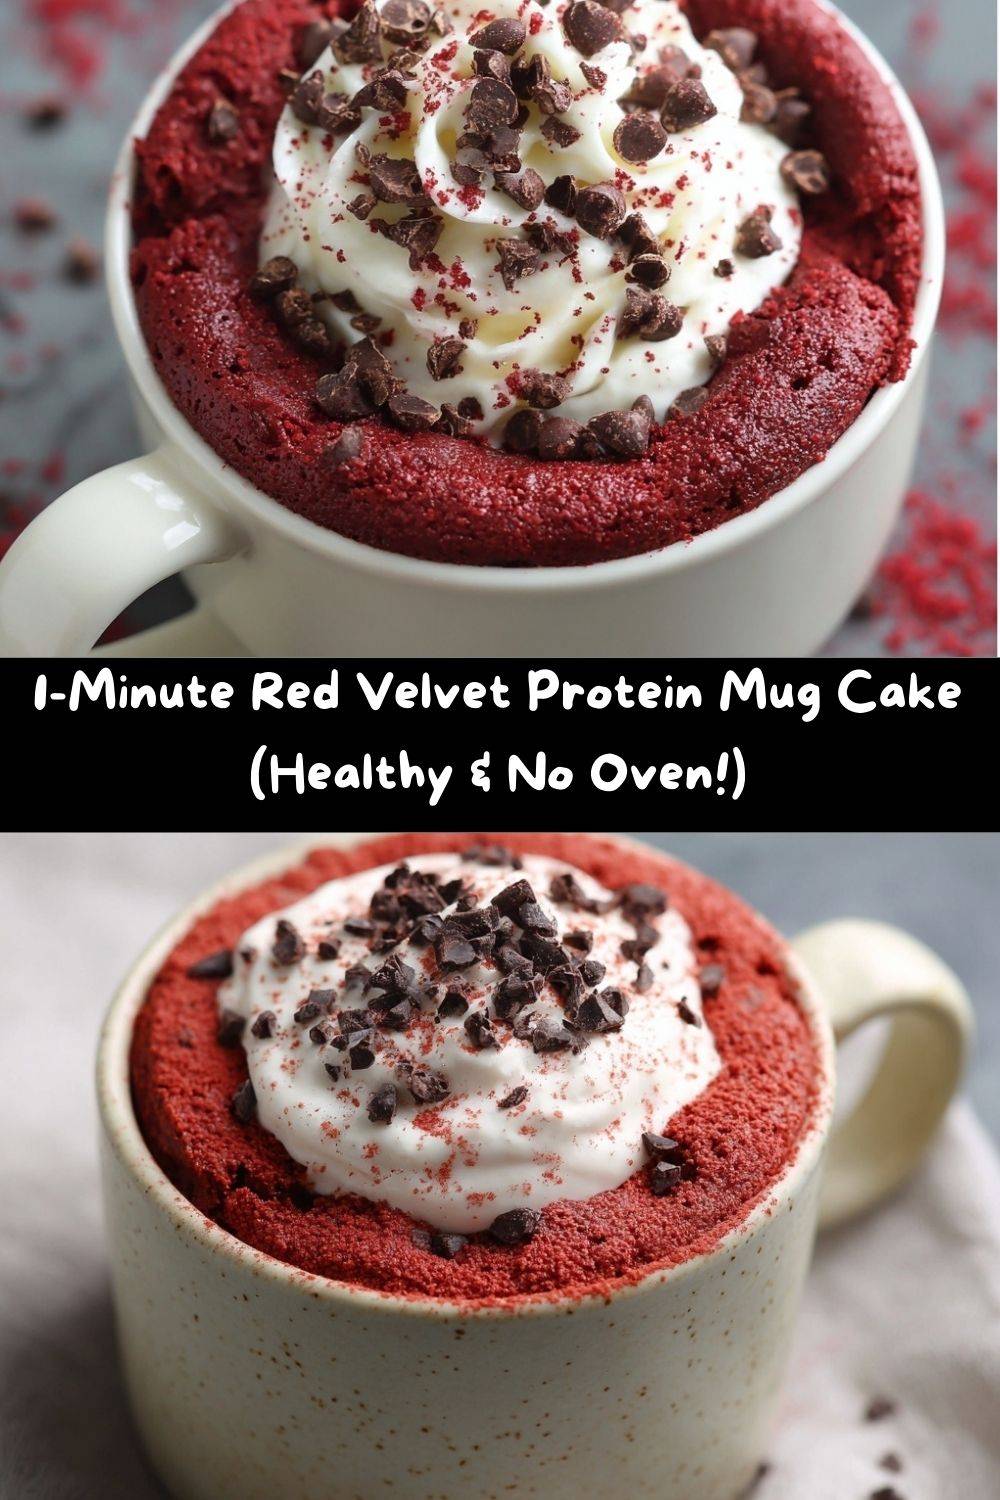
This, my fellow flavor-chaser, is your new secret weapon. This 1-Minute Red Velvet Protein Mug Cake is my go-to for a instant hug in a mug. It’s got that classic cocoa-vanilla flavor, that iconic festive color, and a texture that’s somehow both cakey and gooey in the best possible way. It’s the ultimate single-serve solution for post-workout wins, sneaky afternoon treats, or “I deserve this” moments. So grab your favorite mug—the one with the tiny chip that gives it character—and let’s make some magic. No oven, no fuss, just pure, joyful flavor in a flash.
My Grandma’s Apron & My Microwave: A Love Story
This recipe always makes me smile because it’s a beautiful, messy collision of my past and present. My grandma, the queen of from-scratch everything, baked a towering red velvet cake for every single birthday and holiday. The process was an all-day event—sifting flour, creaming butter, and carefully mixing in that bottle of crimson food coloring. The kitchen smelled like love and cocoa, and we’d all hover, waiting for the beaters to lick.
Fast-forward to me today: a culinary school grad with a passion for flavor but a reality that includes busy weeks, hungry kids, and my own post-gym hunger. I wanted to capture the essence of Grandma’s special cake—that nostalgic flavor, that feeling of celebration—but in a format that fits real, modern life. The microwave mug cake was my canvas, and protein powder became my secret for making it satisfying. It’s my little kitchen homage: all the soul-warming taste, packed into a minute and a mug. I think she’d get a kick out of it.
Gather Your Ingredients (The Fun Part!)
Here’s the beautiful lineup. Part of the joy of mug cakes is that you probably have most of this already. Let’s break it down:
- 1 scoop (30g) vanilla or chocolate protein powder: This is our foundation! Chef’s Insight: I prefer vanilla whey protein isolate for a neutral, cake-like base, but a good chocolate one works amazingly too. For plant-based, a vanilla pea or soy protein blend is perfect. The key is using a powder you enjoy the taste of on its own.
- 1 tbsp cocoa powder: Non-negotiable for that signature red velvet flavor. We’re using just enough for depth, not overpowering chocolate-ness.
- 1 tbsp oat flour or almond flour: Substitution Tip: Oat flour (just blended oats!) gives a classic, tender crumb. Almond flour makes it extra moist and is a great grain-free option. All-purpose flour works in a pinch, but the texture changes slightly.
- 1/4 tsp baking powder: Our tiny but mighty lift agent. This is what gives us that cakey rise in the microwave. Make sure yours is fresh!
- 1/4 tsp vanilla extract: The other half of the red velvet flavor profile. Pure extract makes a difference here, friends.
- 1–2 tsp sweetener of choice: Chef’s Hack: This depends on your protein powder’s sweetness. I use 1 tsp of monk fruit if my protein is sweetened. For an unflavored powder, try 2 tsp maple syrup or coconut sugar. Taste your batter (yes, raw batter is allowed!) before microwaving.
- 1/4 cup almond milk (or any milk): The liquid that brings it all together. Any milk works—dairy, oat, soy. For a richer cake, try cashew milk or even a splash of canned coconut milk.
- 1 tsp beetroot powder OR ½ tsp liquid red food coloring: Why I Love Beetroot: This is my go-to! It gives a gorgeous natural color and a tiny earthy sweetness. If you’re going for that classic vibrant red, food coloring is your friend. No coloring? You’ll have a delicious chocolate protein cake—zero shame.
- Optional: 1 tbsp mini chocolate chips or chunks: Because joy. I like dark chocolate chips for a bittersweet punch.
Let’s Make It: Your 60-Second Countdown to Bliss
Ready? This is so simple, but a few pro-tips will make it perfect every single time.
- Choose Your Mug Wisely. Grab a microwave-safe mug that holds at least 12 oz. Trust me, you want room for the cake to rise without any dramatic overflow situations. I’ve learned this the messy way!
- The Dry Team Mix. In your mug, add the protein powder, cocoa powder, oat flour, baking powder, and sweetener. Whisk them with a fork or a small whisk until you see no lumps and everything is a uniform, dusty brown. This step is crucial for a smooth batter—no one wants a pocket of pure protein powder!
- Bring in the Wet Crew. Pour in your milk, vanilla extract, and your chosen red colorant. Now, stir with purpose! Scrape the bottom and sides, mixing until you have a smooth, vibrantly colored batter. It should be pourable but not super runny, like a thick pancake batter. Chef’s Hack: If using beetroot powder, you can mix it with the tablespoon of milk first to make a paste, ensuring no pink speckles.
- The Chocolate Chip Fold. If you’re using them, gently fold in your chocolate chips. I like to reserve a few to press on top right before microwaving for a bakery-style look.
- The Magic Minute. Pop the mug into the microwave. Here’s the key: start with 45 seconds on high. Microwave powers vary wildly. At 45 seconds, check it. The top should look set, and the center might look just a tiny bit soft—that’s perfect for a slightly gooey, lava-cake-like center. If it looks too wet, add 10-15 more seconds. DO NOT over-microwave or it will become rubbery. It will continue to cook as it rests.
- The Crucial Rest. This is the hardest part! Let your mug cake sit in the microwave or on the counter for a full 60 seconds after cooking. This lets the structure set and saves your tongue from a molten chocolate chip surprise.
How to Serve Your Instant Masterpiece
Now for the best part: the embellishment! Eating it straight from the mug is a perfectly valid life choice. But if you want to elevate it to a proper dessert, here are my favorite ways to serve:
- The Classic Cream Cheese Vibe: Swirl a tablespoon of softened cream cheese (mixed with a touch of sweetener) on top. It’s the iconic pairing!
- Protein Frosting: Mix 2 tbsp of plain Greek yogurt with a scoop of vanilla protein powder and a splash of milk for a thick, high-protein frosting.
- Nut Butter Drizzle: Warm a tablespoon of almond or cashew butter and let it cascade over the top. Adds healthy fats and makes it so decadent.
- Simple & Fresh: A dollop of whipped coconut cream and a few raspberries for a hit of freshness against the rich cake.
Grab a spoon and dig in right in the mug, or for a cute presentation, you can run a knife around the edge and tip it onto a plate!
Mix It Up! 5 Fun Twists on Your Mug Cake
The beauty of this template is its flexibility. Once you master the basic formula, the flavor world is your oyster!
- Chocolate Orange: Use chocolate protein powder, add ½ tsp orange zest to the batter, and swap the vanilla extract for orange extract. Top with a dark chocolate drizzle.
- Peppermint Patty: Use chocolate protein powder and add ¼ tsp peppermint extract. Fold in dairy-free dark chocolate chips. Top with a yogurt “frosting” and a sprinkle of crushed peppermint.
- Lemon Poppy Seed: Omit the cocoa and red coloring. Use vanilla protein powder and add 1 tsp lemon zest, 1 tsp poppy seeds, and ½ tsp lemon extract. It’s bright, sunny, and delightful.
- Double Chocolate Cookie Dough: Use chocolate protein powder, omit the red coloring, and fold in 1 tbsp of chickpeas (yes, really!) blended with ½ tbsp nut butter for a cookie dough chunk effect.
- Grain-Free & Nut-Free: Use almond flour or sunflower seed flour, and make sure your protein powder fits your dietary needs. It’s just as easy and delicious!
Chef Emily’s Notebook Scribbles
This recipe has seen some… experiments. There was the “great red food coloring spill of 2021” that turned my fingertips red for two days. There was the time I forgot the baking powder and ended up with a delicious, dense red velvet puck (not recommended). The version you see here is the goldilocks version after all that tinkering.
I also love that it’s a fantastic base for clean-out-the-pantry additions: a sprinkle of cinnamon, a dash of espresso powder to deepen the chocolate, or even a swirl of peanut butter in the center before microwaving. It’s your kitchen, your rules. Have fun with it!
FAQs & Quick Fixes
Q: My cake came out rubbery. What happened?
A: The #1 culprit is over-microwaving. Microwaves vary in power. Always start with less time (45 sec) and add in 10-second bursts if needed. The second cause can be certain types of protein powder (especially some casein blends). Whey isolate or blend tends to give the best texture.
Q: Can I make this without protein powder?
A: You can, but it changes the structure. Try subbing the protein powder with 2 tbsp of oat flour or almond flour and increase the sweetener slightly. It won’t be as high-protein, but it will still be a tasty mug cake!
Q: It’s not sweet enough for me.
A: No problem! This is why we taste the batter. Before microwaving, give it a try (it’s safe!). Add an extra teaspoon of your favorite sweetener or a sprinkle of chocolate chips. Your cake, your sweetness level.
Q: Can I bake it in a real oven?
A> Absolutely! Pour the batter into a small greased ramekin. Bake at 350°F (175°C) for about 12-15 minutes, until the top is springy to the touch.
Nutritional Breakdown (A Rough Guide!)
Here’s an approximate breakdown for the base recipe made with vanilla whey protein, oat flour, unsweetened almond milk, and no chocolate chips:
- Calories: ~220
- Protein: ~20g (Hello, satisfaction!)
- Carbohydrates: ~15g
- Fat: ~8g
- Sugar: ~3g
Remember, this is a guide. Numbers will shift based on your specific brand of protein powder, type of milk, and add-ins. The point is, it’s a balanced, macro-friendly treat that fuels you and satisfies that dessert craving without the crash. It’s food that makes you feel good, inside and out.
Your New Go-To Treat
And there you have it—your passport to instant dessert satisfaction. This little mug cake is more than a recipe; it’s a reminder that eating well doesn’t mean missing out. It’s about having smart, delicious, and downright fun options up your sleeve (or in your mug).
I hope this recipe becomes a trusted friend in your kitchen, just like it is in mine. The next time that red velvet craving whispers your name, you’ll be ready. So here’s to quick wins, to messy aprons, and to treating ourselves with love, one mug cake at a time.
Now, I’d love to hear from you! Did you add a crazy topping? Try a wild variation? Tag me @TastyChow on social media so I can see your creations. Happy microwaving, friends!
— Emily 🧡