Strawberry Shortcake Snack Cakes: Your New Favorite Bite of Sunshine
Hey there, friends! Emily from Tasty Chow here, coming to you with flour on my apron and a serious spring in my step. Have you ever had one of those days where a sweet, nostalgic craving hits you out of nowhere? Maybe you’re flipping through an old photo album, or you pass by a bakery window, and bam—you’re instantly transported back to simpler times, to lunchboxes and after-school snacks and that pure, unadulterated joy of a perfectly sweet, creamy, fruity treat.
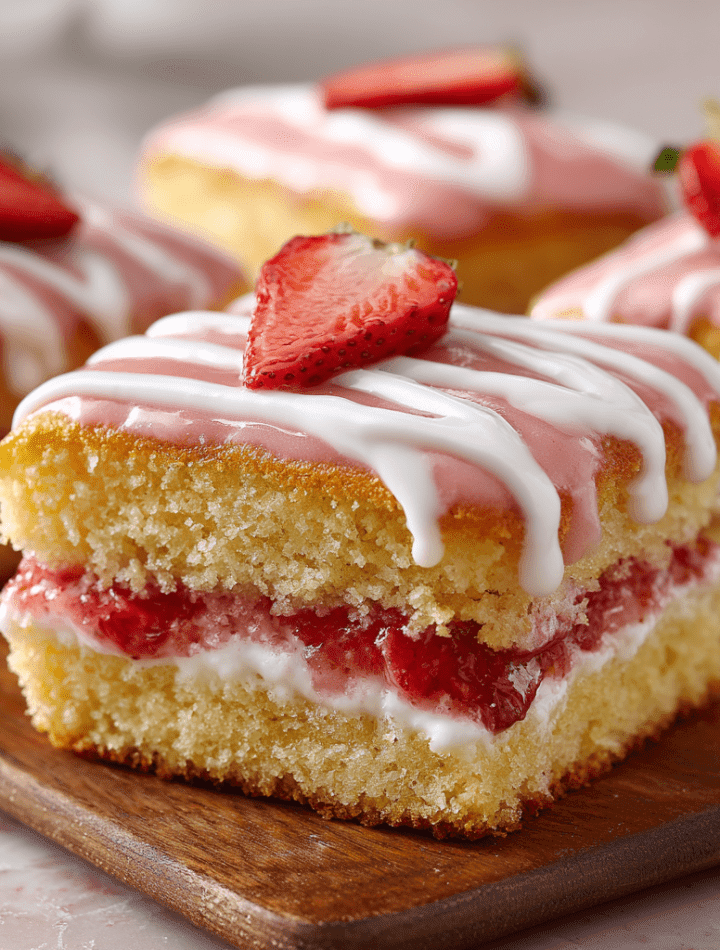
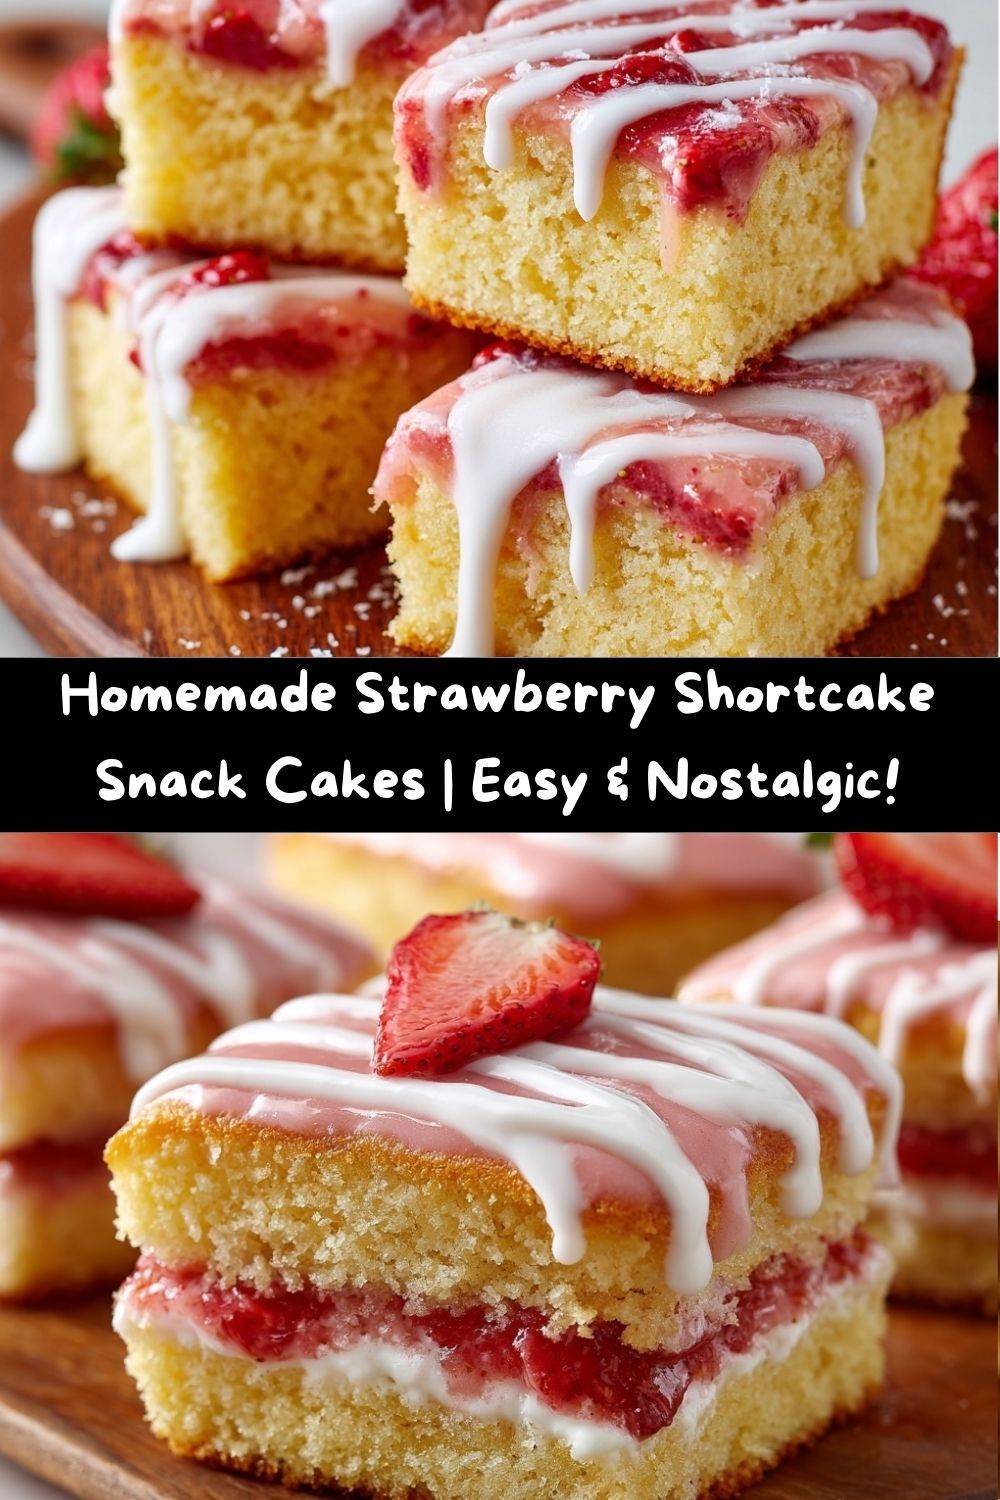
Well, pull up a stool, because today we’re making that daydream a delicious reality. We’re ditching the plastic wrapper and creating something magical from scratch: Homemade Strawberry Shortcake Snack Cakes. Imagine this: pillows of soft, vanilla-kissed cake, layered with a cloud of lightly sweetened whipped cream, all crowned with a glossy, vibrant strawberry glaze that tastes like a ripe berry straight from the patch.
This isn’t just a recipe; it’s a flavor memory, reimagined. It’s the soul of a classic strawberry shortcake, transformed into a handheld, packable, utterly irresistible snack cake. They’re perfect for brightening up a lunchbox, impressing at a picnic, or savoring with a cup of tea during a well-deserved afternoon pause. The best part? They’re surprisingly simple to make, and the payoff—seeing that look of delight on someone’s face (or your own!)—is worth every single minute. So, let’s preheat the oven, grab our favorite mixing bowl, and make something wonderful together.
A Spoonful of Nostalgia: My Grandma’s Strawberry Patch
This recipe whisks me right back to my grandma’s backyard in late June. She had this wild, sprawling strawberry patch that seemed to produce berries as big as my little-kid fists. Every summer visit meant a ritual: we’d wake up early, before the sun got too high, and tiptoe through the dew-soaked grass to hunt for the ripest, reddest jewels.
Later, in her cozy, sun-drenched kitchen, she’d slice those warm berries, sprinkle them with just a whisper of sugar, and let them macerate into a syrupy, fragrant mess. She’d split a tender biscuit, dollop on fresh cream she’d skimmed herself, and pile those glistening berries on top. It was messy, it was imperfect, and it was absolute perfection. That combination of tender cake, cool cream, and sun-warmed fruit is the heart of this snack cake. I’ve just wrapped it all up in a neat little package, so you can carry that same feeling of simple, sunshiny joy wherever you go.
Gathering Your Sunshine: Ingredients & Insights
Here’s everything you’ll need to build these little bites of happiness. I’ve added my chef-y notes and swaps so you can bake with confidence!
For the Fluffy Vanilla Cake:
- 1 cup all-purpose flour: The trusty foundation. For a slightly more tender crumb, you can swap in ½ cup cake flour, but all-purpose works beautifully here.
- ½ teaspoon baking powder: Our little lift agent! Make sure it’s fresh for the best rise.
- ¼ teaspoon salt: The secret flavor enhancer. It balances the sweetness and makes the vanilla pop.
- 2 large eggs, at room temperature: Room temp is key! They incorporate more air, leading to a fluffier cake. If you forgot, just place them in a bowl of warm water for 5 minutes.
- ½ cup granulated sugar: Sweetness and structure. We’re not making an overly sweet cake—the glaze and filling bring the main sweetness.
- ¼ cup whole milk, at room temperature: Whole milk adds richness. Any milk works, but the higher the fat, the more tender the cake.
- ¼ cup vegetable oil: Our moisture keeper! Oil gives this cake a wonderfully soft texture that stays soft for days.
- 1 teaspoon pure vanilla extract: The star of the show. Use the good stuff—you’ll taste the difference.
For the Cloud-Like Filling:
- ½ cup heavy whipping cream, cold: Cold cream is non-negotiable for whipping up stiff, glorious peaks. Chill your bowl and beaters too for extra insurance!
- 2 tablespoons powdered sugar: Sweetens and stabilizes the cream just a touch.
- ½ teaspoon vanilla extract: A little extra vanilla fragrance in the filling ties everything together.
For the Vibrant Strawberry Glaze:
- ½ cup fresh strawberries, puréed: The heart of the flavor! Frozen and thawed berries work in a pinch, but fresh gives the brightest color and taste. Hull them first!
- ½ cup powdered sugar, sifted: Sifting is crucial here for a smooth, lump-free glaze.
- 1 teaspoon fresh lemon juice: The brightening agent. It cuts the sweetness and makes the strawberry flavor sing.
Let’s Bake! Step-by-Step with Chef Emily
Ready? Aprons on! We’re going to walk through this together. I’ll be right here with tips and tricks to make sure your snack cakes are pure perfection.
- Prep & Preheat: First, let’s get organized. Preheat your oven to 350°F (175°C). This gives it time to reach the perfect, even temperature. Line a 9×13-inch baking pan with parchment paper, leaving a little overhang on the sides. This is my favorite hack for easily lifting the whole cake out later—no flipping or wrestling required!
- Mix the Dry Team: In a medium bowl, grab your whisk and give the flour, baking powder, and salt a good, airy whisk. This isn’t just mixing; it’s aerating and ensuring our leavening is evenly distributed. No one wants a baking powder pocket! Set this bowl aside.
- Whip the Wet Team to Glory: Now, in a larger bowl, combine the room-temperature eggs and granulated sugar. Here’s where the magic starts. Using a hand mixer or stand mixer, beat them on medium-high speed for a good 2-3 minutes. You’re looking for the mixture to become pale yellow, thickened, and fluffy. When you lift the beaters, the ribbon of batter that falls should sit on the surface for a second before dissolving. This step incorporates air, which is essential for our light, springy cake texture.
- Bringing It All Together: With the mixer on low, drizzle in the oil, milk, and vanilla into the egg mixture. It might look a little curdled at first—don’t panic! It will smooth out. Now, gently fold in the dry ingredients. I use a rubber spatula and a light hand, stirring just until the last streak of flour disappears. Overmixing is the enemy of tenderness! Pour this beautiful batter into your prepared pan and smooth the top.
- Bake to Golden Perfection: Slide the pan into the center of your preheated oven. Bake for 12-15 minutes. You’ll know it’s done when the top is lightly golden and springs back when gently pressed in the center. A toothpick inserted should come out clean. Let the cake cool completely in the pan on a wire rack. Patience is key here—a warm cake will melt our filling!
- Cut & Create: Once cool, use the parchment paper to lift the entire cake onto a cutting board. Using a sharp knife, cut it into rectangles. I usually go for 8 larger ones or 12 more petite bites. Wipe your knife clean between cuts for neat edges.
- Make the Fluffy Filling: In that chilled bowl, combine the cold heavy cream, powdered sugar, and vanilla. Whip on medium-high until stiff peaks form. That means when you lift the beaters, the peak stands straight up and doesn’t flop over. Be careful not to over-whip into butter!
- Sandwich Time! Place a generous dollop of whipped cream on one cake rectangle. Gently press a second rectangle on top to make a little cake sandwich. Repeat with all pieces. Isn’t this fun?
- The Glorious Glaze: For the glaze, ensure your strawberry purée is smooth (a tiny blender or food processor is perfect). In a small bowl, whisk the puréed strawberries with the sifted powdered sugar and lemon juice until smooth. It should be thick but pourable. Now, either drizzle this ruby-red goodness artfully over each cake with a spoon, or carefully dip the top of each cake sandwich into the glaze. I’m a dipper—I love that full coverage!
- The Final Chill: Place your assembled and glazed snack cakes on a tray and pop them in the fridge for at least 30 minutes. This lets the glaze set and the filling firm up, making them neat enough to pick up and devour.
How to Serve These Little Gems
Presentation is part of the joy! For a casual treat, just pile them on a rustic wooden board or a pretty plate. If you’re feeling fancy, place each one on a small dessert plate with a fresh strawberry fan and a tiny mint leaf beside it. They’re perfect with a glass of cold milk for the ultimate nostalgia trip, a cup of hot tea for a cozy afternoon, or even as a sweet ending to a summer BBQ. They’re portable, so wrap one up in a little parchment paper for a sweet surprise in someone’s lunch or picnic basket.
Make It Your Own! Fun Variations
The beauty of this recipe is its adaptability. Here are a few twists to try:
- Lemon-Berry Bliss: Add the zest of one lemon to the cake batter. Swap the strawberry glaze for a mix of raspberry purée and powdered sugar. Bright and tangy!
- Chocolate-Dipped Dream: Skip the strawberry glaze. Instead, melt ½ cup of semi-sweet chocolate chips with a teaspoon of coconut oil. Dip half of each assembled cake into the chocolate and let set on parchment. Decadence!
- “Neapolitan” Style: Add 1 tablespoon of cocoa powder to half the cake batter. Layer a white cake rectangle, cream, and a chocolate cake rectangle. Use the strawberry glaze as is. Three flavors in one!
- Dairy-Free/Delicious: Use a neutral-flavored oil-based vegan butter in the cake and full-fat canned coconut milk (chilled, scoop out the solid cream) for the filling. The glaze is naturally dairy-free!
- Boozy Berry: For the grown-ups, fold a teaspoon of Chambord or strawberry liqueur into the whipped cream filling. Sublime.
Chef Emily’s Notebook Scribbles
This recipe is a direct descendant of those summers at my grandma’s, but it’s evolved through many messy, happy kitchen tests. The first time I made them, I tried a butter-based cake, but found the oil version stayed softer longer—a must for a “snack cake.” I also learned the hard way that glazing a warm cake is a recipe for a pink puddle! The cooling step is your friend. Now, these are a staple in my house. My favorite kitchen memory with them? My nephew, covered in pink glaze, declaring them “better than any cake in the whole universe.” That’s the good stuff, right there.
Your Questions, Answered!
Q: Can I make these ahead of time?
A: Absolutely! You can bake the cake base up to a day ahead, wrap it tightly, and store at room temp. Assemble with filling and glaze the day you plan to serve them for the best texture. Assembled cakes keep well in the fridge, covered, for 1-2 days.
Q: My glaze is too runny/thick. Help!
A: Glaze consistency is key. Too runny? Whisk in more sifted powdered sugar, a tablespoon at a time. Too thick? Add a few drops of water or more lemon juice. It should coat the back of a spoon nicely.
Q: Can I use frozen strawberries?
A: Yes, but thaw them completely first and drain any excess liquid in a fine-mesh strainer. You might need a touch less lemon juice as frozen berries can be more tart.
Q: My whipped cream won’t get stiff!
A> The usual culprits: cream not cold enough, or your bowl/beaters were warm. Pop everything in the freezer for 10 minutes and try again. Also, ensure you’re using heavy whipping cream, not “whipping cream” or half-and-half.
Nutritional Information*
*Please note: Nutritional info is an estimate provided by an online calculator and will vary based on specific ingredients and portion sizes used.
Prep Time: 20 mins | Bake Time: 15 mins | Chill Time: 30 mins | Total Time: ~1 hr 5 mins | Servings: 8 snack cakes
Per Cake (approx.):
Calories: 260 | Carbohydrates: 28g | Protein: 3g | Fat: 14g | Saturated Fat: 7g | Sugar: 19g | Sodium: 90mg
Remember, these are a treat meant to be savored and enjoyed! We’re using real ingredients like fresh fruit, eggs, and cream—no unpronounceable preservatives in sight.
Final Thoughts from My Kitchen to Yours
And there you have it, my friend—your ticket to homemade snack cake heaven. This recipe is more than just a list of steps; it’s an invitation to play, to create, and to share a little bite of joy. Whether you’re making these for a house full of hungry kids, for a friend who needs a pick-me-up, or just for your own sweet self, I hope they bring a smile to your face.
Food has this incredible power to connect us—to our past, to each other, and to simple pleasures. So, thank you for letting me share my strawberry patch memory with you. Now, I’d love to hear yours! Tag me @TastyChow when you make these, and let me see your beautiful, glazed creations. Until next time, keep your whisks ready and your hearts full. Happy baking!
With love and a sprinkle of sugar,
Emily 🍓