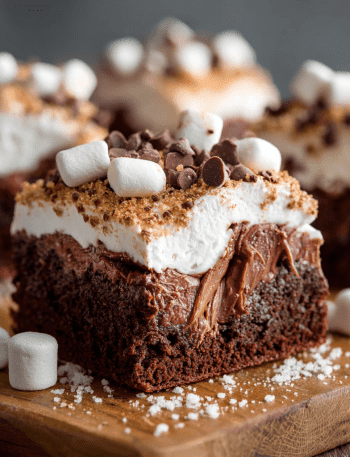
Mini Double Chocolate Berry Cakes: Your New Favorite Bite-Sized Indulgence
Hey there, friend! Picture this: you’re scrolling through your phone, dreaming of something sweet, but you can’t decide between a rich, fudgy brownie and a plate of fresh, juicy berries. What if I told you there’s a dessert that marries these two cravings into one perfectly elegant, single-serving package? Enter my Mini Double Chocolate Berry Cakes.
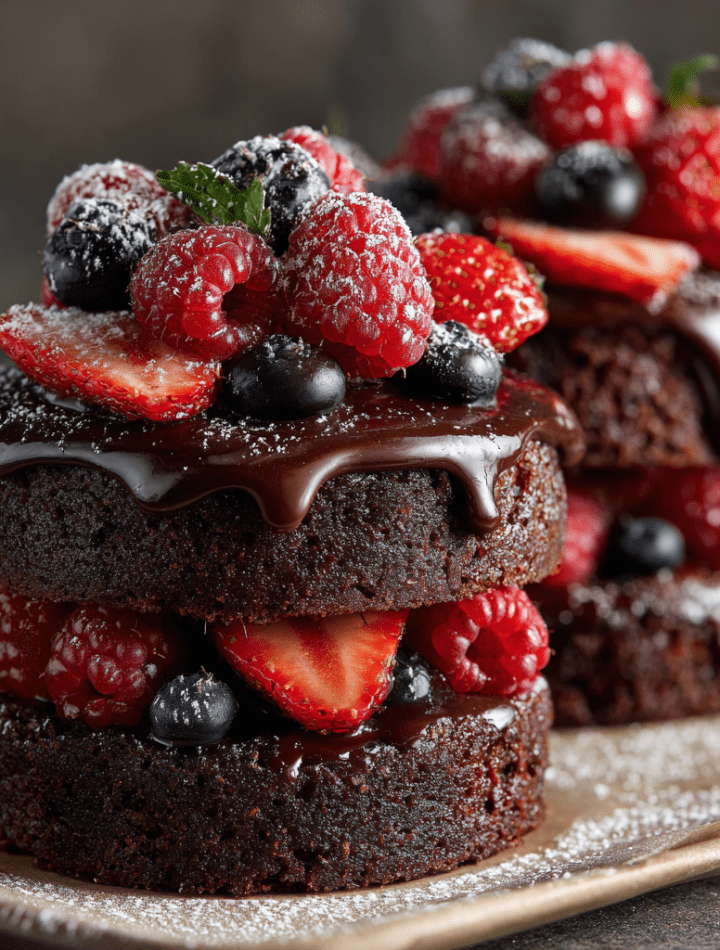
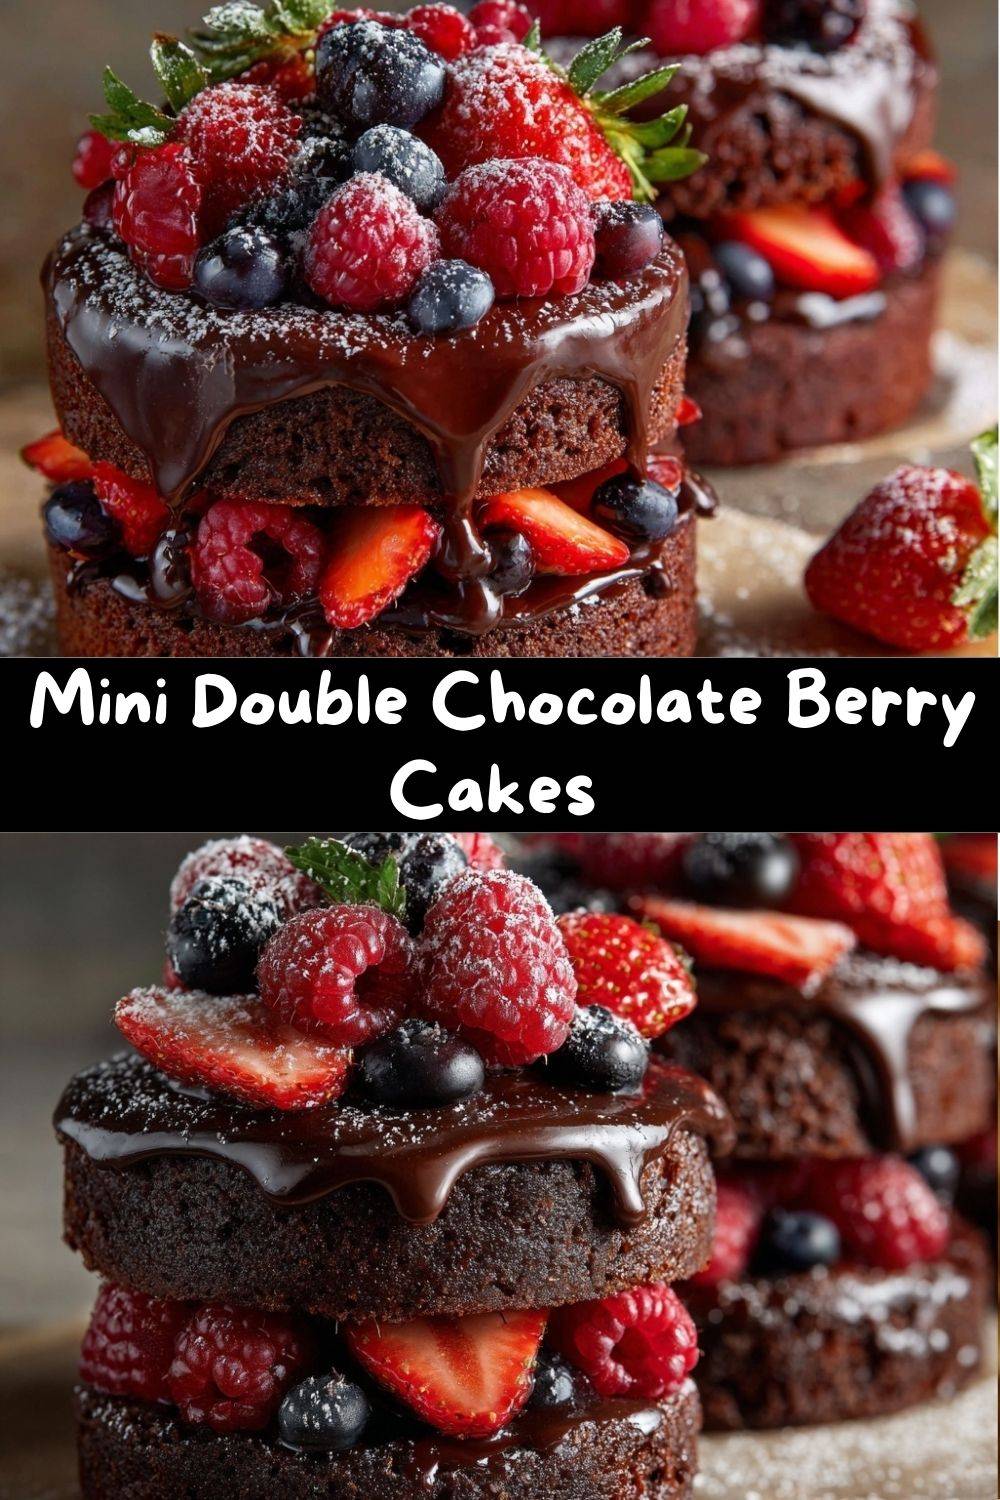
These little guys are the life of every party I’ve ever brought them to. They look like they came from a fancy pastry shop, with their glossy chocolate ganache and jewel-toned berry crowns, but I promise you, they are 100% home-kitchen doable. We’re talking incredibly moist chocolate cake, layers of silky dark chocolate ganache, and a burst of fresh berry goodness in every forkful. They’re perfect for date nights, baby showers, “I survived Monday” celebrations, or just because you deserve a beautiful treat. So, tie on your apron (the messy one is totally welcome here), and let’s make something stunningly delicious together.
The Day My Chocolate Cake Met Its Match
This recipe was born from a happy accident, like many of the best things in life. A few summers ago, I was testing a new chocolate cake recipe for a friend’s wedding. My kitchen looked like a cocoa powder bomb went off—bowls everywhere, spoons dripping with batter. I had just pulled a gorgeous, dark sheet cake out of the oven when my neighbor knocked on the door with a giant, just-picked basket of raspberries and strawberries from her garden.
In my classic Emily-style, I immediately had to taste-test everything. I tore off a warm piece of cake, dipped it in the ganache I had cooling, and popped a sun-warmed raspberry on top. The combination was… magic. The deep, bitter-sweet chocolate and the bright, tart berry juice created a flavor symphony. I abandoned the big cake plan right then and there, grabbed a glass from the cupboard, and started stamping out little cake rounds. Stacked with ganache and piled high with those gorgeous berries, my impromptu creation was even better than the original plan. It reminded me that the best cooking often comes from playful, joyful moments—and sharing the bounty with good people.
Gathering Your Flavor Allies
Here’s what you’ll need to create these mini masterpieces. Don’t just think of these as ingredients; think of them as your flavor-building teammates!
- For the Chocolate Cake:
-
- 1 cup all-purpose flour: The trusty foundation. For a gluten-free swap, a 1:1 GF blend works beautifully here.
- 1/2 cup unsweetened cocoa powder: Use a good quality one! This is your primary chocolate flavor, so make it count. Dutch-processed will give a deeper, smoother taste.
- 1 tsp baking powder & 1/2 tsp baking soda: Our dynamic leavening duo. They work together to give our mini cakes a perfect, tender rise.
- 1/4 tsp salt: The ultimate flavor enhancer. It makes the chocolate taste more, well, chocolatey.
- 2/3 cup buttermilk: The secret to unbelievable moisture and a slight tang. No buttermilk? Make your own: stir 2 tsp lemon juice or vinegar into 2/3 cup regular milk and let it sit for 5 minutes.
- 1/2 cup vegetable oil: Keeps the crumb supremely moist compared to butter. A neutral oil like canola or grapeseed is perfect.
- 2 large eggs: Bring them to room temperature! They’ll incorporate into the batter much more smoothly, giving you a better texture.
3/4 cup granulated sugar: Sweetens the deal. You can reduce this slightly if you prefer a less sweet cake, but I find this balance is just right.
-
- 1 tsp vanilla extract: The aromatic backbone. Pure vanilla is always my go-to.
- 1/2 cup hot water or coffee: This is my CHEF’S SECRET WEAPON. The hot liquid “blooms” the cocoa powder, intensifying its flavor like crazy. Coffee is my favorite—it doesn’t make the cake taste like coffee, it just makes it taste like more chocolate.
- For the Chocolate Ganache:
- 1/2 cup heavy cream (or heavy whipping cream): The luxurious base of our ganache. For a dairy-free version, full-fat coconut cream is a fantastic substitute.
- 1/2 cup dark or semi-sweet chocolate chips: I prefer dark chocolate (60-70%) for a sophisticated, less sugary finish. Use chips or finely chopped bar chocolate for quick melting.
- For the Topping:
- Fresh berries: The colorful, juicy crown! Use what’s in season: strawberries, raspberries, blueberries, blackberries, or a glorious mix. The contrast is everything.
- Optional: powdered sugar for dusting: A light snowy dusting adds a beautiful final touch, especially if you’re serving them on a darker plate.
Let’s Build Some Cake Magic: Step-by-Step
Ready? Let’s do this. I’m walking you through every step with my favorite kitchen hacks tucked in.
- Preheat & Prep: Crank your oven to 350°F (175°C). Grab a standard quarter-sheet pan (approx 9×13) or a similar sized baking pan. Line it with parchment paper and give it a very light spritz of non-stick spray. This guarantees our cake will release beautifully for cutting. Chef’s Tip: Let the parchment paper overhang the sides a bit—it makes lifting the whole cake out a breeze!
- Mix the Dry Team: In a medium bowl, whisk together the flour, cocoa powder, baking powder, baking soda, and salt. Take 30 seconds to really whisk it—this aerates the dry ingredients and ensures the leaveners are evenly distributed, which is key for an even bake. No one wants a baking soda pocket!
- Mix the Wet Team: In a larger bowl, whisk the eggs and sugar together until they’re just combined and look a little pale. Then, whisk in the buttermilk, oil, and vanilla. It might look a bit separated, but that’s A-OK.
- Combine with Care: Add your dry ingredients to the wet ingredients. Gently fold and stir with a spatula until just combined—a few streaks of flour are fine. Here’s the fun part: While the batter is still thick, slowly pour in the hot water or coffee. The batter will become very thin and liquidy. Don’t panic! This is exactly what we want. It creates that incredibly moist, tender crumb.
- Bake to Perfection: Pour the thin batter into your prepared pan. It will spread out evenly. Slide it into the oven and bake for 15-18 minutes. You’ll know it’s done when the top springs back lightly to the touch and a toothpick inserted in the center comes out with just a few moist crumbs. Chef’s Hack: Set a timer for 15 minutes and check. Overbaking is the enemy of moist cake!
- Cool Completely: Let the cake cool in the pan on a wire rack. Patience is a virtue here! If you try to cut warm cake, it will crumble. Go tidy up, make the ganache, and let it cool fully.
- Make the Luscious Ganache: Place your chocolate chips in a heatproof bowl. Heat the cream in a small saucepan over medium heat until it’s steaming and small bubbles form around the edges (don’t let it boil vigorously). Pour the hot cream over the chocolate, cover the bowl with a plate, and let it sit untouched for 1 full minute. This softens the chocolate perfectly. After a minute, whisk slowly from the center outward until you have a smooth, glossy, luxurious ganache. Let it cool and thicken slightly at room temperature while you cut the cakes.
- Cut & Assemble: Once the cake is cool, use a 2 to 3-inch round cookie cutter (or the rim of a glass) to stamp out as many rounds as you can. You should get 6-8. Now, the assembly! Place one cake round on a plate. Spoon or spread a layer of ganache on top. Add a second cake round, more ganache, and then a third if you’re feeling fancy! Finally, spoon a final dollop of ganache on the very top and artfully pile high with fresh berries.
How to Serve These Show-Stoppers
Presentation is half the fun with these mini cakes! For a dinner party, I love plating each one on a simple white dessert plate with a dusting of powdered sugar and a single mint leaf for a pop of green. If I’m serving them family-style, I arrange them all on a beautiful cake stand or wooden board—it creates such a gorgeous, bountiful centerpiece.
Pair them with a cup of strong coffee, a glass of cold milk, or even a sweet dessert wine. The key is to let the berries shine, so don’t hide them! Let them tumble over the sides naturally. Remember, food you eat with your eyes first should make you smile.
Make It Your Own: Delicious Twists & Swaps
This recipe is a fantastic canvas for your creativity! Here are a few of my favorite ways to mix it up:
- Berry Glaze Glory: For an extra glossy finish, brush the berries with a simple warmed raspberry or strawberry jam right before serving. It makes them glisten!
- Citrus Zing: Add the zest of one orange to the cake batter for a subtle chocolate-orange flavor. It’s incredible with the berries.
- Nutty Crunch: Fold 1/3 cup of finely chopped toasted hazelnuts or pecans into the cake batter for a wonderful textural surprise.
- Minty Fresh: Add 1/4 teaspoon of peppermint extract (not mint extract!) to the ganache for a refreshing chocolate-mint berry combo. Top with a small mint sprig.
- Dairy-Free/Vegan: Use the coconut cream swap for the ganache, a plant-based milk + acid for the buttermilk, and a flax egg (1 tbsp ground flax + 2.5 tbsp water per egg) for the eggs. The cake will be slightly denser but still delicious!
Chef Emily’s Kitchen Notebook
This recipe has evolved from that first messy, berry-stained kitchen counter moment. I’ve learned that using coffee instead of water is non-negotiable for me now—it’s the depth-of-flavor game changer. I also used to make these as two-layer cakes, but I found three skinny layers with ganache in between feels more elegant and lets you get that perfect cake-to-frosting-to-berry ratio in every bite.
A funny story: I once brought these to a potluck and a friend spent five minutes trying to figure out which bakery I’d bought them from before I convinced her I made them. That’s the best compliment! The lesson? Don’t underestimate how impressive simple, quality ingredients can look when assembled with love.
Your Questions, Answered!
Q: Can I make any part of this ahead of time?
A: Absolutely! The cake sheet can be baked, cooled, wrapped tightly, and stored at room temperature for a day. The ganache can be made and refrigerated for up to 3 days; just gently re-warm it in the microwave in short bursts, stirring until spreadable. Assemble the mini cakes the day you plan to serve them for the freshest look.
Q: My ganache is too runny/thick! Help!
A: No worries! If it’s too runny, let it sit at room temp longer, or pop it in the fridge for 5-10 minutes, stirring every few minutes. If it’s too thick and has set, gently warm it over a double boiler or in the microwave for 10-second intervals until it loosens up.
Q: What’s the best way to store leftovers?
A: Store them in a single layer in an airtight container in the fridge for up to 2 days. The berries are best fresh, so they might get a little softer, but they’ll still taste amazing.
Q: I don’t have a cookie cutter. What can I use?
A: Get creative! The rim of a drinking glass, a wide-mouth mason jar lid, or even a clean can (with both ends removed) will work. You can also simply cut the cake sheet into small squares or rectangles—they’ll taste just as delicious!
A Note on Nutrition
While we’re definitely in the realm of celebration dessert here, I believe in mindful indulgence. These mini cakes pack a lot of flavor into a small package, which helps with portion satisfaction. The berries add vitamins, antioxidants, and fiber. Using a good dark chocolate in the ganache provides antioxidants and is typically lower in sugar than milk chocolate. This nutrition info is an estimate per cake (assuming 8 servings) using standard ingredients. For precise dietary tracking, I always recommend using a calculator with your specific brand inputs.
- Calories: ~310
- Total Fat: 19g
- Carbohydrates: 30g
- Sugars: 20g (includes natural sugars from berries and chocolate)
- Protein: 4g
Final Thoughts from My Kitchen to Yours
And there you have it! My beloved Mini Double Chocolate Berry Cakes. More than just a recipe, this is an invitation to play, to create something beautiful with your own hands, and to share that joy (or keep it all for yourself—no judgment here!).
The magic of these little cakes isn’t just in the rich chocolate or the juicy berries; it’s in the process. It’s in the smell of cake filling your kitchen, the satisfaction of swirling that glossy ganache, and the smile on someone’s face when you hand them their very own perfect, personal dessert. So go on, give them a try. I can’t wait to hear how they turn out in your kitchen. Tag me if you make them—seeing your creations is my favorite thing!
Happy baking, and remember: always make it with love.
— Emily 🍫🍓