Cool, Creamy, and Dreamy: Your New Favorite Frozen Treat
Hey there, friend! Chef Emily here, waving at you from my perpetually messy-but-happy kitchen. Is it just me, or has the sun decided to turn up the heat a little early this year? Suddenly, I’m dreaming of anything cold, fruity, and capable of transporting me to a beach with my toes in the sand. But let’s be real—while I love a fancy gelato, I don’t always love the sugar crash or the dairy-heavy feeling that follows.
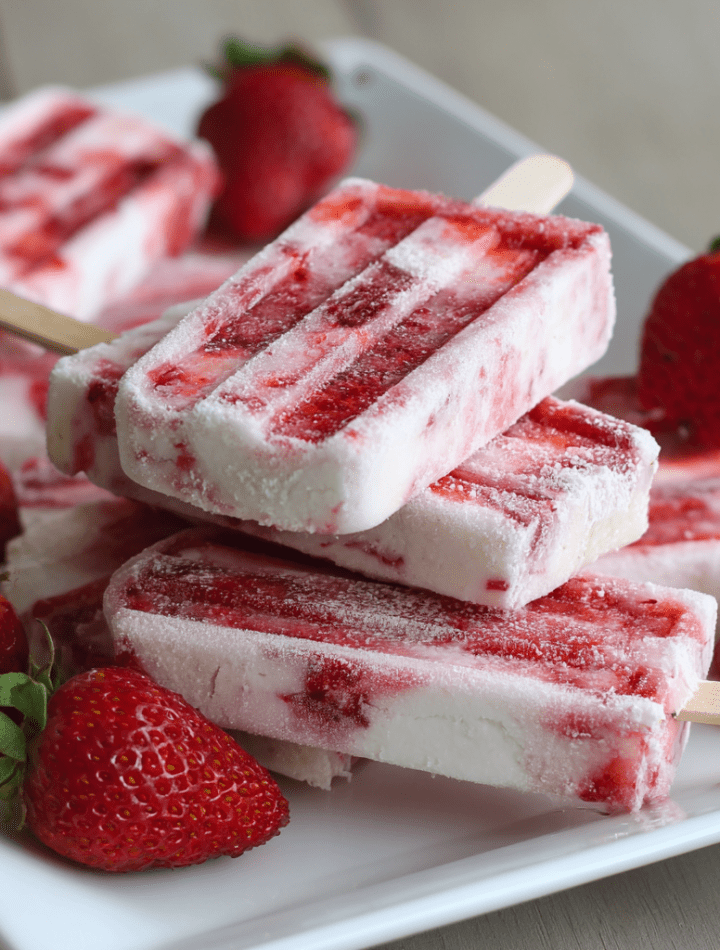
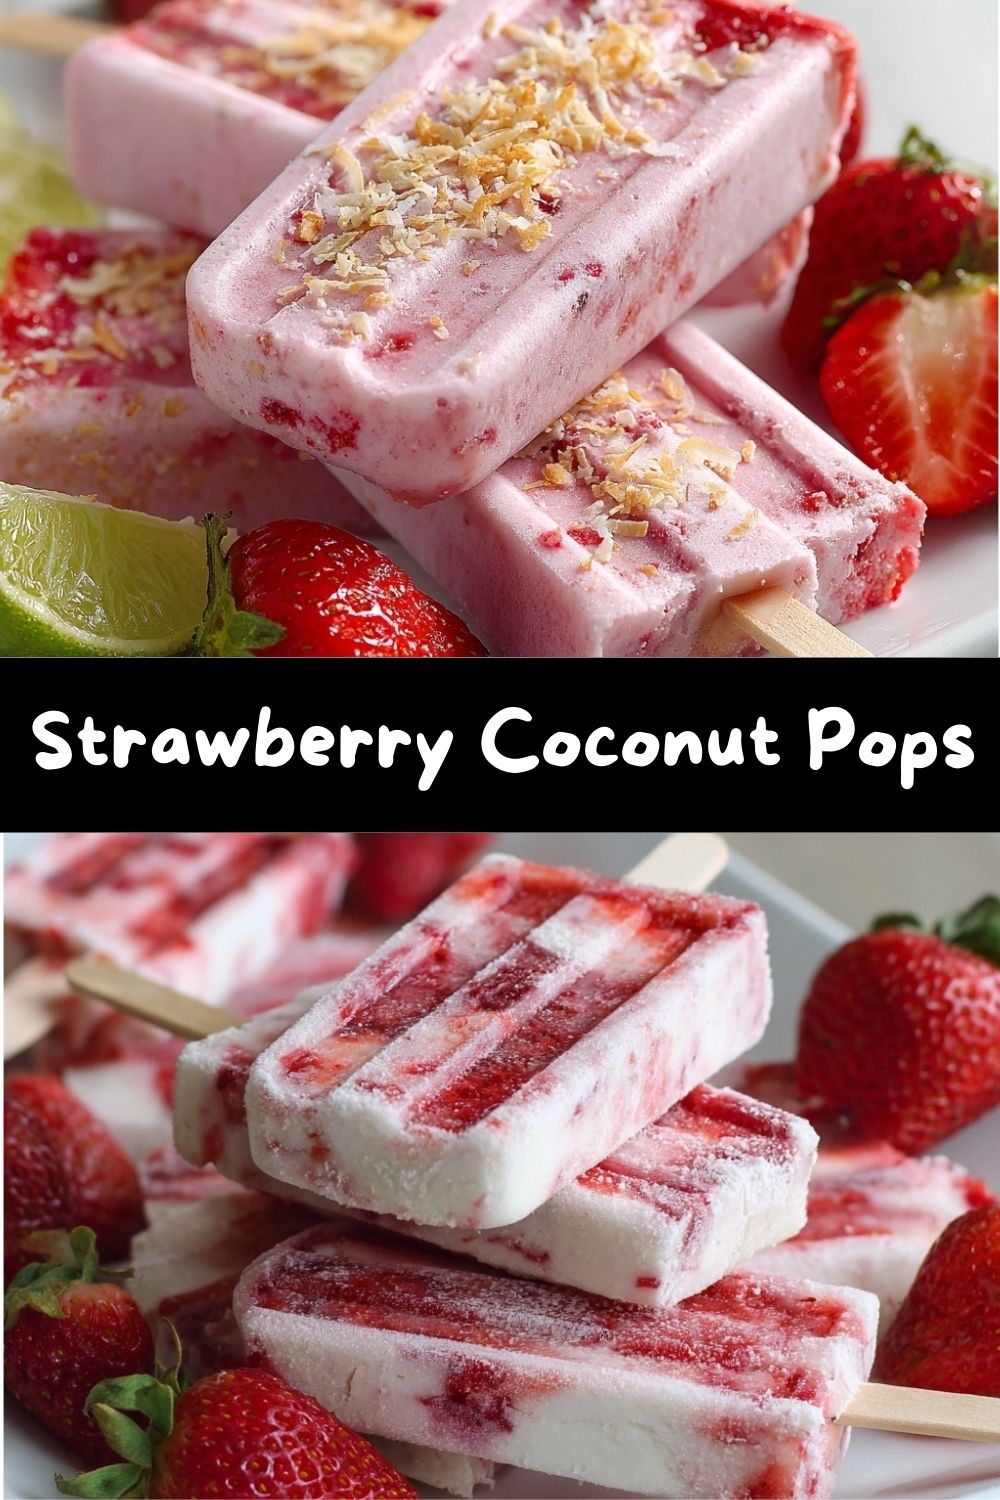
That’s where today’s little slice of frozen heaven comes in. We’re making Strawberry Coconut Pops, and trust me, they are about to become your warm-weather MVP. Imagine the sun-ripened sweetness of strawberries doing a perfect tango with the lush, tropical creaminess of coconut milk. Each bite is a burst of real fruit flavor and a texture so smooth, you’ll swear there’s secret dairy in there. Spoiler: there’s not! These pops are naturally, gloriously dairy-free, vegan-friendly (just choose your sweetener wisely), and made with ingredients you can feel good about.
Whether you’re looking for a healthy-ish dessert to satisfy the after-dinner sweet tooth, a refreshing poolside snack for the kids (and let’s be honest, the adults pretending to watch the kids), or just a bright spot of deliciousness on a busy day, these pops have got you covered. They’re simple, they’re stunning, and they taste like pure, unadulterated joy. So, let’s ditch the store-bought stuff with its unpronounceable ingredients and make something magically delicious together. Grab your blender—it’s popsicle time!
A Wooden Spoon, a Strawberry Patch, and the Birth of a Flavor Love Affair
This recipe takes me right back to my grandma’s backyard. She had this wild, untamed strawberry patch that would explode with tiny, intensely red berries every June. They were nothing like the massive, sometimes-tasteless ones you see year-round. These were flavor bombs. My job, as her official “sous-chef” (a title I earned at age six), was to carefully pick the ripest ones, always sneaking a few warm-from-the-sun berries straight into my mouth.
One particularly sweltering summer day, after we’d collected a big bowl, she looked at me, wiped the sweat from her brow, and declared, “We need to stop cooking and start cooling.” She pulled out a mysterious can of coconut milk from her pantry (a rare, exotic item in our small town!) and her old, chunky blender. We threw in our strawberry haul, a generous glug of her real vanilla extract, and just a spoonful of honey from the neighbor’s bees. The resulting pink cream was a revelation. We didn’t have fancy popsicle molds back then; we used little paper cups and sticks from the craft drawer. But freezing that mixture transformed it into our secret, magical currency for beating the heat. Every lick tasted like summer, love, and a little bit of kitchen rebellion. That’s the spirit I want to bring to your kitchen today.
Gathering Your Sunshine Ingredients
Here’s the beautiful part: you only need a handful of simple things to create pure magic. Quality matters here, but don’t stress—I’ve got tips for every item.
- 1 ½ cups fresh or frozen strawberries: This is our star! If using fresh, make sure they’re ripe and fragrant for the best natural sweetness. Frozen berries are a fantastic, year-round shortcut and actually help create a creamier texture because they’re partially blended while cold. No need to thaw!
- 1 cup full-fat coconut milk (from a can): The key to creaminess! Shake the can well before opening. You want the rich, thick cream and the lighter milk all blended together. Don’t use the kind from a carton in the dairy aisle—it’s too thin. This full-fat version gives our pops that luxurious, melt-in-your-mouth feel.
- 2–3 tablespoons maple syrup or honey: Our sweetener squad. I love maple syrup for its earthy depth (and to keep it vegan), but honey adds a beautiful floral note. The amount totally depends on your berries’ sweetness and your taste buds. Start with 2 tablespoons, blend, then taste and adjust. That’s the chef’s power move!
- 1 teaspoon pure vanilla extract: The flavor enhancer. It rounds out the sharp edges and makes the strawberry and coconut sing in harmony. Always opt for pure extract, not imitation, for the best flavor.
- Optional: 1 tablespoon shredded coconut or lime zest: Your chance to play! Toasted shredded coconut adds a fun, chewy texture and nutty flavor. A bit of lime zest (just the green part, none of the bitter white pith) brightens everything up with a fantastic tropical zing.
Let’s Make Some Magic: Step-by-Step
Ready? This is the fun, fast part. We’ll be in and out of the kitchen in 10 minutes flat, with only the freezer doing the heavy lifting after that.
- The Big Blend:Dump your strawberries, coconut milk, 2 tablespoons of your chosen sweetener, vanilla, and any optional add-ins straight into your blender. No pre-chopping needed if you have a decent blender! Secure that lid tightly. Now, let it rip! Blend on high for 45-60 seconds, or until the mixture is completely smooth, creamy, and a gorgeous shade of pink. Chef’s Hack: If you want an ultra-smooth pop with no seeds, you can strain the mixture through a fine-mesh sieve after blending. I usually skip this for the fiber, but it’s a pro move for a silky finish.
- The Taste Test (The Best Step):Stop the blender, grab a spoon, and TASTE. This is non-negotiable. Is it sweet enough for you? Remember, flavors mute a bit once frozen, so it should taste slightly sweeter than you think it should. Want more coconut flavor? Add a tiny pinch of salt—it sounds weird, but it makes flavors pop! Adjust with another tablespoon of sweetener if needed, blend for another 10 seconds, and taste again. You’re the boss of these pops.
- Mold It Up:Carefully pour your vibrant pink mixture into your popsicle molds. Leave about ¼ inch of space at the top because the mixture will expand as it freezes. Tap the molds gently on the counter to release any air bubbles. Chef’s Hack: If you’re using traditional molds with sticks you insert later, pouring the mixture into a large liquid measuring cup with a spout makes this step infinitely less messy.
- The Freeze Frame:Now, add the lids and insert your sticks. If your mold has a slot for the stick, make sure it’s centered. Pop the whole tray into the coldest part of your freezer. Let them set completely for at least 6 hours, but overnight is ideal for perfect, solid pops. Patience is a virtue, I promise!
- The Grand Unmolding:When the craving hits, don’t yank! Simply run the outside of the mold under warm (not hot) water for 5-10 seconds. Gently wiggle the stick, and your perfect pop should slide right out. If it’s being stubborn, give it another quick warm water bath. Chef’s Hack: For easy storage, once unmolded, you can wrap individual pops in parchment paper and store them in a freezer bag so they don’t stick together.
Serving Up the Sunshine
Okay, you’ve got a frozen masterpiece. Let’s make it an experience! For a simple, stunning treat, just hand them out as-is. The vibrant color is a showstopper on its own.
Want to get fancy? Serve these on a hot day alongside a glass of sparkling water with a lime wedge. The contrast is incredible. For a fun dessert platter, arrange a few pops upright in a tall glass filled with more fresh strawberries and mint leaves. You can even give them a quick drizzle of melted dark chocolate or a roll in some extra shredded coconut before serving for a “gourmet popsicle” vibe. Kids (and let’s face it, adults) love a DIY topping bar!
My favorite way? Enjoying one on my back porch, pretending I’m on a tropical vacation, with absolutely zero guilt about what’s in it. Pure, simple, delicious joy.
Make It Your Own: Delicious Twists & Swaps
The basic formula is your canvas. Let’s play with some variations!
- Tropical Twist: Swap half the strawberries for ripe mango or pineapple chunks. Add that lime zest for a true piña colada vibe.
- Double Berry Bliss: Use a mix of strawberries and raspberries or blueberries. The color will be deep jewel-toned, and the flavor complex and tangy.
- Chocolate-Covered Strawberry: After unmolding, dip the tops of the frozen pops in melted dark chocolate. Let it set on a parchment-lined tray for a minute before devouring. *Chef’s kiss*
- Green Machine Boost: Add a large handful of fresh spinach to the blender. I promise you won’t taste it, but you’ll get a gorgeous pinkish-red pop with a hidden veggie boost! (Great for sneaky parents.)
- Lower-Sugar Option: For a truly sugar-free version, use ripe bananas to sweeten. Replace ½ cup of strawberries with ½ a very ripe, frozen banana and reduce or omit the added syrup.
Chef Emily’s Kitchen Notes
This recipe has evolved from those paper cup days in my grandma’s kitchen, but the soul is the same. I’ve learned a few things along the way. First, using frozen strawberries not only saves time but also means you can make these any day of the year, even when berries aren’t in season. Second, I went through a phase of adding chia seeds for texture… let’s just say frozen chia seeds have an interesting, perhaps not for everyone, mouthfeel. We’ll call that a learning experience!
The biggest lesson? Don’t skimp on the freeze time. I can’t tell you how many times I’ve tried to sneak one out early, only to be met with a delicious but soupy mess. The wait is worth it for that perfect, creamy bite. This recipe is forgiving, fun, and meant to be shared. Make a double batch—they disappear faster than you think!
Your Questions, Answered!
Q: My pops are too icy, not creamy. What happened?
A: This usually means the coconut milk wasn’t full-fat, or the mixture wasn’t blended smooth enough. The fat in the coconut milk is crucial for creaminess. Also, ensure you’re blending until completely homogenous—no strawberry chunks remaining.
Q: Help! My pops won’t come out of the mold!
A: Don’t force it! Warm water is your best friend. Run the mold under it a bit longer, focusing on the area around the specific pop you’re trying to release. If you’re still struggling, let them sit on the counter for 2-3 minutes before trying again.
Q: Can I make these without a popsicle mold?
A: Absolutely! Use small paper cups, cover with foil, and insert a stick through the foil once it’s slightly frozen. You can also use an ice cube tray for fun, bite-sized treats or even freeze the mixture in a shallow pan and scrape it with a fork for a gorgeous coconut-strawberry granita.
Q: How long do they keep in the freezer?
A: They’re best within the first 2-3 weeks for optimal texture and flavor. After that, they might start to develop freezer frost or lose a bit of their vibrant taste. But let’s be real—they never last that long in my house!
A Note on Nutrition
While I’m all about indulgence, I also love knowing what’s in my food. These pops are a treat you can feel genuinely good about. They’re packed with vitamin C from the strawberries and provide healthy fats from the coconut milk, which can help keep you satisfied. They’re naturally dairy-free and gluten-free, and by using maple syrup, they’re vegan-friendly. The fiber from the whole fruit is a bonus! Remember, the nutritional info is an estimate and can vary based on your specific ingredients and serving size. The beauty is in the simplicity and the real food.
Per Pop (Approximate, makes 6): Calories: 90 | Carbs: 10g | Protein: 1g | Fat: 5g | Sugar: 7g (mostly natural) | Fiber: 2g
Final Sweet Thoughts
And there you have it, my friend—your ticket to a cooler, brighter, and tastier season. These Strawberry Coconut Pops are more than just a recipe; they’re a reminder that the best treats are often the simplest ones, made with real ingredients and a whole lot of love.
I hope you whip up a batch, share them with someone you adore, and create your own sunny kitchen memories. Food has this incredible power to connect, comfort, and celebrate, even in the smallest, frostiest of forms.
If you make them (and I really hope you do!), tag me over on Instagram @TastyChow. I love seeing your creations! Now, go grab a pop, put your feet up, and savor every lick. You’ve earned it.
Until next time, keep cooking (and freezing!) with joy,
— Emily 🍓🥥