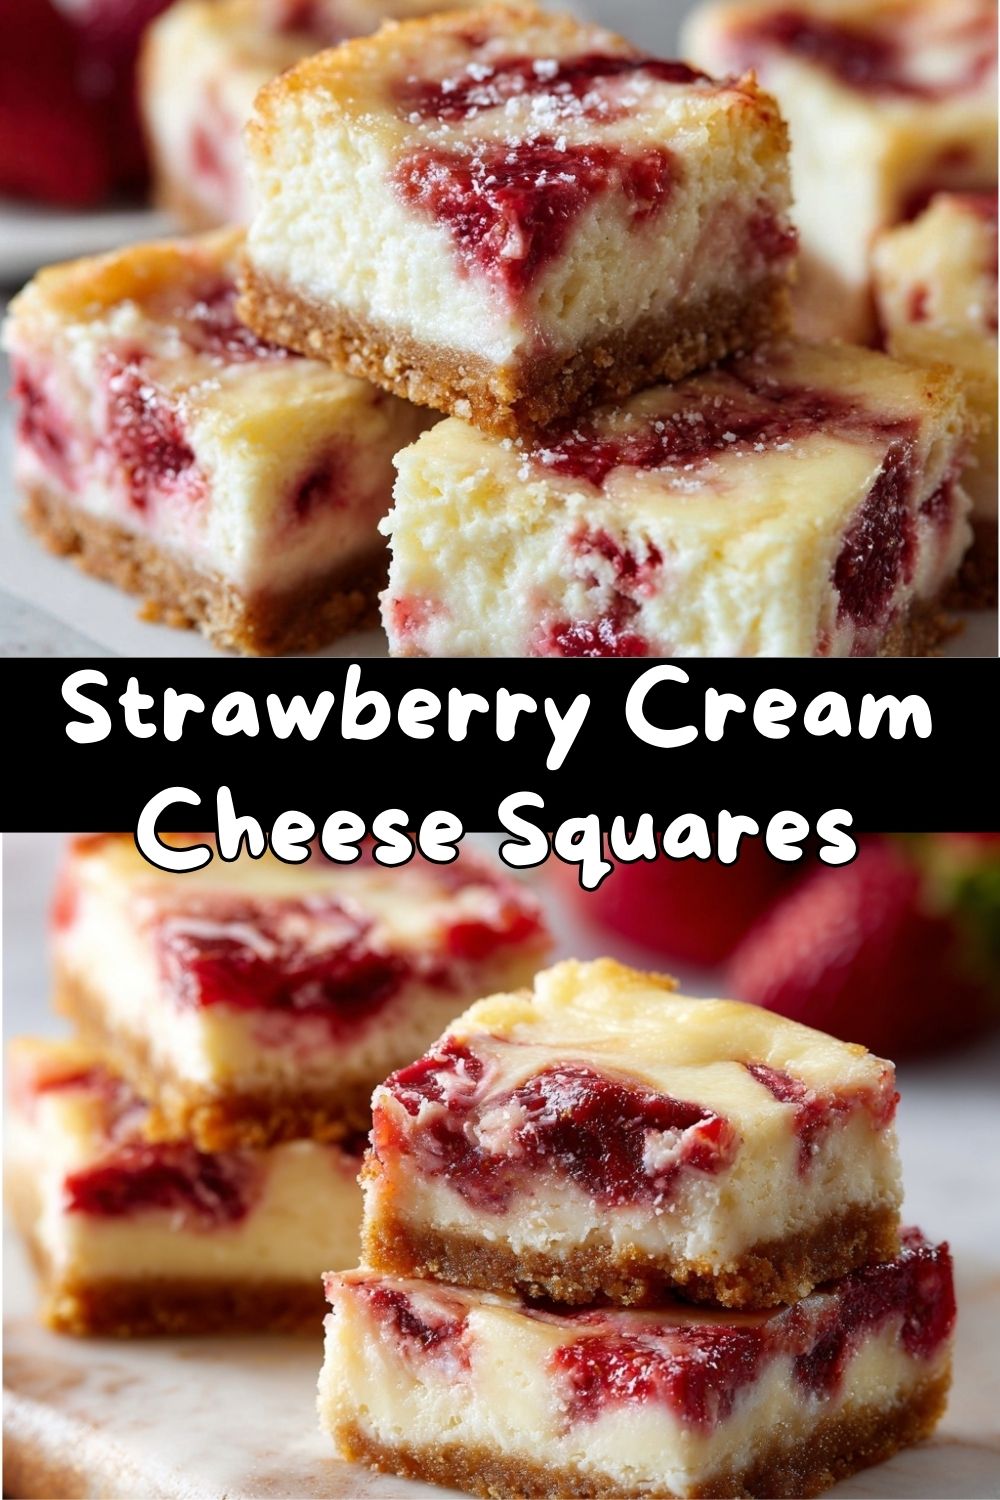
Strawberry Cream Cheese Squares: Your New Favorite Slice of Happiness
Hey there, friend! Pull up a chair and let me pour you a virtual cup of coffee. Have you ever had one of those days where you just need a little square of joy? Something sweet, creamy, and bursting with berry flavor that feels like a hug from the inside? That’s exactly the vibe we’re baking into existence today with these Strawberry Cream Cheese Squares.
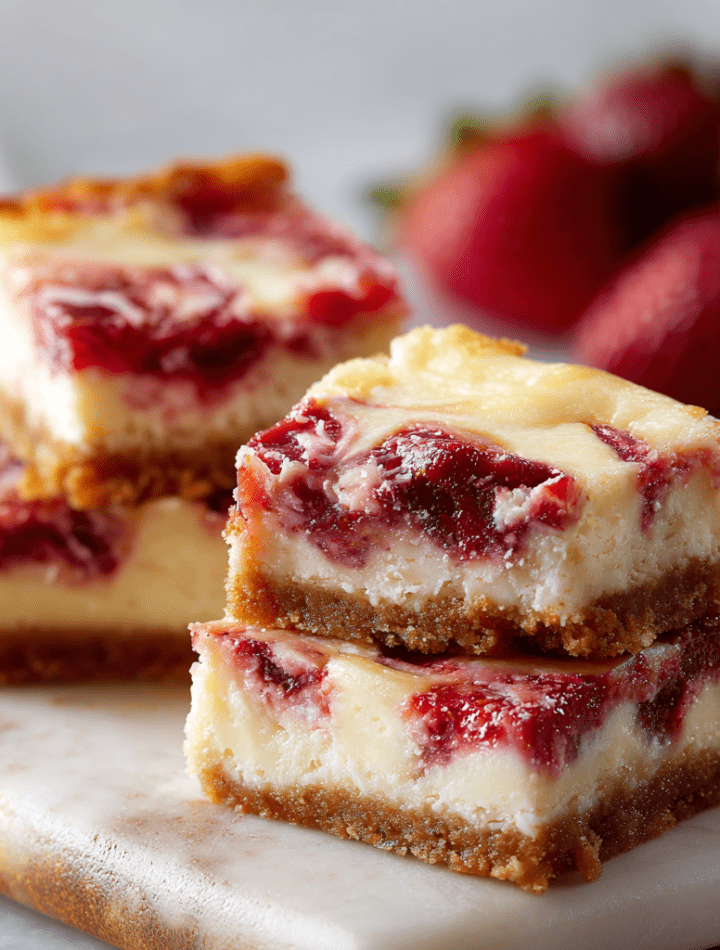
Imagine this: a buttery, crisp graham cracker crust that gives way to a cloud of rich, tangy cream cheese filling, all swirled with ribbons of sweet, ruby-red strawberry jam. It’s like the love child of a cheesecake and a jammy thumbprint cookie, and it’s utterly irresistible. The best part? You don’t need any fancy equipment or a degree in pastry arts. This is a gloriously simple, no-fuss dessert that delivers maximum flavor and smiles per bite.
Whether you’re gearing up for a summer picnic, need a stunning dessert for book club, or are just rewarding yourself for making it through a Wednesday, these squares are your answer. They’re portable, pretty, and guaranteed to make people ask, “Can I have the recipe?” So, tie on that apron—the cute one with the strawberries on it, if you have it—and let’s make some magic happen. Your kitchen is about to smell amazing.
A Spoonful of Nostalgia & Grandma’s Apron Strings
This recipe takes me right back to my Grandma Lila’s linoleum-floored kitchen. She wasn’t a “fancy” baker, but she was a generous one. Her counter was always home to a pie, a plate of cookies, or a pan of something wonderful she called “Jewelled Squares.” Her version used whatever jam she had put up that season—raspberry, peach, or sometimes a wild blackberry from the fence line.
I’d stand on a worn wooden stool, “helping” by pressing the crumb crust into the pan with my small, serious hands. She’d let me dollop the jam and make the swirls, telling me I was creating “kitchen art.” The agonizing wait for them to chill felt like an eternity! But that first bite, cold and sweet with a slight tang, was pure childhood bliss. My version here is a direct descendant of those squares—a little more refined, maybe, with a proper cream cheese layer, but still carrying that same heart. It’s a tribute to the idea that the best recipes aren’t just about flavor; they’re about the memories we stir into the batter.
Gathering Your Berry Bliss Ingredients
Here’s the beautiful cast of characters for our dessert symphony. Simple, accessible, and each playing a crucial role. Let’s break it down:
- For the Crust:
- 1½ cups graham cracker crumbs: The foundation! They give that iconic, slightly honeyed, crunchy base. Chef’s Insight: You can buy crumbs, but blitzing whole crackers in a food processor or sealed bag (crushed with a rolling pin!) is super easy and oddly therapeutic.
- ¼ cup granulated sugar: This sweetens the crust and helps it caramelize and hold together. For a deeper flavor, you can swap in brown sugar.
- 6 tablespoons unsalted butter, melted: The glue! Melted butter binds the crumbs into that perfect, pressable texture. Using unsalted lets you control the salt level.
- For the Filling:
- 8 oz cream cheese, softened: The star! Use full-fat for the creamiest, dreamiest texture. Pro Tip: SOFTENING IS NON-NEGOTIABLE. Take it out of the fridge 1-2 hours ahead. A room-temperature block blends smoothly without lumps.
- ½ cup granulated sugar: Sweetens the creamy filling perfectly.
- 1 large egg: The binder that gives the filling structure and a slight custardy lift as it bakes.
- 1 teaspoon vanilla extract: The flavor enhancer. It rounds out the cheese and berry flavors beautifully. A dash of almond extract is a lovely secret twist here too.
- For the Strawberry Swirl:
- ½ cup strawberry jam or preserves: The jewel on top! Chef’s Choice: I adore using a good-quality seedless strawberry jam for a smooth swirl, but preserves with little fruit bits add fantastic texture. Feel free to use homemade if you’re a superstar!
Let’s Build These Beautiful Layers: A Step-by-Step Dance
Ready? Let’s do this. I’ll walk you through each step with all my favorite little hacks to ensure perfection.
- Prep Like a Pro: First, crank that oven to 350°F (175°C). Now, line your 8×8-inch pan with parchment paper, leaving some overhang on two opposite sides. This is your golden ticket to easy removal and clean slices later! No wrestling with the pan. Lightly grease the exposed sides of the pan for extra security.
- Create the Crust: In a medium bowl, stir together the graham cracker crumbs and sugar. Pour the melted butter over top and mix until every crumb is evenly moistened and it resembles wet sand. Dump this into your prepared pan and press it into a firm, even layer. I use the bottom of a flat measuring cup or a glass to really compact it—this prevents a crumbly crust disaster. Pre-bake this for 8 minutes. This step sets the crust so it stays crisp under the creamy filling. Let it cool slightly while you make the filling.
- Whip Up the Dreamy Filling: In a large bowl (or the bowl of a stand mixer fitted with the paddle attachment), beat the softened cream cheese and sugar together on medium speed for 1-2 minutes. You want it completely smooth, pale, and lump-free. Scrape down the sides of the bowl. Add the egg and vanilla, and mix on medium-low just until fully combined and silky. Big Tip: Don’t overbeat after adding the egg! We want to incorporate air, but beating too much can lead to cracking. Pour this luscious filling over your slightly cooled crust and smooth the top with an offset spatula or the back of a spoon.
- Swirl Your Art: Drop small spoonfuls of the strawberry jam randomly all over the cream cheese layer. Now, take a thin knife, a skewer, or even a toothpick. Gently drag it through the jam and filling, creating beautiful swirls and marbled patterns. Don’t overdo it! A few figure-eight motions are all you need. If you swirl too much, the jam will just blend in. We want defined ribbons of red.
- Bake to Perfect Set: Slide the pan into your preheated oven. Bake for 25-30 minutes. The edges should look set, and the center should have a very slight, gentle jiggle—like Jell-O—when you nudge the pan. It will firm up as it cools. Avoid the temptation to overbake! A dry, cracked square is a sad square. The carryover heat will finish the job.
- The Crucial Cooldown: This is the hardest part: patience. Let the squares cool completely in the pan on a wire rack. Then, cover and refrigerate for at least 2 hours, but ideally overnight. This chilling step is magic. It allows the flavors to meld, the filling to set completely, and makes slicing an absolute dream.
How to Serve These Show-Stopping Squares
Alright, the wait is over! Use the parchment paper “handles” to lift the whole slab of deliciousness out of the pan and onto a cutting board. For pristine squares, wipe your sharp knife clean with a damp cloth between each cut. Now, for the fun part:
I love serving these on a simple white platter to let the gorgeous swirls pop. A tiny dusting of powdered sugar just before serving adds a lovely snowy effect. For a fancy touch, place each square on a dollop of lightly sweetened whipped cream and garnish with a fresh strawberry fan or a single mint leaf.
They are perfect as-is with a cup of coffee for an afternoon pick-me-up, or as the grand finale to a casual dinner. Pack them in a container for picnics or potlucks—they travel like champions! Remember, keep them refrigerated until just before serving to maintain that perfect, firm-yet-creamy texture.
Make It Your Own: Delicious Twists & Swaps
One of the best things about this recipe is its versatility! Don’t be afraid to play. Here are some of my favorite riffs:
- Mixed Berry Bliss: Swap the strawberry jam for raspberry, blackberry, or a mix of all three! A layer of fresh blueberries sprinkled over the cream cheese before swirling is also fantastic.
- Lemon Berry Sparkle: Add the zest of one lemon to the cream cheese filling. Use a lemon curd instead of jam for the swirl. Bright, tangy, and incredible.
- Chocolate Chip Cheesecake Squares: Fold ½ cup of mini chocolate chips into the cream cheese filling. Use a chocolate sauce or Nutella for the swirl. You’re welcome.
- Gluten-Free & Nutty Crust: Use certified gluten-free graham crackers. Or, for a nutty twist, replace the graham crumbs with 1 ½ cups of finely ground almonds or pecans mixed with 2 tablespoons of sugar.
- “Lighter” Option: You can use Neufchâtel cheese (the lower-fat block next to cream cheese) and a sugar substitute that measures like sugar for baking. The texture will be slightly less rich but still delightful.
Emily’s Kitchen Notes & Stories
This recipe has been in my “back pocket” for years, and it’s evolved from my grandma’s original. I once made a batch for a friend’s baby shower and, in a moment of “creative genius,” decided to swirl the jam into heart shapes. Let’s just say it looked more like abstract blobs than hearts… but they tasted amazing, and we all had a good laugh. It was a great reminder that food doesn’t have to be perfect to be perfect.
Over time, I learned that the quality of the jam truly matters—it’s the flavor star of the swirl. I’ve also found that a longer chill (overnight) makes the squares even better, as the graham cracker crust softens just slightly and absorbs some of the filling’s moisture, creating an even more cohesive bite. It’s a forgiving recipe. Trust the process, and most importantly, have fun with it!
Your Questions, Answered!
Q: My filling cracked while baking! What did I do wrong?
A: Don’t stress! Cracking usually happens from overbaking or a too-rapid temperature change. Ensure you’re baking just until the center has a slight jiggle, and always cool the pan completely on the rack before refrigerating. A thin crack can be hidden with a powdered sugar dusting—no one will know!
Q: Can I use frozen cream cheese? How do I soften it quickly?
A> I don’t recommend starting with frozen, but if you forgot to soften it, here’s a safe hack: Remove the block from the foil, place it on a microwave-safe plate, and microwave on 50% power in 15-second increments, flipping after each, just until it yields slightly to pressure. Do NOT let it get warm or melt.
Q: Why do I have to chill it for so long? Can’t I eat it warm?
A> The chilling is essential for the structure. Warm, it will be a gooey, delicious mess (which, honestly, isn’t the worst thing with a spoon). But for clean, firm squares that hold their shape, the full chill is key. It’s worth the wait!
Q: Can I double this recipe?
A> Absolutely! Double all ingredients and bake in a 9×13-inch pan. The baking time may increase by 5-10 minutes—again, watch for the set edges and slightly jiggly center.
Nutritional Information (For Your Info!)
Here’s a general nutritional breakdown per square (based on 12 servings, using the exact ingredients listed). Remember, this is an estimate, and values can change based on specific brands and measurements.
Per Serving: Calories: 210 | Total Fat: 13g | Saturated Fat: 7g | Cholesterol: 45mg | Sodium: 140mg | Total Carbohydrates: 20g | Sugars: 13g | Protein: 3g
I’m all about balance and joy in eating. These squares are a treat, a celebration, a little piece of dessert happiness. Enjoy them mindfully and share them generously—that’s what good food is all about!
Final Slice of Wisdom
And there you have it, my friend—the complete guide to creating these little pockets of strawberry cream cheese joy. From the nostalgic crunch of the crust to the cool, creamy filling and that sweet berry ribbon, every bite is designed to make you smile.
I hope you bake a batch, make a memory, and share them with someone you love. That’s the real secret ingredient, after all. Thank you so much for baking with me today. Now, go enjoy the fruits (literally!) of your labor. Your kitchen is officially certified awesome.
Until next time, keep your whisks busy and your hearts full,
— Emily 🍓