Spinach Dip Bites: Your Party’s New Favorite Appetizer is Here!
Hey there, friend! Let’s talk about that magical moment at a party. You know the one. You’ve been chatting, maybe holding a slightly-too-warm drink, when a platter of something hot, cheesy, and irresistible floats by. Your eyes lock onto it. Your hand, almost of its own volition, reaches out. You take one bite, and a wave of creamy, garlicky, spinach-filled joy hits you. You immediately need another. And another. And you start plotting how to subtly hover near the kitchen door to intercept the next batch.
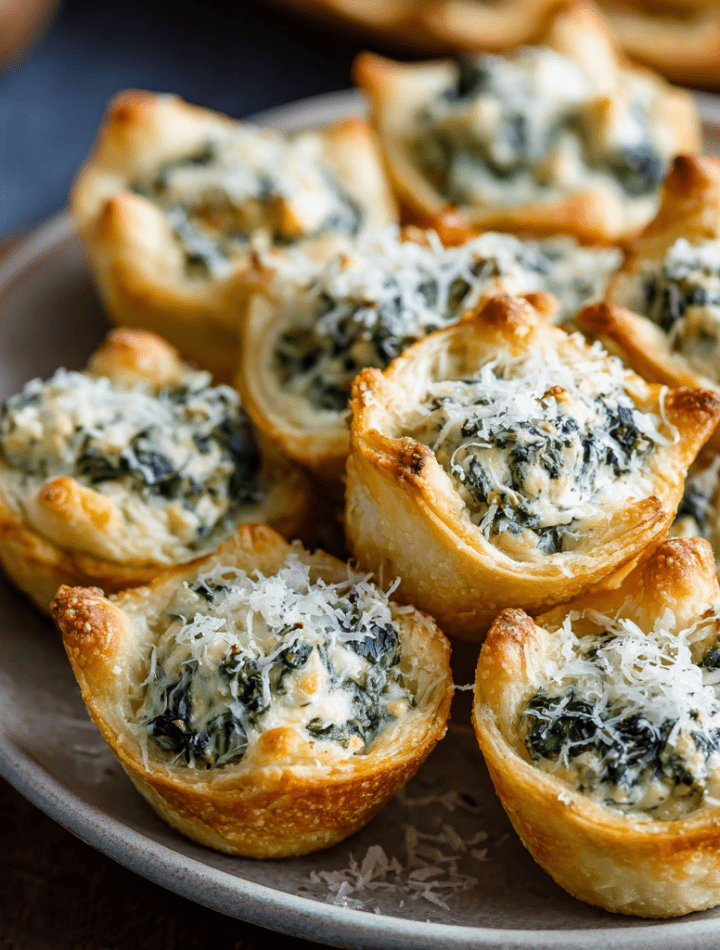
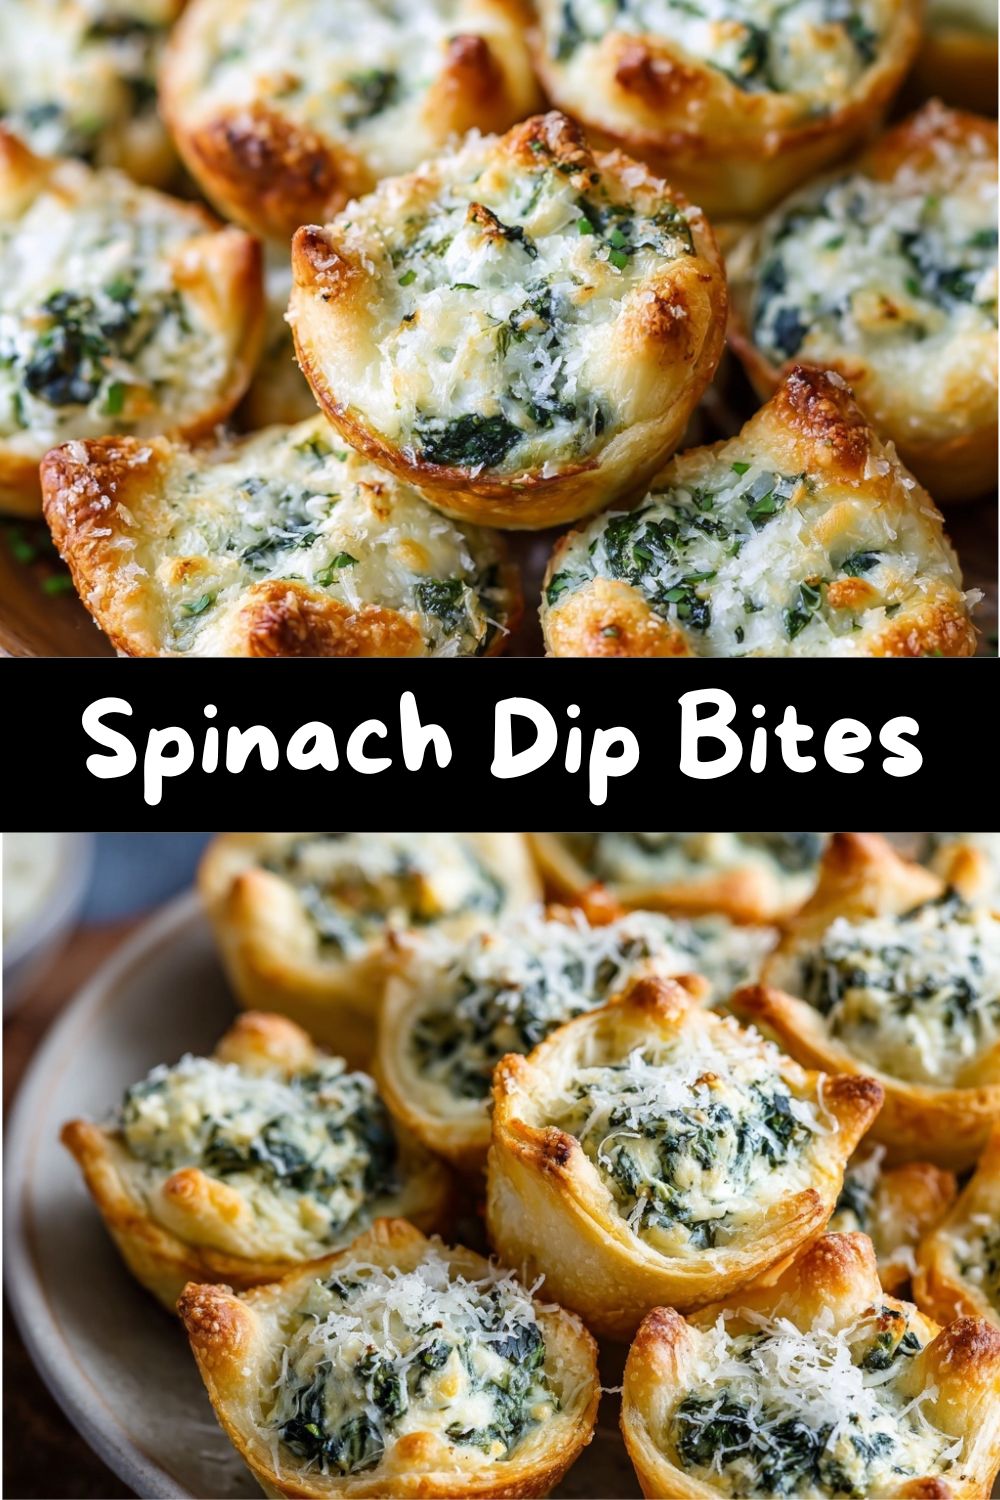
That, my fellow foodie, is the power of a perfect party bite. And today, we’re taking that universally beloved, crowd-pleasing classic—creamy spinach dip—and transforming it into the ultimate finger food: Spinach Dip Bites. Imagine all that flavor you love: the melty cheeses, the savory spinach, the hint of garlic, all tucked into a crispy, golden, buttery crescent dough cup and baked until bubbly. They’re poppable, shareable (in theory—no promises!), and guaranteed to vanish from the tray faster than you can say “Is there more in the oven?”
I created this recipe for all of us who want to bring that “wow” factor without the stress. No serving spoon, no double-dipping dilemmas, just pure, unadulterated cheesy bliss in one perfect, mess-free package. They’re perfect for game day, holiday gatherings, book club, or just because it’s Tuesday and you deserve a treat. So, preheat your oven, grab your favorite mixing bowl, and let’s make something delicious that will have everyone asking you for the recipe!
More Than Just a Dip: A Story of Grandmas and Game Day
This recipe, for me, is a delicious collision of two worlds. The soul of it comes straight from my Grandma Jean’s kitchen. She made a legendary hot spinach dip, baked in a hollowed-out sourdough round. It was a ritual. The smell of onions and garlic sautéing, the frantic mixing of cream cheese and sour cream (sometimes with a wooden spoon, sometimes with her impeccably clean hands), and the triumphant pull from the oven, the cheese a glorious, golden-brown tapestry. We’d tear off chunks of bread and dive in, laughing and talking over each other.
Fast forward to my first “grown-up” hosting gig—a chaotic, wonderful Super Bowl party in my tiny apartment. I wanted to make Grandma’s dip, but the logistics! One bowl, one spoon, limited couch space… it was a recipe for a cheesy carpet disaster. Then it hit me: what if the vessel was the bite? I had a tube of crescent dough in the fridge (a pantry hero, in my opinion), a mini muffin tin, and a flash of inspiration. I pressed the dough into little cups, filled them with a version of Grandma’s mixture, and held my breath. What emerged from the oven were these gorgeous, self-contained bites of nostalgia. They were a total hit! They honored the comforting spirit of that family recipe but translated it perfectly for a room full of hungry friends. Every time I make them now, I think of her—and that wonderfully messy, triumphant first party.
Gathering Your Flavor Arsenal: The Ingredients Breakdown
Simple ingredients, big flavor—that’s my mantra. Here’s what you’ll need to create these little wonders. I’ve added my chef-y notes and swaps so you can make this recipe your own!
- 1 tube (8 oz) crescent roll dough: Our edible, buttery cup! The seamless sheet dough works best, but the classic perforated triangles are easy to press together. Chef’s Tip: If using triangles, just pinch the seams together firmly before cutting.
- 1 cup frozen chopped spinach, thawed and thoroughly drained: This is key! We want spinach flavor, not water. Squeeze it in a clean kitchen towel or paper towels until it’s as dry as you can get it. Swap: An equal amount of finely chopped fresh, steamed, and drained spinach works beautifully.
- ½ cup cream cheese, softened: The lush, creamy base. Full-fat gives the best texture and richness. Let it sit on the counter for 30 minutes before you start. Swap: Neufchâtel cheese is a great 1:1 lower-fat substitute.
- ¼ cup sour cream: Adds a delightful tang and keeps the filling luscious. Swap: Plain Greek yogurt adds a protein boost and similar tang.
- ½ cup shredded mozzarella cheese: For that glorious, stretchy, melty goodness. I like to shred my own from a block—it melts smoother than pre-shredded (which has anti-caking agents).
- ¼ cup grated Parmesan cheese: The flavor powerhouse! The salty, nutty punch takes this from good to “can’t-stop-eating” good. Freshly grated Parmigiano-Reggiano is a game-changer.
- 1 clove garlic, minced: Just enough for a background hum of savory flavor. Feel free to add a second if you’re a garlic fiend! Swap: ¼ tsp garlic powder in a pinch.
- Salt & pepper to taste: Don’t skip seasoning! Taste your filling before baking. The cheeses have salt, but you’ll likely need a few pinches to make the flavors pop.
Optional Boosters: A dash of onion powder, a pinch of crushed red pepper flakes for heat, or a tablespoon of finely chopped artichoke hearts would be delicious additions!
Let’s Get Building: Your Step-by-Step Guide to Bite-Sized Bliss
Ready? Let’s turn these ingredients into magic. Put on some tunes, and let’s get cooking!
- Prep Like a Pro: Preheat your oven to 375°F (190°C). This is your first step—a hot oven is crucial for the dough to puff and turn golden. Generously grease a 24-cup mini muffin tin with non-stick spray or a bit of butter. Trust me, this makes all the difference for easy removal!
- Create Your Cups: Unroll your crescent dough sheet. If it’s perforated, firmly pinch the seams together to create one solid rectangle. Using a pizza cutter or sharp knife, cut the dough into 24 equal squares. They don’t have to be perfect! Gently press each square into a prepared muffin cup, nudging it into the bottom and up the sides. A little dough lip over the top is perfect. Chef’s Hack: If the dough gets too soft, pop the whole tin in the fridge for 5 minutes. Cold dough is easier to handle.
- Mix the Heart & Soul: In a medium bowl, combine your super-dry spinach, softened cream cheese, sour cream, mozzarella, Parmesan, and minced garlic. Season with a good pinch of salt and a few cracks of black pepper. Now, get in there with a fork or spatula and mix until everything is thoroughly combined and creamy. Taste it! This is your moment to adjust. Need more salt? More pepper? A bit more Parmesan? Do it now. You’re the boss of this flavor.
- Fill ‘Er Up: Using a small spoon or a cookie scoop (a #60 scoop is perfect!), portion the filling into each dough cup. Aim for a heaping teaspoonful—you want them generously full but not overflowing. A little mound on top is what we’re after.
- Bake to Golden Perfection: Place the muffin tin in the center of your preheated oven. Bake for 12-15 minutes. You’re looking for the dough edges to be a deep, golden brown and the filling to be hot, set, and bubbly around the edges. Don’t be afraid of a little color on the dough—that’s flavor!
- The Hardest Part – The Cool Down: Carefully remove the tin from the oven. Let the bites cool in the pan for 5 full minutes. This allows the dough to set and the filling to firm up slightly, making them much easier to pop out. Then, use a small offset spatula or a butter knife to gently coax each one out onto a wire rack or serving platter. Serve warm and watch them disappear!
How to Serve These Stars of the Show
Presentation is part of the fun! While they’re amazing straight from the pan on a simple plate, here are a few ideas to elevate your spread:
For a casual gathering, pile them high on a rustic wooden board or a colorful platter. Tuck in a few sprigs of fresh herbs like parsley or dill for a pop of green. Place a small bowl of extra marinara sauce or a creamy ranch dressing in the center for those who love to dip their dip (meta, I know).
Hosting something a bit fancier? Arrange the bites in a elegant spiral on a large white platter. Garnish with a light snowfall of extra grated Parmesan and a few cracks of black pepper. Serve them on individual small spoons or appetizer plates for a passed-tray feel.
The Golden Rule: These are best served warm! You can bake them, let them cool completely, and then reheat in a 350°F oven for 5-8 minutes to recrisp the dough. The texture is worth the extra step.
Mix It Up! 5 Tasty Twists on the Classic
Once you’ve mastered the base recipe, the playground is open! Here are some of my favorite variations:
- The Artichoke-Spinach Combo: Replace half the spinach with an equal amount of finely chopped, well-drained canned artichoke hearts. It’s a classic duo for a reason!
- Bacon Cheddar Bliss: Add ⅓ cup of finely chopped cooked bacon and swap the mozzarella for sharp cheddar cheese. A smoky, savory dream.
- Spicy Southwest Kick: Mix in ¼ cup of diced green chiles (well-drained), use Pepper Jack cheese instead of mozzarella, and add a ½ teaspoon of cumin. Serve with a side of cool avocado crema.
- Everything Bagel Style: Before baking, brush the dough edges lightly with an egg wash and sprinkle generously with Everything Bagel seasoning. The crunchy, salty topping is insane.
- Lightened-Up Version: Use reduced-fat cream cheese and sour cream, part-skim mozzarella, and add an extra ¼ cup of finely chopped spinach for bulk. The flavor is still fantastic!
Chef Emily’s Kitchen Notes
This recipe has evolved from that first experimental batch! I’ve learned that draining the spinach is non-negotiable—I once got lazy and ended up with soggy-bottomed bites (still tasty, but not pretty). I also started adding the Parmesan after realizing it gave the filling a deeper, more complex flavor than just mozzarella alone.
A funny memory: I once made a triple batch for a big party and, in my hurry, forgot to grease the muffin tins. Let’s just say we spent the first 20 minutes of the party performing “surgery” with butter knives to extract the bites. A little spray saves a lot of drama! Now, it’s the very first thing I do. These little bites have become my most-requested appetizer, and I love that they carry a piece of my grandma’s kitchen into every party I host.
FAQs & Troubleshooting: Your Questions, Answered
Q: Can I make these ahead of time?
A: Absolutely! You have two great options. 1) Assemble and refrigerate: Prep the bites up to 24 hours in advance, cover the tin tightly with plastic wrap, and refrigerate. Bake straight from the fridge, adding 1-2 minutes to the bake time. 2) Freeze unbaked: Assemble, then freeze the entire tin until solid. Transfer the frozen bites to a freezer bag. Bake from frozen, adding 3-5 minutes to the bake time.
Q: My filling is a bit runny. What happened?
A: The usual culprit is undrained spinach or vegetables. Make sure you squeeze out every last drop of moisture! Also, ensure your cream cheese is softened but not warm or melted, which can make the mixture looser.
Q: Can I use phyllo dough or puff pastry instead?
A: You can, but the method changes. For puff pastry, cut into squares and press into the tin—it will be flakier. Phyllo is trickier; you’d need to layer and butter small sheets in each cup. The crescent dough is truly the easiest, most forgiving route for perfect results every time.
Q: My bites stuck to the pan! Help!
A: Don’t panic. Let the tin cool a bit more, then gently run a thin knife around each edge. The ones that stick can be carefully prized out—they’ll still taste amazing. Next time, a more generous spray of non-stick coating is your friend.
Nutritional Information (Per Bite, Approximate)
While these are a treat, it’s good to know what you’re enjoying! Based on the recipe making 24 bites: Each bite contains roughly 90 calories, 3g protein, 6g carbohydrates, and 6g fat. Remember, this is an estimate and can vary based on specific brands and any modifications you make.
The spinach provides a boost of Vitamin A and iron, and using part-skim cheeses can lower the fat content. Since they’re so flavorful, a little goes a long way—though I won’t judge if you lose count! Enjoy them as part of a balanced spread with fresh veggies and other lighter options.
Final Thoughts: Let’s Get This Party Started!
And there you have it, my friend—the full story, secrets, and steps behind my beloved Spinach Dip Bites. This recipe is more than just a list of ingredients; it’s a passport to easier, more delicious hosting. It’s about creating those happy, mouthwatering moments around the table (or the coffee table during the big game).
I hope you feel inspired to make them, to share them, and to maybe even create your own kitchen memory around them. Food has this incredible power to connect us, to spark joy, and to turn an ordinary day into a little celebration. That’s what Tasty Chow is all about.
So, go forth and bake! I can’t wait to hear how your batch turns out. Tag me on social or drop a comment below—I love seeing your kitchen creations. Now, if you’ll excuse me, I have a date with a warm batch of these bites and a very hungry group of friends. Happy cooking!
With love and a full platter,
Chef Emily 🧀✨