Ditch the Bowl, Grab a Square!
Hey friends, Emily here! Let’s talk about the morning hustle. You know the drill: the alarm blares, you’re scrambling to get everyone (including yourself) out the door, and a proper breakfast feels like a luxury you just can’t afford. A sad granola bar or a skipped meal becomes the default. Sound familiar? I’ve been there, apron askew, wondering how to make mornings less chaotic and more delicious.
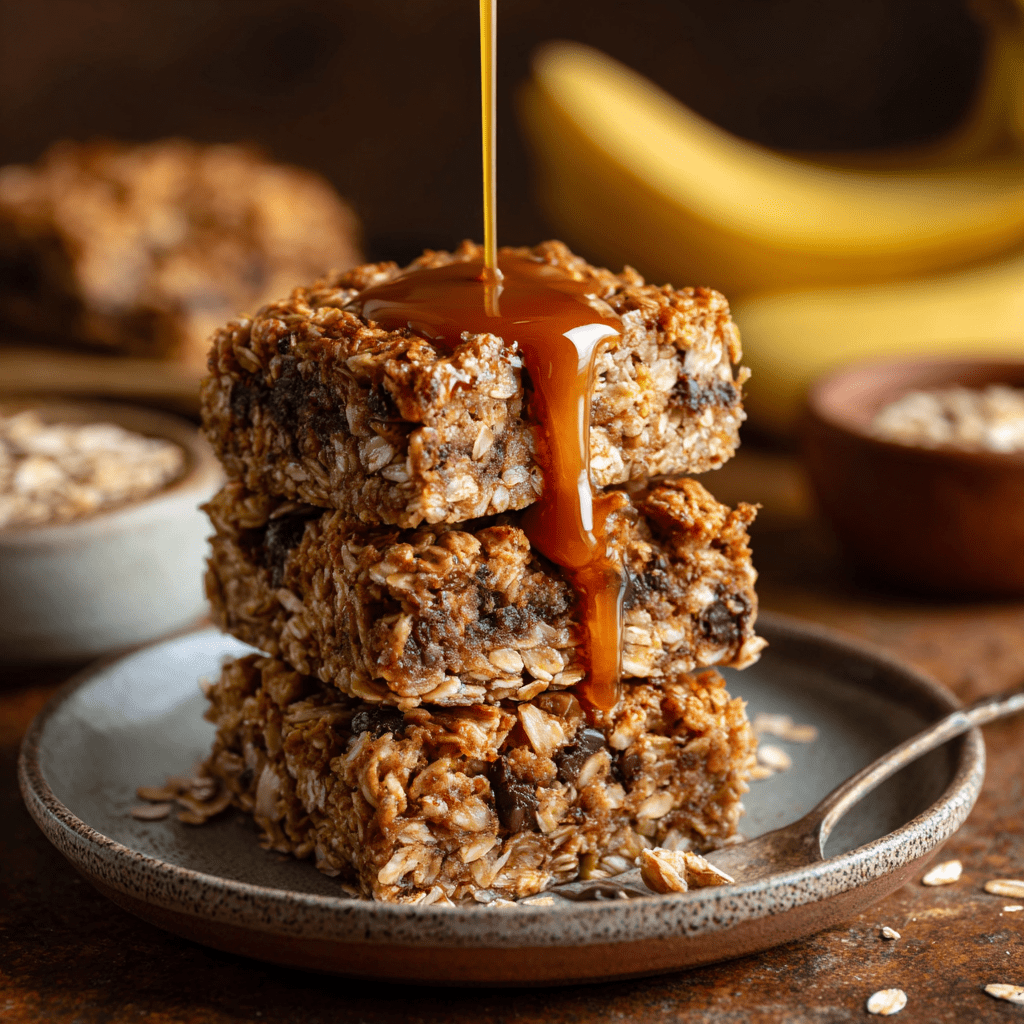
That’s exactly why I became obsessed with creating the ultimate grab-and-go breakfast. I wanted something that felt like a warm, cozy hug in a bowl of oatmeal, but was portable, make-ahead friendly, and so customizable that everyone in the family would love it. After many, many (many!) kitchen experiments—some too gooey, some too dry—I finally landed on this perfect formula. I’m so excited to share these Baked Oatmeal Squares with you!
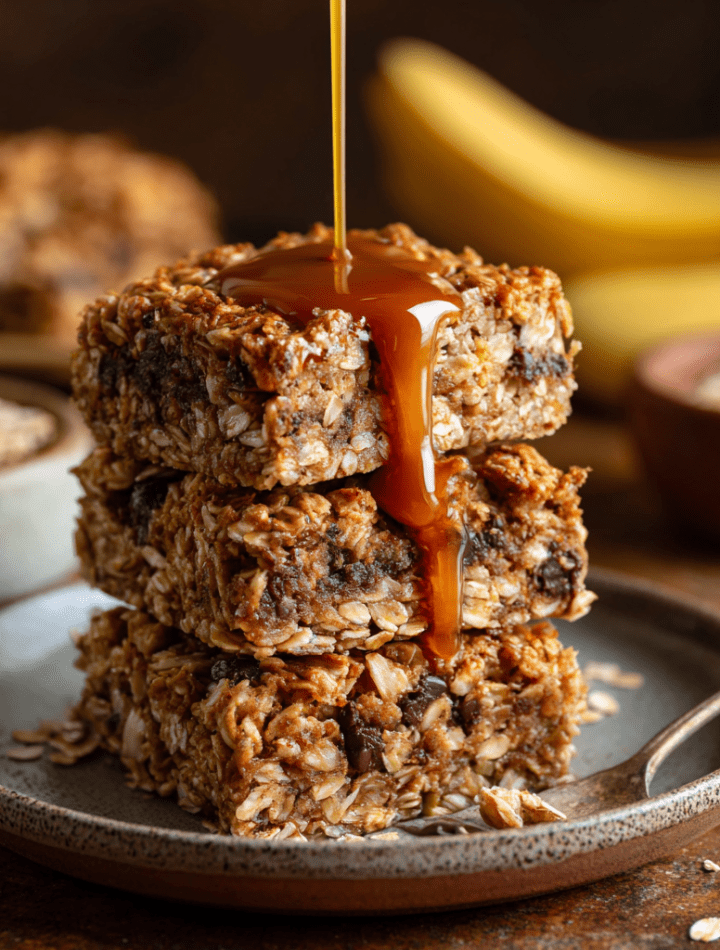
Imagine all the comfort of your favorite cinnamon-spiced oatmeal, but baked into a firm, sliceable square. They’re soft, slightly chewy, naturally sweetened, and packed with wholesome ingredients that actually keep you full. Bake a pan on Sunday, and like magic, you’ve got a stress-free breakfast ready for the entire week. Whether you’re rushing to work, packing lunches, or just want a wholesome snack with your afternoon coffee, these squares are here to save the day. Let’s turn your kitchen into a meal-prep powerhouse and make those hectic mornings a thing of the past!
The “Aha!” Moment: From Messy Bowls to Neat Squares
This recipe has its roots in my grandma’s kitchen, but it took a modern-day kitchen fail to bring it to life. My grandma made the best stovetop oatmeal—creamy, loaded with raisins and brown sugar, always served in her chipped blue bowls. I loved it, but as a busy culinary student living on my own, I missed the ritual. One rushed morning, I tried baking a big batch of oatmeal in the oven, hoping to reheat portions all week. What I pulled out was… not creamy porridge. It had set! It was firm enough to cut with a spatula.
My first thought was, “Well, that’s ruined.” But then I took a bite. It was fantastic! Dense, cake-like, bursting with flavor. I sliced it into rectangles, wrapped them up, and ate them cold straight from the fridge. It was a total game-changer. That “failure” was the birth of my baked oatmeal square obsession. It reminded me that sometimes the best recipes come from happy accidents and that grandma’s wisdom (wholesome, simple food) can always be adapted to fit our crazy, beautiful, busy lives. Now, I think of her every time I pull a golden-brown pan out of the oven.
Gathering Your Flavor Building Blocks
Here’s everything you’ll need to make these incredibly versatile squares. I’ve included my favorite chef-y notes and swaps so you can make it your own with what you have on hand!
- 2 cups old-fashioned oats: The star! Old-fashioned (rolled oats) give the perfect hearty texture. Chef’s Insight: Don’t use quick oats or steel-cut here—the texture will be either too mushy or too tough.
- 1/2 tsp baking powder: Our little lift agent. It gives the squares a slight puff and helps them hold together, making them easy to slice.
- 1 tsp cinnamon: Pure warmth in a jar. This is non-negotiable for me! It makes your kitchen smell amazing and adds that classic oatmeal cookie vibe.
- 1/4 tsp salt: The flavor enhancer. It makes all the other ingredients, especially the sweetness, pop. Trust me on this.
- 2 ripe bananas (or 1/2 cup applesauce): Our natural sweetener and binder! The spottier the bananas, the sweeter and more flavorful your squares will be. Great Swap: No bananas? Unsweetened applesauce works perfectly.
- 2 eggs: The glue that holds it all together. They provide structure and richness.
- 1 1/2 cups milk (dairy or non-dairy): The hydrator. Any milk you love works—almond, oat, soy, or good old cow’s milk. It creates the perfect custardy base.
- 1/4 cup maple syrup or honey: A touch of liquid sweetness. I adore the deep flavor of pure maple syrup, but honey is a gorgeous alternative. You can adjust this amount based on your sweet tooth!
- 1 tsp vanilla extract: The flavor fairy. It rounds everything out beautifully.
- Optional mix-ins (1/2 cup total): This is where you shine! Blueberries, raspberries, diced apple, chopped pecans or walnuts, chocolate chips, or shredded coconut. Pick your passion!
Let’s Bake! Simple Steps to Square Perfection
Follow these easy steps, and you really can’t go wrong. I’m chatting you through each one with my best tips!
- Prep Your Stage: Preheat your oven to 350°F (175°C). This is crucial for even baking. Grab an 8×8 inch baking dish and give it a light coat of butter, cooking spray, or line it with parchment paper. Pro-Tip: Parchment paper with a little overhang makes lifting the whole slab out for super-clean slicing a breeze!
- Mash & Mix the Wet Team: In a large bowl, peel those ripe bananas and mash them well with a fork until mostly smooth. Add the eggs, milk, maple syrup, and vanilla extract. Whisk it all together like you mean it until it’s one harmonious, creamy-looking liquid. Chef’s Hack: No need to dirty another bowl! We’re mixing wet into dry right in this one.
- Bring in the Dry Crew: To the same bowl, add the oats, baking powder, cinnamon, and salt. Grab a sturdy spatula and fold everything together. You want every oat to be coated in that lovely wet mixture. Don’t overmix—just until no dry pockets remain.
- Fold in Your Fun Stuff: Now, gently stir in your chosen mix-ins. If you’re using berries, tossing them in a light dusting of flour first can help prevent them from all sinking to the bottom. Chocolate chips? Just dump ’em in!
- Bake to Golden Bliss: Pour the batter into your prepared pan. Use the spatula to spread it into an even layer, nudging it into the corners. Slide it into the middle of your preheated oven and bake for 30-35 minutes. You’re looking for the top to be set, lightly golden, and for the edges to just start pulling away from the pan. Don’t Overbake! A toothpick inserted should come out mostly clean, but it’s okay if it’s a tiny bit moist—it will set as it cools.
- The Most Important Step: Patience: I know, it’s hard! But let the pan cool on a wire rack for at least 20-30 minutes before you even think about slicing. This allows the squares to firm up fully. Then, slice into 9 even squares.
How to Serve & Savor Your Squares
These squares are fabulous any which way! Here’s how I love to enjoy them:
- Grab-and-Go Classic: Simply wrap a cooled square in parchment or pop it in a container. Eat it at room temperature or cold from the fridge—it’s delicious both ways and so portable.
- Warm & Cozy: For a fresh-from-the-oven experience any day, gently warm a square in the microwave for 15-20 seconds. Serve it on a plate, maybe with an extra drizzle of maple syrup or a dollop of yogurt.
- Brunch-Worthy: Make it fancy! Place a warm square on a plate, add a scoop of Greek yogurt or a splash of cold milk on the side, and scatter a few fresh berries and a sprinkle of nuts on top. Instant brunch hero.
- Kid-Friendly Dippers: My nephew loves these cut into smaller “finger” strips. They’re perfect for little hands to dip into a side of yogurt or apple sauce.
Mix It Up! 5 Delicious Twists
Once you master the base, the flavor world is your oyster! Here are some of my favorite variations:
- Apple Pie: Swap the bananas for 1/2 cup applesauce. Fold in 1 cup of finely diced apples (like Honeycrisp or Granny Smith) and an extra 1/2 tsp of cinnamon.
- Berry Blast: Use 1/2 cup of mixed berries—blueberries, raspberries, chopped strawberries. Frozen berries work great, no need to thaw!
- Tropical Vacation: Add 1/3 cup shredded coconut and 1/3 cup diced mango or pineapple to the batter. A tablespoon of chopped macadamia nuts would be incredible here too.
- Chocolate Peanut Butter: Swirl 1/4 cup of creamy peanut butter into the batter before baking. Fold in 1/3 cup of dark chocolate chips. This is my personal weakness.
- Pumpkin Spice (seasonal favorite!): Replace the bananas with 3/4 cup of pure pumpkin puree. Increase the milk by 2 tablespoons. Add 1 tsp pumpkin pie spice along with the cinnamon.
Emily’s Kitchen Notes
This recipe is a living, breathing favorite in my house, and it’s evolved over time. I used to add a lot more sweetener, but I’ve found that letting the natural sweetness of the bananas (or applesauce) shine through is perfect for our tastes. My husband likes his with a hefty handful of walnuts, while I’m a blueberry purist. The best part? Watching my nieces and nephews customize their own “quarter” of the pan with their chosen mix-ins before we bake it—it gets them so excited to eat their creation! Storage is key: they keep beautifully in an airtight container in the fridge for up to 5 days. You can also freeze them individually for up to 2 months; just thaw overnight in the fridge or quick-defrost in the microwave.
Your Questions, Answered!
Q: Can I make these gluten-free or vegan?
A: Absolutely! For gluten-free, ensure your oats are certified gluten-free. For vegan, use a flax egg (1 tbsp ground flax + 2.5 tbsp water per egg, let sit 5 mins) and any plant-based milk. The bananas/applesauce do a great job binding, but the flax egg adds necessary structure.
Q: Why are my squares too wet/mushy in the middle?
A: This usually means they needed more bake time. Ovens vary! Next time, give them an extra 5 minutes. Also, ensure you’re using old-fashioned oats, not quick oats, which absorb liquid differently. Letting them cool completely is non-negotiant for the texture to set.
Q: Can I double this recipe?
A: Yes! Double all ingredients and bake in a 9×13 inch pan. You may need to add 5-10 minutes to the bake time—just keep an eye on it until the center is set.
Q: My squares are very dense. Is that normal?
A: They are meant to be hearty and sliceable, not light and cakey. But if they seem *too* dense, check your baking powder to make sure it’s fresh. Also, avoid overmixing the batter once the oats are added, as this can lead to a tougher texture.
Nutritional Snapshot (Per Square)
Please note: This is an estimate for the base recipe with 2% milk and without optional mix-ins. Values will change with substitutions.
- Calories: ~180
- Carbohydrates: 24g
- Fiber: 3g
- Sugars: 8g (primarily natural from banana & maple syrup)
- Fat: 6g
- Protein: 5g
Why I Love These Numbers: This isn’t a diet food—it’s real, satisfying food. The combo of complex carbs from the oats, fiber, and a good amount of protein provides sustained energy, keeping those mid-morning hunger pangs at bay far better than a sugary pastry. It’s a breakfast you can feel really good about.
Final Thoughts from My Kitchen to Yours
And there you have it, my food-loving friends! My complete love letter to the humble oat, transformed into the most convenient, customizable breakfast square. This recipe is more than just a list of ingredients; it’s a tool for easier mornings and a canvas for your creativity. I hope it brings a little bit of calm and a whole lot of flavor to your routine.
I’d love to hear how you make it your own. Did you go for the chocolate peanut butter twist? Throw in some zucchini? Let me know in the comments below—nothing makes me happier than seeing your kitchen victories. Now, go preheat that oven, mash those bananas, and get ready to make your future self very, very happy. Happy baking!
With love and a full plate,
Emily 🥰