Easy Chicken Stuffed Peppers: Your New Go-To High Protein, Low Carb Dinner
Hey friend! Pull up a chair and let’s talk about dinner. You know the drill—it’s 5:30 PM, your stomach is grumbling, and you’re staring into the fridge hoping a delicious, healthy meal will magically assemble itself. I’ve been there more times than I can count, especially after a long day of recipe testing (which, let’s be honest, often means more dishes than I’d like).
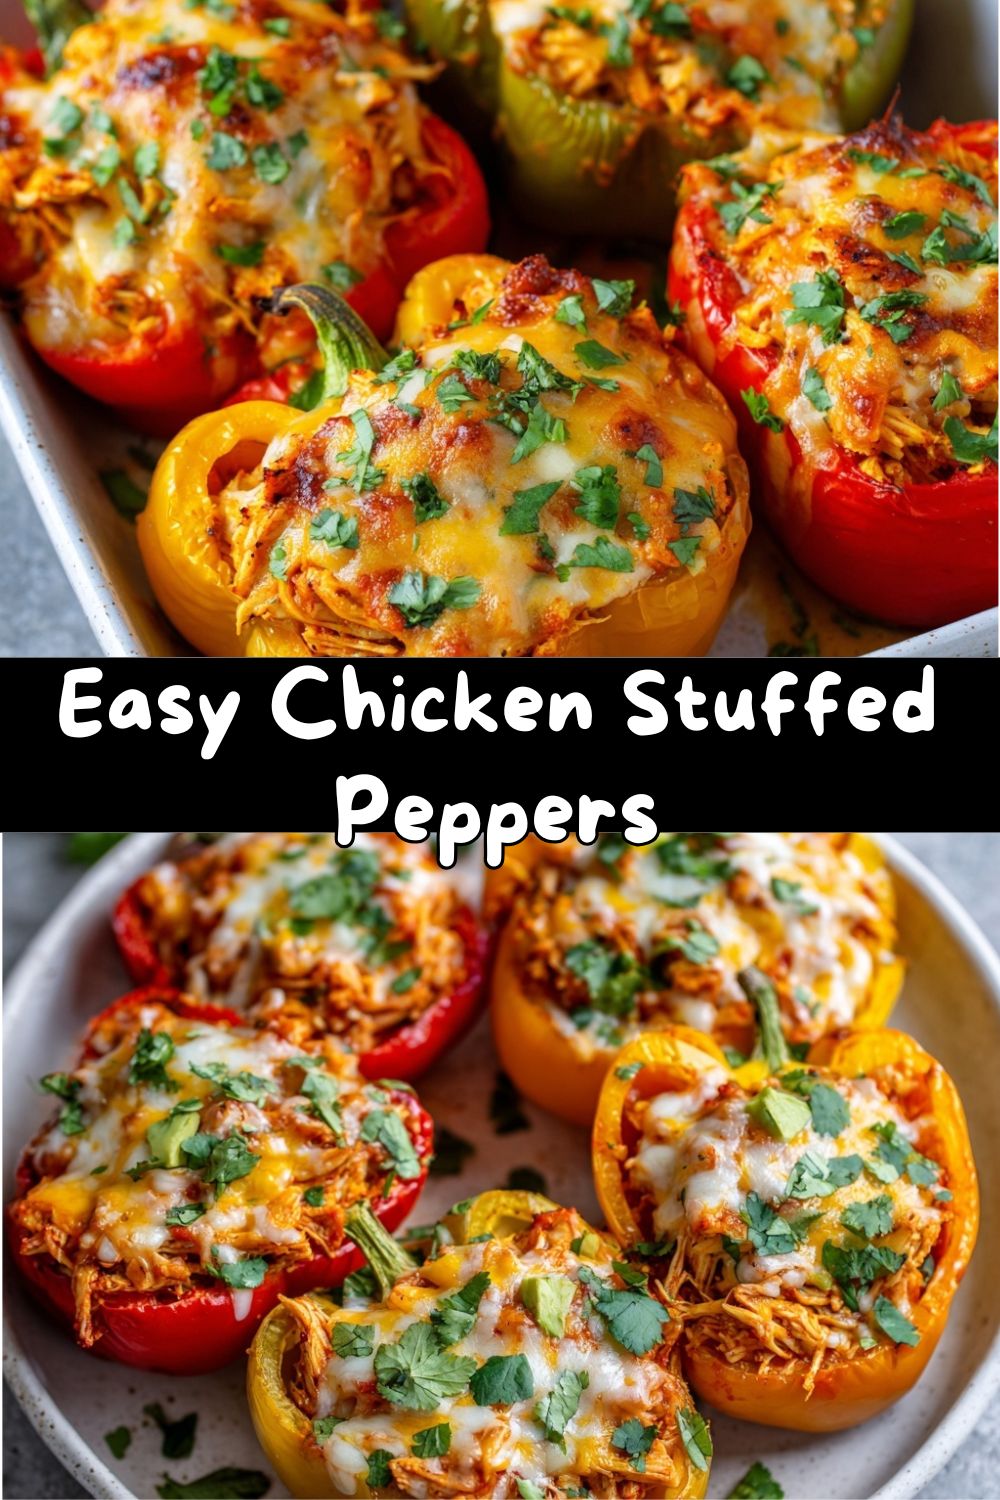
That’s exactly why I’m so crazy about these Easy Chicken Stuffed Peppers. They are my kitchen superheroes. They’re not just food; they’re a flavorful, colorful, nutrient-packed solution that comes together with minimal fuss. Imagine tender-crisp bell peppers, stuffed to the brim with savory shredded chicken, melted cheese, and just the right kick of spice, all baked until bubbly and perfect.
This recipe is the beautiful intersection of “I need to eat better” and “I have zero energy to cook.” It’s naturally low in carbs, sky-high in protein to keep you full and satisfied, and endlessly customizable based on what’s in your pantry. Whether you’re feeding a family, prepping lunches for the week, or just treating yourself to a nourishing meal, these stuffed peppers have your back. So, tie on that apron (the messy one is welcome here!), and let’s make a dinner that’s as satisfying to make as it is to eat.
More Than Just a Pepper: A Little Kitchen Memory
This recipe always takes me back to my grandma’s kitchen, though her version was… let’s say, hearty. She’d make stuffed peppers with enough rice and ground beef to feed a small army, simmered for hours in tomato sauce. They were glorious, a total comfort food monument. But when I got older and started paying more attention to what made my body feel good, I found myself craving that same comfort in a lighter, brighter package.
One rainy Tuesday, faced with leftover roast chicken and a fridge drawer of bell peppers begging to be used, I had a lightbulb moment. What if I swapped the heavy rice for cauliflower rice? What if I used lean chicken and let tangy salsa do the saucy work? I threw it all together, topped it with a mountain of cheese (some traditions must be honored), and crossed my fingers. The result was a revelation—all the cozy, nostalgic flavor of my childhood, but feeling energized and light after eating it. It was a perfect “Emily” recipe: simple, flavorful, and born from a happy kitchen experiment. That’s the spirit I want to bring to your table!
What You’ll Need: Your Flavor Toolkit
Here’s the beautiful part—the ingredient list is short, sweet, and flexible. This is a “clean out the fridge” dream recipe. Let’s break it down:
- 3 large bell peppers (any color!) – I love using a mix of red, yellow, and orange for a pop of color and slightly sweeter flavor. Green peppers are great too for a more classic, slightly bitter note. Chef’s Insight: Look for peppers with flat bottoms so they sit nicely in the dish.
- 1 ½ cups cooked shredded chicken – This is your protein powerhouse! Use leftover rotisserie chicken (my weeknight secret weapon), grilled chicken, or even canned chicken in a pinch. For a vegetarian twist, see the variations below!
- ½ cup cooked rice or cauliflower rice – This is optional but gives great texture. For low-carb, go with cauliflower rice—it soaks up the flavors beautifully. Brown rice, quinoa, or even riced broccoli work too!
- ½ cup salsa or tomato sauce – This is our flavor and moisture agent. Use your favorite salsa (mild, medium, or hot!). For a less chunky texture, tomato sauce or even marinara works wonders.
- ½ cup shredded cheese – Melty, glorious cheese. I’m partial to a Mexican blend or sharp cheddar, but mozzarella, pepper jack, or even cotija would be fantastic.
- 1 tsp taco seasoning or seasoning of choice – This little spoonful is a flavor bomb. Use store-bought or your own blend. Chef’s Hack: No taco seasoning? Mix ½ tsp chili powder, ¼ tsp cumin, and a pinch each of garlic powder and paprika.
- Salt & pepper to taste – Don’t forget to season your filling! Taste it before it goes into the peppers.
- Optional toppings: Chopped cilantro, Greek yogurt (or sour cream), diced avocado, sliced jalapeños, a squeeze of lime. – This is where you make it your own! Toppings add freshness, creaminess, and crunch.
Let’s Get Cooking: Step-by-Step with Chef Emily
Ready? Let’s turn these ingredients into your new favorite dinner. I’m right here with you, sharing my best tips to make it foolproof.
- Preheat and Prep: Fire up your oven to 375°F (190°C). Grab a baking dish (an 8×8 or similar works great). Now, let’s tackle the peppers. Slice them in half from top to bottom. Use a paring knife to cut out the core and remove the seeds and white ribs. Chef’s Tip: Leave the stems on! They look pretty and give you a handy little handle for eating. Give the halves a quick rinse inside and out, then pat them dry. Place them cut-side up in your baking dish. If they’re wobbly, you can slice a tiny bit off the back to help them sit flat.
- Mix the Magic Filling: In a medium bowl, combine your shredded chicken, salsa, cooked rice (or cauliflower rice), taco seasoning, and half of your shredded cheese. Season with a pinch of salt and pepper. Now, get in there with a fork or your hands and mix it all up until it’s beautifully combined. Chef’s Commentary: This is the moment to taste! Try a little bit. Need more spice? Add a dash of chili powder. Want more tang? A splash of lime juice is perfect. Make it taste good to YOU.
- Stuff ‘Em! Using a spoon, generously pile the chicken mixture into each pepper half. Don’t be shy—pack it in and mound it up nicely. They should be full and proud! Little Hack: If you have extra filling, you can bake it in a small ramekin alongside the peppers for a delicious little side cup.
- Top & Tent: Sprinkle the remaining cheese evenly over the top of each stuffed pepper. This is the golden, bubbly crown. Then, cover the entire baking dish tightly with aluminum foil. This creates a little steam oven that will cook the peppers evenly and keep everything moist.
- Bake to Perfection: Slide the dish into your preheated oven. Bake covered for 25-30 minutes. You’ll know they’re getting close when you can smell that amazing aroma. After 25 minutes, carefully remove the foil. Bake for another 5-10 minutes, uncovered, until the cheese is fully melted, slightly golden, and the pepper edges are tender-crisp (or softer, if you prefer).
- Garnish and Serve! Take them out of the oven and let them cool for just 5 minutes—this helps the filling set. Then, go wild with your favorite toppings! A dollop of cool Greek yogurt, some bright cilantro, creamy avocado… the sky’s the limit.
How to Serve These Flavor-Packed Gems
Presentation is part of the fun! I love serving these right in the baking dish for a rustic, family-style meal. Simply bring the dish to the table and let everyone admire their colorful dinner before diving in.
For a more plated look, use a wide spatula to carefully transfer one or two pepper halves to a plate. Spoon any saucy bits from the bottom of the dish over the top. Pair them with a simple side salad with a lime vinaigrette, some roasted zucchini, or a quick scoop of black beans. The peppers are a complete meal in themselves, but a little something green on the side always feels nice.
And don’t forget the toppings bar! Set out small bowls of sliced jalapeños, extra salsa, lime wedges, and cilantro. Let everyone customize their perfect bite. It turns dinner into an interactive, fun experience.
Make It Your Own: 5 Tasty Twists
The basic formula is your canvas. Here are some of my favorite ways to play with it:
- The “Everything but the Kitchen Sink” Veggie Load: Sauté ½ cup each of diced onions, zucchini, and mushrooms before adding to the filling. It’s a fantastic way to pack in more nutrients and flavor.
- Italian Night-In: Swap the salsa for marinara sauce, use Italian seasoning instead of taco seasoning, and mix in some chopped spinach and shredded mozzarella. Top with a sprinkle of Parmesan and fresh basil.
- Full Keto/Low-Carb: Skip the rice entirely. Bulk up the filling with extra chicken and add ¼ cup of cream cheese to the mixture for incredible richness. You won’t miss a thing!
- Turkey or Beef Swap: Not a chicken fan? Use ground turkey or lean ground beef. Just brown it in a pan with some onions and garlic, drain any excess fat, and use it in place of the shredded chicken.
- Greek-Inspired: Use cooked ground lamb or chicken, mix in 2 tbsp of chopped kalamata olives and 1 tsp of dried oregano. Skip the salsa and use a plain tomato sauce. Top with crumbled feta cheese and a drizzle of tzatziki after baking.
Chef Emily’s Notebook Scribbles
This recipe has evolved so much since that first rainy Tuesday experiment. I’ve learned that par-cooking the peppers for 5 minutes in the microwave before stuffing can speed things up if I’m in a real hurry. I’ve also accidentally used pineapple salsa once (don’t ask) and was shocked at how delicious the sweet-and-savory combo was!
The biggest lesson? Don’t stress about perfection. If a pepper half tips over in the dish, it’s fine. If you only have two peppers, pack the extra filling around them in the dish—it becomes a cheesy, delicious bake. Cooking is about joy, not perfection. These peppers are forgiving and flexible, just like we should be in the kitchen.
Your Questions, Answered!
Q: My peppers are still too crunchy! What happened?
A: No worries! Pepper thickness and oven temps can vary. Just cover them back up with foil and bake for another 5-10 minutes. Next time, you can blanch the pepper halves in boiling water for 3-4 minutes before stuffing to guarantee tenderness.
Q: Can I make these ahead for meal prep?
A: Absolutely! This is a fantastic meal prep recipe. Assemble the stuffed peppers in the baking dish, cover tightly, and refrigerate for up to 24 hours. When ready, bake as directed, adding maybe 5-10 extra minutes since they’re going in cold. They reheat beautifully all week.
Q: Can I freeze them?
A: Yes, but with a tip. Freeze them after baking and cooling. Wrap each pepper half individually in plastic wrap and then foil, or store in a single layer in an airtight container. Thaw in the fridge overnight and reheat in the oven or microwave until hot throughout.
Q: The filling seems dry. How can I fix it?
A> Easy fix! Just add a bit more moisture. Stir in an extra tablespoon or two of salsa, a splash of chicken broth, or even a dollop of sour cream into the filling mix before baking.
Nutritional Info (Because Knowledge is Power!)
Here’s a general breakdown per stuffed pepper half (using chicken, cauliflower rice, and a Mexican cheese blend). Remember, toppings will add to this:
- Calories: ~200-220
- Protein: ~20-22g (Awesome for staying full!)
- Carbohydrates: ~10-12g (Mostly from the pepper—it’s a vegetable!)
- Fiber: ~3g
- Fat: ~9-11g
This makes it an excellent choice for those following lower-carb, high-protein, or diabetic-friendly eating plans. By using lean chicken and loading up on the veggie pepper “bowl,” you’re getting a mega-dose of Vitamin C and satisfaction without the heavy carbs. It’s comfort food that loves you back.
Final Thoughts from My Kitchen to Yours
Well, friend—that’s dinner done. And done right.
These Easy Chicken Stuffed Peppers are proof that healthy eating doesn’t have to feel like a chore or a compromise. They’re warm, cheesy, colorful, and comforting in that deeply satisfying way that makes you pause after the first bite and think, “Yep. This is going into the regular rotation.”
They meet you exactly where you are—busy, hungry, maybe a little tired—but still wanting to eat something that makes you feel good. They’re flexible enough for weeknight chaos, sturdy enough for meal prep, and cozy enough to feel like real comfort food. That’s the magic.
So whether you’re cooking for your family, prepping lunches for the week, or just taking care of yourself after a long day, I hope these stuffed peppers bring a little calm and a lot of flavor to your table.
If you make them, I’d love to see your spin—extra cheese, different spices, or whatever your fridge inspired. Tag me or share it with someone who needs an easy dinner win. Good food is better when it’s shared.
From my kitchen to yours—keep it simple, keep it nourishing, and always cook with heart.
— Emily