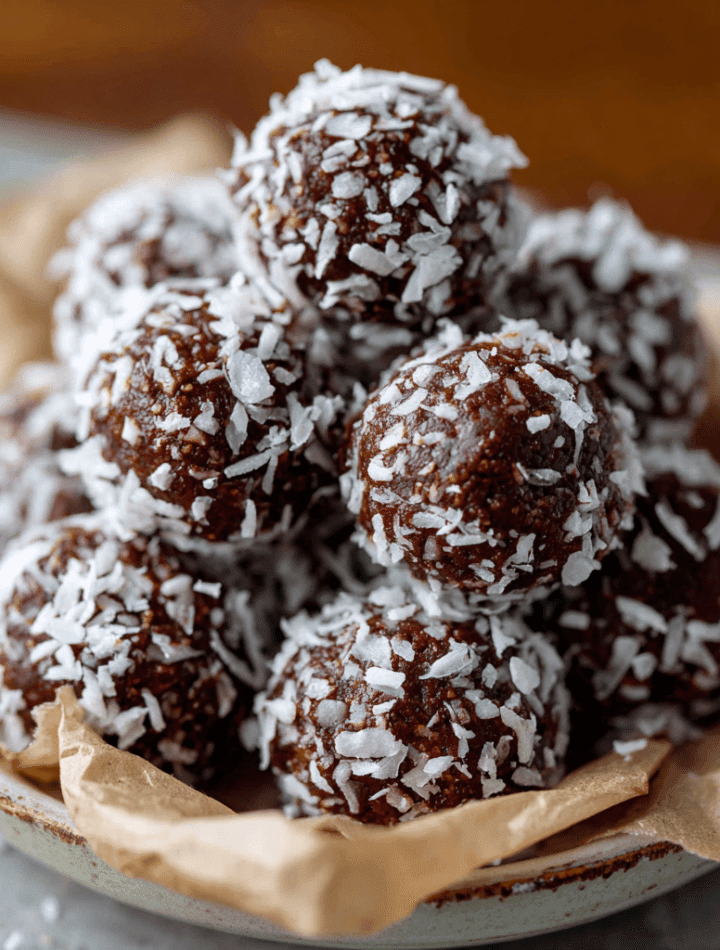
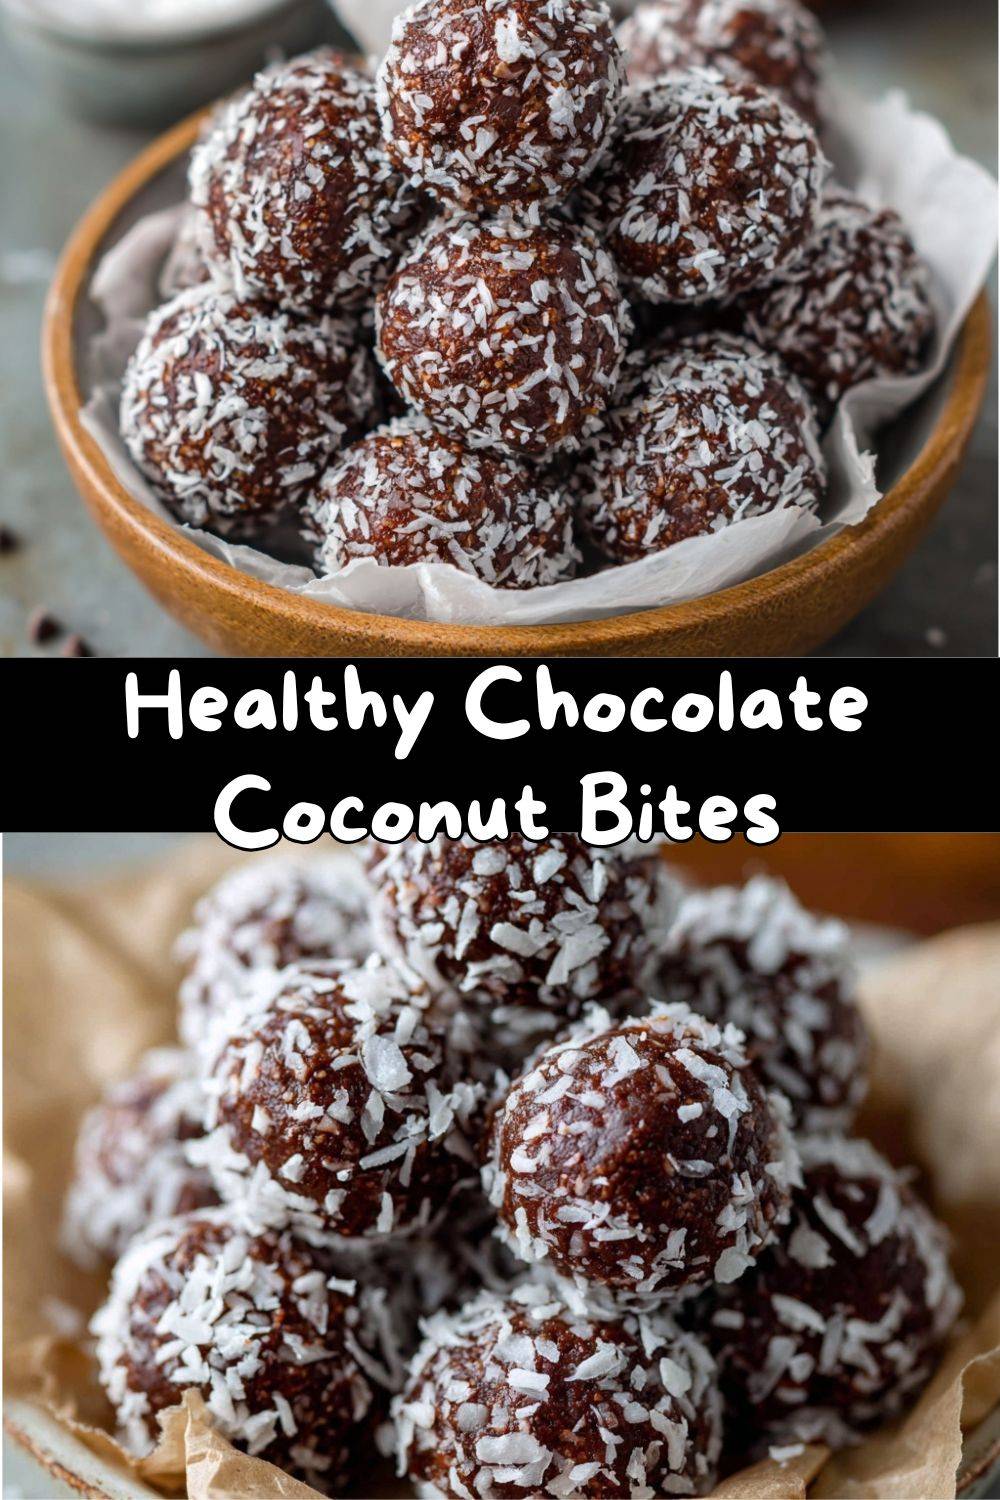
Healthy Chocolate Coconut Bites: Your New Favorite Sweet Escape
Hey there, friend! Come on in, pull up a stool, and let me pour you a virtual cup of tea. You know those afternoons when a craving hits you like a ton of bricks? That deep, soul-whispering need for something sweet, something rich, something that feels like a decadent treat… but you also want to feel good about what you’re eating? I have been there approximately a million times. It’s the classic kitchen conundrum: indulgence versus intention.
Well, get ready to do a happy dance, because these Healthy Chocolate Coconut Bites are the glorious solution we’ve all been dreaming of. They’re the snack that bridges the gap between a candy bar and a superfood bite. We’re talking chewy, coconutty centers hugged by a crisp shell of dark chocolate, all finished with a cheeky little sprinkle of sea salt. The magic? They’re naturally sweetened, made with clean ingredients you can feel great about, and require zero baking. Just a bowl, a spoon, and about 30 minutes of your time.
These bites have become my secret weapon. I stash them in my fridge for post-yoga cravings, pack them for road trips, and yes, I absolutely sneak one (or two) while dinner is simmering. They prove that a treat doesn’t need refined sugar or a long ingredient list to be utterly satisfying. So, tie on your favorite apron—the messy one is always the best—and let’s make something delicious that loves you back.
The Day My Grandma’s Macaroons Got a Makeover
This recipe has a little bit of my heart baked right in, though technically, there’s no baking involved! It all goes back to my Grandma June and her legendary coconut macaroons. Every Easter, her kitchen would transform into a coconut-scented wonderland. She’d have these towering, golden-piped mounds cooling on every available surface. To me, they were pure magic—sweet, chewy, and impossibly delicious.
Years later, when I was deep in culinary school and starting to explore how food fuels our bodies, I found myself craving that exact coconutty texture, but I wanted to create a version that was a bit simpler, a bit cleaner, and something I could enjoy anytime without the holiday fanfare. I remember experimenting in my tiny apartment kitchen, trying to capture that nostalgic chew without Grandma’s cup of sugar. It took a few tries (batch number three was a delicious but tragic puddle of coconut oil), but the moment I dipped that first perfectly firm bite into dark chocolate and took a taste, I knew I had it. It was the soul of Grandma’s macaroon, reimagined for my everyday life. Now, every time I make these, I think of her, that wooden spoon, and the sweet truth that the best recipes are the ones that connect us—to memory, to joy, and to each other.
Gathering Your Delicious, Clean Ingredients
Part of what makes this recipe so wonderful is its beautiful simplicity. We’re using just a handful of powerhouse ingredients, each playing a crucial role. Here’s exactly what you’ll need and why it’s in the bowl:
- 1½ cups unsweetened shredded coconut: This is the star of the show, providing that iconic chewy texture and rich, nutty flavor. Using unsweetened is key—it lets us control the sweetness ourselves. Chef’s Insight: Look for a medium-shred coconut for the perfect bite; super-fine shred can get pasty.
- ¼ cup coconut oil, melted: Our magical binder! When chilled, it solidifies and holds our bites together beautifully. It also adds a subtle tropical flavor. Substitution Tip: If you’re not a coconut fan, refined avocado oil or melted cacao butter works wonderfully as a neutral binder.
- 2–3 tablespoons maple syrup or honey: Our natural sweeteners. I love the caramel notes of maple syrup, but raw honey brings its own floral sweetness. Start with 2 tablespoons and add the third only if you like things sweeter. Chef’s Insight: The type of sweetener will slightly change the final texture—maple syrup keeps things a bit softer.
- ½ teaspoon vanilla extract: The flavor enhancer! It rounds out the sweetness and adds a warm, comforting depth. For a next-level treat, try using vanilla bean paste.
- ½ cup dark chocolate chips: The luxurious coating. I opt for a good-quality dark chocolate (70% or higher) for its rich flavor and antioxidant boost. Substitution Tip: Ensure they’re dairy-free if needed, or use chopped chocolate bars for an even smoother melt.
- Sea salt for topping (optional, but highly recommended): This is the game-changer! A tiny flake of sea salt on top creates a perfect sweet-salty contrast that makes the chocolate taste even richer.
Let’s Make Some Magic: Step-by-Step
Ready? This is where the fun happens. We’re going to mix, roll, dip, and delight. Follow these steps, and you’ll have perfect bites in no time.
- Combine the Base: In a medium mixing bowl, add your shredded coconut, melted coconut oil, maple syrup (or honey), and vanilla extract. Here’s my little hack: use a fork first to break up the coconut and ensure the liquid is evenly distributed, then switch to a sturdy spoon or your hands. Mix until every single strand of coconut is shiny and coated. The mixture should hold together when you pinch it. If it seems too dry, add another teaspoon of melted coconut oil. If it seems too wet, add a tablespoon more of shredded coconut.
- Roll with Love: Line a small baking sheet or plate with parchment paper. Scoop out about a tablespoon of the mixture. Now, channel your inner kid making mud pies and roll it firmly between your palms into a tight, compact ball. The firmer you pack it, the better it will hold its shape. Place it on the parchment-lined tray. Repeat with the remaining mixture—you should get about 12 lovely little orbs.
- The Chill Factor: Pop the tray into the freezer for 15-20 minutes. This isn’t just a suggestion; it’s a crucial step! This solidifies the coconut oil, turning our soft balls into firm, dip-able bites. Don’t skip it, or you’ll have a chocolate-covered puddle (trust me, I’ve been there!).
- Melt the Chocolate: While the bites are chilling, melt your chocolate. You can do this in a double boiler, but my favorite easy method is in the microwave. Place chocolate chips in a microwave-safe bowl and heat in 20-second bursts, stirring vigorously after each burst, until just smooth. Chef’s Hack: Adding a tiny pinch of coconut oil to the chocolate while melting makes it thinner and easier for a smooth, delicate coating.
- The Big Dip: Take your firm coconut bites out of the freezer. Using a fork or dipping tools, submerge each ball into the melted chocolate, tap gently on the side of the bowl to let the excess drip off, and place it back on the parchment paper. Work relatively quickly so the bites stay cold.
- The Finishing Touch: Immediately after dipping each bite, while the chocolate is still wet, sprinkle on a tiny, elegant flake of sea salt. It’s the jewelry for your dessert!
- Set to Perfection: Return the tray to the fridge for at least 10 minutes, or until the chocolate is completely set and crisp. Then, try not to eat them all at once.
How to Serve & Savor Your Creation
You’ve done it! Now, how to enjoy these beauties? Honestly, straight from the fridge with your fingers is a perfectly valid method. But if you want to get fancy or share the love, here are a few ideas:
For a beautiful dessert platter, arrange the bites in a small cupcake liner on a slate board alongside some fresh berries and a few toasted almond slivers. The red of the berries against the dark chocolate is stunning. They also make incredible homemade gifts! Pack a few into a small kraft box or a glass jar with a ribbon—it’s a treat that says, “I made this for you with love.” My personal favorite way? Crumbled over a bowl of vanilla coconut milk yogurt with some mango chunks for an incredible breakfast parfait. Yes, I said breakfast. You’re welcome.
Get Creative: 5 Fun Twists on the Classic
Once you’ve mastered the basic bite, the kitchen playground opens up! Here are some of my favorite ways to mix things up:
- Almond Joy Vibes: Before rolling the mixture into balls, press a whole, raw almond into the center of each one. Dip in chocolate as usual. You get a wonderful crunch in the middle!
- Matcha Green Tea: Add 1-2 teaspoons of high-quality culinary matcha powder to the coconut mixture. Dip in white or dark chocolate for a stunning, antioxidant-rich treat with a beautiful green hue inside.
- Cookie Dough Dream: Add 2 tablespoons of almond flour and ¼ cup of mini dairy-free chocolate chips to the base mixture. It creates a heartier, chunkier bite that truly tastes like edible cookie dough.
- Tropical Sunrise: Add 2 tablespoons of finely chopped dried mango and 1 tablespoon of chopped macadamia nuts to the mix. Dip in chocolate and imagine you’re on a beach.
- Protein Power Boost: For a post-workout snack, stir 2 scoops of your favorite vanilla or chocolate collagen peptides or plant-based protein powder into the base. You may need to add an extra teaspoon of coconut oil or maple syrup to compensate for the dryness.
Chef Emily’s Kitchen Notes
This recipe has lived in my back pocket for years, and it’s evolved with me. The first time I made them, I was so impatient that I tried to dip them after only 10 minutes in the freezer. Let’s just say I ended up with chocolate-covered coconut “blobs” instead of bites. They tasted amazing, but they were not pretty! The lesson? Patience is a virtue, especially in a no-bake recipe.
I also used to be very precious about perfectly round balls. Now, I embrace a little rustic charm. Sometimes I’ll even press the mixture into a small loaf pan, chill it, and cut it into squares before dipping for a more “bark-like” treat. Food should be fun, not stressful. Make it your own!
FAQs & Troubleshooting
Q: My mixture is too dry and won’t stick together. What did I do wrong?
A: No worries! This usually means you need a touch more binder. Add an extra teaspoon of melted coconut oil or maple syrup, one at a time, mixing thoroughly until it reaches that “pinchable” consistency.
Q: Can I use desiccated coconut instead of shredded?
A: You can, but the texture will be different. Desiccated coconut is much finer and drier, resulting in a denser, less chewy bite. You’ll likely need to add a bit more liquid (coconut oil or syrup) to help it bind. I personally prefer the texture of shredded.
Q: Why did my chocolate coating get streaky or seize up?
A: This is almost always a temperature issue. If your coconut bites aren’t cold enough, the warm chocolate can melt the outer layer of coconut oil, causing streaks. Ensure bites are fully chilled. If the chocolate itself seizes (becomes clumpy), it means a tiny bit of water got in. You can sometimes save it by stirring in a teaspoon of coconut oil.
Q: How long do these really last in the fridge?
A: In an airtight container, they are perfect for 7-10 days. You can also freeze them for up to 2 months! Just place them in a single layer on a tray to freeze solid, then transfer to a bag. Thaw in the fridge for an hour before eating.
A Quick Look at the Good Stuff (Nutritional Info)
While I’m all about the joy of eating first, I know it feels great to understand what’s fueling your body. Here’s a general breakdown per bite (based on 12 bites, using maple syrup and without added nuts):
- Calories: ~130
- Protein: 1g
- Fat: 11g (primarily healthy saturated fats from the coconut)
- Carbohydrates: 8g
- Fiber: 2g
- Sugars: 5g (all naturally occurring from maple syrup/coconut)
Remember, these are nourishing fats that provide sustained energy. The fiber from the coconut helps keep things balanced, and the dark chocolate adds a dose of antioxidants. It’s a snack that satisfies your taste buds and supports your wellness goals—a true win-win.
Final Thoughts from My Kitchen to Yours
And there you have it! Your passport to a world of easy, healthy, and deeply satisfying treats. I hope these Healthy Chocolate Coconut Bites bring as much joy to your kitchen as they have to mine. They’re proof that taking care of yourself doesn’t mean sacrificing flavor or fun.
I’d love to hear how your batch turns out! Did you add a fun twist? Did your family devour them in five minutes flat? Tag me on social @TastyChow or drop a comment below—seeing your creations is my favorite part of this whole delicious journey.
Now, go forth and snack fearlessly, my friend. Remember, the best meals and memories are always Made with Love.
— Emily 🥥🍫