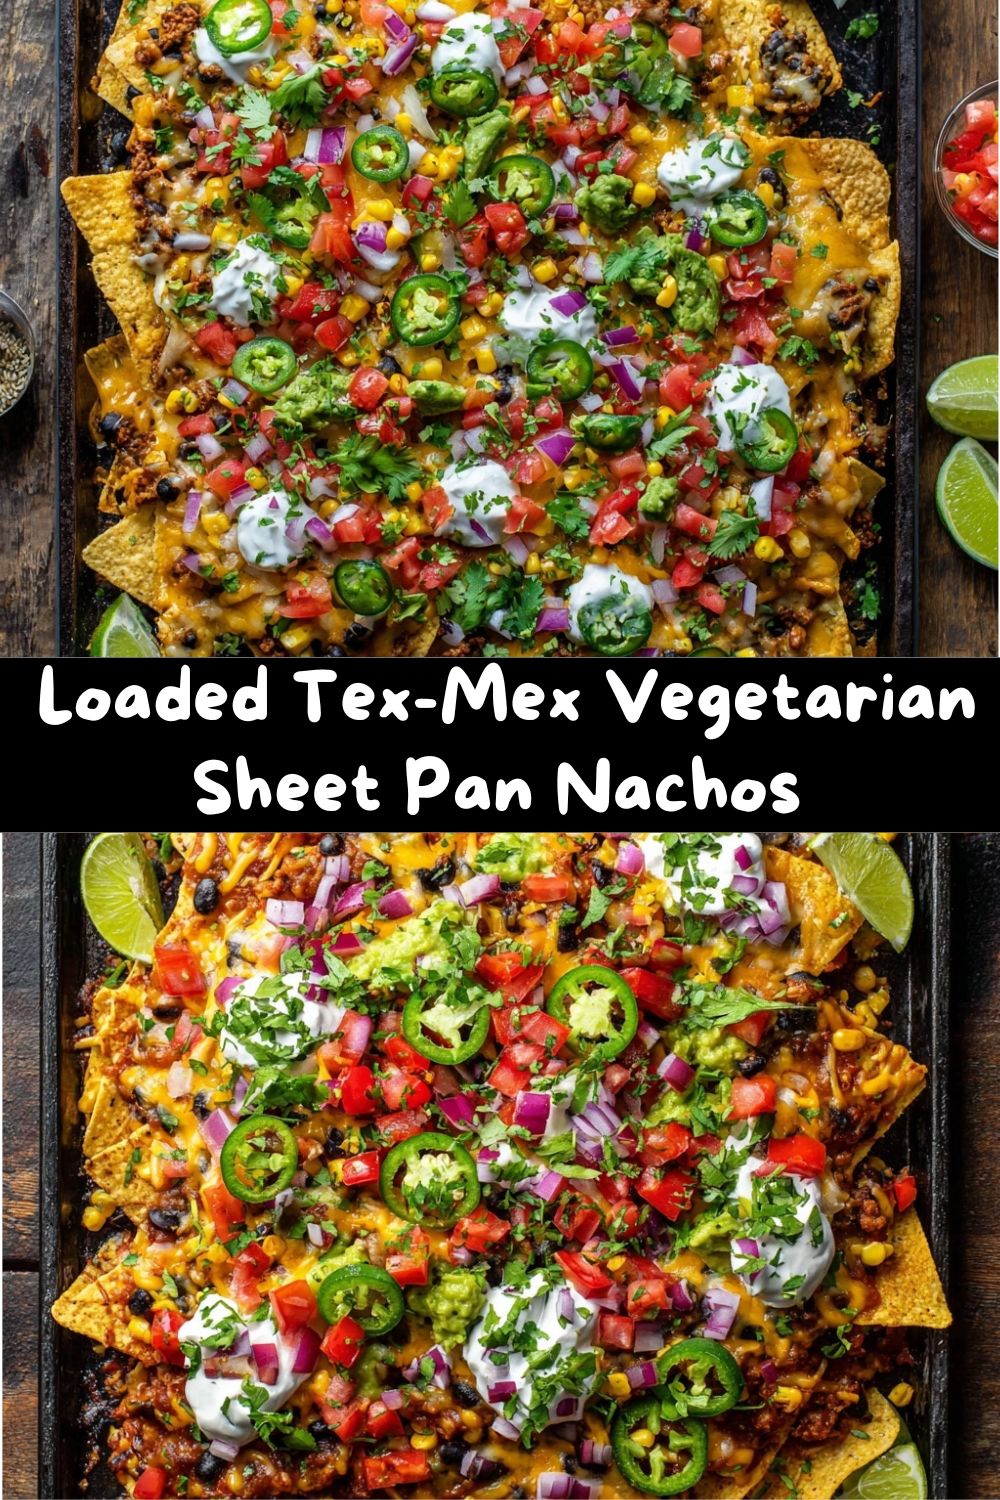
Craving Crunch? Let’s Make the Ultimate Shareable Feast!
Ever had one of those days where you’re craving something big, bold, and flavor-packed, but the thought of a mountain of dishes makes you want to order takeout instead? I hear you. That’s exactly why I fell head-over-aprons for sheet pan dinners, and today, we’re taking that beautiful, lazy-genius concept and turning it into the most epic, shareable, vegetarian-friendly party on a pan: Loaded Tex-Mex Vegetarian Sheet Pan Nachos.
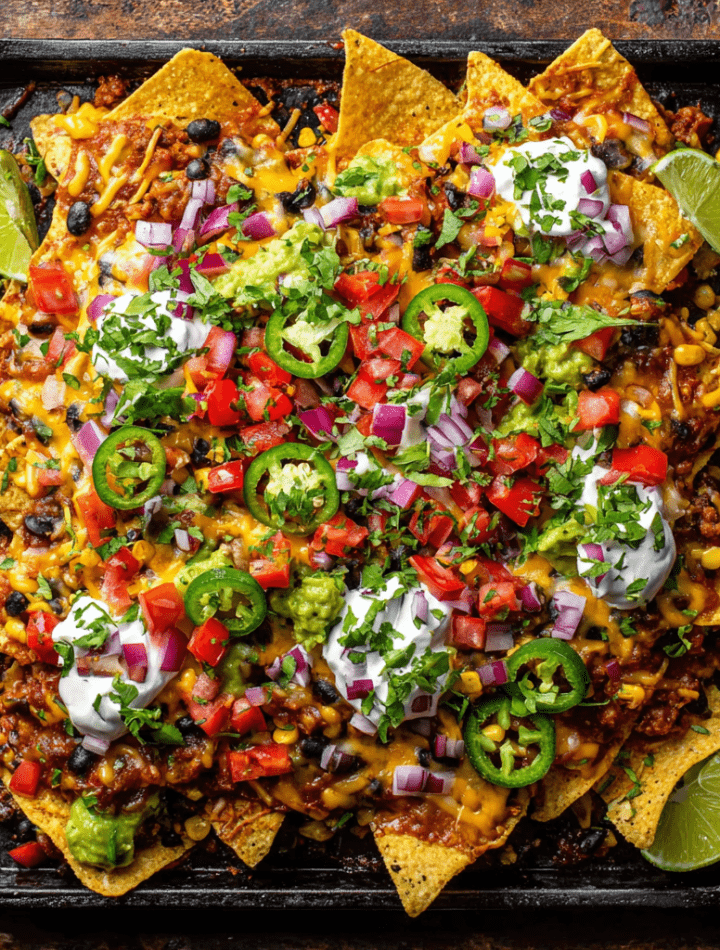
Imagine this: A symphony of crispy tortilla chips, blanketed in melty cheese, loaded with seasoned black beans, sweet corn, and colorful peppers, all roasted to perfection on a single pan. Pulled from the oven bubbling and glorious, ready for a confetti of cool, fresh toppings. This isn’t just a snack; it’s a 30-minute meal that feels like a celebration. It’s the answer to “What’s for dinner?” on busy weeknights, the MVP of game-day spreads, and the star of any casual get-together. Best part? We’re doing it all without any meat, proving that plant-based eating can be every bit as hearty and satisfying. So, preheat that oven, grab your largest sheet pan, and let’s create some delicious, crunchy magic together. Your taste buds (and your dishwasher) will thank you.
The Nacho That Started It All: A Cinco de Mayo Save
My love affair with sheet pan nachos started in a beautiful, chaotic whirlwind of poor planning and last-minute genius. A few years back, I volunteered to bring an appetizer to a friend’s Cinco de Mayo potluck. In classic Emily fashion, I spent the day testing a complicated, seven-layer dip that, well… let’s just say it met an unfortunate fate with my kitchen floor. With an hour to go and zero groceries left, I stood in my kitchen, panicking.
Then, I saw them: a half-eaten bag of tortilla chips, a can of black beans, and a lonely bell pepper in the fridge. Desperation, as they say, is the mother of invention. I threw everything onto a sheet pan, showered it with cheese, and crossed my fingers as it baked. What emerged was a revelation! The edges of the chips were extra crispy, the cheese was perfectly gooey, and the beans had warmed through. I hastily topped it with whatever else I could find (sour cream, a sad-looking but still tasty avocado, some cilantro). I arrived at the party, humble sheet pan in hand, expecting side-eye. Instead, it was the first dish demolished. Friends huddled around the pan, scraping up every last cheesy bit. That night taught me a powerful lesson: the best food isn’t about perfection; it’s about flavor, fun, and sharing. These sheet pan nachos have been my go-to “hero” recipe ever since.
Gathering Your Flavor Arsenal
Here’s everything you’ll need to build your nacho masterpiece. I’ve included my favorite chef-y insights and swaps so you can make this recipe your own!
- 1 (13-16 oz) bag of sturdy tortilla chips: This is your foundation! Go for a thick, restaurant-style chip. They hold up to the toppings without turning to mush. (Insider Tip: A mix of yellow corn and a few blue corn chips looks gorgeous!)
- 1 (15 oz) can black beans, rinsed and drained: Our plant-based protein powerhouse. Rinsing removes the starchy can liquid and helps the beans crisp up a bit on the pan. Swap: Pinto beans or seasoned refried beans (dolloped over the chips) work wonderfully.
- 1 cup corn: Sweetness and pop! I love using fire-roasted corn from the freezer section for extra smoky flavor. Fresh off the cob in summer is divine. Swap: A drained can of Mexican-style corn with peppers adds color.
- 1 ½ cups shredded Mexican blend cheese: The glue that holds our happiness together! A pre-shredded blend of cheddar, Monterey Jack, and asadero melts like a dream. Chef’s Secret: For next-level meltiness, grate your own cheese from a block—it melts smoother because it lacks the anti-caking agents in pre-shredded bags.
- 1 bell pepper, diced: I use red or orange for maximum sweetness and color. Green peppers work too, for a sharper bite.
- 1 small red onion, diced: They mellow and sweeten beautifully in the oven. If you’re sensitive to raw onion bite, this step is your best friend.
- 1 jalapeño, thinly sliced (optional): For the spice lovers! Remove the seeds and membranes for mild heat, leave ’em in for a serious kick.
- 1 teaspoon chili powder & ½ teaspoon ground cumin: The dynamic duo of Tex-Mex flavor. Don’t skip the cumin—it adds that warm, earthy depth. Swap: Use 1 ½ tsp of a pre-mixed taco seasoning if that’s what you have.
- Salt and black pepper, to taste: Season as you go!
- Toppings (The Grand Finale!): This is where personality shines. Think: diced avocado or guacamole, fresh chopped cilantro, salsa or pico de gallo, a dollop of sour cream (or Greek yogurt for a tangy protein boost), and lime wedges for a mandatory squeeze of brightness.
Let’s Build & Bake: Your Foolproof Roadmap to Nacho Nirvana
Follow these steps for perfectly layered, crispy-every-bite nachos. No sad, soggy chips on my watch!
- Preheat & Prep: Crank your oven to 400°F (200°C). This high heat melts cheese quickly and re-crisps the chips. Line your largest, heav-duty sheet pan with parchment paper. (Trust me, this makes cleanup an absolute dream).
- Layer Like a Pro: Here’s the key to success: DON’T just dump everything in the middle. Spread a single, even layer of tortilla chips across the pan, slightly overlapping. We want every chip to have access to cheesy goodness. Evenly sprinkle about half of your rinsed black beans, corn, diced bell pepper, and red onion over the chips. Now, shower on about half of your cheese. Repeat with another layer: chips, the remaining beans/veggies, and finally, the rest of the cheese. This double-layer method ensures cheesy coverage from top to bottom! Sprinkle the chili powder and cumin evenly over the top.
- The Oven Magic: Carefully slide your loaded pan into the hot oven. Bake for 10-12 minutes. You’re looking for the cheese to be completely melted, bubbly, and possibly just starting to brown in spots. The edges of the chips will be golden. (Chef’s Hack: If your cheese isn’t browning but is melted, pop the pan under the broiler for 60-90 seconds—watch it like a hawk!).
- The Grand Topping Finale: Pull that beautiful, bubbling creation from the oven. THIS IS CRUCIAL: Let it sit for just 2-3 minutes. This lets the cheese set slightly so your cold toppings don’t immediately melt into a puddle. Now, artfully (or enthusiastically!) scatter your fresh toppings: spoonfuls of salsa and guac, dollops of sour cream, a generous handful of cilantro, and those lime wedges on the side.
- Serve Immediately! Grab some plates, forks (or just go face-first—I won’t judge), and dive in. Nachos are at their absolute peak right out of the oven.
How to Serve Your Masterpiece
Presentation is part of the fun! I love placing the entire sheet pan right in the center of the table on a trivet, letting everyone dig in family-style. It creates such a fun, communal vibe. For a more plated approach, use a large spatula to lift out hearty sections onto individual plates. Don’t forget to provide plenty of napkins—the best nachos are a delightfully messy affair.
What to serve with it? If you’re turning this into a full feast, keep the Tex-Mex theme going! A simple side of cilantro-lime rice or a crisp chopped salad with a lime vinaigrette balances the richness perfectly. For drinks, classic margaritas, ice-cold Mexican beer, or a refreshing agua fresca are ideal partners in crime.
Mix It Up! 5 Delicious Twists on the Theme
Once you master the basic blueprint, the world is your nacho oyster. Here are some of my favorite riffs:
- The “Fajita” Nachos: Toss sliced bell peppers and onions with a tablespoon of oil and a packet of fajita seasoning before layering. Add sliced sautéed mushrooms for an extra meaty texture.
- Breakfast for Dinner Nachos: Swap the beans for a layer of seasoned, scrambled eggs or crumbled cooked breakfast sausage (plant-based or regular). Top after baking with pico de gallo and a drizzle of hot sauce.
- Fully Loaded Vegan Nachos: Use your favorite vegan shredded cheese or a creamy queso made from blended cashews and nutritional yeast. Top with vegan sour cream and ensure your beans are just seasoned, not cooked with animal products.
- The Southwest Sweet Potato: Add a layer of roasted, diced sweet potato (tossed in chili powder) for a boost of fiber, sweetness, and gorgeous color.
- Buffalo “Chickpea” Nachos: Toss rinsed chickpeas in buffalo sauce before layering. After baking, drizzle with more buffalo and top with a blue cheese or ranch dressing and diced celery.
Emily’s Kitchen Notes & Nostalgia
This recipe has evolved so much from that first desperate pan. I’ve learned that a little smoked paprika in the spice mix adds a fantastic whisper of campfire. I’ve also been known to sneak a can of drained, diced green chiles into the layers for extra zing. My husband’s favorite addition is a sprinkle of pickled jalapeños before baking—they get slightly caramelized and even more flavorful.
The funniest mishap? One time I was chatting so much while cooking that I accidentally used cinnamon instead of cumin. Let’s just say “Mexican Dessert Nachos” are NOT a thing I’d recommend. We salvaged it by scraping off the spice layer and starting over, laughing the whole time. It’s a good reminder that even kitchen flops can make great stories. The goal is to have fun and feed the people you love.
Nacho Questions? I’ve Got Answers!
Q: How do I prevent my nachos from getting soggy?
A: The arch-nemesis of good nachos! Key defenses: 1) Use sturdy chips. 2) Don’t overload with wet ingredients (rinse those beans well, drain corn). 3) Add all juicy fresh toppings (salsa, sour cream, guac) after baking. 4) Bake at a high temp (400°F) for a shorter time to melt cheese fast without steaming the chips.
Q: Can I make these ahead of time?
A> You can prep all your components ahead—chop veggies, rinse beans, shred cheese. But assemble and bake right before serving for the best texture. A slightly stale chip is a sad chip.
Q: My cheese isn’t melting well. Help!
A> Pre-shredded cheese has additives to prevent clumping, which can also hinder melting. For superbly melty cheese, always grate it yourself from a block. Also, ensure your oven is fully preheated so the heat blast melts it quickly.
Q: How do I store leftovers?
A> Honestly, leftovers are never as good. The chips will soften. But if you must, pick off the top layer of toppings and store them separately. Reheat the chip/cheese/bean base in a 350°F oven for 5-10 minutes to re-crisp slightly, then re-top.
Nutritional Breakdown (A Peek at the Goodness!)
While I’m all about joy and flavor first, it’s nice to know what’s fueling the fun! This nutritional estimate is for 1 of 6 servings, including standard toppings like avocado, salsa, and a dollop of sour cream. Remember, variations will change these numbers.
Approximate Per Serving: ~380 calories | 14g protein | 19g fat | 40g carbohydrates | 9g fiber | 6g sugar.
This dish is a solid source of plant-based protein and fiber from the black beans, which helps keep you full and satisfied. The cheese provides calcium, and the colorful veggies offer a variety of vitamins and antioxidants. To lighten it up, you can reduce the cheese slightly, use a lighter cheese alternative, or increase the proportion of beans and veggies to chips. It’s a balanced, feel-good feast!
Your New Go-To for Fun & Flavor
And there you have it, friends—your ticket to the easiest, most crowd-pleasing meal in your repertoire. These Tex-Mex Vegetarian Sheet Pan Nachos are more than just a recipe; they’re a reminder that incredible food doesn’t have to be complicated. It’s about layering bold flavors, embracing the messy joy of sharing, and getting a delicious dinner on the table with minimal fuss.
I hope this recipe becomes a regular in your home, the one you turn to when you need a surefire hit. Make it, share it, tag me if you post a picture—I love seeing your kitchen creations! Now, go forth and conquer that sheet pan. I can’t wait to hear about all the memories you’ll make around it.
With love and a side of salsa,
Emily