The Secret’s in the Pickle Juice: My Quest for the Perfect Copycat Chick-fil-A Chicken
Hey there, friends! Emily here, waving at you from my flour-dusted kitchen counter. Can we talk about cravings for a second? You know the ones—those specific, gotta-have-it-NOW yearnings for a taste you can’t easily shake. For me, for years, that was Chick-fil-A’s classic chicken sandwich. That perfect, crispy-yet-juicy bite, that hint of tangy brine, the soft buttered bun… it’s a masterpiece of fast-food engineering. But as someone who loves to cook, I became obsessed with a mission: could I bring that magic into my own kitchen?
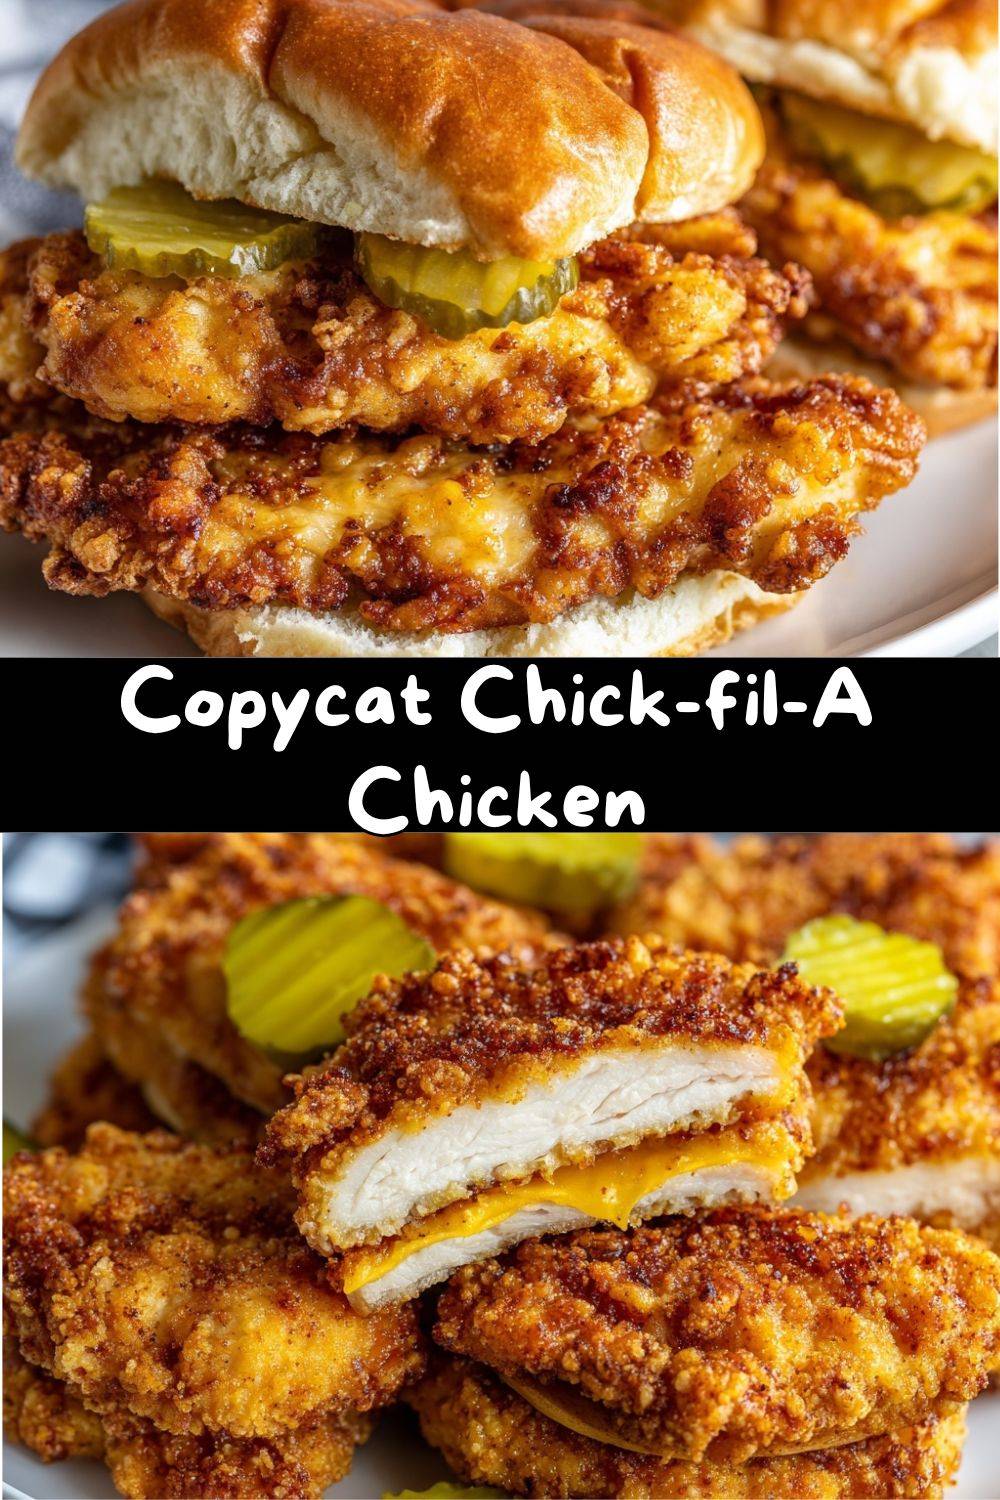
After what I can only describe as a deliciously messy journey of trial, error, and a whole lot of taste-testing (someone had to do it!), I cracked the code. This isn’t just *a* fried chicken recipe. This is my lovingly crafted, meticulously tested, and absolutely spot-on Copycat Chick-fil-A Chicken. We’re talking that signature crispy coating, that unbelievably juicy center, and that subtle, iconic flavor that makes it so addictively good.
This recipe is for all of us who’ve wished for a Sunday chicken sandwich, who want to know exactly what’s going into our food, or who just love the fun of recreating a beloved favorite at home. It’s surprisingly simple, wildly satisfying, and the best part? You probably have most of the ingredients already. So, tie on your favorite apron (the messy one is totally acceptable), and let’s make some kitchen magic happen. Your family is about to crown you the home-fried chicken champion.
My Grandma’s Pickle Jar & A Fast-Food Epiphany
This recipe always takes me back to my grandma’s pantry. She was a “waste not, want not” kind of cook, and she never threw out the brine from a finished jar of pickles. That tangy juice was liquid gold in her kitchen—a secret tenderizer for her Sunday pot roast. Years later, during my umpteenth attempt to nail this copycat recipe, I was staring at a sad, dry batch of chicken, feeling defeated. And then I saw it: my own nearly-empty pickle jar sitting on the fridge door.
Grandma’s voice popped into my head: “That’s flavor, honey. Don’t you dare pour it down the drain.” It was my eureka moment. I sliced up some chicken, submerged it in that peppery, vinegary juice, and let it hang out. The result? The juiciest, most flavor-infused chicken I’d ever fried. It was the missing puzzle piece! It turns out, the soul of this famous sandwich isn’t just in the fryer—it’s in that humble, often-overlooked marinade. Now, every time I make this, I think of my grandma and her thrifty wisdom, and it makes the first bite taste even better.
Gathering Your Flavor Arsenal
Here’s everything you’ll need to build your masterpiece. The beauty is in the simplicity!
- For the Marinade:
- 2 boneless, skinless chicken breasts: The star of the show! Go for plump, even-sized breasts. Chef’s Insight: If they’re very thick, I like to place them between plastic wrap and gently pound them to an even ½-inch thickness. This ensures quick, even cooking and a perfect sandwich fit.
- ½ cup pickle juice: The SECRET WEAPON! Use the juice from your favorite dill pickle jar. It adds moisture, tang, and that distinct background note. Sub Tip: In a pinch, you can mix ½ cup water with 2 tbsp white vinegar and ½ tsp salt.
- ¼ cup milk: Combined with the acidic pickle juice, this acts like a quick buttermilk, tenderizing the chicken beautifully.
- For the Breading:
- 1 cup all-purpose flour: The base of our crispy crust.
- 2 tbsp powdered sugar: “Sugar?!” Trust me on this. It’s the key to that golden-brown color and balances the saltiness perfectly. Don’t skip it!
- 1 tsp paprika: For warmth and that gorgeous color.
- ½ tsp each: salt, black pepper, garlic powder: The essential flavor brigade. Use fresh pepper if you can—it makes a difference.
- ½ tsp baking powder: Our little kitchen hack! It creates tiny air bubbles in the crust for an extra-light, crispy texture.
- For Frying:
- Vegetable oil, peanut oil, or canola oil for frying: You’ll need enough to come about ¾-inch up the side of your pan. Peanut oil is my top choice for its high smoke point and neutral flavor.
Let’s Get Cooking: Step-by-Step to Crispy Perfection
Follow these steps, and you’re guaranteed success. I’ve packed each one with my best tips!
- Prep the Chicken: Slice your chicken breasts horizontally into two thinner cutlets, or chop them into 1.5-inch nugget pieces. Chef’s Hack: Slightly damp hands make handling the raw chicken much less sticky!
- The Magical Marinade: In a bowl or large zip-top bag, whisk together the pickle juice and milk. Add the chicken pieces, making sure they’re fully submerged. Seal it up and let it hang out in the fridge for at least 30 minutes, up to 4 hours. This is where the flavor and juiciness happens—don’t rush it!
- Mix the Breading: While the chicken marinates, whisk all the breading ingredients (flour, powdered sugar, paprika, salt, pepper, garlic powder, baking powder) in a shallow dish. A pie plate works perfectly. Give it a good whisk to ensure the baking powder and sugar are evenly distributed.
- Heat the Oil: Pour oil into a heavy-bottomed skillet (cast iron is king here!) or Dutch oven until it’s about ¾-inch deep. Heat over medium-high heat until it reaches 350°F (175°C). Use a thermometer! If the oil is too cool, the chicken will be greasy; too hot, and it’ll burn before cooking through.
- Dredge Like a Pro: Remove a piece of chicken from the marinade and let the excess drip off. Dredge it thoroughly in the flour mixture, pressing gently to make sure every nook and cranny is coated. Pro Tip: Place the breaded piece on a wire rack while you finish the others. This lets the coating “set” and prevents it from getting gummy.
- Fry to Golden Glory: Carefully place the chicken in the hot oil. Don’t overcrowd the pan—cook in batches. Fry for 3-4 minutes per side for fillets, 2-3 minutes total for nuggets, until deeply golden brown and cooked through (internal temp of 165°F). The baking powder will give it that amazing, craggy, crispy texture.
- Drain and Rest: Transfer the cooked chicken to a wire rack set over a paper towel-lined baking sheet. This is crucial! The rack keeps the bottom from getting soggy. Let it rest for 5 minutes—this allows the juices to redistribute, ensuring every bite is moist.
How to Serve Your Homemade Masterpiece
Now for the fun part—building your perfect meal!
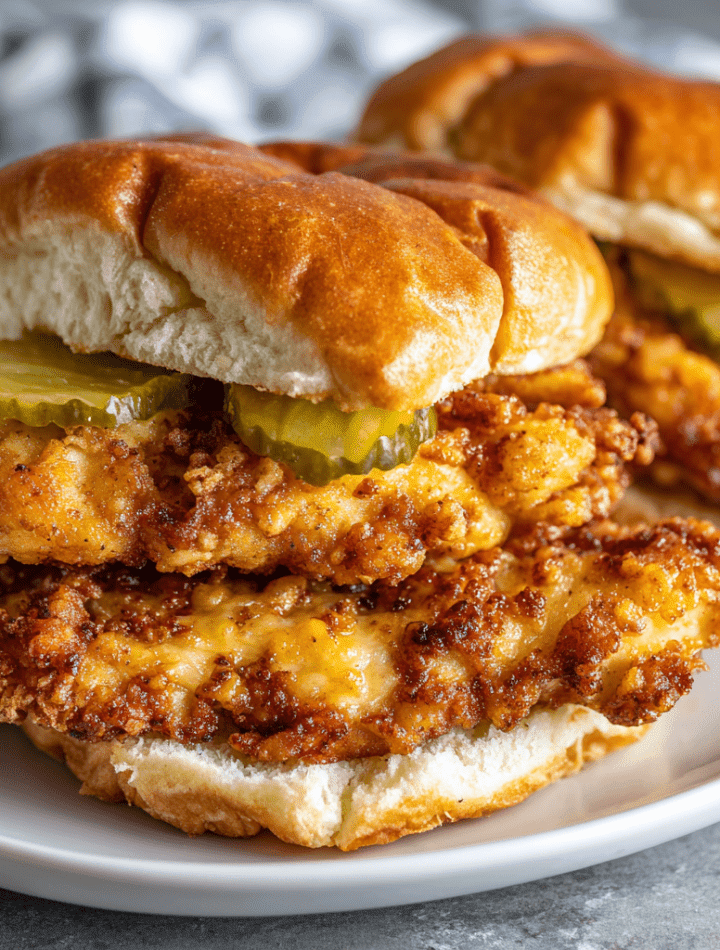
For the Classic Sandwich: Lightly toast and butter a soft, squishy brioche bun. Add a crispy chicken fillet, top with two or three dill pickle chips, and if you’re feeling fancy, a dollop of Chick-fil-A sauce or classic mayo. Press the lid down gently and take that iconic first bite.
As Nuggets or Tenders: Perfect for a party or game day! Serve a big pile on a platter with an array of dipping sauces: honey mustard, barbecue, polynesian, or a simple mix of ketchup and mayo.
Make it a Meal: Pair your chicken with some crispy waffle fries (toss frozen fries in a touch of peanut oil and salt before baking for extra crunch!), a simple side salad, or my favorite, a creamy coleslaw. Don’t forget the sweet tea!
Get Creative: 5 Tasty Twists on the Classic
Love this base recipe? Here’s how to make it your own:
- Spicy Sriracha-Honey: Add 1 tbsp sriracha and 1 tbsp honey to the marinade. Mix ½ tsp cayenne pepper into the breading for a sweet heat kick.
- Gluten-Free & Crispy: Swap the all-purpose flour for a 1:1 gluten-free flour blend. The result is just as delicious and crispy!
- Oven-Baked “Fakeout”: Want less mess? After dredging, place breaded chicken on a wire rack over a baking sheet. Spray lightly with cooking spray and bake at 400°F for 18-22 minutes, flipping halfway. It’s healthier and still super tasty.
- Nashville Hot Style: After frying, whisk 2 tbsp of the hot frying oil with 1 tbsp cayenne pepper, ½ tsp paprika, and a pinch of brown sugar. Brush this spicy glaze all over the hot chicken for a fiery finish.
- Herb & Parmesan: Add 2 tbsp grated parmesan and 1 tsp dried Italian herbs (like oregano and basil) to the breading mix for a cozy, cheesy twist.
Chef Emily’s Kitchen Notes
This recipe has evolved so much from my first attempt (which, bless its heart, was a bland, dry mess). The pickle juice revelation was the big one, but learning to use a thermometer for the oil and the wire rack for draining were total game-changers. I also used to be afraid of frying at home—it seemed so intimidating! But once you do it, you realize it’s just about being prepared and careful. Now, the sizzle of chicken hitting the hot oil is one of my favorite kitchen sounds. It’s the sound of something delicious about to happen. My biggest tip? Read through the recipe once before you start. Mise en place—having everything in its place—is the secret to a calm, fun, and successful cooking experience.
FAQs & Troubleshooting: Your Questions, Answered
- Q: Can I marinate the chicken overnight?
A: I don’t recommend more than 4 hours. The acid in the pickle juice can start to break down the protein too much, giving the chicken a slightly mushy texture. 30 minutes to 2 hours is the sweet spot! - Q: My breading fell off! What happened?
A: This usually means the oil wasn’t hot enough, or the chicken was too wet when dredged. Make sure your oil is a steady 350°F, and let the excess marinade drip off thoroughly before coating. Pressing the flour on firmly helps, too. - Q: Can I use chicken thighs?
A: Absolutely! Thighs are super juicy and flavorful. Just adjust cooking time slightly, as they may take a minute or two longer to cook through. - Q: How do I store and reheat leftovers?
A: Store in an airtight container in the fridge for up to 3 days. To reheat, do not microwave (it’ll get soggy!). Use a toaster oven or regular oven at 375°F for 10-15 minutes, or an air fryer for 5-7 minutes to recrisp the coating.
Nutritional Information (Approximate)
Please note: This is an estimate per serving (one chicken fillet) based on the ingredients used. Values can vary depending on specific brands and how much oil is absorbed during frying.
- Calories: 390
- Total Fat: 18g
- Saturated Fat: 3g
- Cholesterol: 85mg
- Sodium: 480mg
- Total Carbohydrates: 25g
- Dietary Fiber: 1g
- Sugars: 4g
- Protein: 30g
For a lighter option, try the oven-baked variation mentioned above, which will significantly reduce the fat and calorie content.
Final Thoughts from My Kitchen to Yours
And there you have it, my food-loving friend—the culmination of my many kitchen experiments, all for the love of that perfect, crispy, juicy chicken. What I love most about this recipe isn’t just the incredible flavor (though that’s a huge win), but the confidence it builds. Making a restaurant-quality favorite at home is such a rewarding feeling. It’s about more than just a sandwich; it’s about the laughter in the kitchen, the proud look when you serve it, and the joy of sharing something truly delicious you made with your own two hands.
I hope this recipe becomes a staple in your home, a solution to those cravings, and a fun project for a casual Friday night. If you make it, I’d love to hear about it! Tag me on social or leave a comment on the blog. Now, go forth and fry some chicken. You’ve totally got this.
With a full heart and a hungry belly,
— Emily 🧑🍳