Say Hello to Your New Favorite Bite of Comfort
Hey there, friend! Pull up a stool and let’s chat. Have you ever had one of those days where you’re craving the deep, soul-satisfying comfort of a classic Shepherd’s Pie, but the thought of making (and then washing) a giant casserole dish feels like just… too much? Or maybe you’re looking for a fun, crowd-pleasing appetizer for game day that’s a little more special than the usual fare? Well, my fellow flavor-chaser, I have the most delightful solution for you: Mini Shepherd’s Pie Cups.
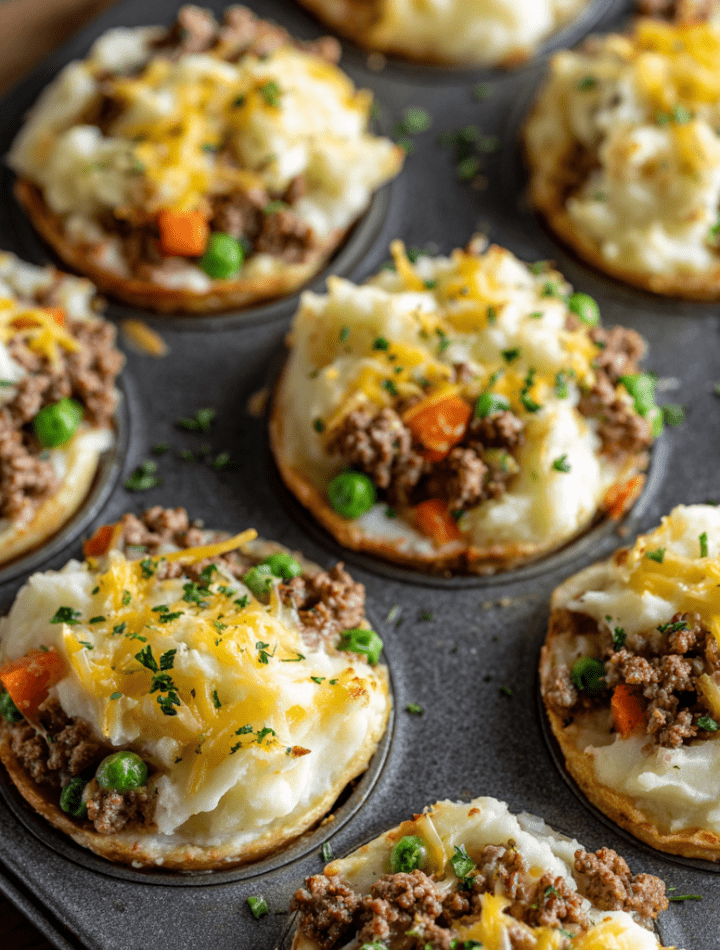
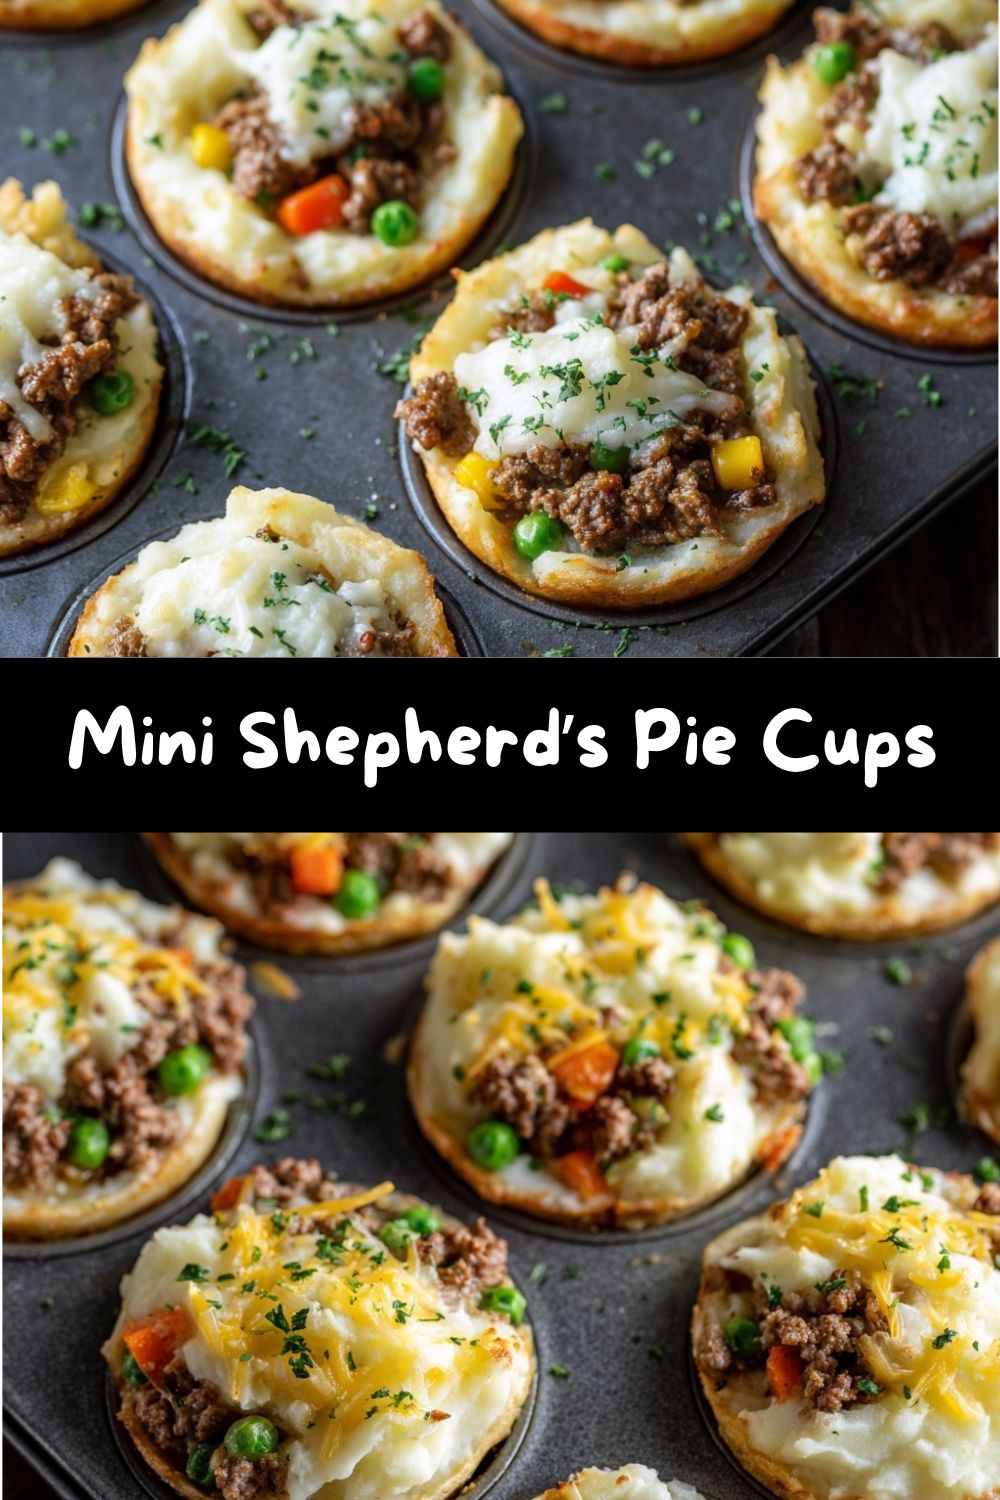
Imagine this: all the iconic, savory goodness of the traditional dish—the rich, seasoned meat, the tender veggies, the creamy, buttery mashed potatoes—but baked into adorable, perfectly-portioned individual cups. They’re like little edible hugs, and they are downright irresistible. The best part? They come together faster than you can preheat your oven, they use a humble muffin tin (genius, right?), and they are a total hit with both kids and adults. Whether you need a clever weeknight dinner, a make-ahead lunch hero, or the star of your next party spread, these mini pies are about to become your secret weapon. Let’s grab our aprons and turn that cozy daydream into a delicious reality!
A Messy-Apron Memory
This recipe takes me right back to my first apartment kitchen, which was roughly the size of a postage stamp. I was fresh out of culinary school, buzzing with fancy techniques, but what I craved was my grandma’s Shepherd’s Pie. The problem? My tiny oven couldn’t handle her giant ceramic dish, and my roommates were never home at the same time to eat a whole one. One night, staring at a lone muffin tin (I was big on making mini quiches back then), I had a “what if?” moment. What if I made Shepherd’s Pie… but tiny?
That first batch was a hilarious, glorious mess. I overfilled the cups, the potato topping bubbled over like little savory volcanoes, and getting them out required a minor archaeological dig. But that first bite? Pure magic. It captured every nostalgic flavor in a fun, handheld package. My roommates descended on the kitchen like they’d smelled a feast from three blocks away, and the whole batch vanished in minutes. That’s when I knew I was onto something. It wasn’t about reinventing the wheel; it was about making a classic feel new, accessible, and shareable. Just like my grandma’s wooden spoon taught me, the best food is made with love and a sense of fun.
Gathering Your Flavor Crew
Here’s everything you’ll need to create these savory bites. I’ve added my favorite chef notes and swaps so you can make this recipe work with what you’ve got!
For the Savory Meat Filling:
- 1 lb ground beef or ground lamb – The hearty star! 85/15 beef is perfect for flavor without being greasy. Lamb is the traditional choice for a true “Shepherd’s” pie and adds a gorgeous, rich depth.
- 1 tablespoon olive oil – For sautéing. Keeps everything from sticking and adds a fruity base note.
- 1 small onion, diced – The flavor foundation. A yellow or white onion works great here, melting into sweet goodness.
- 2 cloves garlic, minced – Because garlic is life. Feel free to add an extra clove if you’re a garlic fiend like me.
- 1 cup frozen peas and carrots – The easy button! Using frozen means no chopping, and they’re frozen at peak freshness. A classic combo for color and sweetness.
- 2 tablespoons tomato paste – This is our flavor secret weapon! It adds a concentrated umami richness that broth alone can’t. Pro tip: Sauté it with the meat for a minute to deepen its flavor.
- 1 teaspoon Worcestershire sauce – The tangy, savory backstage hero. It amplifies all the meaty flavors. If you’re gluten-free, check the label or use a certified GF brand like Lea & Perrins.
- ½ cup beef broth – Creates a luscious, saucy filling. Use low-sodium if you’re watching salt, so you can control the seasoning.
- Salt and pepper to taste – Season in layers! Taste after simmering and adjust. Remember, potatoes on top need seasoning too.
For the Creamy Potato Blanket:
- 2 cups mashed potatoes – The fluffy cloud on top! You can use leftover mashed potatoes (my favorite hack) or make a quick batch. For speed, instant potatoes work in a pinch!
- 2 tablespoons butter – For richness and sheen. Salted or unsalted is fine.
- ¼ cup milk, warmed – Warm milk helps create a smooth, pipeable (or scoopable) texture without making the potatoes gummy. Any fat percentage works.
- Salt to taste – Even if your potatoes were pre-seasoned, give them a taste. Potatoes are a flavor sponge!
- Optional for topping: A sprinkle of shredded cheddar cheese for a golden, cheesy crust, or some chopped fresh parsley or chives for a pop of color and freshness.
Let’s Build Some Mini Masterpieces!
Ready to create? These steps are simple, but I’m right here with you with all my favorite kitchen hacks to ensure perfection.
- Preheat & Prep: Fire up your oven to 375°F (190°C). This is the perfect temperature to heat the filling through and get those potato tops beautifully golden. Take your standard 12-cup muffin tin and give it a light but thorough coating of non-stick spray. Trust me, this makes the “release” part so much easier!
- Sizzle Your Aromatics: In a large skillet, heat the olive oil over medium heat. Add the diced onion and cook for 3-4 minutes until it’s soft and translucent. Now add the garlic and stir for just 30 seconds until fragrant—you’ll smell it! We don’t want burnt garlic, just awakened garlic.
- Brown the Meat: Crumble in your ground meat. Use your spoon to break it up into small pieces as it cooks. Cook until it’s no longer pink. If there’s a lot of excess grease, you can drain it off, but I usually leave a tablespoon or so for flavor.
- Build the Flavor Foundation: Here’s the key step! Push the meat to the sides and plop the tomato paste right into the center of the skillet. Let it cook and “toast” for about a minute—this caramelizes it slightly and makes its flavor incredible. Then, mix it into the meat. Add the Worcestershire sauce, frozen peas and carrots, and beef broth. Give it all a big stir.
- Simmer to Savory Perfection: Let the mixture simmer for 5-7 minutes, stirring occasionally. You’ll see it thicken up beautifully as the liquid reduces. This is when the magic happens—the flavors marry! Take it off the heat and give it a taste. Season generously with salt and pepper. Set aside to cool slightly while you work on the potatoes.
- Fluff Your Cloud: In a medium bowl, combine your mashed potatoes, butter, and warm milk. Stir vigorously until it’s smooth, creamy, and dreamy. If your potatoes are cold, warming them briefly in the microwave first makes this step a breeze. Taste and add salt if needed. Chef’s Hack: For super fancy-looking tops, you can spoon the potatoes into a piping bag or a large zip-top bag with the corner snipped off.
- Assemble the Cups: Using a spoon or a cookie scoop, divide the meat mixture evenly among the 12 prepared muffin cups, filling each about ¾ full. Gently press it down with the back of the spoon. Now, top each one with a generous scoop (or a pretty pipe!) of mashed potatoes. If you’re using cheese, sprinkle a little on top of each now.
- Bake to Golden Bliss: Bake for 20-25 minutes, until the edges of the meat are bubbling and the potato tops are set with those gorgeous golden-brown spots. For extra crispiness on top, pop them under the broiler for 2-3 minutes at the end—just watch them like a hawk!
- The Grand Release: Let the tin cool on a wire rack for at least 10 minutes. This lets everything set up, so they hold their shape. Then, gently run a small knife or offset spatula around the edge of each cup. They should pop right out! Garnish with fresh herbs if you like.
How to Serve & Shine
Okay, you’ve got a tray of these gorgeous, golden-brown cuties. Now what? The possibilities are endless!
For a fun family dinner, serve 2-3 cups per person alongside a simple, bright green salad with a tangy vinaigrette to cut through the richness. It’s a complete, balanced meal that feels special.
Hosting a party or game day gathering? Place them on a platter as the ultimate finger food. Stick a small cocktail fork or even a festive toothpick in each one. I promise they’ll disappear faster than you can say “touchdown!”
For meal prep, let them cool completely, then store in an airtight container in the fridge. They reheat like a dream in the microwave or toaster oven for a quick lunch that’s miles better than any frozen dinner. They also freeze incredibly well—more on that in the FAQs!
Make It Your Own! Creative Twists & Swaps
I love this recipe because it’s a fantastic template for creativity. Don’t be afraid to play!
- Turkey or Chicken Twist: Swap the red meat for ground turkey or chicken. Use chicken broth instead of beef, and add a teaspoon of dried thyme or rosemary to the filling for an herby lift. Lighter but still packed with flavor!
- The Cozy Vegetarian Option: Use a plant-based ground “meat” or a cup of cooked brown lentils and a cup of finely chopped mushrooms for a meaty texture. Swap the beef broth for rich vegetable broth. You won’t miss the meat at all!
- Loaded Potato Style: Mix crispy chopped bacon, shredded cheddar cheese, and sliced green onions right into your mashed potato topping. It’s like a baked potato party on top of a savory pie!
- Sweet Potato Surprise: Replace the regular mashed potatoes with mashed sweet potatoes or even a cauliflower-sweet potato blend. The slight sweetness pairs amazingly with the savory filling.
- Spicy Fiesta Cups: Add a diced jalapeño to the onion, use a tablespoon of taco seasoning in place of some salt/pepper, and mix a can of drained black beans in with the peas and carrots. Top with a pepper jack cheese blend before baking.
Emily’s Kitchen Confidential
This recipe has evolved in my kitchen over the years from that first messy batch. I learned that letting the filling cool just a bit before assembling prevents the potato topping from sinking in. I also started using a cookie scoop for the potatoes—it’s faster and makes them all look uniform.
The biggest laugh? The time I tried to make “giant” ones in a jumbo muffin tin without adjusting the bake time. Let’s just say the filling was still a soup volcano when the tops were brown! We scooped it all into bowls, called it “Deconstructed Shepherd’s Pie Soup,” and loved it anyway. Cooking is about the joy, not perfection. If your first one doesn’t come out cleanly, just call it a “taster” and eat it with a smile.
Your Questions, Answered!
Q: Can I make these ahead of time?
A: Absolutely! You have two great options. 1) Assemble the cups completely, cover the tin tightly with plastic wrap, and refrigerate for up to 24 hours before baking. Add a few extra minutes to the bake time since they’ll be cold. 2) Bake them completely, let them cool, and freeze (see below).
Q: How do I freeze and reheat them?
A: They freeze beautifully! After baking and cooling, place them in a single layer on a baking sheet to “flash freeze” for 1-2 hours. Then, transfer to a freezer bag or container for up to 3 months. Reheat from frozen in a 350°F oven for 20-25 minutes, or in the microwave in 60-second bursts until hot.
Q: My filling is too watery/soggy. What happened?
A> This usually means the filling didn’t simmer long enough to reduce and thicken. Make sure you let it bubble away for the full 5-7 minutes until it’s quite thick. Also, ensure your frozen veggies aren’t carrying extra ice crystals—you can give them a quick rinse in a colander and pat dry before using.
Q: Can I use store-bought mashed potatoes?
A: You sure can! The refrigerated section of the grocery store often has pretty decent plain mashed potatoes. Just doctor them up with the butter and milk as directed. This is a huge time-saver for busy nights.
Nutritional Info (Because We’re All Curious!)
Here’s a general breakdown per mini pie, based on using 85/15 ground beef and 2% milk. Remember, variations will change this!
Makes: 12 mini pies
Prep Time: 20 minutes
Cook Time: 25 minutes
Total Time: 45 minutes
Per Mini Pie (approx.):
Calories: ~160 | Protein: 10g | Carbohydrates: 12g | Fat: 8g | Saturated Fat: 3.5g | Cholesterol: 30mg | Sodium: 200mg (varies with seasoning) | Fiber: 1g | Sugar: 2g
These are a wonderfully balanced little package! The protein and carbs will keep you satisfied, and you can easily adjust the fat content by using leaner meat, skipping the cheese, or using less butter in the potatoes. As always, this is an estimate—cooking is an art, not an exact science!
Final Thoughts from My Kitchen to Yours
Well, friend, we’ve reached the end of our mini pie journey. I hope you’re as excited to make these as I still am every single time. These Mini Shepherd’s Pie Cups embody everything I love about cooking: they transform a familiar comfort into something novel and shareable, they’re forgiving, and they bring people together over genuinely delicious food.
So, whether you’re whipping them up on a hectic Tuesday, packing them for a week of easy lunches, or proudly presenting them at your next get-together, I hope they bring a little extra joy and flavor to your table. Remember, the secret ingredient is always a dash of fun and a sprinkle of love. Now go forth, create, and chow down!
Made with love,
Chef Emily 🥧