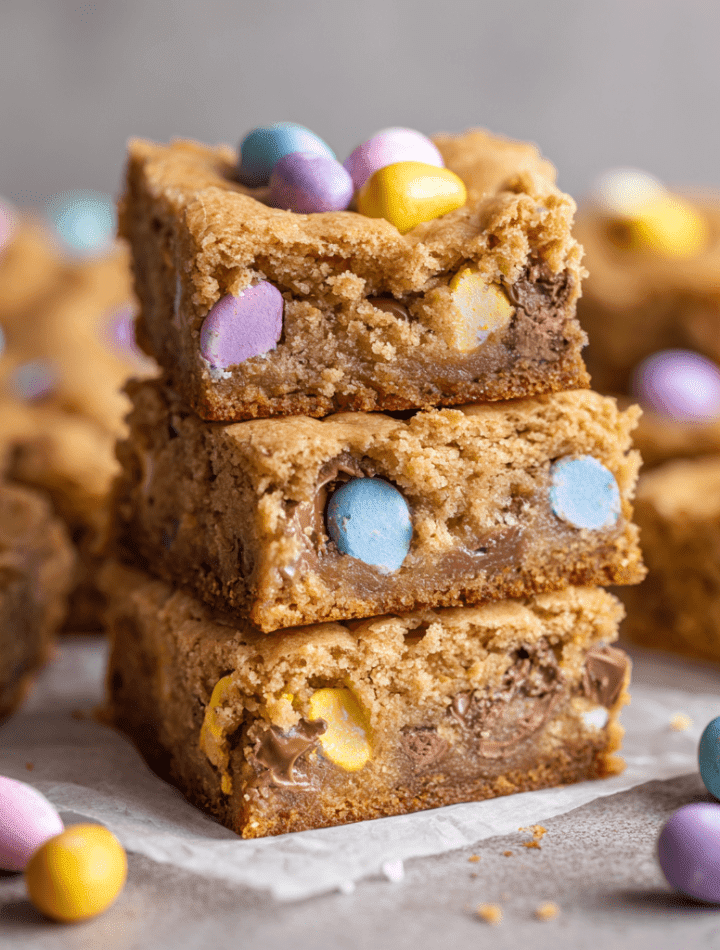
Say Hello to Your New Favorite Easter Treat: Mini Egg Blondies!
Hey there, friend! Pull up a chair and let me pour you a virtual cup of coffee. Do you smell that? It’s the warm, buttery, toasty scent of sugar and happiness wafting from my oven right this second. I’ve just pulled out a pan of what might be my most-requested springtime bake: Mini Egg Blondies.
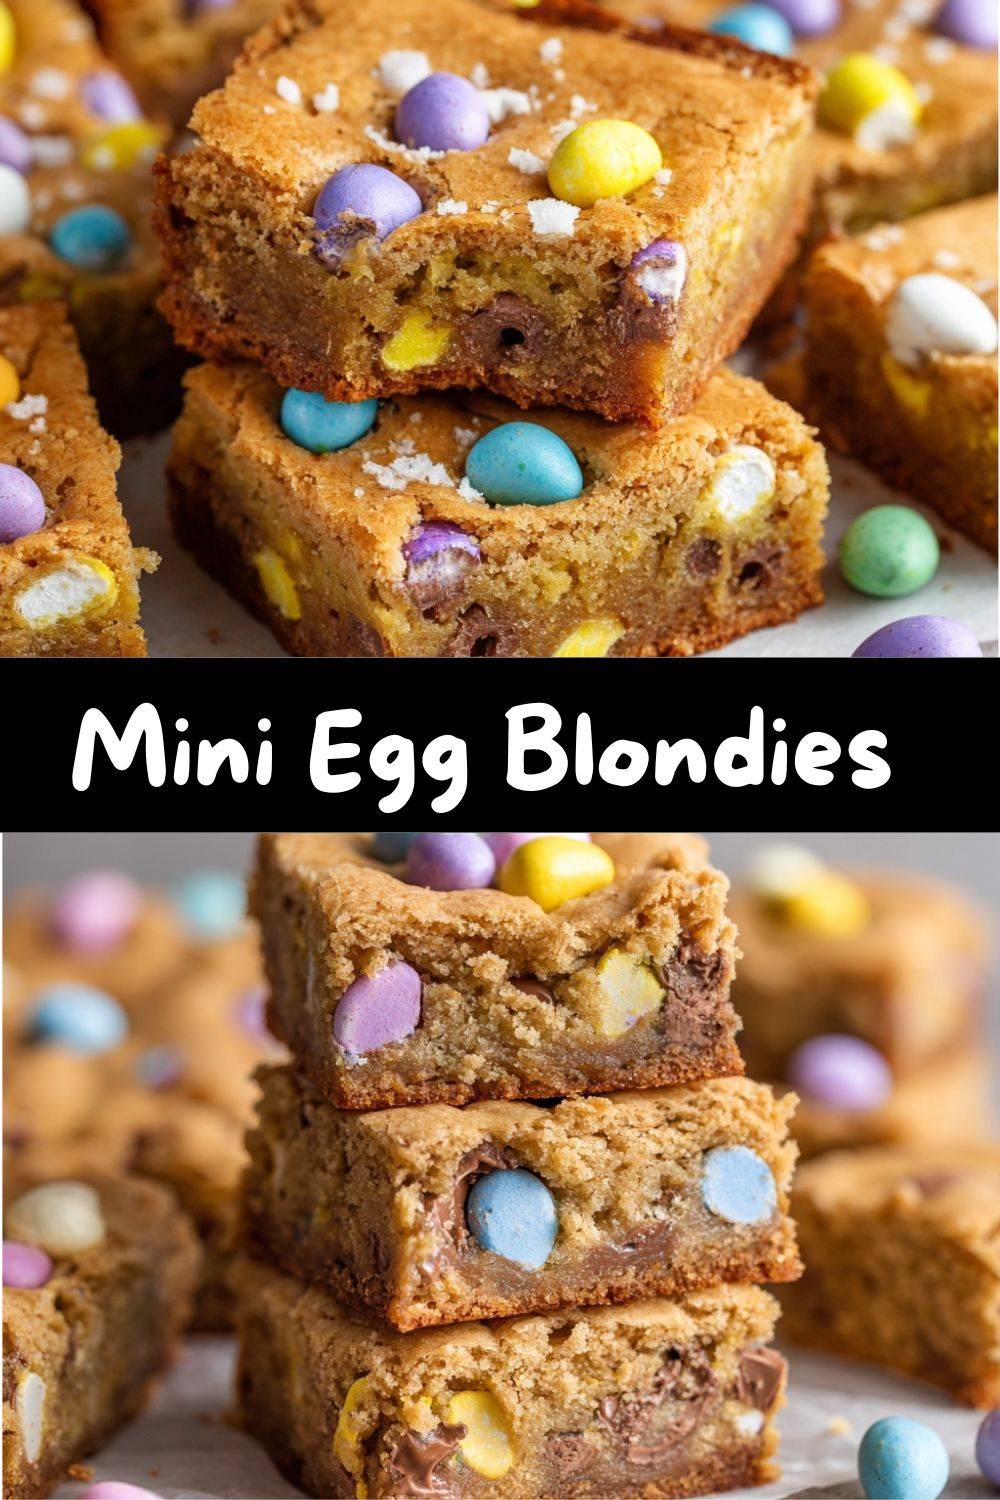
Now, I know what you’re thinking. “Emily, aren’t blondies just brownies without the chocolate?” And I’m here to tell you, with my apron strings tied tight and a smudge of flour on my cheek, that blondies are a glorious universe all their own. They’re the butterscotch-kissed, chewy-centered, crisp-edged cousin to the fudgy brownie, and when you stud them with pastel-colored Cadbury Mini Eggs? Magic happens. Pure, unadulterated, share-with-everyone-you-love (or hide in the breadbox) magic.
These bars are the edible embodiment of a sunny spring day. They have that deep, caramel-like flavor from brown sugar, a texture that’s somehow both dense and light, and then… CRUNCH. Those little candy shells give the most satisfying pop of color and texture against the soft, rich blondie. They’re festive without being fussy, impressive but stupidly easy to make. Whether you’re hosting an Easter brunch, need a knockout dessert for a potluck, or just want to treat yourself after a long week, this recipe is your new best friend in the kitchen. So, grab your favorite mixing bowl—let’s make something incredibly delicious together.
A Blondie Born from a Happy Kitchen Accident
My love affair with blondies started, like many great kitchen stories, with a happy accident. Picture a much younger me, about ten years old, helping my grandma make her famous brownies for a church bake sale. In my excitement, I grabbed the wrong bag from the pantry. Instead of cocoa powder, I dumped in a heaping cup of light brown sugar. Grandma, ever the patient saint, just chuckled and said, “Well, we’ve come this far. Let’s see what happens.”
What happened was a pan of golden, gooey bars that tasted like buttery toffee. We were shocked! They sold out faster than the brownies. That moment taught me one of my core cooking beliefs: some of the best creations come from a little improvisation and a lot of curiosity. Years later, when Cadbury Mini Eggs hit the stores every spring, my brain immediately went, “These need to be in something. Something chewy and buttery…” The memory of Grandma’s “accident” blondies flashed back, and the recipe was born. Every time I bake them, I think of her worn oven mitts and her belief that there are no real mistakes in the kitchen, just delicious discoveries waiting to happen.
Gathering Your Golden Ingredients
Here’s the beautiful part: you probably have most of this in your pantry already. This is a simple, humble list that transforms into something spectacular.
- ½ cup (1 stick) unsalted butter, melted – This is our flavor foundation. Melting the butter first gives us that dense, chewy texture we crave in a blondie. I use unsalted so we control the salt level. Chef’s Insight: Let it cool just slightly after melting so you don’t accidentally cook the egg in the next step!
- 1 cup packed light brown sugar – This isn’t just sweetener; it’s the SOUL of the blondie. The molasses in brown sugar creates that deep, almost caramel-like flavor and contributes to the gorgeous, crackly top. Pack it firmly into your measuring cup for the right amount.
- 1 large egg, at room temperature – Our binding agent and structure-builder. Room temperature blends more smoothly into the butter and sugar. Quick Tip: No time to wait? Place your egg in a bowl of warm water for 5 minutes.
- 1½ teaspoons pure vanilla extract – The flavor enhancer. It rounds out the butterscotch notes beautifully. Don’t be shy with it!
- 1 cup all-purpose flour – The backbone. We’re using just enough to give structure without making the bars cakey. For a Gluten-Free Swap: Use a 1:1 gluten-free flour blend with xanthan gum.
- ¼ teaspoon fine sea salt – The secret weapon! Salt makes all the flavors pop and balances the sweetness. If you only have table salt, use a scant ¼ teaspoon.
- ½ teaspoon baking powder – Our little lift. It gives the blondie a slight rise and a tender crumb, without making it puffy like a cake.
- ¾ cup Cadbury Mini Eggs, roughly chopped, plus extra for topping – The star of the show! Chopping them distributes the chocolate and colorful shell pieces throughout every bite. Substitution Tip: Out of season? Use chopped chocolate-covered toffee bits, peanut butter cups, or even plain chocolate chips.
Let’s Bake! Step-by-Step to Blondie Bliss
Ready? This is where the fun happens. I’ll walk you through each step with all my favorite kitchen hacks.
- Prep Your Stage. Preheat your oven to 350°F (175°C). This is non-negotiable for even baking. Take an 8×8-inch baking pan and line it with parchment paper, leaving an overhang on two opposite sides. This is my BEST tip: it creates a sling so you can lift the entire blondie slab out of the pan for pristine, crumb-free cutting. Lightly grease any exposed parts of the pan.
- The Butter & Sugar Tango. In a medium bowl, pour in your slightly cooled, melted butter. Add the packed brown sugar. Now, grab a whisk and go to town! Whisk vigorously for a good 45-60 seconds. You’re not just mixing; you’re dissolving the sugar into the butter and incorporating air. This step is KEY for that shiny, crackly top. The mixture will look like thick, glossy sand.
- Bring in the Backup. Crack in your room-temperature egg and add the vanilla. Switch to a spatula and mix until the mixture is completely smooth, thick, and homogenous. It will lighten in color just a bit. Scrape down the sides of the bowl.
- Dry Team Assemble. In a separate small bowl, whisk together the flour, salt, and baking powder. This ensures the leavening and salt are evenly distributed. Add these dry ingredients to your wet bowl. Now, use your spatula and fold gently. I mean gently. Mix until just a few streaks of flour remain. Overmixing is the enemy of a chewy, dense blondie—it develops the gluten and can make them tough.
- The Grand Fold-In. Add about two-thirds of your chopped Mini Eggs to the batter. Fold them in with a few swift strokes until just combined. The batter will be thick and glorious.
- Pan & Press. Scrape the batter into your prepared pan. Use the spatula to spread it evenly into all the corners. Now, take the remaining chopped Mini Eggs and press them gently into the surface. This guarantees a pretty, festive top. For a chef-y flourish, sprinkle on a tiny pinch of flaky sea salt. Trust me.
- The Bake-Off. Slide the pan into the center of your preheated oven. Bake for 22-25 minutes. Here’s my doneness test: The edges will be deeply golden brown and will have pulled away slightly from the pan. The center should look set, but if you give the pan a gentle nudge, it should have a very slight, soft jiggle—not a liquid wave. A toothpick inserted near the edge should come out clean, but inserted in the center might have a few moist crumbs. That’s perfect! Remember, they continue to cook as they cool.
- The Test of Patience. This is the hardest part. Let the pan cool completely on a wire rack. I know, I know. The smell is torture. But slicing into warm blondies is a recipe for a gooey mess. For the cleanest, most beautiful bars, let them cool fully. Use the parchment sling to lift them onto a cutting board.
How to Serve These Golden Gems
Presentation is part of the joy! Once completely cool, use a sharp chef’s knife to slice into 9 generous squares or 12 smaller rectangles. Wipe the knife clean between cuts for super-sharp edges.
These blondies are a star all on their own, perched on a simple plate. But if you want to elevate them for a special occasion, here are a few ideas: Place a square on a dessert plate with a small scoop of high-quality vanilla bean ice cream or a dollop of softly whipped cream. The warm-cold contrast is dreamy. For a brunch spread, stack them on a cute cake stand alongside fresh berries. And my personal favorite way? Warmed for about 10 seconds in the microwave until the chocolate bits just start to melt, alongside a giant mug of cold milk or a hot latte. Pure comfort.
Get Creative! Blondie Variations to Try
Once you master the base, the world is your blondie oyster! Here are a few of my favorite twists:
- Salted Caramel Pretzel: Fold in ½ cup of crushed pretzel pieces and ½ cup of caramel baking bits. Drizzle with melted caramel and more sea salt after baking.
- Cookies & Cream: Swap the Mini Eggs for 1 cup of roughly chopped cream-filled chocolate sandwich cookies (like Oreos). The black and white look is stunning.
- Everything But the Kitchen Sink: Go full trail mix! Use ½ cup semi-sweet chocolate chips, ¼ cup toasted pecans, and ¼ cup sweetened shredded coconut.
- Peanut Butter Paradise: Swirl ⅓ cup of warm peanut butter into the batter before baking, and use chopped peanut butter cups instead of Mini Eggs.
- Festive Sprinkle Blondies: For any holiday, replace the Mini Eggs with ¾ cup of festive sprinkles or seasonal M&Ms. Birthdays, Christmas, Fourth of July—you name it!
From My Kitchen to Yours: Chef’s Notes
This recipe has seen many iterations in my kitchen! I once, in a sleep-deprived haze (new baby at home!), accidentally used a whole cup of baking powder instead of a half teaspoon. Let’s just say we got blonde cake that tasted like metal. A valuable lesson in careful measuring! Over time, I’ve landed on this perfect ratio. I also used to chop the Mini Eggs super fine, but I love the bigger chunks of chocolate you get from a rough chop—it creates amazing pockets of melty goodness. The biggest evolution? That parchment paper sling. Game-changer for presentation. These blondies are a testament to the idea that sometimes, the simplest recipes, made with love and good ingredients, are the ones that become legends.
Your Questions, Answered (FAQs & Troubleshooting)
Q: My blondies came out cakey and dry. What happened?
A: The most common culprits are overmixing the batter after adding the flour (which develops gluten) or overbaking. Remember, mix until *just* combined and pull them out when the center is still soft-set. Also, double-check your measuring—too much flour will dry them out.
Q: Can I double this recipe?
A: Absolutely! Double all ingredients and bake in a 9×13-inch pan. The bake time will be a bit longer, likely 30-35 minutes. Use the same visual and jiggle tests for doneness.
Q: My blondies are too greasy.
A: This usually means the butter wasn’t measured correctly or the sugar wasn’t whisked in thoroughly enough. Make sure you’re accurately measuring your butter (1 stick = ½ cup) and whisk that butter-sugar combo really well until it’s fully combined and glossy.
Q: Can I make these ahead of time?
A> Yes, they are actually even better the next day! The flavors meld and the texture becomes even more perfectly chewy. Store them in an airtight container at room temperature for up to 4 days, or freeze for up to 3 months.
Nutritional Information (Because We’re All About Balance!)
Okay, let’s be real: these are a treat, meant to be savored and enjoyed. But if you’re curious about the details, here’s a general breakdown per bar (based on 12 servings): Approximately 230 calories, 10g fat, 30g carbohydrates, 20g sugar, 2g protein. Remember, this is an estimate and can vary based on specific ingredients and exact portion size. My philosophy? Enjoy real, homemade treats mindfully. When you bake it yourself, you control the ingredients and the love that goes in—and that counts for something, too. So have a blondie, savor every bite, and maybe go for an extra walk with a friend. Life (and dessert) is all about the sweet balance.
Final Thoughts: Share the Love!
And there you have it—my go-to recipe for spreading joy, one buttery, crunchy, chocolate-filled square at a time. I hope these Mini Egg Blondies bring as much happiness to your kitchen as they have to mine. They’re more than just a dessert; they’re a conversation starter, a memory maker, and a simple way to say, “I’m thinking of you.”
If you make them (and I really hope you do!), I’d be absolutely thrilled if you tagged me @TastyChow on social media or left a comment on the blog. There’s nothing I love more than seeing your creations and kitchen stories. Now, go preheat that oven, get a little messy, and make something delicious. Happy baking, my friend!
With love and a full baking sheet,
Emily