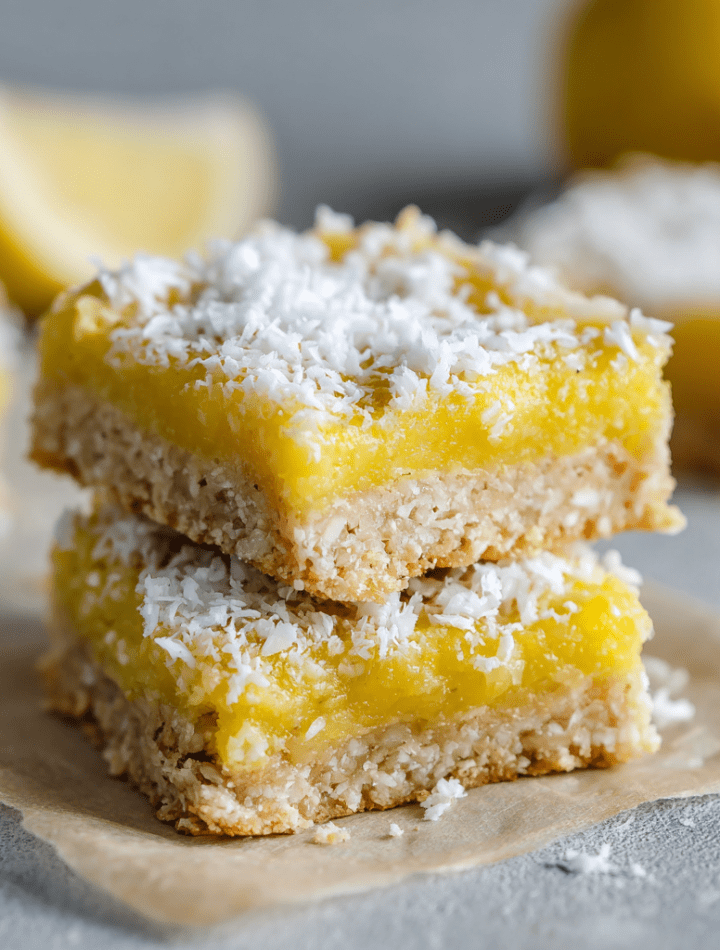
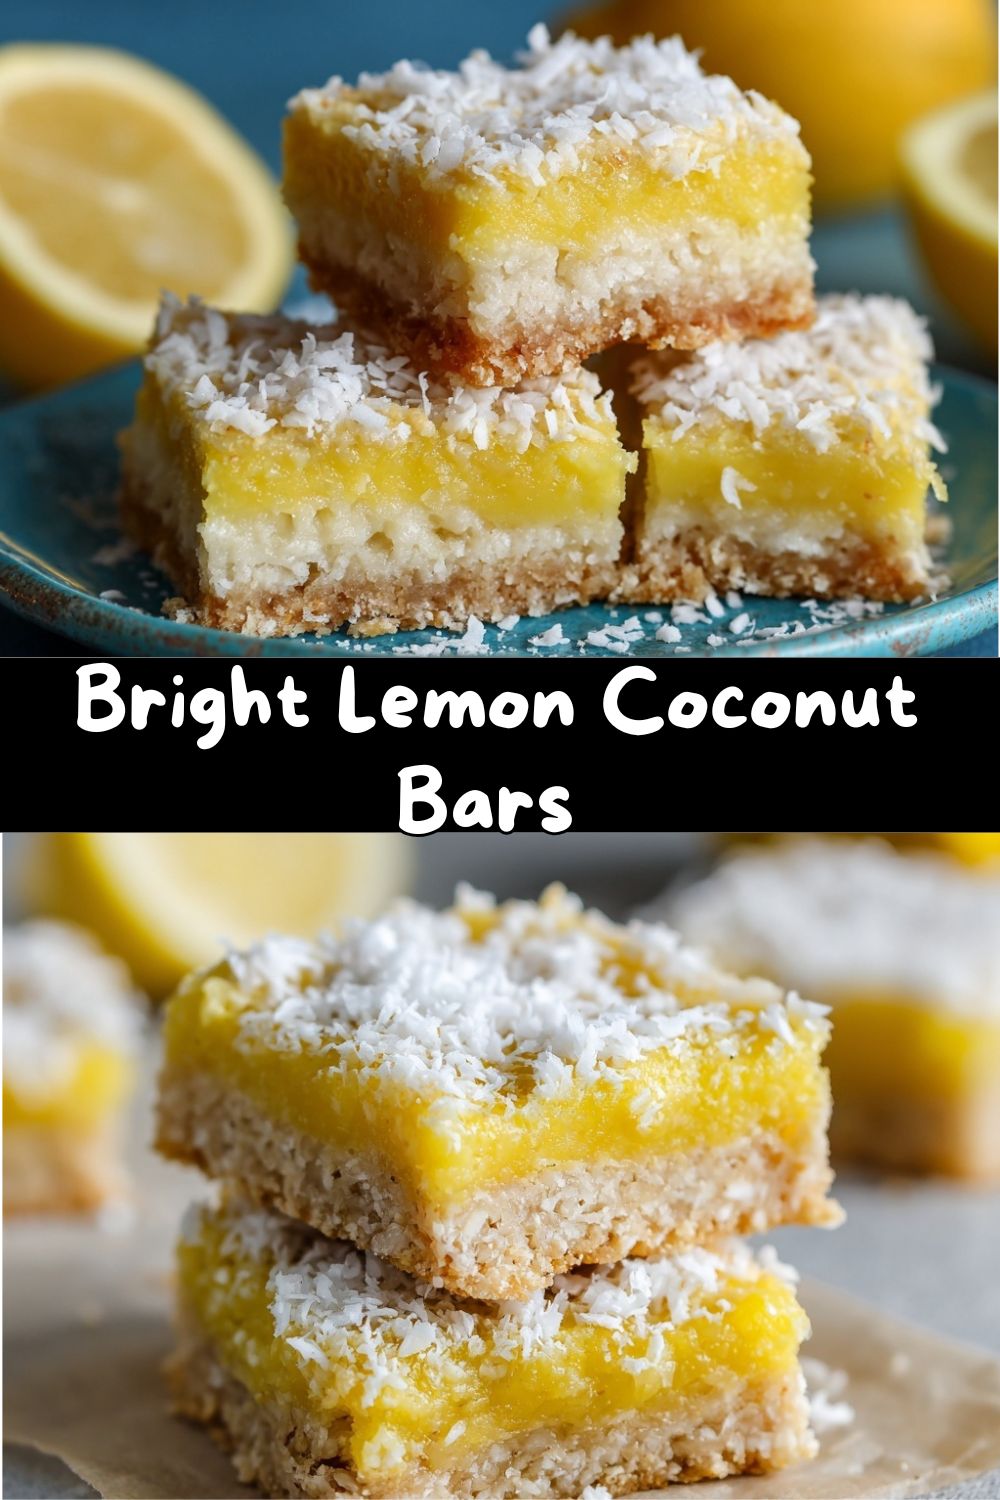
Sunshine in a Square: My Bright Lemon Coconut Bars
Hey there, fellow food lover! 👋 Have you ever bitten into something that just instantly lifts your mood? That’s the magic I was chasing the first time I whisked together these Bright Lemon Coconut Bars. Picture this: a buttery, nutty coconut-oat crust that crumbles just right, topped with a layer of lemon filling so vibrant and tangy-sweet it tastes like a sunbeam made edible. These bars are my edible answer to a gray day, a burst of tropical cheer you can hold in your hand.
I’m all about recipes that feel like a celebration but don’t require a culinary degree or a whole day to make. These lemon coconut bars are exactly that. They’re naturally gluten-free, sweetened with maple syrup, and come together with simple, wholesome ingredients. Whether you’re craving a post-lunch pick-me-up, need a stunning (yet easy!) dessert for a picnic, or just want to make your kitchen smell like a sunny paradise, this recipe is your new best friend. So, tie on that apron—the messy one is totally acceptable here—and let’s bake a little happiness.
The Lemon Tree & The Lesson
My love affair with lemon desserts started not in a fancy patisserie, but under the sprawling branches of my neighbor’s overgrown lemon tree as a kid. Mrs. Henderson’s tree was legendary, producing more tart, knobby fruit than she could ever use. She’d call over the fence, “Emily! Basket’s full!” and I’d come running, arms ready to be loaded with sunshine-yellow treasure.
One sweltering summer day, I decided to be “helpful” and make her a thank-you dessert with my haul. I attempted a lemon curd… without a recipe. Let’s just say my first creation was a chaotic, eggy, overly bitter soup that even our dog turned his nose up at. But Mrs. Henderson, bless her, didn’t laugh. She pulled up a stool, showed me how to properly zest a lemon (“Just the yellow, honey, the white is a troublemaker”), and taught me the magic balance between tart juice and sweetener. That afternoon, covered in powdered sugar and lemon zest, was where I learned that kitchen flops are just stepping stones to something wonderful. These Bright Lemon Coconut Bars are the grown-up, perfected version of that lesson—all the bright joy, none of the curdled drama.
Gathering Your Sunshine Ingredients
Here’s what you’ll need to create this taste of the tropics. I’ve added my chef insights so you know the *why* behind each item!
For the Coconut-Oat Crust:
- 1 cup rolled oats: Old-fashioned oats give the best texture. They get ground up with the other ingredients to create a flour-like base that’s hearty and holds together beautifully. Chef’s Insight: Don’t use quick oats—they can make the crust gummy.
- ¾ cup shredded unsweetened coconut: The star of the crust! Unsweetened is key so we control the sweetness. It toasts up and gives that incredible tropical flavor and chewy bite.
- ½ cup almond flour: This adds richness, helps bind the crust, and keeps it gloriously gluten-free. Sub Tip: In a pinch, you can use an additional ½ cup of oats, but the texture will be less tender.
- ¼ cup maple syrup: Our natural sweetener. It adds a warm, caramel-like depth that pairs amazingly with coconut. Pure maple syrup is worth it here!
- ¼ cup coconut oil, melted: The binding agent that also amps up the coconut flavor. Make sure it’s melted but not hot. Sub Tip: Unsalted butter works if you’re not dairy-free.
- Pinch of salt: Never, ever skip this! Salt makes all the flavors pop and balances the sweetness perfectly.
For the Luscious Lemon Filling:
- ½ cup fresh lemon juice (about 3–4 lemons): FRESH IS NON-NEGOTIABLE. Bottled juice simply won’t give you that bright, sunny tang. Roll your lemons on the counter before juicing to get every last drop.
- Zest of 1 lemon: This is where the potent, aromatic lemon oil lives. It infuses the filling with incredible fragrance.
- ⅓ cup maple syrup: Sweetens the tang. You can adjust this up or down by a tablespoon based on your lemon’s tartness and your sweet tooth.
- 3 tbsp cornstarch or arrowroot starch: This is our magic thickener. It creates that silky, set filling without eggs. I love arrowroot for a slightly clearer finish, but cornstarch works perfectly.
- ½ cup coconut milk: Full-fat will give you the creamiest, most luxurious texture, but light works too for a slightly lighter bar. Shake the can well!
- ¼ tsp turmeric (for color, optional): My little secret! A tiny pinch gives the filling a gorgeous, sunshiny yellow hue naturally, without any artificial dyes. You won’t taste it, I promise.
Optional Topping:
- A sprinkle of toasted shredded coconut or a dusting of powdered sugar right before serving adds a lovely finishing touch.
Let’s Build These Bars! Step-by-Step
Ready? Let’s turn these beautiful ingredients into your new favorite dessert. I’ll walk you through each step with all my favorite tips.
- Preheat & Prep: Fire up your oven to 350°F (175°C). Take an 8×8-inch baking pan and line it with parchment paper, leaving some overhang on two sides. Chef’s Hack: This “sling” is your best friend! It lets you lift the entire batch of bars out of the pan for easy, crumble-free slicing later. Lightly grease the exposed parts of the pan.
- Make the Crust: In a food processor, add your rolled oats, shredded coconut, almond flour, and salt. Pulse 8-10 times until the mixture looks like coarse sand and the oats are broken down. Drizzle in the melted coconut oil and maple syrup. Pulse again until the mixture starts to clump together when pinched. It should look like damp sand. Pour this mixture into your prepared pan. Now, here’s the secret to a perfect crust: press it down HARD. Use the bottom of a measuring cup or a glass to really compact it into an even, firm layer. No wimpy pressing allowed! This ensures it holds together when sliced. Bake for 12-14 minutes until the edges are just turning a light, golden brown. It will smell amazing.
- Create the Lemon Filling: While the crust bakes, let’s make the magic. In a medium saucepan, whisk together the lemon juice, lemon zest, maple syrup, and your chosen starch (cornstarch or arrowroot) until completely smooth and no lumps remain. This is crucial! Then, whisk in the coconut milk and that optional pinch of turmeric.
- Cook to Perfection: Place the saucepan over medium heat. Now, you become a stirring machine. Whisk constantly! The mixture will start thin, then begin to thicken and become opaque. After about 5-7 minutes, it will bubble and turn into a thick, pudding-like consistency that coats the back of a spoon. Chef’s Tip: Once it starts bubbling, let it cook for a full 60 seconds while whisking—this ensures the starch is fully activated and your filling will set properly. Remove it from the heat immediately.
- Assemble & Bake: Your crust should be out of the oven now. Pour the warm, thick lemon filling directly over the hot crust. Spread it quickly into an even layer with a spatula. Pop the pan back into the oven for 15-18 minutes. You’re looking for the filling to be fully set—it might puff slightly and the center should no longer jiggle like a liquid when you gently shake the pan.
- The Patience Test (The Hardest Part!): Remove the pan and place it on a wire rack. Let the bars cool completely at room temperature. This can take an hour or so. Then, cover the pan and transfer it to the refrigerator to chill for at least 2 hours, or preferably overnight. This chilling step is non-negotiable for clean, perfect slices. It lets the filling firm up completely.
- Slice & Serve: Use the parchment paper sling to lift the entire square of bars onto a cutting board. Slice into 9 or 16 squares with a sharp knife. For super-clean cuts, wipe the knife clean between each slice. Sprinkle with toasted coconut or a whisper of powdered sugar right before serving.
How to Serve These Tropical Gems
Presentation is part of the fun! These bars are stunningly simple on their own, but a little flair never hurts.
For a casual treat, just stack them on a cute plate or in a lunchbox. For something more special, place each bar on a small dessert plate with a tiny dollop of whipped coconut cream or a fresh raspberry on the side. In the summer, I love serving them slightly chilled with a scoop of vanilla bean ice cream or a few fresh blueberries scattered around the plate—the berry-lemon combo is a classic for a reason!
They’re perfect for a spring brunch, a bake sale showstopper, or as a sweet, “not-too-heavy” ending to a BBQ. Pop them into pretty cupcake liners for individual portions that are easy to grab and go.
Make It Your Own: Delicious Twists
Love the base recipe? Let’s play! Here are a few ways to switch it up:
- Mango-Lime Magic: Swap the lemon juice for lime juice and add ¼ cup of pureed fresh mango to the filling mixture before cooking. Top with toasted coconut and a sprinkle of chili-lime salt for a truly epic twist.
- Berry Swirl: After pouring the lemon filling onto the crust, drop small spoonfuls of your favorite seedless berry jam (raspberry is my go-to) on top. Use a toothpick to swirl it gently for a beautiful marbled effect before the second bake.
- Chocolate-Dipped Delight: For the decadent version, melt ½ cup of dark chocolate with a teaspoon of coconut oil. Dip one corner of each chilled bar into the chocolate and let it set on parchment paper. Sweet, tangy, and chocolatey—heaven.
- Nutty Crust Upgrade: Replace ¼ cup of the oats in the crust with ¼ cup of raw cashews or macadamia nuts. Process until fine. This adds an incredible, buttery depth to the base.
- Vegan “Meringue” Topping (Advanced Fun): For a showstopping look, top the cooled and chilled bars with dollops of vegan aquafaba meringue and brûlée it with a kitchen torch for a toasted marshmallow-like finish.
From My Kitchen to Yours: Chef’s Notes
This recipe has been my sunny-side-up staple for years, and it’s evolved with every batch. The turmeric trick came after a batch where my lemons were surprisingly pale, and I wanted that cheerful color without food coloring. Game changer!
I’ve also learned that the quality of your coconut makes a HUGE difference. Look for unsweetened, medium-shred coconut for the best texture. And a funny story: I once, in a frantic baking rush, tried to speed up the chilling process by putting the warm pan directly in the freezer. The thermal shock made the glass pan crack (oops!). So learn from my mistake—always cool to room temp first! These bars taste even better on day two, as the flavors fully meld, so don’t hesitate to make them ahead.
FAQs & Troubleshooting
Q: My filling didn’t set! It’s still runny after chilling. What happened?
A: This usually means the starch wasn’t fully cooked. Next time, make sure you bring the filling to a full bubble (big bubbles popping on the surface) and cook, whisking constantly, for a full 60 seconds after it starts bubbling. If it’s already runny, you can try re-cooking it: gently scrape it back into a saucepan, add an extra teaspoon of starch mixed with a tablespoon of cold water, and re-cook until thickened, then re-chill.
Q: Can I use something besides almond flour for the crust?
A> Absolutely! For a nut-free version, you can use gluten-free oat flour or all-purpose gluten-free flour blend in equal measure. The texture will be slightly different but still delicious.
Q: Why is my crust crumbly and not holding together?
A> You likely need to press it more firmly into the pan. Really pack it down! Also, ensure your coconut oil is properly melted and that you’ve mixed the crust until it holds together when pinched. If it’s still too dry, add another half tablespoon of melted coconut oil or maple syrup.
Q: How long do these bars keep?
A> Stored in an airtight container in the fridge, they are perfect for up to 5 days. You can also freeze them for up to 2 months! Slice first, then freeze on a parchment-lined tray before transferring to a container. Thaw in the fridge overnight.
A Note on Nutrition
While I’m a chef, not a dietitian, I do believe in being mindful of what we’re feeding ourselves and the people we love. These Bright Lemon Coconut Bars strike that happy middle ground between treat and feel-good indulgence. They’re naturally gluten-free, sweetened with maple syrup instead of refined sugar, and made with wholesome ingredients like oats, coconut, and fresh citrus.
Lemon brings brightness and vitamin C, coconut adds healthy fats that help keep you satisfied, and the lack of heavy dairy makes these bars feel lighter than traditional lemon desserts. In other words, they’re the kind of sweet you can enjoy without a side of guilt — just pure sunshine and balance.
Approximate nutrition per bar (based on 16 bars):
Calories: ~170
Fat: 9g
Carbohydrates: 20g
Sugar: 10g
Protein: 3g
Fiber: 3g
(As always, values may vary depending on brands and portion size.)
Final Thoughts from My Kitchen to Yours
And there you have it, my friend — sunshine in a square. These Bright Lemon Coconut Bars are everything I love about baking: simple, joyful, and full of heart. They’re the kind of dessert you make when you want to brighten someone’s day, including your own. No fuss, no fancy equipment — just good ingredients, a little patience, and a whole lot of lemony cheer.
So bake a batch, crack a window, let the citrusy scent fill your kitchen, and savor that first tangy bite. If you ask me, desserts like this are proof that joy doesn’t have to be complicated — sometimes it’s just oats, coconut, and a few lemons doing what they do best.
If you make these, I’d love to see them. Tag me and share your sunshine. Until next time, keep cooking with curiosity, confidence, and just a little bit of mess.
With love and lemon zest,
Hannah 🍋✨