Let’s Talk About That Perfect Crust
Hey friends! Let’s get real for a second. How many times have you stood in the grocery store aisle, staring at those refrigerated pie crusts, feeling a little… guilty? You want that magical, made-from-scratch taste, but the idea of making pastry dough feels shrouded in mystery, like it’s some secret club only for grandmas and professional bakers.
I’m here to pull back the curtain, grab your hand, and say, “You’ve totally got this.” This recipe is my kitchen workhorse, my go-to, my “oh-crap-company’s-coming” savior. It comes together with just four basic ingredients, requires zero fancy equipment, and delivers a crust that’s flaky, tender, and so buttery it’ll make you want to write a love song about it. We’re talking about the kind of dough that turns a simple fruit filling into a masterpiece and makes a weeknight quiche feel like a special occasion. So tie on that apron (the messy one is preferred), and let’s make some magic together. Trust me, once you taste the difference, you’ll never go back to the store-bought stuff.
The Pie Crust That Started It All
My love affair with this dough started, like many good things, with a little bit of failure and a whole lot of butter. I was about ten, “helping” my grandma make her famous apple pie for a family reunion. My job was to cut the shortening into the flour. I was overzealous, mashing it into a smooth, dense paste. Grandma took one look, chuckled, and said, “Honey, you’re making biscuit dough. For pie, we want it to look like lumpy peas and gravel.”
She showed me how to use my fingers, quickly and lightly, leaving big, glorious chunks of fat throughout the flour. “Those lumps,” she whispered, like she was sharing a state secret, “are what make the steam pockets. Steam is what makes the flakes.” When that pie came out of the oven, the crust was a golden-brown, layered masterpiece. That moment—the smell, the crunch, the realization that perfection was in the imperfect lumps—stuck with me. This recipe is that lesson, refined over years but always honoring the “peas and gravel” wisdom. It’s not just a technique; it’s a little edible heirloom.
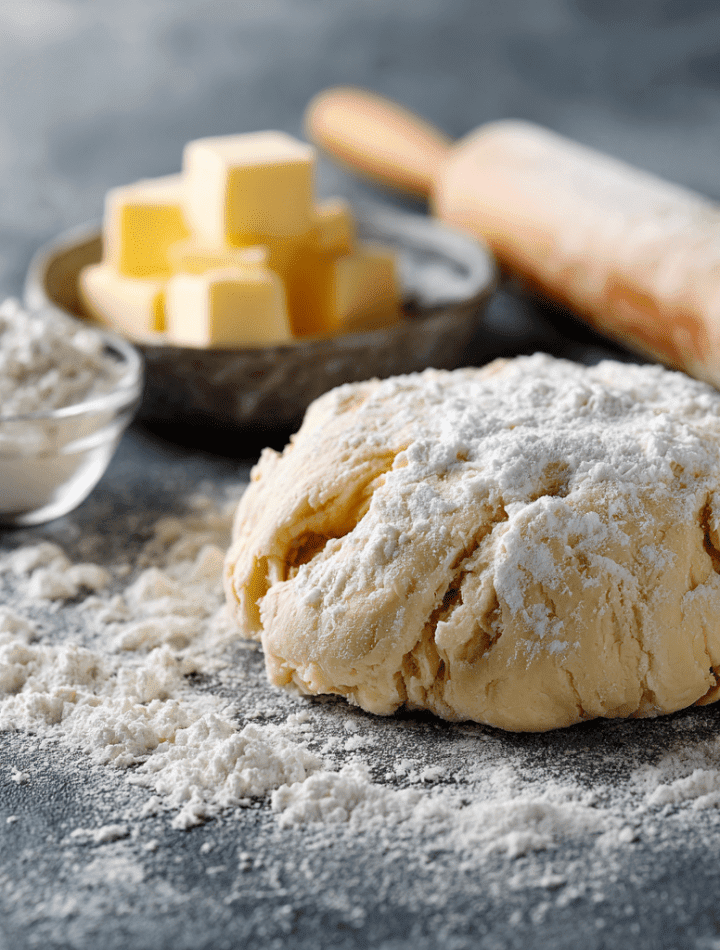
Gathering Your Flaky Foundation
See? I told you it was simple. The magic isn’t in a long list of exotic ingredients; it’s in how we treat these humble staples. Here’s what you need and why each one matters:
- 2 ½ cups (315 g) All-Purpose Flour: The backbone. I use standard, unbleached all-purpose flour for the perfect balance of tenderness and structure. For a slightly more delicate crust, you can swap out ½ cup for cake flour. Chef’s Insight: Spoon and level your flour into the measuring cup! Don’t scoop directly from the bag, or you’ll pack in too much and end up with a tough dough.
- 1 teaspoon Salt: The flavor booster. Never skip this! Salt enhances the buttery flavor and balances sweetness in desserts. It’s the quiet hero that makes everything taste more like itself.
- 1 tablespoon Granulated Sugar (optional): The subtle sweetener. I add this for any sweet pie application. It encourages browning and adds a whisper of flavor. For a savory quiche or pot pie, leave it out.
- 1 cup (225 g) Cold Unsalted Butter, Cubed: THE STAR. Use the best butter you can for the best flavor. It must be cold, cold, cold. I chop it, then pop it back in the freezer for 10 minutes. Those solid fat pieces are what create flaky layers when they melt in the oven. Substitution Tip: For a slightly more tender (less flaky) crust, you can use half butter, half cold vegetable shortening.
- 6–8 tablespoons Ice-Cold Water: The binder. The key word is “ice-cold.” I add a few ice cubes to a glass of water and measure from that. We add just enough to bring the dough together without making it wet. Chef’s Hack: For an extra-tender, foolproof dough, replace 1-2 tablespoons of the water with cold vodka or vinegar. The alcohol (which evaporates) or acid inhibits gluten development, leading to a more tender crust.
Let’s Build Some Layers: A Step-by-Step Guide
Ready? We’re going to do this with confidence. Read through once, then just go for it. It’s more forgiving than you think!
- Mix the Dry Goods: In a large, wide bowl, whisk together your flour, salt, and optional sugar. That’s right, just a quick whisk to get everyone acquainted and aerated. This little step prevents over-mixing later.
- Cut In the Butter – The “Peas & Gravel” Stage: Scatter your tiny, glacier-cold butter cubes over the flour. Now, using a pastry cutter, two forks, or (my preferred method for control) your fingertips, start working the butter into the flour. Your goal is to break the butter down until the mixture looks like coarse meal with lots of pea-sized butter chunks still visible. Chef’s Tip: Work quickly so the butter stays cold. If your hands are warm, run them under cold water first! Those visible butter bits are your future flakes. Don’t turn it into a uniform paste.
- Add the Water – The Gentle Touch: Drizzle 4 tablespoons of your ice-cold water over the flour-butter mixture. Using a rubber spatula or fork, gently fold and stir. Add more water, one tablespoon at a time, just until the dough begins to clump together. You should be able to pinch a bit and have it hold its shape. It will look shaggy and messy—that’s perfect!
- Bring It Together & Chill: Dump the shaggy mass onto a clean counter. Use your hands to gently press and knead it, just 3-4 times, into a cohesive ball. Divide it in half and flatten each half into a 1-inch thick disk. Do not overwork it! Wrap each disk tightly in plastic wrap. This is non-negotiable: refrigerate for at least 30 minutes, or up to 2 days. This relaxes the gluten and re-chills the butter, which is essential for easy rolling and maximum flakiness.
- Roll & Use: When you’re ready, take one disk out of the fridge and let it sit for 5 minutes. On a lightly floured surface, roll from the center outward, turning the dough a quarter turn often to prevent sticking, until it’s about 1/8-inch thick and larger than your pie dish. Roll with confidence! Gently fold it into quarters, transfer to your dish, unfold, and trim/ crimp as desired. For a pre-baked (blind-baked) shell, prick the bottom with a fork, line with parchment and pie weights, and bake at 375°F (190°C) for 15-20 minutes.
Show Off Your Beautiful Dough!
Okay, superstar, you have this gorgeous, homemade pastry dough. Now what? The world is your buttery oyster!
For a classic double-crust fruit pie (apple, cherry, peach), use one disk for the bottom, add your filling, and roll out the second for a gorgeous lattice or solid top. Brush with an egg wash (1 egg + 1 tbsp water) and sprinkle with coarse sugar for a sparkling, professional finish.
For a rustic galette, roll one disk into a rough circle, pile sweet or savory fillings in the center, and fold the edges up over the filling. It’s beautifully imperfect and impossible to mess up.
For savory delights, use it as the base for a deep-dish quiche Lorraine, individual chicken pot pies, or elegant goat cheese and caramelized onion tarts. Serve a quiche warm or at room temperature with a simple green salad dressed in a sharp vinaigrette to cut the richness.
Make It Uniquely Yours: Fun Twists & Swaps
Once you master the basic formula, play with it! Here are a few of my favorite riffs:
- Herb & Cheese Savory Crust: Add ½ cup finely grated Parmesan or sharp cheddar and 1 tablespoon of fresh chopped herbs (like thyme or rosemary) to the dry ingredients. Perfect for quiches or savory tarts.
- Whole Wheat Honey Crust: Substitute 1 cup of the all-purpose flour with whole wheat flour and add 1 tablespoon of honey to the ice water. It adds a lovely, nutty depth, especially great for autumn pies.
- Cookie-Cutter Pie Toppers: Roll out your second dough disk and use small cookie cutters (hearts, stars, leaves) to create shapes. Arrange them artfully over your filling instead of a full top crust. It’s adorable and lets the filling peek through.
- Sweet & Spicy Sugar Crust: Mix 1 tablespoon of the sugar with a pinch of cinnamon or cardamom before adding it to the flour. A wonderful complement to apple or pear pies.
- Gluten-Free Option: Use a trusted 1:1 gluten-free all-purpose flour blend (like Bob’s Red Mill or King Arthur). You may need a touch less water, so add slowly. The texture will be slightly more crumbly but still delicious.
From My Messy Apron to Yours
This recipe has evolved from my grandma’s “peas and gravel” lesson through countless kitchen experiments. I once tried to make it in a food processor on a hot day and ended up with pastry soup. Lesson learned: sometimes, your hands are the best tool. I also used to be terrified of adding enough water, resulting in a crumbly dough that cracked everywhere. Now I embrace the shaggy mess—it always comes together.
My biggest piece of advice? Don’t strive for perfection. Strive for flavor and joy. A slightly misshapen, homemade crust bursting with buttery layers will always, always beat a perfect, bland, store-bought one. This dough freezes beautifully too (wrap the disks well and freeze for up to 3 months). Thaw in the fridge overnight, and you’re always just 30 minutes away from fresh pastry magic.
Your Questions, Answered
Q: My dough is tough and chewy, not flaky. What happened?
A: This is almost always due to overworking. You either cut the butter in too finely, added too much water, or kneaded the dough too vigorously. Remember, we want visible butter bits and a just-barely-holding-together dough. Next time, use a lighter touch and trust the process.
Q: The dough is super crumbly and won’t roll out without cracking.
A: It needs a touch more moisture. Sprinkle a teaspoon of cold water over the dry spots and gently press it in. Also, ensure you let the chilled dough sit at room temp for 5-10 minutes before rolling—too-cold dough can crack.
Q: Can I make this in a food processor?
A: You can, but be careful! Pulse the dry ingredients and butter until just coarsely combined (about 10 pulses). Then, pulse in the water 1 tbsp at a time until it just begins to clump. It’s very easy to over-process in a machine, so when in doubt, use your hands.
Q: How long can I store the dough?
A: Wrapped tightly, it lasts 2-3 days in the fridge. You can also freeze the disks for up to 3 months. Thaw in the refrigerator before using.
A Note on Nutrition & Indulgence
Let’s be honest: this is a treat. It’s a buttery, glorious foundation for celebrations, cozy nights, and sharing food with people you love. While I’m all about balance, I also believe in enjoying real, homemade food without guilt. This recipe uses simple, recognizable ingredients—flour, butter, salt, water. You control what goes in, unlike many store-bought versions with preservatives.
Here’s a rough nutritional breakdown per 1/8th of a single crust (because knowledge is power!):
- Calories: ~240 kcal
- Fat: 16g (Saturated Fat: 10g)
- Carbohydrates: 22g
- Protein: 3g
- Sodium: 150mg
Alright, friend—let’s wrap this up with a bow of butter and confidence. Here’s a natural, heartfelt ending that flows right from your last section and leaves readers feeling empowered (and ready to bake):
And that’s it, y’all. That’s the crust.
Not the intimidating, fussy, “only-if-you’ve-been-baking-for-40-years” kind—but the kind you make once and suddenly realize, Oh… I can do this. The kind that turns a bowl of fruit into a celebration, a carton of eggs into a quiche worth lingering over, and an ordinary afternoon into something quietly special.
This pie crust isn’t about perfection. It’s about trust—trusting your hands, trusting cold butter, trusting that a little mess is part of the magic. Some days your edges will be rustic. Some days your lattice won’t be Pinterest-perfect. And every single time, it will still taste like love, effort, and real homemade goodness.
So keep a couple of dough disks tucked in your freezer. Pull one out when inspiration strikes or company surprises you. Roll it out on a floured counter, breathe in that clean, buttery scent, and remember: this is how kitchen confidence is built—one flaky layer at a time.
If you make this crust (and I truly hope you do), let it be the foundation for memories. Sunday pies. Holiday quiches. “Just because” tarts. The kind of food that gathers people close and makes them feel at home.
From my messy apron to yours,
Hannah 💛🥧