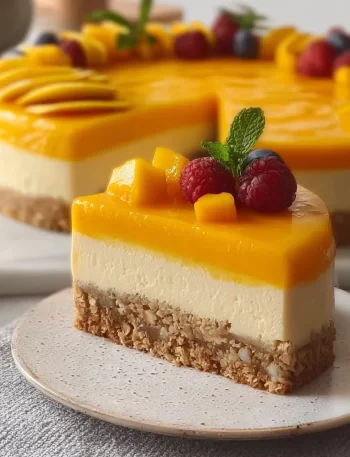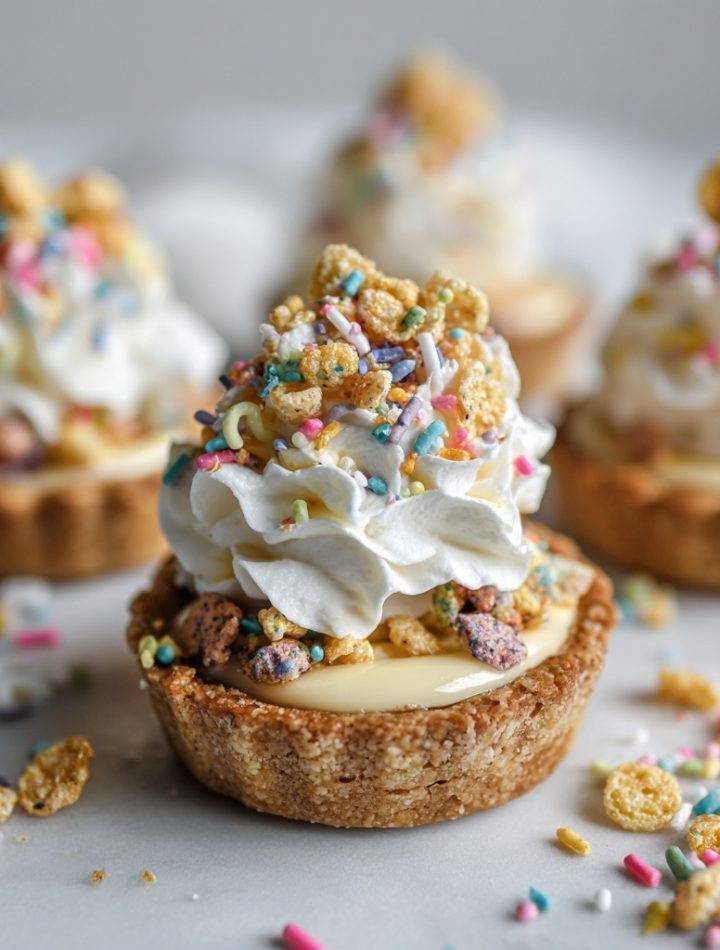
Cereal Milk Tartlets with Funfetti Blondie Crust & Vanilla Bean Cream
Hey there, friend! Emily here, apron already dusted with flour and probably a sprinkle or two. Today, we’re not just baking; we’re time-traveling. We’re heading straight back to those Saturday mornings spent parked in front of cartoons, a giant bowl of sugary cereal in hand, with not a single care in the world.
But what if we could bottle that magical, milky-sweet nostalgia and turn it into a dessert so elegant it belongs at a celebration, yet so playful it makes you grin like a kid? That, my fellow flavor-chaser, is the mission of these Cereal Milk Tartlets.
Imagine this: a soft, chewy, funfetti blondie crust that tastes like birthday cake batter. It cradles the silkiest, most luxurious cereal milk pastry cream you’ve ever dreamed of—all those toasty, sweet, and comforting notes from your childhood cereal, transformed into something utterly sophisticated. And because joy deserves a crown, we’re topping it all with a cloud of vanilla bean whipped cream.
This recipe is my love letter to playful baking. It’s a little indulgent, a lot whimsical, and 100% guaranteed to spark conversation (and serious cravings). So, let’s ditch the boring desserts and make something that feels like a confetti cannon went off in your mouth and your heart. Ready? Let’s chow down on some creativity!
The Saturday Morning Alchemy
This recipe’s soul lives in my grandma’s sunny kitchen, circa 1996. My brother and I would be mesmerized by Saturday morning cartoons, but the real magic happened when the cereal box hit the table. For us, it was always the one with the colorful marshmallows. The ritual was sacred: pour the cereal, listen to the *shush-shush-shush*, then the glorious glug of cold milk.
But the best part? The grand finale. After the last crunchy bite was gone, we’d lift our bowls with both hands and drink that enchanted, sweetened milk at the bottom. It was the prize. My grandma would just shake her head, laughing, saying we were “drinking pure sugar.” She was right, of course. But it was perfect sugar.
Years later in culinary school, I learned about “steeping” and “infusions.” My brain immediately went *ping!* What if we steeped cereal like tea leaves? What if we could harness that end-of-the-bowl magic and turn it into a custard? After more experiments than I’d like to admit (let’s just say my roommates were very well-fed that month), the cereal milk pastry cream was born. Paired with a celebratory funfetti crust? It’s my edible version of a happy memory. Every bite takes me right back to that linoleum floor and my grandma’s laugh.
Gather Your Happy Ingredients
Here’s everything you’ll need to create this masterpiece. Don’t stress about perfection—this is about flavor and fun! I’ve included my favorite tips and swaps so you can make it your own.
- For the Cereal Milk:
- 2 cups cereal (marshmallows removed if using a marshmallow kind): This is your flavor star! I love using the classic crispy rice cereal with colored marshmallows for maximum nostalgia. But cornflakes or toasted oat cereal make a delicious, slightly less sweet version. Chef’s Insight: Removing the marshmallows first prevents them from dissolving into goo and ensures a clear, flavorful milk.
- 1 cup whole milk + 1 cup heavy cream: The duo creates the perfect rich base. The milk gets the flavor, the cream adds luxurious body. For a lighter version, you can use all whole milk, but the cream is a game-changer for texture.
- Pinch of salt: Trust me! This tiny pinch makes all the sweet, toasty flavors pop. It’s the secret handshake of good pastry.
- For the Pastry Cream:
- All of the prepared cereal milk: You’ve made liquid gold, now let’s use it!
- 6 large egg yolks: They give our cream its rich, velvety structure and beautiful yellow hue. Save the whites for a healthy omelet or meringues!
- ⅓ cup granulated sugar: Sweetens and helps stabilize the yolks.
- ¼ cup cornstarch: Our thickening hero. It gives the cream that luscious, pudding-like consistency that holds its shape.
- 1 tsp vanilla bean paste (or extract): I adore the specks of real vanilla in bean paste, but pure extract works beautifully too.
- 4 tbsp unsalted butter, softened: Whipped in at the end for incredible silkiness and shine. It’s the final touch of luxury.
- For the Funfetti Blondie Crust:
- 6 tbsp unsalted butter, melted: Melted butter gives us that dense, chewy blondie texture. No waiting for it to soften!
- 1 cup all-purpose flour: The foundation.
- ¼ cup dry milk powder: My secret weapon! It amplifies the buttery, baked-good flavor and adds tenderness. Don’t skip it!
- ½ tsp baking soda: For a little lift.
- ⅛ tsp salt: Balances the sweet.
- ¼ cup rainbow sprinkles (jimmies): Use “jimmies” (the long sprinkles) rather than nonpareils (tiny balls), as they hold their color better during mixing and baking.
- ½ cup granulated sugar + ¼ cup packed brown sugar: The white sugar for sweetness, the brown sugar for moisture and that classic blondie molasses note.
- 1 large egg: Binds our crust together.
- ½ tbsp vanilla bean paste (or extract): Doubling down on that warm vanilla flavor.
- For the Vanilla Bean Whipped Cream:
- 1½ cups cold heavy cream: Must be cold for maximum volume. I chill my bowl and whisk, too!
- 3 tbsp powdered sugar: Dissolves instantly and sweetens gently.
- ½ tsp vanilla bean paste (or extract): The aromatic finale.
Let’s Build Some Magic: Step-by-Step
Follow along, but don’t be afraid to put on some music and dance around your kitchen. That’s part of the recipe, too.
- Make the Cereal Milk (The Heart of the Dish): In a large bowl, combine the cereal, whole milk, heavy cream, and that all-important pinch of salt. Give it a gentle stir and let it steep on the counter for 30 minutes. It will look like a delicious science experiment. Chef’s Hack: Set a timer! Over-steeping can lead to a slightly bitter taste. When time’s up, strain it through a fine-mesh sieve into a measuring jug, pressing gently on the cereal to get all that flavorful liquid out. Discard the soggy cereal (its noble work is done).
- Create the Pastry Cream (Be Bold!): Pour your beautiful cereal milk into a medium saucepan and heat it over medium until it just begins to simmer. While it heats, whisk the egg yolks, sugar, and cornstarch in a separate bowl until it’s pale, thick, and falls off the whisk in a “ribbon.” This is called the blanchir stage. Now, here’s the key moment: tempering. Slowly drizzle about half of the hot cereal milk into the egg mixture while whisking constantly. This gently brings the eggs up to temperature without scrambling them. Then, pour the whole mixture back into the saucepan. Chef’s Commentary: Switch to a spatula now and cook over medium heat, stirring constantly and scraping the bottom. It will thicken suddenly! Once you see a big bubble *bloop* in the center, cook for one more minute to neutralize the cornstarch taste. Off the heat, whisk in the butter and vanilla until silky smooth. Pour into a clean bowl and press plastic wrap directly onto the surface (this prevents a skin). Chill for at least 2 hours.
- Bake the Funfetti Crust (The Colorful Base): Preheat your oven to 325°F (165°C). Grease six 4-inch removable-bottom tartlet pans. In a small bowl, whisk the flour, milk powder, baking soda, and salt. In a larger bowl, whisk the melted butter, both sugars, egg, and vanilla until combined. Gently fold the dry ingredients into the wet until almost mixed, then add the sprinkles and fold just until no dry streaks remain. Chef’s Tip: Don’t overmix! That leads to tough crusts. Divide the dough among the pans (it will be sticky) and use your fingers or a small glass to press it evenly across the bottom and up the sides. Bake for 18-22 minutes, until the edges are golden and the center looks set. Let them cool completely in the pans on a rack.
- Whip the Cream (The Fluffy Crown): Just before assembling, place your cold cream, powdered sugar, and vanilla in a chilled bowl. Whip with an electric mixer (or a very determined whisk and strong arm) until you get soft, billowy peaks. Don’t go to stiff peaks—we want it cloud-like, not buttery.
- The Grand Assembly (The Fun Part!): Carefully remove the cooled crusts from their pans. Give the chilled pastry cream a good stir with a spatula to loosen it. Divide it evenly among the crusts, smoothing the tops. Now, pile or pipe on generous mounds of the vanilla bean whipped cream. Garnish with an extra pinch of sprinkles or a tiny piece of cereal if you’re feeling fancy. Serve immediately and watch eyes light up!
Serving Your Masterpiece
Presentation is part of the joy here! I love serving these on a colorful platter or individual dessert plates. For an extra touch of whimsy, place them on small cake stands or even vintage saucers. These tartlets are rich, so they’re perfect as they are, but a few fresh berries on the side never hurt anyone. They’re the ultimate birthday dessert, a show-stopper at a potluck, or the perfect “just because” treat to make a Tuesday feel spectacular. Serve with small forks and big napkins—things might get deliciously messy!
Make It Your Own: Fun Variations
Play with this formula! Here are a few of my favorite twists:
- Chocolate Cereal Twist: Use a chocolate-flavored cereal for the milk steeping. Add 2 tablespoons of cocoa powder to the dry ingredients of the crust for a chocolate funfetti situation. Divine.
- Fruity Pebbles Fantasy: Steep Fruity Pebbles for a vibrant, citrusy milk. Pair it with a classic shortbread crust (omitting the sprinkles) for a beautiful contrast.
- Peanut Butter Lover’s Dream: Use a peanut butter puff cereal. Swirl ¼ cup of warm peanut butter into the finished pastry cream. Garnish the whipped cream with chopped salted peanuts.
- Gluten-Free & Dairy-Swap Friendly: Use a certified gluten-free cereal and a 1:1 GF flour blend. For dairy-free, use your favorite non-dairy milk and cream alternative (coconut cream works well) and vegan butter.
- Mini Marvels: Use a 24-cup mini muffin tin! Press in smaller amounts of dough and bake for 10-12 minutes for adorable, two-bite tartlets perfect for a party.
Chef Emily’s Notebook Scribbles
This recipe is a living thing in my kitchen. The first time I made it, I was so eager I tried to pour the hot pastry cream directly into the crusts. Let’s just say I had a delicious, soupy, crumb-filled puddle. Chilling the cream completely is non-negotiable—it’s the difference between a mess and a masterpiece.
I’ve also learned that the type of sprinkle matters. Once, in a pinch, I used the tiny round nonpareils. They bled their color into the dough, creating a lovely… greyish-green crust. Still tasty, but not the rainbow vibe I was going for. Jimmies for the win!
Most importantly, this recipe taught me that the best baking connects us to memories. Don’t get bogged down in precision. If you’re out of one cereal, use another. If you want more sprinkles, add more! Make it with love, and it will always turn out delicious.
FAQs & Kitchen Rescue Tips
- Q: My pastry cream turned out lumpy! What happened? Can I fix it?
A: Lumps usually mean the eggs scrambled slightly during tempering or cooking. Prevention: Go slower when drizzling in the hot milk and stir like your dessert depends on it! If it happens, don’t panic. Immediately strain the hot cream through a fine-mesh sieve into your bowl. This will catch any cooked egg bits. Whisk in the butter and vanilla as usual—it will save it! - Q: Can I make any parts ahead of time?
A: Absolutely! The cereal milk can be made 2 days ahead and kept in the fridge. The pastry cream is best made the day before. The baked and cooled crusts can be stored in an airtight container at room temp for a day. Assemble with the whipped cream the day you’re serving for the freshest taste and texture. - Q: My crust stuck to the pan! Help!
A: A little persuasion often helps. Run a thin knife carefully around the edge. If it’s a removable-bottom pan, place the tart on a wide glass or can and let the metal ring fall down. For stubborn spots, a gentle nudge from a small offset spatula or butter knife from the top edge usually does the trick. Greasing the pans well is key! - Q: Is there a good cereal to milk ratio if I want to experiment?
-
A: Yes! A great rule of thumb is 2 cups cereal to 2 cups liquid (milk + cream combined). That ratio gives you bold flavor without turning bitter or overly sweet. If you’re using a very sugary cereal, lean a bit more on milk than cream. If it’s toasted or plain (like cornflakes), the cream really helps round it out.
The Last Spoonful: Why This Dessert Matters
These Cereal Milk Tartlets are more than a recipe—they’re proof that nostalgia belongs in grown-up kitchens, too. Baking doesn’t always have to be serious or pristine or perfectly minimal. Sometimes it should be colorful, playful, and just a little ridiculous in the best possible way.
Every time I serve these, someone laughs before they take the first bite. And then they pause. And then they say, “Wait… this tastes like my childhood.” That moment? That’s why I bake.
So whether you make these for a birthday, a brunch table, a baby shower, or a random Wednesday that needs a little joy—know that you’re serving comfort, creativity, and a whole lot of heart.
If you try them, I’d absolutely love to hear how you made them your own. Different cereal? Extra sprinkles? A childhood favorite I haven’t thought of yet? Drop a comment, share a photo, or tell me the memory it brought back for you.
Until next time—keep baking bravely, chasing flavor, and never underestimate the magic at the bottom of the bowl.
With sprinkles on everything,
Emily 🌈🥣🍰