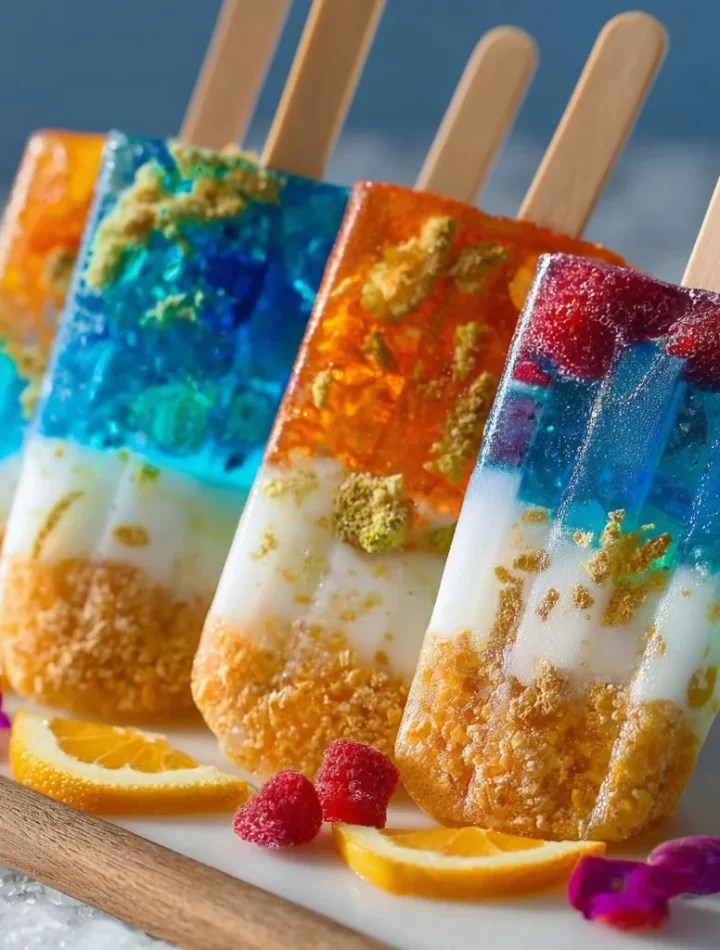
Edible Aquarium Popsicles: A Splash of Fun in Every Bite!
Hey there, fellow food lover! 🌊 Are you ready to make a splash this summer—or really any time you need a refreshingly fun treat? Today, I’m super excited to share with you my recipe for Edible Aquarium Popsicles. They’re not just any ordinary popsicles; these beauties are delightful ocean-themed confections that are sure to wow both kids and adults alike! With vibrant colors and delicious fruity flavors, they resemble a real-life aquarium filled with colorful fish, seaweed, and all that ocean creativity just waiting to make a big splash in your kitchen.
You might be wondering, “How did Chef Emily come up with such a fun idea?” Well, let me take you back to a sunny afternoon spent in my kitchen, where fresh fruit meets creativity in the most delicious way. These popsicles are a perfect blend of nostalgia, creativity, and a major dose of fun! You know those days when you feel like doing something extra special with your kids or friends? This is it! Making these edible aquarium popsicles together feels more like an exciting culinary adventure than a task, turning any ordinary moment into a celebration!
Not only are these popsicles visually stunning, but they’re also packed with healthy fruits that not only satisfy your sweet tooth but also boost your energy! As a nutrition enthusiast, being able to make a treat that is both fun and good for you is a win-win in my book.
So, grab your silicone molds, let’s dive into this vibrant sea of flavors, and create some adorable, edible aquariums together! 💙
Personal Story
I vividly remember the first time I introduced my little sister to the magic of popsicle-making. It was a warm summer day, and the sun was shining brightly, casting sparkles on the lake nearby. We decided to have a DIY popsicle party! I set up a mini “candy station” on the kitchen table with all sorts of colorful fresh fruits and juices. As we combined our ingredients, the kitchen transformed into a wonderland of colors and creativity.
Between giggles and splashes of juice everywhere, we mashed berries, layered colorful juices, and even tried our hands at using some edible glitter—because, let’s be honest, what’s a popsicle without a little sparkle? When we finally popped those beauties into the freezer and waited anxiously for them to freeze, we felt like true culinary artists. When we finally enjoyed our creations a few hours later—oh, what joy! They looked like miniature aquariums, and the taste was simply sensational.
Now, every time I make edible aquarium popsicles, I’m reminded of that sun-soaked day filled with laughter, creativity, and the best kinds of memories made in the kitchen. So, are you ready to make some memories of your own? Let’s get crafting these colorful treats!
Ingredients
Here’s what you’ll need to create these spectacular Edible Aquarium Popsicles. Gather the below ingredients, each chosen to create a delightful burst of flavor and color!
-
Juice of your choice (e.g., coconut water, orange, or blueberry juice)
These provide the base for your popsicles. Coconut water offers a tropical twist, while citrus juices bring in essential vitamins and brightness. -
Fresh fruits (like strawberries, kiwis, or blueberries)
Fresh fruits not only add flavor but also gorgeous colors to mimic an underwater scene. You can mix and match based on your personal favorites. -
Edible glitter (optional)
A touch of edible glitter adds that magical ocean sparkle! It’s completely optional, but let me tell you—it’s like fairy dust for food! -
Gummy fish or sea creatures
These are the fun “stars” of your aquarium! Look for gummy candies that reflect your favorite sea life. They bring back memories of childhood treats and give a playful touch. -
Layering ingredients (like yogurt or sweetened coconut)
If you want to create the illusion of depth in your underwater scene, yogurt or coconut can act like sand at the bottom. -
Silicone popsicle molds
These molds are essential for shaping your popsicles. Ensure they are sturdy and easy to remove for maximum fun!
Here’s a quick chef insight: when choosing juices and fruits, think about how the colors will look layered together—it’s all about presentation here! Try contrasting colors to create the most interesting edible aquarium!
Step-by-Step Instructions
Now, let’s dive into the making—a splashy yet straightforward process.
Step 1: Prepare Your Fruits
-
Chop Your Fresh Fruits: Begin by washing and chopping your selected fruits into small chunks. If you’re using strawberries, remove the tops and slice them; for kiwis, peel and chop into small pieces. Feel free to get creative with shapes!
Chef Tip: The smaller the pieces, the easier they’ll fit into the molds, and the more evenly you can layer them.
Step 2: Prepare Your Molds
-
Select Your Molds: Grab your silicone molds and place them on a sturdy surface to avoid spills.
-
Add the First Layer: Start by adding a thin layer of juice as the base—this will be your “water.” Pour just enough to cover the bottom (about 1/4 inch). Insert sticks now, or leave them out for the initial phase.
Step 3: Layer Fruits and Juices
-
Add Fruits: Carefully place some of your fruit chunks on top of the liquid layer. You can create different layers with various fruits. This is where your aquarium comes to life!
-
Add More Juice: Depending on how you want to compose the popsicle, pour in different juices to create layers. I usually like to put some coconut water for a tropical accent.
Step 4: Gummy Fish Moment
- Insert your Gummy Fish: Add gummy sea creatures right before you add the final layer of juice. Ensure they’re well-distributed so that they’re seen through the clear juices!
Step 5: Freezing Time
-
Cover: If your silicone molds come with lids, feel free to use them to avoid freezer burn. If not, carefully cover with plastic wrap.
-
Freeze: Place the assembled molds in the freezer and allow them to freeze for at least 4-6 hours or until completely solid. (Check on them; sometimes it’s hard to resist the temptation to peek!)
Step 6: Serve
- Remove from Molds: Once frozen, run the molds under warm water for a few seconds to help release the popsicles. Pull them out gently—voila!
Chef Tip: If they’re stubborn, just let them sit at room temperature for a minute longer. Patience pays off!
Serving Suggestions
These Edible Aquarium Popsicles are not only a delightful treat but also a visual feast that can bring joy to any occasion! Consider serving these popsicles at summer picnics, birthday parties, or even as a fun family dessert while watching a movie.
-
Plating Ideas: Consider placing your popsicles upright in a glass filled with crushed ice for a beach-themed presentation. You could also sprinkle some extra edible glitter over the top for that extra pizazz.
-
Garnishing: Serve alongside fresh fruit slices, sprigs of mint, or a light drizzle of honey or chocolate syrup for added flavor.
Let your creativity flow when presenting these delights! Make it a fun event where everyone can grab their favorite flavors and enjoy.
Recipe Variations
Feel like switching things up? Here are several creative twists you can try with this base recipe:
-
Tropical Treasure: Use mango and pineapple juices, and swap gummy fish with gummy pineapples and coconuts!
-
Berry Blast: Stick to a variety of berries, like raspberries and blackberries, with a splash of lemon juice, then go wild with vibrant gummy bears.
-
Coconut Paradise: Layer coconut milk with various tropical fruits for a creamy taste reminiscent of beach vacations.
-
Yogurt Layers: Mix in some sweet Greek yogurt between fruity layers to create a creamy, less sugary treat.
-
Sugar-free or Dairy-free: Substitute with sugar-free gummy candies and fruit juices. Use almond milk or coconut yogurt for dairy alternatives.
The sky’s the limit when it comes to flavor combos—have fun creating your own "ocean"!
Chef’s Notes
Making Edible Aquarium Popsicles has morphed into a family favorite for me over the years. I remember when my cousin suggested adding coconut milk in the mix; it added a whole new level of creaminess. It was genius! We’ve also had plenty of laughs when the gummy fish sometimes managed to sink or float. That’s the joy of creative cooking—the unexpected surprises that happen along the way.
Watching the faces of friends and family light up when they see and taste these treats is genuinely priceless. I can honestly say there’s never a dull moment in my kitchen, especially when I get the chance to whip up these playful creations!
FAQs and Troubleshooting
Q1: What should I do if my popsicles are hard to remove from the molds?
A1: If they’re giving you trouble, run them under warm water briefly. This helps to loosen them without melting the popsicles too much!
Q2: Can I use frozen fruits instead of fresh?
A2: Absolutely! Frozen fruits can add texture and color, but make sure to thaw and drain any excess water to prevent extra ice crystals.
Q3: How long will these popsicles last in the freezer?
A3: These popsicles can last up to 2 months if stored well—though I doubt they’ll make it that long before being gobbled up!
Q4: Can I customize for dietary restrictions?
A4: For sure! Use vegan gummy candies, sugar-free juice, or alternative dairy options to cater to any dietary needs.
Nutritional Info
While I’m all about indulging in delightful treats, it’s also important to keep an eye on nutrition—especially with kids around. Here’s a quick overview you might find useful:
- Calories: Varies based on ingredients (around 50-100 calories per popsicle)
- Fat: Minimal if using fruit and juices predominantly
- Sugars: Naturally occurring sugars from fruits; you can adjust based on your juice or fruits chosen
- Vitamins: Packed with vitamins C, A, and potassium, these popsicles offer a refreshing nutritional bonus!
These nutritional values will depend heavily on the fruits and juices chosen, so choose wisely if you’re calorie conscious!
Final Thoughts
So there you have it—Edible Aquarium Popsicles that are as fun to make as they are to eat! This recipe isn’t merely a treat; it’s an experience and a memory in the making. Whether you enjoy making these delightful pops with your kids, friends, or even all by yourself (because self-care is vital!), the joy and creativity that fills the kitchen are priceless.
I hope you’ve gleaned plenty of inspiration from these colorful treats! Now, it’s time to channel your inner chef and create your own edible aquarium. Whatever concoction you whip up, remember it’s the fun and togetherness of cooking that counts the most. Now, grab your molds, dive in, and let’s make a splash!
Happy cooking and even happier eating! 🍧💖
Print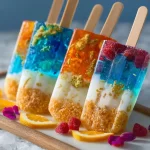
Edible Aquarium Popsicles
- Total Time: 360 minutes
- Yield: 6 servings
- Diet: Vegetarian
Description
Delightful ocean-themed popsicles packed with fresh fruits that resemble a real-life aquarium, perfect for summer fun!
Ingredients
- Juice of your choice (e.g., coconut water, orange, or blueberry juice)
- Fresh fruits (like strawberries, kiwis, or blueberries)
- Edible glitter (optional)
- Gummy fish or sea creatures
- Layering ingredients (like yogurt or sweetened coconut)
- Silicone popsicle molds
Instructions
- Prepare Your Fruits: Chop your fresh fruits into small chunks.
- Select Your Molds: Grab your silicone molds and place them on a sturdy surface.
- Add the First Layer: Pour a thin layer of juice as the base.
- Add Fruits: Carefully layer fruit chunks on top of the liquid layer.
- Insert your Gummy Fish: Add gummy sea creatures before adding the final layer of juice.
- Freeze: Cover and place molds in the freezer for 4-6 hours.
- Remove from Molds: Run molds under warm water to release popsicles.
Notes
For varied flavors, consider adding different fruits and juices. Use contrasting colors for better presentation.
- Prep Time: 15 minutes
- Cook Time: 0 minutes
- Category: Dessert
- Method: Freezing
- Cuisine: American
Nutrition
- Serving Size: 1 popsicle
- Calories: 75
- Sugar: 10g
- Sodium: 0mg
- Fat: 0g
- Saturated Fat: 0g
- Unsaturated Fat: 0g
- Trans Fat: 0g
- Carbohydrates: 18g
- Fiber: 1g
- Protein: 1g
- Cholesterol: 0mg
Keywords: popsicles, summer treats, healthy desserts, fruity snacks, kids fun