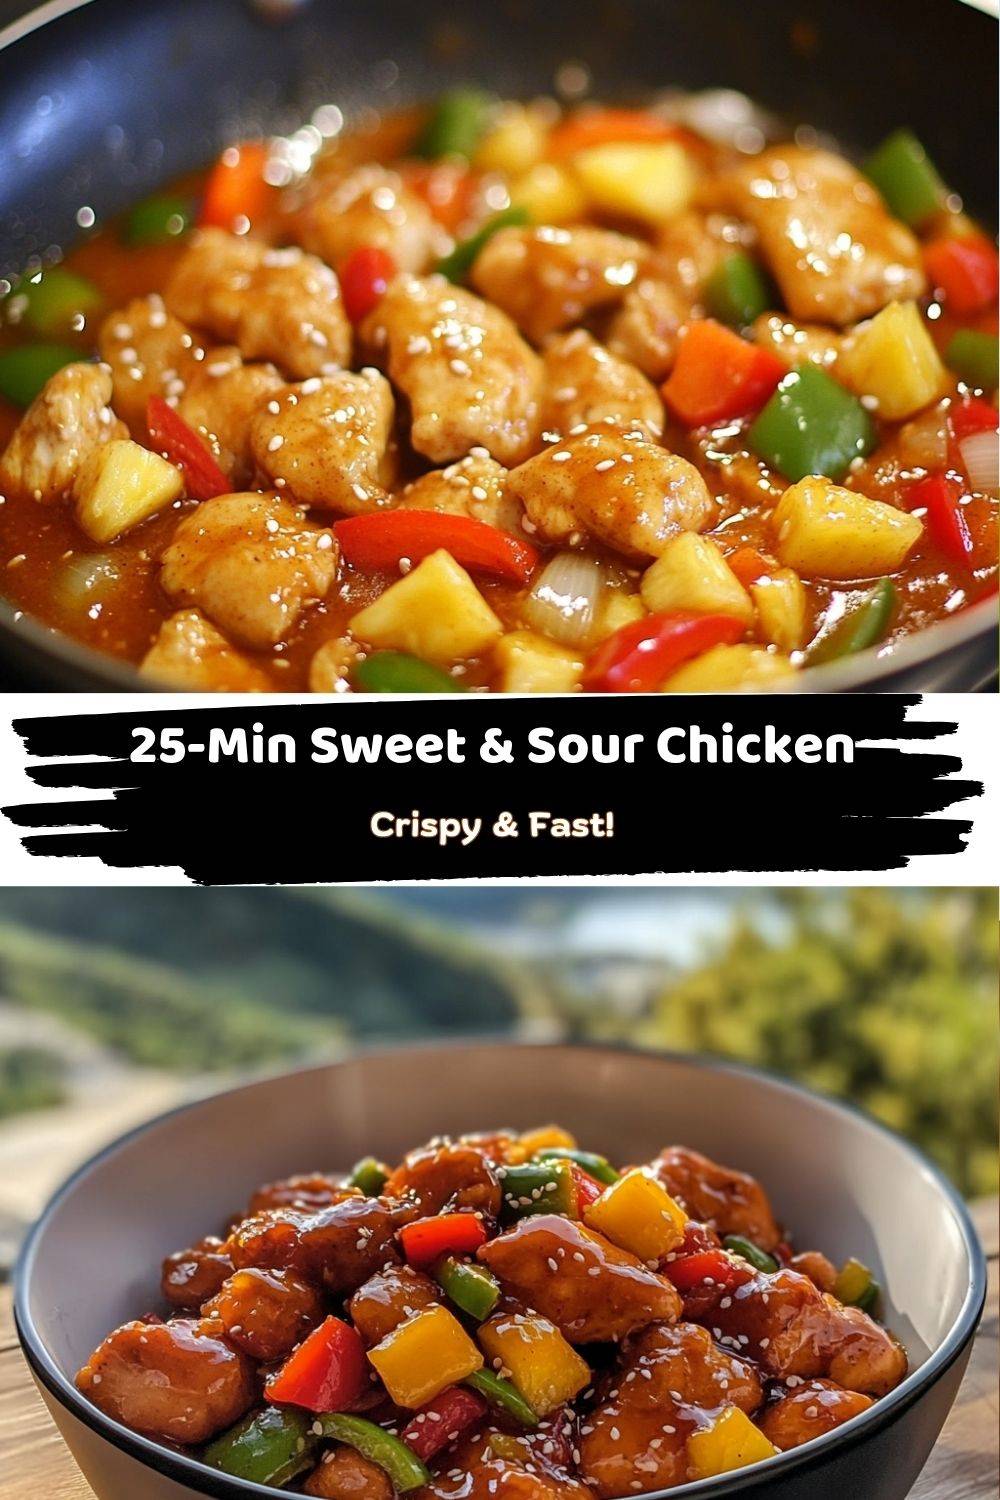
Homemade Sweet and Sour Chicken in 25 Minutes: Your New Weeknight Hero!
Hey, kitchen pals! Emily here, waving my sauce-splattered spoon from my bustling home kitchen. Ever have one of those nights where takeout cravings hit HARD, but your wallet (or your determination to cook real food) says “nope”? That’s exactly why I created this lightning-fast homemade sweet and sour chicken recipe. Forget soggy delivery and mysterious ingredients – we’re making crispy, tangy, sweet-and-sour MAGIC in just 25 minutes flat! Picture this: golden chicken chunks crackling in the pan, vibrant peppers dancing in that glossy red sauce, and the whole house smelling like your favorite Chinese restaurant. It’s the ultimate flavor hug for busy weeknights, lazy weekends, or “oops-I-forgot-to-defrost-dinner” emergencies. Grab your wok (or trusty skillet!), and let’s turn ordinary ingredients into extraordinary yum together. Trust me, your taste buds will throw a party!
A Love Story That Started With Takeout Boxes
This recipe? It’s pure nostalgia on a plate! When my husband Mark and I were newlyweds (and seriously budget-challenged), Friday nights meant one glorious splurge: sweet and sour chicken from “Golden Dragon,” this tiny takeaway joint down the street. We’d spread newspapers on our rickety apartment floor, crack open those iconic white boxes, and feast like royalty. That perfect crunch! That addictive sweet-tangy sauce! Fast forward a few years (and one culinary degree later), I became obsessed with recreating that magic at home. After countless trials (including one infamous “sweet-and-gluey” disaster involving cornflour overload), I nailed this 25-minute version. Every time I make it, I’m instantly back on that floor with Mark, grinning like fools with sauce on our chins. Food memories? They’re the best kind of heirlooms.
Print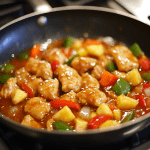
Homemade Sweet and Sour Chicken
- Total Time: 25 minutes
- Yield: 4 1x
Description
My first taste of sweet and sour chicken came from a little Chinese takeaway when I was newly married. It was our Friday night treat. Years later, I wanted to recreate that magic at home—crispy chicken, vibrant veggies, and that unforgettable tangy-sweet sauce. This recipe hits all the right notes and brings back delicious memories every time. Share it with someone you love cooking for!
Ingredients
For the Chicken:
5 tbsp vegetable oil
2 eggs, lightly beaten
3 tbsp cornflour (cornstarch)
90g (¾ cup) plain flour
½ tsp salt
½ tsp pepper
½ tsp garlic salt
2 tsp paprika
3 skinless chicken breasts, cut into bite-size chunks
For the Sauce:
1 tbsp vegetable oil
1 large onion, chopped into chunks
1 red pepper, chopped
1 green pepper, chopped
2 garlic cloves, crushed
1 tsp minced ginger
150ml (⅔ cup) tomato ketchup
2 tbsp malt vinegar
6 tbsp dark brown muscovado sugar
475g (17 oz) canned pineapple chunks in juice
To Serve:
Egg fried rice or boiled rice
1 tsp sesame seeds (optional garnish)
Instructions
Mix the flours, salt, pepper, garlic salt, and paprika in a bowl. Dip the chicken into the beaten egg, then into the flour mix.
Heat oil in a large pan. Fry chicken in batches until golden and crispy. Remove and set aside.
In a clean pan, add 1 tbsp oil and sauté onion, peppers, garlic, and ginger for 3-4 minutes.
Add ketchup, vinegar, sugar, and pineapple with juice. Stir and simmer for 5 minutes.
Return chicken to the pan, mix well, and cook for 2-3 more minutes.
Serve hot with rice, sprinkle with sesame seeds.
- Prep Time: 10 minutes
- Cook Time: 15 minutes
Nutrition
- Calories: 520 per serving
- Sugar: 20g per serving
- Fat: 20g per serving
- Carbohydrates: 45g per serving
- Protein: 35g per serving
Your Flavor-Packed Arsenal: Ingredients & Chef Secrets
Gather these simple stars! Pro tip: Mise en place (a.k.a. prepping everything BEFORE you turn on the stove) is your secret weapon for hitting that 25-minute mark.
- Vegetable Oil (5 tbsp + 1 tbsp): Our trusty frying friend! Use a neutral oil with a high smoke point. Chef’s Swap: Canola or peanut oil works great too.
- Eggs (2, lightly beaten): The glue for our crispy coating! Lightly beating ensures even coverage. Chef’s Tip: Room temp eggs blend smoother.
- Cornflour (Cornstarch) (3 tbsp) & Plain Flour (90g/¾ cup): The DREAM TEAM for ultra-crispy chicken! Cornflour adds that signature takeout crunch. Chef’s Insight: No cornflour? Double the plain flour, but expect slightly less crunch.
- Salt (½ tsp), Pepper (½ tsp), Garlic Salt (½ tsp), Paprika (2 tsp): Flavor boosters for the chicken coating! Paprika adds subtle sweetness and color. Chef’s Swap: Smoked paprika for a deeper vibe, or onion powder if garlic salt’s MIA.
- Skinless Chicken Breasts (3, cubed): Quick-cooking lean protein! Chef’s Hack: Partially freeze breasts for 30 mins for easier, neater cubing.
- Onion (1 large), Red & Green Peppers (1 each): The colorful crunch squad! Chef’s Swap: Throw in carrots, snap peas, or pineapple chunks (save juice!) for extra veg.
- Garlic (2 cloves, crushed), Ginger (1 tsp minced): The aromatic power duo! Chef’s Tip: Use fresh! Jarred works in a pinch, but fresh sings.
- Tomato Ketchup (150ml/⅔ cup): The saucy base! Sounds quirky, but it’s authentic for that tangy sweetness. Chef’s Insight: No sub needed – it’s key!
- Malt Vinegar (2 tbsp), Dark Brown Muscovado Sugar (6 tbsp): The “sour” and the “sweet”! Muscovado’s molasses depth beats regular brown sugar. Chef’s Swap: Apple cider vinegar or rice vinegar works if malt’s missing.
- Canned Pineapple Chunks (475g/17 oz) WITH Juice: Tropical sweetness & tang! The juice is sauce gold. Chef’s Tip: Use chunks packed in juice, NOT syrup.
- For Serving: Egg Fried Rice or Boiled Rice, Sesame Seeds (1 tsp, optional). Chef’s Must: The sesame seeds! They add nutty flair and make it *look* pro.
Let’s Get Sizzling: Your Foolproof Steps!
Ready? Aprons on, pans hot! We’re moving fast but staying calm. Channel your inner wok master!
- Coat the Chicken: In a shallow bowl, whisk together the cornflour, plain flour, salt, pepper, garlic salt, and paprika. In another bowl, lightly beat those eggs. Dip each chicken chunk first in the egg (let excess drip off!), then dredge it thoroughly in the flour mixture. Chef’s Hack: Toss a few pieces at a time in a zip-top bag with the flour mix for less mess and even coating!
- Fry to Golden Perfection: Heat 5 tbsp vegetable oil in a large skillet, wok, or deep frying pan over medium-high heat. Test the oil – a pinch of flour should sizzle immediately. Carefully add chicken in a single layer (don’t crowd the pan! Do batches if needed). Fry for 3-4 minutes per side, turning occasionally, until deeply golden and crispy. Chef’s Secret: Resist stirring for the first 90 seconds! This builds the crunch. Remove crispy chicken with a slotted spoon and drain on a wire rack (paper towels work too).
- Sauté the Veggie Rainbow: Wipe out the pan (or grab a clean one) and heat the remaining 1 tbsp oil over medium-high heat. Add the onion and pepper chunks. Stir-fry for 2 minutes until slightly softened but still vibrant and crisp-tender. Add the crushed garlic and minced ginger – stir like crazy for 30 seconds until fragrant (don’t let them burn!).
- Create the Magic Sauce: Pour in the ketchup, malt vinegar, dark brown muscovado sugar, and the ENTIRE can of pineapple chunks WITH the juice. Stir everything together, scraping up any tasty browned bits from the pan bottom. Bring it to a lively simmer and let it bubble happily for 5 minutes. Chef’s Tip: Taste it! Want more tang? Add a splash more vinegar. Sweeter? A pinch more sugar.
- Bring It All Home: Gently slide the crispy chicken back into the pan with that gorgeous bubbling sauce and veggies. Stir carefully to coat every piece without losing the crunch. Cook for just 2-3 more minutes until the chicken is heated through and luxuriously coated. Chef’s Warning: Don’t over-stir now! We’re preserving that hard-won crispiness.
Plating Like a Pro (Minimal Effort, Max Wow!)
Time for the grand finale! Fluff up a big bowl of steaming egg fried rice or simple boiled rice. Spoon that glorious sweet and sour chicken and all its saucy, veggie-packed goodness right over the top. The vibrant red and green peppers against the golden chicken is pure edible art. The non-negotiable finishing touch? A generous sprinkle of those toasted sesame seeds. They add a nutty whisper and make it look straight from a restaurant kitchen. Serve immediately with big smiles and maybe extra napkins – things might get joyfully messy!
Shake It Up! Delicious Twists on the Classic
Love this base recipe? Make it your own with these fun spins!
- Spicy Firecracker: Add 1-2 tsp sriracha or a pinch of red pepper flakes to the sauce with the ketchup. Top with sliced fresh chili for serious heat lovers!
- Pineapple Swap-Out: Not a pineapple fan? Use mandarin orange segments (canned in juice, drained) instead! The citrus tang is divine.
- Gluten-Free Guru: Swap the plain flour for a certified GF all-purpose blend and ensure your cornstarch is GF. Use tamari or coconut aminos instead of soy sauce in your fried rice.
- Veggie Powerhouse: Skip the chicken! Double the peppers, add broccoli florets, snap peas, and carrots. Toss in crispy tofu cubes (coated like the chicken!) for plant-based perfection.
- Hawaiian Luau: Add ¼ cup chopped ham or cooked SPAM (don’t knock it till you try it!) with the pineapple for a tropical, salty-sweet punch.
Emily’s Kitchen Confessions & Evolution
Okay, full disclosure: my first homemade sweet and sour attempt? Let’s just say the chicken resembled sad, soggy beige lumps drowning in ketchup soup. Tragic! The breakthrough came when I started double-dipping the chicken in egg THEN flour (thanks, culinary school drills!) and learned the sacred rule of not crowding the pan. That crispiness is EVERYTHING. Over the years, I’ve tweaked the sauce ratios endlessly – Mark was my very patient (and sauce-smeared) taste tester. The muscovado sugar was a game-changer for depth, and using ALL the pineapple juice? That’s pure flavor gold, baby! Now, my kids demand this weekly, and it’s our go-to “impress the in-laws” dish. The best part? Seeing YOUR recreations light up my social feeds! Tag me @TastyChow – I live for your saucy success stories.
Sweet & Sour SOS: Your Questions Answered!
Ran into a hiccup? I’ve got your back! Here’s the scoop on common quirks:
- Q: My sauce is too thin! Help! A: No panic! Mix 1 tsp cornflour with 2 tsp cold water into a smooth slurry. Stir it into the simmering sauce (before adding chicken back) and cook 1 minute. It’ll thicken right up! Prevention: Simmer the sauce uncovered for the full 5 mins to reduce.
- Q: Why isn’t my chicken staying crispy? A: Two culprits! 1) Overcrowding the pan lowers the oil temp, leading to steaming instead of frying. Batch cook! 2) Letting the chicken sit in the sauce too long before serving. Add it back for just 2-3 mins to warm and coat, then serve IMMEDIATELY.
- Q: Can I use chicken thighs? A: Absolutely! Thighs add richer flavor. Use boneless, skinless, cut into chunks. They might need an extra 1-2 mins frying per batch.
- Q: Is there a baked option to avoid frying? A: For a lighter version: Toss coated chicken chunks with 1-2 tbsp oil, spread on a parchment-lined baking sheet. Bake at 200°C (400°F) for 15-18 mins, flipping halfway. Sauce and veggies cook stovetop as directed, then combine!
Nutritional Nibbles (Per Serving – 4 Servings)
Calories: ~520 | Protein: 35g | Fat: 20g | Carbs: 45g | Sugar: 20g
Note: Includes chicken and sauce, served with 1 cup plain boiled rice (approx. 200 cals). Values are estimates.
Prep Time: 10 mins | Cook Time: 15 mins | Total Time: 25 mins
🍍 Final Thoughts: The Takeout Swap You’ll Crave Again and Again
There’s just something magical about recreating a nostalgic takeout favorite right in your own kitchen—and this 25-minute Homemade Sweet and Sour Chicken proves that fast doesn’t have to mean flavorless. It’s a symphony of crispy, golden chicken mingling with that glossy, sweet-tangy sauce and vibrant, tender-crisp veggies. Each bite tastes like a trip back to cozy date nights or childhood splurges from your favorite Chinese spot.
But beyond the flavor fireworks, here’s what makes this recipe a true weeknight hero: it’s approachable. Whether you’re a seasoned home cook or a total kitchen newbie, the step-by-step flow, the chef’s hacks, and the flexible ingredient swaps make success totally doable. And when you hear that satisfying crunch? That’s your kitchen confidence growing.
This dish has become a cherished go-to in my own home—one of those recipes that brings people running to the table with smiles (and napkins) ready. It’s ideal for family dinners, friend-filled weekends, or even solo cooking wins when you just need something cozy and crave-worthy in a flash.
So next time the takeout menu calls your name, I hope you think of this recipe instead—your crispy, colorful, better-than-restaurant alternative. And hey, if you drizzle on extra sauce or sneak a pineapple chunk straight from the pan? No judgment here. That’s part of the joy.
From my sauce-splattered kitchen to yours—happy cooking, flavor lovers!