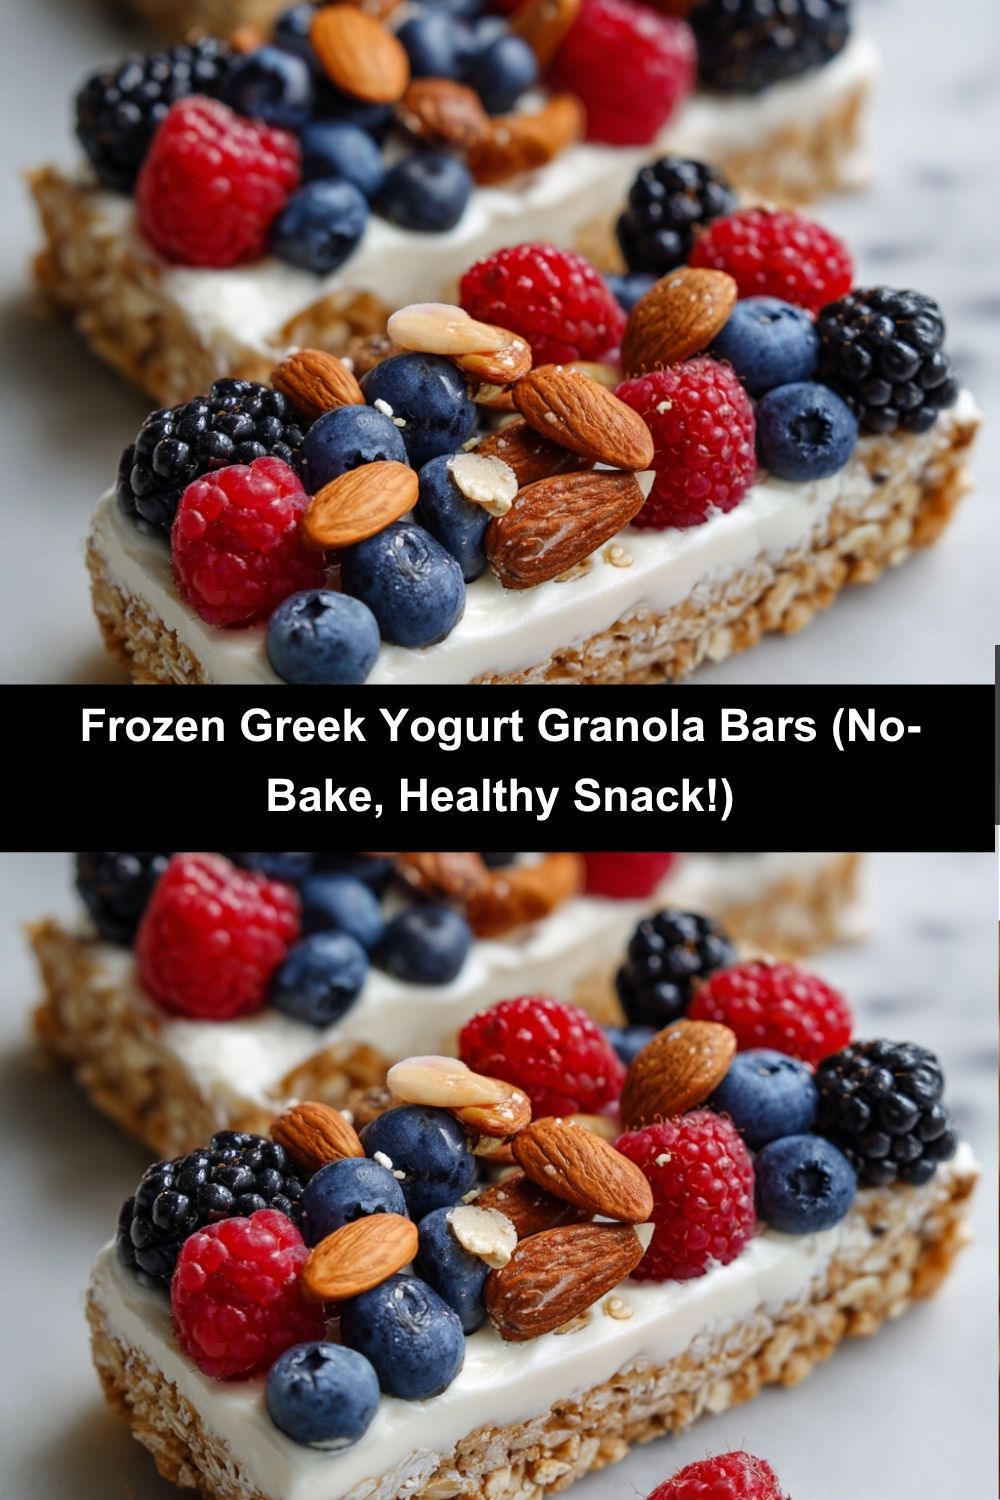
Beat the Heat with My Favorite Freezer Treat: Frozen Greek Yogurt Granola Bars!
Hey there, snack squad! 👋 Chef Emily here, your partner-in-crime for all things delicious and no-fuss. Picture this: It’s 3 PM. Your energy’s crashing, the sun’s blazing, and that bag of chips is whispering sweet nothings… but what if I told you there’s a superhero snack hiding in your freezer? Enter my Frozen Greek Yogurt Granola Bars—your new best friend for beating cravings and staying cool. These creamy, crunchy bars are like sunshine on a stick (minus the melting!). We’re talking protein-packed Greek yogurt swirled with honey, a nutty oat base that’ll make you swoon, and jewel-toned berries bursting with flavor. Best part? Zero baking required. Just mix, freeze, and conquer snack time like a boss. Whether you’re juggling work calls, herding kiddos, or just craving something wholesome, these bars are your ticket to happy taste buds. So grab that apron (embrace the mess—I always do!), and let’s make magic happen!
Why These Bars Taste Like Summer Memories
Okay, story time! 🌞 These bars were born one sweltering July day when my AC decided to retire. My kitchen felt like a sauna, and my then-toddler was chanting “snack-attack!” on loop. Desperate, I riffed on my grandma’s no-bake energy balls—mashing oats, almond butter, and yogurt straight into a pan. As they froze, I dotted them with berries from our farmer’s market haul. When we bit into those frosty bars, my kiddo’s eyes lit up like fireworks. “Mama, it’s ICE CREAM OATMEAL!” she yelled. That messy kitchen moment? Pure gold. Now, every time I make these, I’m back in that sticky-sweet afternoon—proving that the best recipes aren’t just made, they’re felt. ❤️
Your Kitchen Treasure Hunt: What You’ll Need
Granola Base:
- 2 cups whole rolled oats – The MVP! Rolled oats give chewiness (not mush). Chef’s swap: Use gluten-free oats if needed.
- 1 cup creamy almond butter – Binds everything + adds richness. Chef’s tip: Stir natural nut butters well—oil separation is real! Swap with peanut or sunflower seed butter.
- ⅓ cup honey – Nature’s glue! Helps the base hold its shape. For vegans, maple syrup works (bars will be softer).
- ½ cup chopped almonds – Extra crunch! Toast ’em for deeper flavor. Sub with walnuts or pepitas.
- ¼ tsp salt – Secret weapon! Balances sweetness. Don’t skip it.
Yogurt Layer:
- 2 cups plain full-fat Greek yogurt – Creaminess central! Full-fat freezes smoother. Chef’s rant: Avoid non-fat—it gets icy!
- 3 tbsp honey – Just enough sweetness. Adjust to taste!
- 1 tsp vanilla extract – Warmth in every bite. Try almond extract for fun.
Toppings:
- ¼ cup each raspberries, blueberries, blackberries – Burst of freshness! Press ’em in so they stick. Frozen berries work too—no thawing!
Let’s Build Those Bars: Step-by-Step Fun!
Step 1: Line an 8×8-inch pan with parchment paper, letting it hang over the edges. Chef’s hack: Spritz the pan first—the paper clings like magic! This is your “bar lifter” later.
Step 2: In a big bowl, mix oats, almond butter, honey, chopped almonds, and salt. Pro tip: If your almond butter’s stiff, warm it slightly! Stir until it looks like chunky cookie dough.
Step 3: Dump the mix into the pan. Now, PRESS! Use a glass or measuring cup to compact it tightly. Seriously—go HAM here. A firm base = no crumble chaos later.
Step 4: Whisk Greek yogurt, honey, and vanilla in another bowl. Taste it! Want it sweeter? Add honey. Pour over the base and smooth the top. Chef’s warning: Don’t pour too fast—you might disrupt the base!
Step 5: Art time! Scatter berries over the yogurt. Gently press them in halfway (so they’re anchored but still visible). Go wild with patterns—stripes, polka dots, your initials!
Step 6: Freeze for 3+ hours. Patience, grasshopper! Overnight is best. Slice cold: run your knife under hot water first for clean cuts. Store bars in a freezer bag with parchment between layers.
Serving Up Smiles: How to Enjoy!
Slide those beauties onto a cutting board and slice into 10-12 rectangles. I love them straight from the freezer—let ’em sit 2 minutes for the perfect “chew.” Pack ’em in lunchboxes (they’ll thaw slightly by noon), or crumble one over oatmeal for breakfast. Feeling fancy? Drizzle with melted dark chocolate or dunk in extra yogurt! 🥄
Shake It Up: 5 Tasty Twists!
- Tropical Vibes: Swap berries for diced mango + coconut flakes. Use lime zest in the yogurt!
- Choco-Nut Bliss: Add ¼ cup mini chocolate chips to the base. Top yogurt with crushed peanuts.
- Vegan Delight: Use coconut yogurt + maple syrup. Sunflower seed butter keeps it nut-free!
- PB&J Remix: Swirl 2 tbsp jam into yogurt before topping. Almond butter + strawberries = heaven.
- Pumpkin Spice: Mix 2 tbsp pumpkin purée + 1 tsp pie spice into yogurt. Top with pecans.
Confessions from My Kitchen
Okay, true story: The first time I made these, I got overzealous with the berries. When I sliced them? Total fruit avalanche! 😂 Now I gently press each berry halfway in—pretty AND practical. Over the years, I’ve tweaked the honey ratio (less is more!) and learned that freezing the base for 10 minutes before adding yogurt prevents mixing layers. My husband calls these my “freezer fame” recipe—they’ve survived potlucks, road trips, and one epic toddler meltdown (the kid, not the bar!). Make them yours—that’s the joy!
Your Burning Questions, Answered!
Q: My bars crumble when I cut them! Help!
A: Two fixes: 1) Press the base HARDER next time (really muscle it!). 2) Freeze longer—overnight is best. If they still crack, crumble ’em over yogurt for “deconstructed” bars!
Q: Can I use regular yogurt instead of Greek?
A: Greek yogurt’s thickness is key! Regular yogurt makes icy bars. If you MUST, strain it overnight first (line a sieve with coffee filters over a bowl).
Q: How long do these last in the freezer?
A: 2-3 weeks in an airtight container! Layer with parchment to prevent sticking. They’ll vanish way before then—promise.
Q: Can I skip the nuts for allergies?
A: Absolutely! Swap almonds in the base for seeds (sunflower, pumpkin), and use sunflower seed butter. Top with seeds or extra fruit.
Nutritional Perfection (Because Balance!)
Prep Time: 10 mins | Freeze Time: 3+ hrs | Total Time: ~3 hrs 10 mins | Servings: 10-12 bars
Per Bar: Calories ~180 kcal • Protein ~8g • Carbs ~20g • Fat ~9g
Gluten-free option (use GF oats) • Naturally sweetened
Frozen Greek Yogurt Granola Bars
- Total Time: +3 hours 10 minutes
- Yield: 10–12 bars 1x
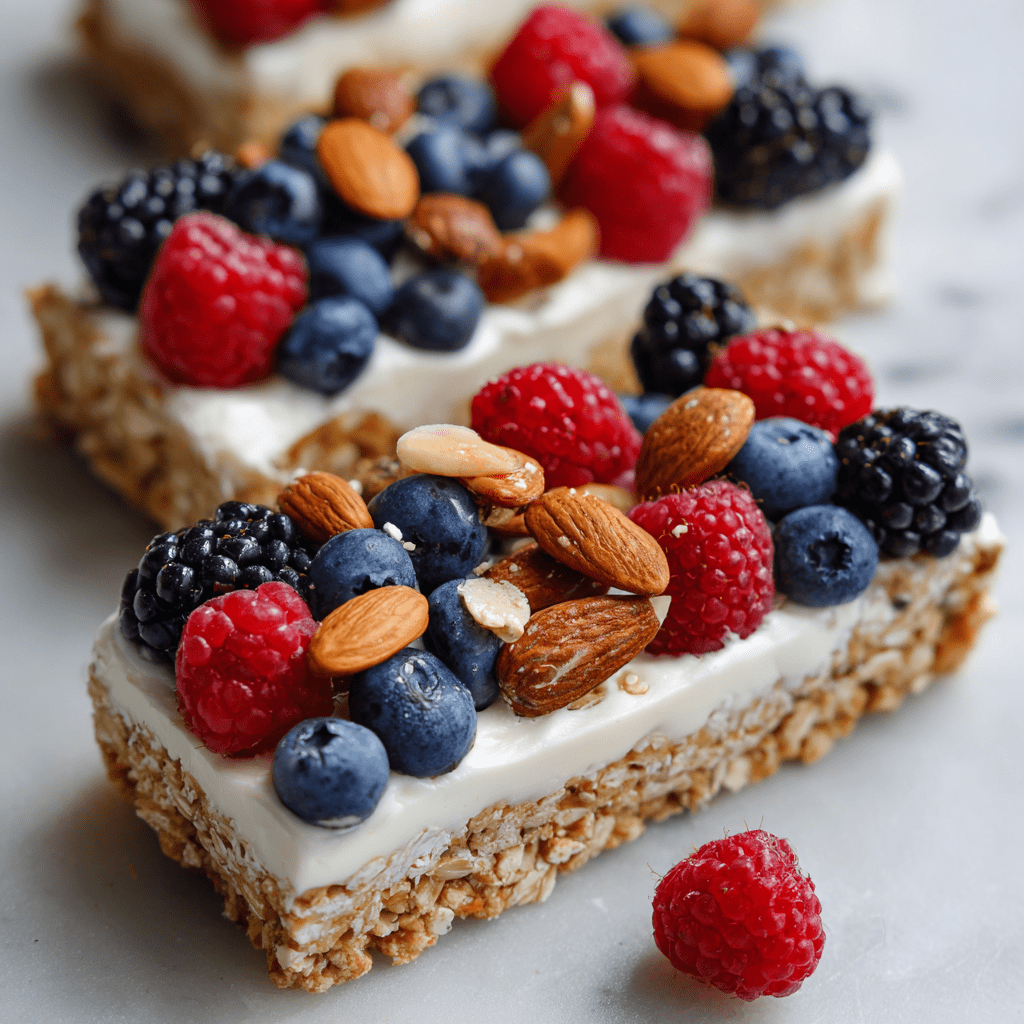
Description
Cool, creamy, and naturally sweet—these Frozen Greek Yogurt Granola Bars are a refreshing twist on snack time. Packed with oats, almond butter, honey, and fresh berries, they’re a protein-rich treat that keeps you energized and satisfied, no oven required.
Ingredients
Granola Base:
2 cups whole rolled oats
1 cup creamy almond butter
⅓ cup honey
½ cup chopped almonds
¼ tsp salt
Yogurt Layer:
2 cups plain full-fat Greek yogurt
3 tbsp honey
1 tsp vanilla extract
Toppings:
¼ cup raspberries
¼ cup blueberries
¼ cup blackberries
Instructions
Line an 8×8-inch baking pan with parchment paper.
In a bowl, mix oats, almond butter, honey, chopped almonds, and salt until well combined. Press firmly into the bottom of the pan to form a crust.
In another bowl, mix Greek yogurt, honey, and vanilla extract. Spread evenly over the granola base.
Top with berries, pressing them gently into the yogurt.
Freeze for at least 3 hours, or until completely firm.
Slice into bars and store in the freezer.
- Prep Time: 10 minutes
- Freeze Time: +3 hours
Nutrition
- Calories: 180 per bar
- Fat: 9g per bar
- Carbohydrates: 20g per bar
- Protein: 8g per bar
Final Thoughts: Snack Smarter, Freeze Happier
Let’s be real—life gets hot, hectic, and a little hangry. But these Frozen Greek Yogurt Granola Bars? They’re your cool, calm, and collected answer to all of it. They’re not just a snack—they’re a moment. A pause. A sweet reminder that fueling your body can also feel like a treat.
Whether you’re sneaking one between Zoom calls, handing them to sticky little hands, or eating one barefoot on the porch (highly recommended!), these bars prove that a freezer stocked with goodness = future-you winning. And the best part? No oven, no fuss, no regrets.
So here’s to freezer magic, snack sanity, and saying “heck yes” to happy, wholesome bites all summer long. Keep a batch tucked away and consider it edible self-care. You’ve earned it.
Now go forth and snack like the cool, clever kitchen hero you are. 💛❄️